
Related Manuals for Janome Memory Craft 6500 Professional


Summary of Contents for Janome Memory Craft 6500 Professional
- Page 1 *Please Note: This version is only a partial manual. Visit your local Janome Dealer for a full version.
-
Page 2: Important Safety Instructions
IMPORTANT SAFETY INSTRUCTIONS When using an electrical appliance, basic safety precautions should always be followed, including the followings: Read all instructions before using this appliance. DANGER— To reduce the risk of electric shock: An appliance should never be left unattended when plugged in. Always unplug this sewing machine from the electric outlet immediately after using and before cleaning. -
Page 3: Table Of Contents
KNOW YOUR MACHINE ........3 Name of Parts ............3 Standard Accessories ..........4 GETTING READY TO SEW ......5 Connecting the Power Supply ........5 Controlling Sewing Speed ........5 Speed control lever ............5 Foot control ..............5 Function Buttons ............ -
Page 4: Know Your Machine
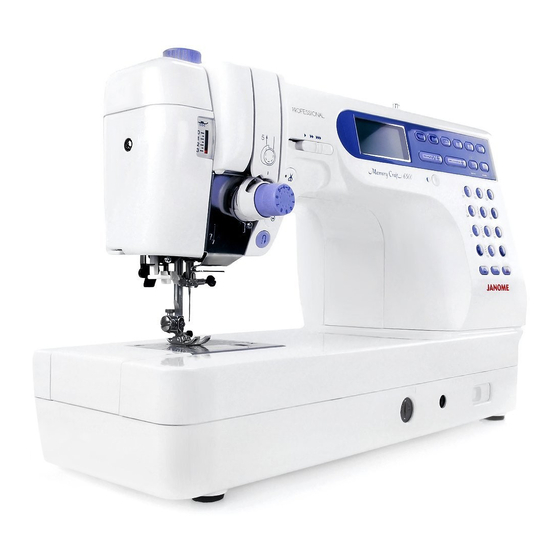
KNOW YOUR MACHINE Name of Parts Foot Pressure Dial Thread Take-up Lever Thread Guide Quick Reference Board Speed Control Lever Retractable Thread Guide Bobbin Winder Spindle Bobbin Winder Stopper LCD Screen 10. Function Buttons 11. LCD Contrast Adjusting Dial 12. Drop Feed Lever 13. -
Page 5: Standard Accessories
Standard Accessories 1. Zigzag Foot A (comes attached to the machine) 2. Overedge Foot C 3. Rolled Hem Foot D 4. Zipper Foot E 5. Satin Stitch Foot F 6. Blind Hem Foot G 7. Cording Foot H 8. Overcasting Foot M 9. -
Page 6: Getting Ready To Sew
GETTING READY TO SEW Connecting the Power Supply Turn off the power switch. Insert the foot control plug into the machine socket. Insert the machine plug into the machine socket. Insert the power supply plug into the wall outlet. Turn on the power switch. 1 Power Switch 2 Foot Control Plug 3 Machine Socket... -
Page 7: Function Buttons
Function Buttons Thread cutter button Press this button after finishing sewing and the machine will trim the threads. The LED signal blinks while cutting the threads. Thread Cutter Signal NOTES: The auto thread cutter will work well with normal sewing threads #30 or finer. - Page 8 Mode button: Press this button to select the desired mode. Letter style button: Press this button to change the letter style of monogram. Memory/recall button: Press this button to register or recall programmed pattern combinations. The previous pattern combination will be replaced by the new combination when pressing this button after programming.
-
Page 9: 12 Pattern Selection Buttons
12 Pattern selection buttons Press these buttons to select the desired pattern. In the direct selection mode (Mode 1), patterns number 01 to 10 can be directly selected by pressing the corresponding button. In other modes, enter the two-digit pattern number with the numeral buttons. -
Page 10: Raising And Lowering The Presser Foot
Raising and Lowering the Presser Foot The presser foot lifter raises and lowers the presser foot. You can raise the presser foot about 6 mm (1/4") higher than the normal up position by exerting more pressure when lifting the presser foot lifter. This allows for easy removal of the presser foot and helps you to place thick fabrics under it. -
Page 11: Changing The Presser Foot
Changing the Presser Foot CAUTION: Turn OFF the power switch before changing the foot. Always use the proper foot for the selected pattern. Wrong foot can cause the needle to break. To snap off: Raise the needle and presser foot. Press the red button on the back of the foot holder and the foot will drop. -
Page 12: Variety Of Presser Feet And Their Uses
Variety of Presser Feet and Their Uses Zigzag foot A: This is the most versatile foot. It can be used for various stitches including straight stitches and zigzag stitches. It is designed to achieve firm and neat seam results. Overedge foot C: This foot is exclusively for overedging. -
Page 13: Winding The Bobbin
Winding the Bobbin Removing the bobbin Slide the hook cover plate release button to the right, and remove the hook cover plate. Lift out the bobbin from the bobbin holder. Hook Cover Plate Release Button Hook Cover Plate Bobbin NOTES: Avoid using a bobbin when it begins to empty since it may cause thread bunching. -
Page 14: Winding The Bobbin
Return the bobbin winder stopper to its original position, and cut the thread. NOTE: The Memory Craft 6500 has an exclusive motor for bobbin winding, which allows you to wind the bobbin while stitching. -
Page 15: Inserting The Bobbin
Inserting the bobbin Place the bobbin in the bobbin holder with the thread running off counterclockwise. Thread Bobbin Holder Guide the thread into notch (A) on the front of the bobbin holder. Draw the thread to the left, sliding it between the tension spring blades. -
Page 16: Threading The Machine
Threading the Machine Raise the presser foot lifter. Press the up/down needle button twice to raise the needle to its highest position. Pass the thread through the guide on the thread guide bar from behind. 1 Thread Guide Bar Pass the thread through the right thread guide. 2 Right Thread Guide Hold the upper thread with both hands as shown and slip it under the thread guide plate. - Page 17 Threading the Machine (continued) Draw the thread down and around the tension dial from the right to the left. Pull the thread up to insert it between the tension disks and under the loop of the check spring. Be sure that the thread is coming out from notch of the disk.
-
Page 18: Automatic Needle Threader
Automatic Needle Threader Raise the needle to its highest position by pressing the up/down needle button twice. Turn the power switch off. Lower the presser foot. Up/Down Needle Button Depress the needle threader knob as far as it will go. The hook comes out through the needle eye from behind. -
Page 19: Drawing Up The Bobbin Thread
Drawing Up the Bobbin Thread Raise the Presser Foot Lifter. Hold the needle thread with your finger and press the up/down needle button twice to pick up the bobbin thread. Needle Thread Needle Up/Down Button Draw up the needle thread to bring up a loop of the bobbin thread. -
Page 20: Changing Needles
Changing Needles Raise the needle by pressing the up/down needle button and lower the presser foot. Turn off the power switch. 1 Loosen the needle clamp screw by turning it counterclockwise. Remove the needle from the clamp. 1 Needle Clamp Screw 2 Insert a new needle into the needle clamp with the flat side of the needle to the rear. -
Page 21: Balancing Thread Tension
Balancing Thread Tension Correct tension: The ideal straight stitch has threads locked between two layers of fabric. For an ideal zigzag stitch, the bobbin thread does not show on the right side of the fabric, and the needle thread shows slightly on the wrong side of the fabric. Needle Thread Right Side of the Fabric Wrong Side of the Fabric... -
Page 22: Adjusting The Foot Pressure
Adjusting the Foot Pressure The foot pressure dial should be set at “3” for regular sewing. Reduce the pressure for appliqué, sewing on fine synthetics and elastic fabrics. Set the dial at “1” when sewing extra fine fabrics. Foot Pressure Dial Setting mark NOTE: Do not reduce the foot pressure lower than “0”. -
Page 23: Selecting The Sewing Mode
Selecting the Sewing Mode On the LCD screen, the mode number and the following information are displayed: Stitch Pattern Recommended Thread Tension Recommended Foot Stitch Width Stitch Length Recommended Foot Pressure Single or Twin Needle Setting The following 4 sewing modes are available: Mode 1 (Direct): Mode 1 The 10 most commonly used stitches can be selected... -
Page 24: The Help Button
The Help Button Pressing this button will show alternative applications of the selected pattern when the pattern 01, 08, 09, 10 (Mode 1), or 01, 02, 03, 04, 05 or 22 (Mode 3) has been selected. Example: When the pattern 01 has been selected. Each time you press the help button, the LCD will show as follows: The zigzag foot and quilting bar for quilting will be... -
Page 25: Customizing Machine Settings
Customizing Machine Settings You can customize the machine settings to your preference. Turn the power switch on while pressing the memory button and the LCD screen will show the machine setting window. Memory button Power Switch Machine Setting Window Resumption setting The last pattern sewnbefore turning the power off will be recalled when turning the power on again.