Table of Contents
Advertisement
Advertisement
Table of Contents

Related Manuals for Janome Memory Craft 4900 QC


Summary of Contents for Janome Memory Craft 4900 QC
-
Page 2: Important Safety Instructions
IMPORTANT SAFETY INSTRUCTIONS When using an electrical appliance, basic safety precautions should always be followed, including the followings: Read all instructions before using this appliance. DANGER — To reduce the risk of electric shock: An appliance should never be left unattended when plugged in. Always unplug this sewing machine from the electric outlet immediately after using and before cleaning. -
Page 3: Instrucciones Importantes De Seguridad
INSTRUCCIONES IMPORTANTES DE SEGURIDAD Cuando se utiliza un aparato eléctrico es necesario tomar ciertas precauciones básicas de seguridad, como lassiguientes: Lea todas las instrucciones antes de utilizar este aparato. PELIGRO — Para reducir el riesgo de choque eléctrico: 1. No deje nunca el aparato sin vigilancia mientras esté enchufado. Desenchufe siempre la máquina de la toma eléctrica inmediatamente después de utilizarla y antes de limpiarla. - Page 4 CONSIGNES DE SÉCURITÉ IMPORTANTES Pour utiliser un appareil électrique, il faut toujours respecter les consignes de sécurité fondamentales, notamment les consignes suivantes : Avant d’utiliser cet appareil, lisez toutes ces instructions. DANGER : Pour réduire les risques d’électrocution. Il ne faut jamais laisser un appareil sans surveillance lorsqu’il est branché. Il faut toujours débrancher cette machine à...
-
Page 5: Table Of Contents
TABLE OF CONTENTS NAME OF PARTS Help button ..............56 Name of parts ..............8 Adjusting the needle drop position ........ 58 Standard Accessories ........... 10 Adjusting the stitch length ..........58 Extension Table ............. 12 To customize the preset value for the stitch length Detaching the table ............ - Page 6 TABLE OF CONTENTS PROGRAMMING PATTERNS Pattern combination 1 ..........132 Pattern combination 2 ..........134 Combination for a mirror image ........136 Pattern elongation ............138 Programming a pattern combination with an elongated pattern ............138 Extender stitches ............140 Free-motion quilting ............
- Page 7 INDICÈ NOMBRE DE LAS PARTES Ajuste de la posición de bajada de la aguja ....59 Nombre de las partes ............9 Ajuste de la longitud de la puntada ........ 59 Accesorios estndares ............. 11 Personalización de los valores predefinidos Tabla de amplicación ............
- Page 8 INDICÈ Alargamiento de patrones ..........139 Programación de una combinación de patrones con un patrón alargado ......139 Puntada de alargamiento ..........141 Acolchado libre ............. 143 Edición de programas .......... 145–147 Ajuste individual de puntadas ........149 Programación de un monograma ......151–153 Reducción del tamaño de un monograma ....
- Page 9 TABLE DES MATIÈRES DÉNOMINATION DES COMPOSANTS Couture de tissus épais ..........55 Dénomination des composants ........9 Touche Aide ..............57 Accessoires standard ............. 11 Ajustement de la position de piqûre de l’aiguille .... 59 Table rallonge ..............13 Réglage de la longueur de point ........59 Dépose de la table rallonge ...........
- Page 10 TABLE DES MATIÈRES PROGRAMMATION DES MOTIFS Combinaison de motifs 1 ..........133 Combinaison de motifs 2 ..........133 Combinaison pour la réalisation d’une image miroir ..137 Allongement de motif ........... 139 Programmation d’une combinaison de motifs avec un motif allongé ........... 139 Points d’extension ............
-
Page 11: Name Of Parts Name Of Parts
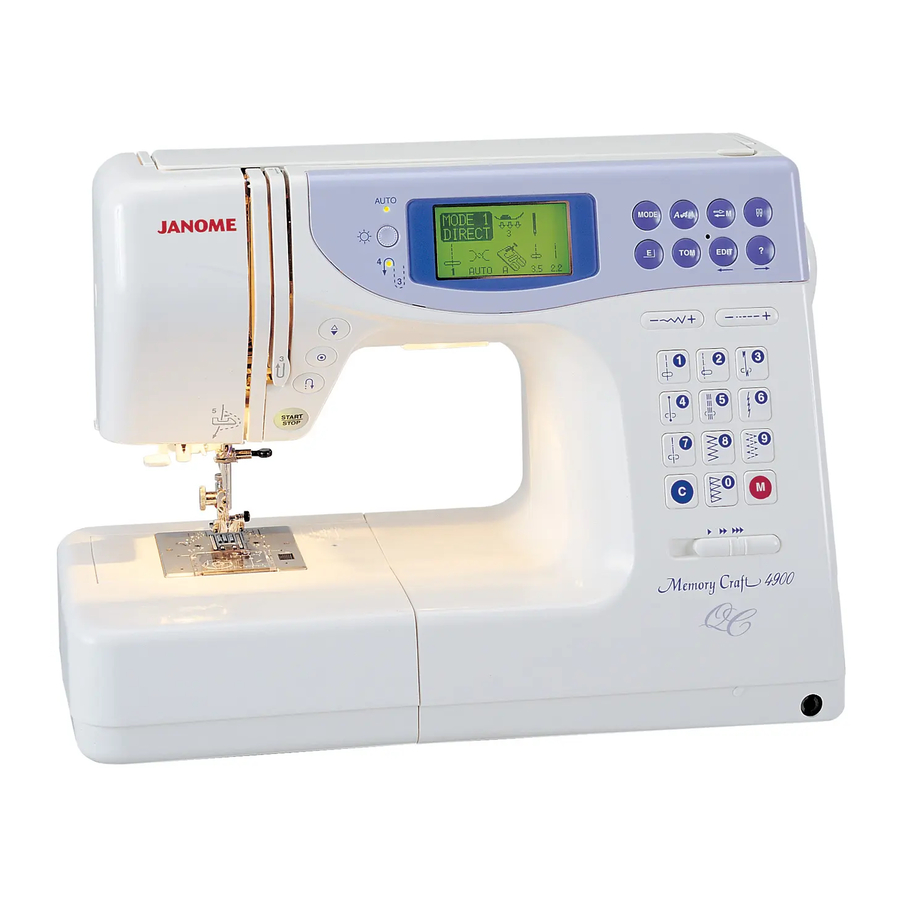
NAME OF PARTS Name of parts q Function keys w Liquid crystal display e Screen sharpness adjustment dial r Bobbin winder stopper t Bobbin winder spindle y Hole for additional spool pin u Spool pin i Large spool holder o Thread tension dial !0 Reference chart !1 Foot pressure dial !2 Face cover... -
Page 12: Nombre De Las Partes Nombre De Las Partes
NOMBRE DE LAS PARTES DÉNOMINATION DES COMPOSANTS Dénomination des composants Nombre de las partes q Touches de fonction q Teclas de función w Écran à cristaux liquides w Pantalla de cristal líquido e Cadran de réglage de la netteté de l'écran e Regulador de la nitidez de la pantalla r Butée d'enroulement de canette r Tope de la bobinadora... -
Page 13: Standard Accessories
Standard Accessories q Assorted needles w L: Quilting bar e G: Blind hem foot r F: Satin stitch foot t D: Hemmer foot y C: Overedge foot u E: Zipper foot i A: Zigzag foot (attached to the machine) These accessories can be stored in the compartment under the top cover. -
Page 14: Accesorios Estndares
Accesorios estandares Accessoires standard q Agujas variadas q Assortiment d'aiguilles w L: Barra del acolchado w L : Barre de matelassage e G: Pie para dobladillo ciego e G : Pied pour ourlet invisible r F: Pie para bordado de realces r F : Pied pour point passé... -
Page 15: Extension Table
Extension Table The extension table provides an extra surface for sewing bulky materials, and can be removed for free-arm sewing. Detaching the table Pull the table away from the machine as illustrated. Free-arm sewing can be used for: Stitching sleeves, waistbands, pant legs or any tubular garment area, darning socks as well as mending knees, elbows or children’s wear. -
Page 16: Tabla De Amplicación
Tabla de ampliación Table rallonge La tabla de ampliación proporciona una superficie adicional para La table rallonge procure une surface de couture supplémentaire coser materiales abultados que se puede retirar fácilmente para pour les étoffes volumineuses et est escamotable pour la couture coser con el brazo libre. -
Page 17: Getting Ready To Sew Connecting The Power Supply
GETTING READY TO SEW Connecting the Power Supply CAUTION Always turn the power switch off and unplug the sewing machine from the electrical outlet when the machine is not in use. To use start/stop button Turn off the power switch, then insert the machine plug into the machine and the power supply plug into the wall outlet. -
Page 18: Preparativos Antes De Coser Conexión A La Alimentación
PREPARATIVOS ANTES DE COSER PRÉPARATION DU TRAVAIL DE Conexión a la alimentación COUTURE Raccordement de la machine au secteur PRECAUCIÓN ATTENTION Apague siempre el interruptor y desenchufe la máquina de coser Veillez toujours à couper l'interrupteur d'alimentation et à de la red eléctrica cuando no la esté usando. débrancher la machine à... -
Page 19: Speed Control Slider
Speed control slider Sewing speed can be varied according to your sewing needs with the speed control slider. q To increase sewing speed, slide it to the right. w To decrease sewing speed, slide it to the left. Foot control Sewing speed is varied by the foot control. -
Page 20: Deslizador De Control De Velocidad
Deslizador de control de velocidad Curseur de réglage de la vitesse La vitesse de couture peut être ajustée selon vos besoins avec le La velocidad de costura se puede modificar con el deslizador de curseur de réglage de la vitesse. control de la velocidad, según sus preferencias. -
Page 21: Function Buttons
FUNCTION BUTTONS START STOP q q q q q Start/stop button Press this button to start or stop the machine. The machine starts running slowly for the first few stitches, it then runs at the speed START set by the speed control slider. STOP NOTE: •... -
Page 22: Botones De Fonctió N
BOTONES DE FUNCIóN TOUCHES DE FONCTION q q q q q Botón de inicio/parada q q q q q Touche de marche/arrêt (Start/Stop) Cette touche sert à démarrer ou à arrêter la machine. La machine Pulse este botón para iniciar o detener la máquina. La máquina démarre doucement pour les premiers points, puis avance à... -
Page 23: Screen Brightness Adjustment Dial
y u i o !0 !1 !2 !3 t t t t t Screen brightness adjustment dial Use this dial to adjust the brightness of the liquid crystal display. If the screen is not clear, adjust the screen brightness with this dial. y y y y y Mode key (see page 24) When the power switch is turned on, the direct pattern selection (mode 1) is set automatically. -
Page 24: Regulador Del Brillo De La Pantalla
t t t t t Regulador del brillo de la pantalla t t t t t Cadran de réglage de la luminosité de l’écran Utilice este regulador para ajustar el brillo de la pantalla de cristal Ce cadran sert à ajuster la luminosité de l'écran à cristaux liquides. líquido. -
Page 25: Function Touchpad
!4 !4 !4 !4 !4 Stitch width adjustment key (see page 58, 60, 70) Press “+” or “–” to change the stitch width. !5 !5 !5 !5 !5 Stitch length adjustment key (see page 58, 60, 70) Press “+” or “–” to change the stitch length. !6 !6 !6 !6 !6 Function touchpad (see page 12) •... -
Page 26: Tecla De Ajuste Del Ancho De La Puntada
!4 !4 !4 !4 !4 Tecla de ajuste del ancho de la puntada !4 !4 !4 !4 !4 Touche de réglage de la largeur de point (consulte las páginas 59, 61, 71) (voir en pages 59, 61, 71) Pulse las teclas “+” o “–” para cambiar el ancho de la puntada. Appuyez sur “+”... -
Page 27: Stitch Width Adjustment Key
Mode selection When you switch on the machine, the direct select mode (mode 1) is activated. Press the mode key to change the mode. z z z z z Mode 1 Screen indication You can select 10 of the most commonly used patterns directly by pressing the pattern keys. -
Page 28: Seleción De Modo
Selección de modo Sélection du mode Al encender la máquina se activa el modo de selección directa Lorsque vous mettez la machine sous tension, le mode de (modo 1). Pulse la tecla de modo para cambiar el modo. sélection directe (mode 1) est activé. Appuyez sur la touche Mode pour modifier le mode. -
Page 29: Pattern Selection
Pattern Selection z z z z z Mode 1 Pattern selection and screen indication You can select the stitch patterns below directly by pressing the pattern keys. x x x x x Mode 2, 3 and Monogramming To select a pattern, enter the 2-digit number of the desired stitch pattern with the number keys. -
Page 30: Selección De Patrones
Selección de patrones Sélection de motifs z Modo 1 z Mode 1 Selección de patrones e indicación en pantalla Sélection de motifs et indication d'écran Vous pouvez sélectionner les motifs de points ci-dessous Es posible seleccionar directamente los patrones que se muestran a continuación, pulsando las teclas de los directement en appuyant sur les touches de motifs. -
Page 31: Customizing Machine Settings
CUSTOMIZING MACHINE SETTINGS You can customize the machine settings to your preference. Turn on the power switch w while pressing the memory key q. The machine setting window will appear. q Memory key w Power switch e Machine setting window Resumption setting The last pattern sewn before turning the power off will be recalled when the power is turned on again. -
Page 32: Personalización De La Configración De La M Á Quina
Personalización de la configuración de la máquina Adaptation des réglages de la machine Puede personalizar la configuración de la máquina para adaptarla Vous pouvez adapter les réglages de la machine selon vos a sus preferencias. Apague el interruptor de encendido w, préférences. -
Page 33: To Drop Or Raise The Feed Dog
To drop or raise the feed dog q Drop feed dog lever w To drop the feed dog e To raise the feed dog The drop feed dog lever is located underneath the free arm bed on the back side of the machine. •... -
Page 34: Elevación Y Bajada De Los Dientes De Arrastre
Elevación y bajada de los dientes de arrastre Réglage de la griffe d'entraînement q Palanca de los dientes de arrastre bajada q Levier d’escamotage de la griffe d’entraînement w Pour abaisser la griffe d’entraînement w Para bajar los dientes de arrastre e Pour relever la griffe d’entraînement e Para elevar los dientes de arrastre Le levier d’escamotage de la griffe d’entraînement est situé... -
Page 35: Changing The Presser Foot
Changing the presser foot q Snap-on button (red button) w Groove e Pin CAUTION: Turn off the power switch before changing the foot. Always use the proper foot for the selected pattern. The wrong foot can cause the needle to break. •... -
Page 36: Cambio Del Prensatelas
Cambio del pie prensatelas Changement de pied presseur q Bouton pression (bouton rouge) q Botn de ajuste automático (botón rojo) w Échancrure w Ranura e Charnière e Pasador ATTENTION: APRECAUCIÓN: Mettez l'interrupteur d'alimentation en position d'arrêt avant de Ponga el interruptor en OFF antes de cambiar el pie. Utilice changer le pied. -
Page 37: Changing The Needle
Changing the needle q Needle clamp screw w Needle clamp CAUTION Always make sure to turn the power switch off and disconnect the machine from power supply before changing the needle. z Turn off the power switch. Raise the needle to its highest position by turning the handwheel counterclockwise, and lowering the presser foot. -
Page 38: Cambio De La Aguja
Cambio de la aguja Changement d’aiguille q Tornillo de fijación de la aguja q Vis de pince-aiguille w Sujecin de la aguja w Pince-aiguille PRECAUCIÓN ATTENTION Apague siempre el interruptor y Veillez toujours à couper l'interrupteur d'alimentation et desconecte la máquina de la fuente de alimentación antes de à... -
Page 39: Thread And Needle Chart
Thread and Needle Chart WEIGHT FABRIC TYPE of NEEDLE NEEDLE SIZE Very Light Chiffon, Georgette, Fine Lace, Organdy Universal 9 (65) Net, Tulle Ball Point 9 (65) Light Batiste, Voile, Lawn, Pure Silk, Crepe de Chine, Blue Tipped Needle 11 (75) Sheer Crepe, Chambray, Handkerchief Linen, Universal 11 (75) -
Page 40: Tabla De Las Telas E Hilos
Table de las telas e hilos TAILLE DE PESO TELA TIPO DE AGUJA L'AIGUILLE 9 (65) Gasa, crespón georgette, encaje fino, organdí universal Muy ligero 9 (65) y tul Punta redondeada 11 (75) Batista, gasa, linón, seda pura, crespón de china, Aguja de punta azul Ligero 11 (75) -
Page 41: Bobbin Winding
Bobbin Winding • Removing the bobbin q Hook cover plate release button w Hook cover plate e Bobbin Slide the hook cover plate release button q to the right, and remove the cover plate w. Lift out the bobbin e from the bobbin holder. •... -
Page 42: Bobinado De La Bobina
Bobinado de la bobina Bobinage de canette • Extracción de la bobina • Retrait de la canette q Botn de apertura de la placa de cubierta del portabobinas q Bouton d’ouverture de la plaque de recouvrement du crochet w Plaque de recouvrement du crochet w Placa de la cubierta del portabobinas e Canette e Bobina... -
Page 43: Bobbin Winding
Bobbin Winding NOTE: Set the speed control slider at its fastest position for bobbin winding. q Upper thread guide (A) w Upper thread guide (B) e Bobbin winding tension disk r Bobbin winder spindle t Bobbin winder stopper z Draw the thread from the spool. x Guide the thread around the upper thread guide (A) q, upper thread guide (B) w and bobbin winding tension disk e. -
Page 44: Bobinado De La Bobina
Bobinado de la bobina Bobinage de canette NOTA: REMARQUE: Ponga el deslizador de control de la velocidad en la posición Réglez le curseur de réglage de vitesse sur sa position la plus más rápida para el bobinado de la bobbina. rapide pour enrouler la canette. -
Page 45: Inserting The Bobbin
Inserting the bobbin z Place the bobbin in the bobbin holder with the thread running off counterclockwise. q Thread w Bobbin holder x Guide the thread into notch (A) on the front of the bobbin holder. c Draw the thread to the left, sliding it between the tension spring blades. -
Page 46: Introducción De La Bobina
Introducción de la bobina Introduction de la canette z Coloque la bobina en el portabobinas con el hilo saliendo por l z Placez la canette dans le logement de la canette avec le fil a izquierda. tournant dans le sens opposé des aiguilles d'une montre. q Hilo q Fil w Portabobinas... -
Page 47: Threading The Machine
Threading the machine z Raise the presser foot lifter. x Turn the power switch on. Press the up/down needle position button twice to raise the needle. The threading light will light up. q Threading light NOTE: If you want to use the handwheel to raise the needle, make sure the threading light is on when threading. -
Page 48: Enhebrado De La Máquina
Enhebrado de la máquina Enfilage de la machine z Suba el alzador prensatelas. z Relevez le relève-pied. x Ponga el interruptor en la posición ON. Pulse dos veces el x Mettez l'interrupteur d'alimentation en position de marche. botón de subida y bajada de la aguja para subirla. La luz de Appuyez sur le bouton de position d'aiguille Haute/Basse à... -
Page 49: Built-In Needle Threader
Built-in needle threader NOTE: The needle threader can be used with a #11 to #16 needle, or a #11 Blue needle. Thread size 50 to 90 is recommended. z Raise the presser foot. Raise the needle to its highest position. Push down the needle threader knob q as far as it will go. -
Page 50: Enhebrador Integrado De Aguja
Enhebrador integrado de agujas Enfile-aiguille intégré NOTA: REMARQUE: El enhebrador de aguja se puede usar con una aguja del nº 1 al L’enfile-aiguille peut être utilisé avec une aiguille n° 1 à n° 16 ou nº 16 o con una aguja de Punta Azul nº 11. une aiguille n°... -
Page 51: Drawing Up Bobbin Thread
Drawing up bobbin thread Drawing up bobbin thread Drawing up bobbin thread Drawing up bobbin thread Drawing up bobbin thread z Raise the presser foot. Hold the needle thread lightly with your left hand. x Press the up/down needle position button q twice to lower and raise the needle to pick up the bobbin thread e. q Up/down needle position button w Needle thread e Bobbin thread... -
Page 52: Extracción Del Hilo De La Bobina
Extracción del hilo de la bobina Installation du fil de la canette z Eleve el prensatelas. Sujete el hilo de la aguja con suavidad, z Relevez le pied presseur. Tenez le fil d'aiguille avec précaution con la mano izquierda. dans la main gauche. x Pulse dos veces el botón de subida y bajada de la aguja q, x Appuyez sur le bouton de position d'aiguille Haute/Basse à... -
Page 53: Balancing Thread Tension
Balancing thread tension • Auto-thread tension When the thread tension dial is set at AUTO for automatic thread tension, the green light will be on. For general sewing, set the tension dial at AUTO, which covers a wide range of sewing conditions. z Align the AUTO mark of the thread tension dial with the indication line. -
Page 54: Equilibrado De La Tensión Del Hilo
Equilibrado de la tensión del hilo Équilibrage de la tension de fil • Tensión automática del hilo • Tension de fil automatique Al poner el regulador de tensión del hilo en AUTO para que la Lorsque le cadran de tension du fil est réglé sur AUTO pour une tensión se ajuste automáticamente, se enciende la luz verde. -
Page 55: Basic Stitches (Mode 1)
BASIC STITCHES (MODE 1) Straight stitch Machine settings q Pattern: 1 or 2 (mode 1) w Presser foot: Zigzag foot A e Thread tension: AUTO To sew Raise the presser foot and position the fabric next to a seam guide line on the needle plate. Lower the needle to the point where you wish to start. -
Page 56: Puntadas Rectas
PUNTADAS BÁSICAS (MODO 1) POINTS DE BASE (MODE 1) Puntadas rectas Point droit Configuración de la máquina Réglages de la machine q Patrón: q Motif : 1 ó 2 (modo 1) 1 ou 2 (mode 1) w Pied presseur : w Pie prensatelas: Pie para zigzag (A) Pied de point zigzag A... -
Page 57: Using The Seam Guides On The Needle Plate
Using the seam guides on the needle plate q Needle drop position w Edge of fabric e Needle plate guide lines The seam guides on the needle plate are engraved to help you measure seam width. The number on the needle plate indicates the distance between the center needle position and the edge of the fabric. -
Page 58: Utilización De Las Guías De Costuras En La Placa De Aguja
Utilización de las guías de costuras en la Utilisation des lignes guides de couture placa de agujas situées sur la plaque à aiguille q Posicin de caída de la aguja q Position de piqûre de l’aiguille w Bord du tissu w Borde de las telas e Lignes guides de couture de la plaque à... -
Page 59: Help Button
Help button Pressing this button will show alternative applications of the selected pattern when patterns 0, 1, 8, 9 (mode 1) or 11, 12, 13, 14, 15, 27, 32 (mode 2) have been selected. Example: When pattern 1 has been selected. Each time you press the help key, the LCD screen will show as follows: z The zigzag foot and quilting bar for quilting will be... -
Page 60: Botón De Ayuda
Botón de ayuda Touche Aide Si pulsa este botón, verá diferentes aplicaciones del patrón Si vous appuyez sur ce bouton, les autres applications du motif seleccionado, siempre que sea uno de los siguientes: 0, 1, 8, 9 sélectionné s'affichent lorsque les motifs 0, 1, 8, 9 (mode 1) ou (modo 1) ó... -
Page 61: Adjusting The Needle Drop Position
Adjusting the needle drop position The needle drop position can be altered by pressing the stitch width adjustment button. Press the right side of the button (+ sign) to move the needle bar to the right. Press the left side of the button (– sign) to move the needle bar to the left. -
Page 62: Ajuste De La Posición De Bajada De La Aguja
Ajuste de la posición de bajada de la aguja Ajustement de la position de piqûre de l’aiguille Se puede modificar la posición de la caída de la aguja pulsando Vous pouvez modifier la position de piqûre de l’aiguille en el botón de ajuste del ancho de la puntada. appuyant sur la touche de réglage de la largeur de point. -
Page 63: To Customize The Preset Value For The Stitch Length And Width
To customize the preset values for the stitch length and width The stitch patterns in the direct mode (mode 1), and for buttonholes, eyelets, darnning, bartacks and basting have their own original settings for the stitch length and stitch width. These original settings are called preset values. -
Page 64: Personalización De Los Valores Predefinidos Del Ancho Y La Longitud De La Puntada
Personalización de los valores predefinidos Personnalisation des valeurs prédéfinies del ancho y la longitud de la puntada pour la longueur et la largeur de point Los patrones de puntada en el modo directo (modo 1) y los de Les motifs de points en mode direct (mode 1), et pour les ojales, ojetes, zurcidos, remates e hilvanados tienen sus propias boutonnières, les œillets, les reprises, les arrêts de couture et le configuraciones originales en cuanto a longitud y ancho de la... -
Page 65: Basting
Basting Machine settings q Pattern: 7 (mode 1) w Presser foot: Darning foot P e Thread tension: 1-3 * Feed dog: Dropped The basting stitch is used to hold fabric layers together during fitting. Attaching the darning foot P Loosen the thumbscrew and remove the foot holder. Attach the darning foot P to the presser bar putting the pin on the needle clamp screw. -
Page 66: Hilvanado
Hilvanado Bâti Configuración de la máquina Réglages de la machine q Patrón: q Motif : 7 (modo 1) 7 (mode 1) w Pie prensatelas: w Pied presseur : Pied à repriser P Pie de zurcido (P) e Tensión del hilo: e Tension du fil : 1-3 * Griffe d’entraînement : Abaissée * Dientes de arrastre: Bajados... -
Page 67: Lock-A-Matic Stitch
Lock-a-Matic stitch Machine settings q Pattern: 3 (mode 1) w Presser foot: Zigzag foot A e Thread tension: AUTO Use it to reinforce areas such as crotch and armhole seams, as well as when constructing items such as back- packs for extra strength. When you reach the end of the seam, press the reverse stitch button once. -
Page 68: Puntada "Lock-A-Matic" De Seguridad
Puntada “Lock-a-Matic” de seguridad Point Lock-a-Matic Réglages de la machine Configuración de la máquina q Motif : q Patrón: 3 (modo 1) 3 (mode 1) w Pie prensatelas: w Pied presseur : Pied de point zigzag A Pie para zigzag (A) e Tension du fil : e Tensión del hilo: AUTO... -
Page 69: Locking Stitch
Locking stitch Machine settings q Pattern: 4 (mode 1) w Presser foot: Zigzag foot A e Thread tension: AUTO This unique stitch is used where an invisible locking stitch is needed. Lower the needle close to the front edge of the fabric. The machine will sew several locking stitches in place and continue sewing forward. -
Page 70: Puntada De Seguridad
Puntada de seguridad Point noué Configuración de la máquina Réglages de la machine q Patrón: 4 (modo 1) q Motif : 4 (mode 1) w Pie prensatelas: Pie para zigzag (A) w Pied presseur : Pied de point zigzag A e Tensión del hilo: Automática e Tension du fil :... -
Page 71: Decorative Stitch
Decorative stitch Machine settings q Pattern: 56 (mode 2) w Presser foot: Satin stitch foot F e Thread tension: AUTO * Stitch pattern 58 (mode 2) can also be used. Use this stitch for quilting or decorative stitching. French knot Machine settings q Pattern: 54 (mode 2) -
Page 72: Puntadas Decorativas
Puntadas decorativas Point fantaisie Configuración de la máquina Réglages de la machine q Patrón: 56 (modo 2) q Motif : 56 (mode 2) w Pie prensatelas: Pie de puntadas de realce (F) w Pied presseur : Pied pour point passé F e Tensión del hilo: Automática e Tension du fil :... -
Page 73: Zigzag Stitch
Zigzag stitch Machine settings q Pattern: 8 (mode 1) w Presser foot: Zigzag foot A e Thread tension: AUTO Zigzag stitch is used for various sewing needs including overcasting. It can be used on most woven fabrics. A dense zigzag stitch can also be used for appliqué. Adjusting the stitch width Press the right side of the button (+ sign) to increase the stitch width. -
Page 74: Puntadas En Zigzag
Puntada en zigzag Point zigzag Configuración de la máquina Réglages de la machine q Patrón: 8 (modo 1) q Motif : 8 (mode 1) w Pie prensatelas: Pie para zigzag (A) w Pied presseur : Pied de point zigzag A e Tensión del hilo: Automática e Tension du fil :... -
Page 75: Types Of Overcasting Stitches
Types of Overcasting Stitches Overcasting with zigzag stitch Machine settings q Pattern: 8 (mode 1) w Presser foot: Overedge foot C e Thread tension: AUTO Place the fabric edge next to the guide of the foot and then sew. q Edge of Fabrics w Guide e Wires on Foot CAUTION:... -
Page 76: Tipos De Puntadas De Cobertura (Sobrehirado)
Tipos de puntadas de cobertura (sobrehilado) Différents points de surfilage Surfilage avec le point zigzag Sobrehilado con puntada de cobertura en zigzag Réglages de la machine Configuración de la máquina q Motif : q Patrón: 8 (mode 1) 8 (modo 1) w Pied presseur : Pied de point surjet C w Pie prensatelas:... -
Page 77: Knit Stitch
Knit stitch Machine settings q Pattern: 11 (mode 2) w Presser foot: Zigzag foot A e Thread tension: AUTO This stitch is recommended for sewing such fabrics as synthetic knits and stretch velour, as it provides the greatest amount of elasticity and strength. Sew along the fabric edge leaving an adequate seam allowance. -
Page 78: Puntada En Tejidos De Punto
Puntada en tejidos de punto Point tricot Configuración de la máquina Réglages de la machine q Patrón: 11 (modo 2) q Motif : 11 (mode 2) w Pie prensatelas: Pie para zigzag (A) w Pied presseur : Pied de point zigzag A e Tensión del hilo: Automática e Tension du fil :... -
Page 79: Button Sewing
Button sewing Machine settings q Pattern: 27 (mode 2) w Presser foot: Button sewing foot T e Thread tension: AUTO * Lower the feed dog (see page 14) Attaching the button sewing foot T Insert the rear pin on the foot into the groove of the foot holder. -
Page 80: Costura De Botones
Costura de botones Couture de boutons Configuración de la máquina Réglages de la machine q Patrón: 27 (modo 2) q Motif : 27 (mode 2) w Pie prensatelas: Pie para costura de botones (T) w Pied presseur : Pied pour boutons T e Tensión del hilo: Automática e Tension du fil :... -
Page 81: Variations Of Buttonholes
Variations of Buttonholes Square Buttonhole This square buttonhole is widely used on medium to heavy weight fabrics. The buttonhole size is automatically determined by placing a button in the foot. Round-end Buttonhole This buttonhole is used on fine to medium weight fabrics especially for blouses and children’s clothes. -
Page 82: Variaciones De Ojales
Variaciones de ojales Divers types de boutonnière Boutonnière carrée Ojal cuadrado Este ojal cuadrado se usa para telas de peso medio a Cette boutonnière carrée est très utilisée sur les tissus grande. El tamaño del botón se determina moyennement épais à épais. La taille de la boutonnière est automáticamente al poner un botón en el pie prensatelas. - Page 83 Square buttonhole Machine settings q Pattern: 17 (Mode 2) w Presser foot: Automatic buttonhole foot R e Thread tension: AUTO NOTE: The size of the buttonhole is automatically set by placing a button in the rear of automatic buttonhole foot R. The button holder of the foot takes a button size of 0.5 cm (3/16˝) to 2.5 cm (1˝) in diameter.
-
Page 84: Ajal Cuadrado
Ojal cuadrado Boutonnière carrée Configuración de la máquina Réglages de la machine q Patrón: 17 (modo 2) q Motif : 17 (Mode 2) w Pie prensatelas: Pie de ojales automáticos (R) w Pied presseur : Pied de boutonnière automatique R e Tensión del hilo: 1 a 5 e Tension du fil :... - Page 85 c Pull the buttonhole lever down as far as it will go. q Buttonhole lever NOTE: If you start sewing without pulling down the buttonhole lever, the LCD screen will show a warning and the machine will stop after a few stitches. Pull the buttonhole lever down and restart the machine.
- Page 86 c Baje la palanca de ojal tanto como sea posible. c Abaissez à fond le levier de boutonnière. q Palanca de ojal q Levier de boutonnière NOTA: REMARQUE : Si comienza a coser sin bajar la palanca de ojales, la Si vous commencez à...
- Page 87 b Start the machine to sew the buttonhole. The buttonhole will be automatically sewn. n When buttonhole sewing is finished, push the buttonhole lever upward as far as it will go. m Remove the fabric and place a pin just below the bartack at each end to prevent accidentally cutting stitches.
- Page 88 b Arranque la máquina para coser el ojal. b Démarrez la machine pour coudre la boutonnière. El ojal se cose automáticamente. La couture de la boutonnière se fait automatiquement. n Después de coser el ojal, empuje hacia arriba la n Lorsque la couture de la boutonnière est terminée, relevez à palanca de ojal tanto como sea posible.
-
Page 89: Double Layer Buttonhole
Double layer buttonhole To make a solid and sturdy buttonhole, sew another layer of buttonhole over the previous stitches. After the buttonhole is finished, simply start the machine again. Do not raise the foot or buttonhole lever. The machine will sew another buttonhole in the following order and stop automatically when it is completed: z Step 1:Straight stitching in reverse to go back to the starting point... -
Page 90: Ojal De Dobre Capa
Ojal de doble capa Boutonnière double couche Para realizar un ojal sólido y resistente, cosa otra capa Pour faire une boutonnière solide et résistante, cousez une autre sobre las puntadas anteriores. couche de boutonnière par-dessus la couche précédente. Una vez finalizado el ojal, vuelva a arrancar la máquina. Lorsque la boutonnière est terminée, il suffit de redémarrer la No suba el pie ni la palanca para ojales. -
Page 91: Adjusting Stitch Density
Adjusting buttonhole width Press the stitch width adjustment key and the adjustment window opens. Press on “+“ to increase the buttonhole width. Press on “–“ to decrease the buttonhole width. q Stitch width adjustment key w Narrower buttonhole e Wider buttonhole Adjusting stitch density Press the stitch length adjustment key, the adjustment window opens. -
Page 92: Ajuste Del Ancho Del Ojal
Ajuste del ancho del ojal Réglage de la largeur de boutonnière Appuyez sur la touche de réglage de la largeur de point : la Pulse la tecla de ajuste del ancho de la puntada. Se abre fenêtre correspondante s'ouvre. la ventana de ajuste. Appuyez sur “+”... -
Page 93: Round-End Buttonholes (#18)
Round-end buttonholes (#18) Machine settings q Pattern: 18 (mode 2) w Presser foot: Automatic buttonhole foot R e Thread tension: AUTO * The sewing procedue is same as buttonhole #17 (see pages 80 to 82). Keyhole buttonholes (#20) Machine settings q Pattern: 20 (Mode 2) w Presser foot:... -
Page 94: Ojales Redondeados (Nº. 18)
Ojales redondeados (n.º 18) Boutonnières arrondies (nº 18) Configuración de la máquina Réglages de la machine q Patrón: 18 (modo 2) q Motif : 18 (mode 2) w Pie prensatelas: Pie de ojales automáticos (R) w Pied presseur : Pied de boutonnière automatique R e Tensión del hilo: Automática e Tension du fil :... -
Page 95: Knit Buttonhole (#24)
Knit buttonhole (#24) Machine settings q Pattern: 24 (mode 2) w Presser foot: Automatic buttonhole foot R e Thread tension: AUTO z Sew the left row. x Sew the front bartack. c Sew the rear bartack and right row. The machine will automatically stop when buttonhole sewing is finished. -
Page 96: Ojal Para Punto (Nº. 24)
° Ojal para punto (n.º 24) Boutonnière tissu de tricot (n Configuración de la máquina Réglages de la machine q Patrón: q Motif : 24 (mode 2) 24 (modo 2) w Pied presseur : Pied de boutonnière automatique R w Pie prensatelas: Pie de ojales automáticos (R) e Tension du fil : AUTO... -
Page 97: Welted Buttonhole
Welted buttonhole Machine settings q Pattern: 26 (mode 2) w Presser foot: Automatic buttonhole foot R e Thread tension: AUTO A welted buttonhole is made by stitching a strip or patch of fabric to the buttonhole. Welted buttonholes are particularly suited to tailored garments, but are not recommended for sheer or delicate fabrics where the patch might show through or add bulk. -
Page 98: Ojal Con Vivo
Ojal con vivo Boutonnière passepoilée Configuración de la máquina Réglages de la machine q Patrón: 26 (modo 2) q Motif : 26 (mode 2) w Pie prensatelas: Pie de ojales automáticos (R) w Pied presseur : Pied de boutonnière automatique R e Tensión del hilo: Automática e Tension du fil :... - Page 99 b Fold back each side of the patch to form buttonhole lips. q Wrong side of patch w Right side of garment fabric e Right side of patch n Press both folds with an iron. e Right side of patch r Wrong side of garment fabric m Baste both edges of the seam with a needle and thread as shown.
- Page 100 b Doble los lados de la pieza de inserción para formar b Repliez chaque côté du renfort pour former des lèvres. q Envers du renfort unos “labios” alrededor del ojal. q Reverso de la pieza de inserción w Endroit du tissu w Anverso de la tela e Endroit du renfort e Anverso de la pieza de inserción...
-
Page 101: Welted Buttonhole
⁄0 The patch should be cut 1 to 1.5 cm (7/16˝ – 10/16˝) ⁄0 away from the hole. The corners should be cut rounded off as shown. e Right side of patch r Wrong side of garment fabric ⁄1 ⁄1 Place the facing on the wrong side of the garment fabric. -
Page 102: Ojal Con Vivo
⁄0 La pieza de inserción se debe cortar a una distancia de ⁄0 Le renfort doit être coupé à 1 – 1,5 cm de l'ouverture. Les entre 1 y 1,5 cm desde el orificio del ojal. Las esquinas coins doivent être coupés en arrondi, comme illustré. se deben cortar redondeadas, como muestra la e Endroit du renfort imagen. -
Page 103: Eyelet
Eyelet Machine settings q Pattern: 30 (mode 2) w Presser foot: Satin stitch foot F e Thread tension: AUTO The eyelet is used for belt holes etc. To sew Depress the foot control to sew. The machine will sew an eyelet and stop automatically when completed. -
Page 104: Ojete
Ojete Œillet Configuración de la máquina Réglages de la machine q Patrón: 30 (modo 2) q Motif : 30 (mode 2) w Pie prensatelas: Pie de puntadas de realce (F) w Pied presseur : Pied pour point passé F e Tensión del hilo: Automática e Tension du fil : AUTO... -
Page 105: Zipper Sewing
Zipper sewing Machine settings q Pattern: 1 (Mode 1) w Presser foot: Zipper foot E e Thread tension: AUTO To sew on the left side of the zipper, attach the foot holder to the right pin on the zipper foot. To sew on the right side of the zipper, attach the foot holder to the left pin on the zipper foot. -
Page 106: Costura De Cremalleras
Costura de cremalleras Couture de fermetures à glissière Configuración de la máquina Réglages de la machine q Patrón: 1 (modo 1) q Motif : 1 (Mode 1) w Pie prensatelas: Pie para cremalleras (E) w Pied presseur : Pied ganseur E e Tensión del hilo: Automática e Tension du fil :... - Page 107 To sew c Fold back the left seam allowance. Turn the right seam allowance under to form a 0.2 to 0.3 cm (1/8˝) fold. Place the zipper teeth next to the fold and pin it in place. Set the stitch length and thread tension back to the original setting.
- Page 108 Para coser Pour coudre c Doble hacia atrás el margen izquierdo. Gire el margen c Repliez le rentré de couture gauche. Tournez le rentré droit de costura derecho debajo, para formar un pliegue de vers le dessous pour former un pli de 0,2 à 0,3 cm. Placez les entre 0,2 y 0,3 cm.
- Page 109 n Close the zipper q and spread the fabric open flat with the right side facing up. Baste the opened fabric and zipper tape e together. q Zipper w Basting stitches e Zipper tape r Wrong side of fabric t Right side of fabric m Re-attach the zipper foot E with the left pin.
- Page 110 n Cierre la cremallera q y abra la tela, con el anverso de n Fermez la fermeture à glissière q et étalez complètement le la tela hacia arriba. tissu, l'endroit orienté vers vous. Hilvane la tela abierta y la cinta de la cremallera e Bâtissez ensemble le tissu ouvert et le ruban de la fermeture à...
-
Page 111: Darning
Darning Machine settings q Pattern: 28 (mode 2) w Presser foot: Automatic buttonhole foot R e Thread tension: AUTO z Pull the button holder to the rear as far as it will go. q Button holder x Place the garment under the foot. Press the up/down needle position button twice. -
Page 112: Zurcido
Zurcido Reprise Configuración de la máquina Réglages de la machine q Patrón: 28 (modo 2) q Motif : 28 (mode 2) w Pie prensatelas: Pie de ojales automáticos (R) w Pied presseur : Pied de boutonnière automatique R e Tensión del hilo: Automática e ension du fil : AUTO... -
Page 113: Darning
To sew a shorter darning To sew a darning shorter than 2 cm (3/4˝), first stop the machine after sewing the required length, then press the reverse button. The required length has been determined. Restart the machine and continue sewing until the machine stops automatically. -
Page 114: Zurcido
Para realizar un zurcido más corto Pour coudre une reprise plus petite Para realizar un zurcido de menos de 2 cm de largo, Pour coudre une reprise de moins de 2 cm de long, arrêtez la machine après avoir cousu la longueur nécessaire, puis appuyez detenga la máquina cuando llegue a la longitud deseada y sur la touche de point arrière. -
Page 115: Tacking
Tacking Machine settings q Pattern: 29 (mode 2) w Presser foot: Satin stitch foot F e Thread tension: AUTO Tacking is used to reinforce pockets, crotches and belt carriers where extra strength is needed. To sew Depress the foot control until the machine stops automati- cally. -
Page 116: Embaste
Embaste Faufilure Configuración de la máquina Réglages de la machine q Patrón: 29 (modo 2) q Motif : 29 (mode 2) w Tensión del hilo: Pie de puntadas de realce (F) w Tension du fil : Pied pour point passé F e Pie prensatelas: 3 a 6 e Pied presseur :... -
Page 117: Blind Hem
Blind hem Machine settings q Pattern: 14 (mode 2) w Presser foot: Blind hem foot G e Thread tension: AUTO Select pattern 14 for woven fabrics or pattern 15 for elastic fabrics. NOTE: The stitch width of the patterns 14 and 15 cannot be changed, but the needle drop position will move. -
Page 118: Dobradillo Ciego
Dobladillo ciego Ourlet à points cachés Configuración de la máquina Réglages de la machine q Patrón: 14 (modo 2) q Motif: 14 (mode 2) w Pie prensatelas: Pie para dobladillo ciego (G) w Pied presseur: Pied pour ourlet invisible G e Tensión del hilo: Automática e Tension du fil:... -
Page 119: Decorative Stitches Pintucking
DECORATIVE STITCHES Pintucking Machine settings q Pattern: 2 (mode 1) w Presser foot: Blind hem foot G e Thread tension: AUTO Fold a fabric with the right side together. Place the folded fabric under the blind hem foot. Align the edge of the fold with the guide on the foot, and lower the foot. -
Page 120: Puntadas Decorativas
PUNTADAS DECORATIVAS POINTS DÉCORATIFS Remate Nervures Configuración de la máquina Réglages de la machine q Patrón: 2 (modo 1) q Motif: 2 (mode 1) w Pie prensatelas: Pie para dobladillo ciego (G) w Pied presseur: Pied pour ourlet invisible G e Tensión del hilo: Automática e Tension du fil:... -
Page 121: Shell Tuck
Shell tuck Machine settings q Pattern: 16 (mode 2) w Presser foot: Satin stitch foot F e Thread tension: 6–8 Use a light weight fabric (tricot, for example). Fold the fabric as shown and stitch on the fold. Allow the needle to just clear the folded edge to create a shelled edge. -
Page 122: Retenido De Forros
Retenido de forros Point coquille Configuración de la máquina Réglages de la machine q Patrón: 16 (modo 2) q Motif : 16 (mode 2) w Pie prensatelas: Pie de puntadas de realce (F) w Pied presseur : Pied pour point passé F e Tensión del hilo: 6 a 8 e Tension du fil :... -
Page 123: Smocking
Smocking Machine settings q Pattern: 87 (mode 2) w Presser foot: Satin stitch foot F e Thread tension: AUTO Smocking is a delicate decorative treatment used on children’s clothes or women’s blouses. Choose a soft and lightweight fabric such as batiste, gingham or challis. -
Page 124: Fruncido
Fruncido Smocks Configuración de la máquina Réglages de la machine q Patrón: 87 (modo 2) q Motif: 87 (mode 2) w Pie prensatelas: Pie de puntadas de realce (F) w Pied presseur: Pied pour point passé F e Tensión del hilo: Automática e Tension du fil: AUTO... -
Page 125: Scallop (A)
Scallop (A) Machine settings q Pattern: 75 (mode 2) w Presser foot: Zigzag foot A e Thread tension: AUTO Fold the fabric with right sides together. Sew scallops 3/8˝ (1 cm) from folded edge. Trim close to stitching leaving 1/8˝ (0.3 cm) seam allow- ance. -
Page 126: Festón (A)
Festón (A) Coquille (A) Configuración de la máquina Réglages de la machine q Patrón: 75 (modo 2) q Motif : 75 (mode 2) w Pie prensatelas: Pie para zigzag (A) w Pied presseur : Pied de point zigzag A e Tensión del hilo: Automática e Tension du fil : AUTO... -
Page 127: Patchwork
Patchwork Machine settings q Pattern: 77, 78 (mode 2) or 88–91 (mode 3) w Presser foot: Satin stitch foot F e Thread tension: AUTO Sew the fabrics right sides together with straight stitch 01. Press seam allowance open. Sew pattern stitch 77 on right side of garment centering over the seam line. -
Page 128: Patchwork
Patchwork Patchwork Configuración de la máquina Réglages de la machine q Patrón: 77, 78 (modo 2) u 88 a 91 (modo 3) q Motif: 77, 78 (mode 2) ou 88 à 91 (mode 3) w Pie prensatelas: Pie de puntadas de realce (F) w Pied presseur: Pied pour point passé... -
Page 129: Rolled Hem
Rolled hem Machine settings q Pattern: 1 (mode 1) w Presser foot: Hemmer foot D e Thread tension: AUTO To sew: 0.5 cm Fold the edge of the fabric twice, 6 cm (2 3/8˝) in length and 0.3 cm (1/8˝) in width. Trim the corner 0.5 cm (3/16˝) by 0.8 cm (1/4˝) for easier 0.8 cm insertion of the hem into the foot. -
Page 130: Dobladillo Enrollado
Dobladillo enrollado Ourlet roulé Configuración de la máquina Réglages de la machine q Patrón: 1 (modo 1) q Motif : 1 (mode 1) w Pie prensatelas: Pie para dobladillos D w Pied presseur : Pied d'ourlet D e Tensión del hilo: Automática e Tension du fil : AUTO... -
Page 131: Cross Stitch
Cross stitch Machine settings q Pattern: 60 to 70 (mode 3) w Presser foot: Satin foot F e Thread tension: AUTO You’ll love the beautiful designs you can make with this craft stitch pattern, and in half the time it would take if embroidered by hand. -
Page 132: Punto De Cruz
Punto de cruz Point de croix Configuración de la máquina Réglages de la machine q Patrón: 60 a 70 (modo 3) q Motif : 60 à 70 (mode 3) w Pie prensatelas: Pie de realce (F) w Pied presseur : Pied pour point passé... -
Page 133: Twin Needle Sewing
Twin needle sewing Machine settings q Pattern: 26 (example) w Presser foot: Satin stitch foot F e Thread tension: AUTO NOTES: * When you sew patterns with the twin needle, press the twin needle button and test the stitches first before you begin to sew. -
Page 134: Costura Con Agujas Dobles
Costura con agujas dobles Couture avec une aiguille jumelée Configuración de la máquina Réglages de la machine q Patrón: 26 (ejemplo) q Motif: 26 (example) w Pie prensatelas: Pie de puntadas de realce (F) w Pied presseur: Pied pour point passé F e Tensión del hilo: Automática e Tension du fil:... -
Page 135: Pattern Combination 1
Pattern combination 1 Example: Programming patterns 33 and 35 Machine settings q Presser foot: Satin stitch foot F w Thread tension: AUTO z Selet pattern 33 (mode 2). x Press the memory key. q Mode w Pattern number e The number of programmed patterns c Select the pattern 35 (mode 2). -
Page 136: Combinación De Patrones 1
Combinación de patrones 1 Combinaison de motifs 1 Ejemplo: programación de los patrones 33 y 35. Exemple : Programmation des motifs 33 et 35 Configuración de la máquina Réglages de la machine q Pie prensatelas: Pie para bordado de realces (F) q Pied presseur: Pied pour point passé... -
Page 137: Pattern Combination 2
Pattern combination 2 Example: Programming patterns 33, 35 and 98 Machine settings q Presser foot: Satin stitch foot F w Thread tension: AUTO z Select pattern 33 in mode 2. x Press the memory key. c Select pattern 35. v Press the memory key. b Select pattern 98 in mode 3 (locking stitch). - Page 138 Combinación de patrones 2 Combinaison de motifs 2 Ejemplo: programación de los patrones 33, 35 y 39. Exemple : Programmation des motifs 33, 35 et 39 Configuración de la máquina Réglages de la machine q Pie prensatelas: Pie para bordado de realces (F) q Pied presseur : Pied pour point passé...
-
Page 139: Combination For A Mirror Image
Combinations for a mirror image Example: Programming pattern 41 and its mirror image Machine settings q Presser foot: Satin stitch foot F w Thread tension: AUTO z Select pattern 41 in mode 2. x Press the memory key. c Press the turnover memory key. v Start sewing. -
Page 140: Combinación Para Imágenes Inversas (Especukares)
Combinaisons pour la réalisation d'une image Combinación para imágenes inversas miroir (especulares) ° Exemple : Programmation du motif n 41 et de son image Ejemplo: programación del patrón 41 y su imagen inversa (especular). miroir Réglages de la machine Configuración de la máquina q Pied presseur : q Pie prensatelas: Pied pour point passé... -
Page 141: Pattern Elongation
Pattern Elongation Machine settings q Stitch pattern 33 (mode 2) w Presser foot: Satin stitch foot F e Thread tension: AUTO Patterns number 31–47 (mode 2) can be elongated. Example: Pattern 33 Select pattern 33 (mode 2). Press the elongation key to change the elongation ratio. Elongation ratio is indicated in multiples of the original pattern length. -
Page 142: Alargamiento De Patrones
Alargamiento de patrones Allongement de motif Configuración de la máquina Réglages de la machine q Patrón de puntada 33 (modo 2) q Motif de points 33 (mode 2) w Pie prensatelas: Pie de puntadas de realce (F) w Pied presseur : Pied pour point passé... -
Page 143: Extender Stitches
Extender stitches Machine settings q Stitch pattern 51 (mode 2) * The stitches can also be used. w Presser foot: Zigzag foot A or Satin stitch foot F e Thread tension: AUTO The extender stitch is used to insert straight stitches The number of the extender stitches between stitch patterns. -
Page 144: Puntada De Alargamiento
Puntadas de alargamiento Points d’extension Configuración de la máquina Réglages de la machine q Patrón de puntada 51 (modo 2) q Motif de points 51 (mode 2) * También se pueden usar las puntadas * Les points peuvent également être utilisés. w Pie prensatelas: Pie para zigzag (A) o pie para w Pied presseur:... -
Page 145: Free-Motion Quilting
Free-motion quilting Machine Settings q Pattern: 1 (mode 1) w Presser foot: Darning foot P e Thread tension: Auto Feed dog: Dropped Attach the darning/embroidery foot P (refer to page 62 for how to attach it). Baste or pin the quilt layers. Draw a quilt design on the top fabric with a washable marker. -
Page 146: Acolchado Libre
Acolchado libre Matelassage en mouvement libre Configuración de la máquina Réglages de la machine q Patrón: 1 (modo 1) q Motif : 1 (mode 1) w Pie prensatelas: Pie de zurcido (P) w Pied presseur : Pied à repriser P e Tensión del hilo: Automática e Tension du fil :... -
Page 147: Editing Program
Editing program Uniform stitch adjustment (Modes 2 and 3 only) The stitch width and length of the programmed stitch patterns can be uniformly altered. Example 1: To alter the stitch width of the programmed pattern 27 and its mirror image in mode 3. z Shift the cursor to the right of the last programmed pattern q. -
Page 148: Edición De Programas
Edición de programas Édition d'un programme Ajuste de puntada uniforme (sólo modos 2 y 3) Uniformisation de tailles de points (Modes 2 et 3 uniquement) El ancho y la longitud de la puntada de los patrones Il est possible d'uniformiser la largeur et la longueur de point de programados se pueden modificar uniformemente. - Page 149 Combining satin and decorative stitches Example: combination of patterns 41 and 27 z Press the stitch width adjustment key. x The stitch width will be applied to all memorized patterns. c Start sewing. * You cannot adjust the stitch length setting when you combine satin stitches and decorative stitches.
- Page 150 Combinaison de points plumetis et de points Combinación de puntadas de realce y decorativas décoratifs ° ° Exemple : Combinaison des motifs n 41 et n Ejemplo: combinación de los patrones 41 y 27 z Pulse la tecla de ajuste del ancho de la puntada. Appuyez sur la touche de réglage de la largeur de point.
-
Page 151: Custom Stitch Adjustment
Custom stitch adjustment (Mode 2 and 3 only) The stitch width and length can be individually altered for each pattern in the programmed combination. Example: To alter the stitch width and length of a single pattern in the combination z Press the edit key to shift the cursor under the pattern you wish to alter. -
Page 152: Ajuste Individual De Puntadas
Ajuste individual de puntadas (sólo modos 2 y 3) Personnalisation des tailles de points (Modes 2 et 3 uniquement) El ancho y la longitud de la puntada se pueden modificar Il est possible de modifier individuellement la largeur et la en cada patrón de la combinación programada por longueur de point pour chaque motif d'une combinaison separado. -
Page 153: Programming A Monogram
The uppercase letter “S” will be memorized. v Select the lowercase letter “u” (pattern 57). b Press the memory key. n Select the lowercase letter “n” (pattern 50). m Press the memory key. * Use a Janome blue needle when sewing monograms. -
Page 154: Programación De Un Monograma
Sélectionnez la lettre minuscule “n” (motif n° 50). m Pulse la tecla de memoria. m Appuyez sur la touche de mémorisation. * Utilisez une aiguille bleue Janome pour coudre des * Utilice una aguja azul Janome para coser los monogramas. -
Page 155: Programming A Monogram
Programming a monogram (2) Example: To program “A_B” in the Script font. (with a space between letters) z Press the monogramming key to select the Script font. x Press the memory key. The uppercase letter “A” will be memorized. c Select the space ( ) (pattern 67). -
Page 156: Programación De Un Monograma
Programación de un monograma (2) Programmation d'un monogramme (2) Ejemplo: Para programar “A_B” en fuente Script (con un Exemple: Pour programmer “A_B” dans la police Script. (avec espacio entre las letras). un espacement entre les lettres) z Pulse la tecla de monogramas para seleccionar la z Appuyez sur la touche de broderie monogramme pour fuente Script. -
Page 157: Reducing The Size Of A Monogram
Reducing the size of a monogram Press the turnover memory key. The selected letter will be decreased to 2/3 of its original size. z Press the monogramming key. Select Broadway style x Press the memory key. c Select “&” (pattern 64). v Press turnover memory key. -
Page 158: Reducción Del Tamaño De Un Monograma
Reducción del tamaño de un monograma Réduction de la taille d'un monogramme Appuyez sur la touche de mémorisation de motif inversé. La lettre Pulse la tecla de registro invertido. La letra seleccionada sélectionnée est réduite de 2/3 par rapport à sa taille d'origine. se reducirá... -
Page 159: Viewing A Long Text
Viewing a long text z The LCD screen only shows 8 characters of a monogram at a time. If the entire text is not displayed, press the edit key or help key to scroll the text. x Pressing the edit key shifts the cursor and scrolls the text to the left. -
Page 160: Visualización De Un Texto Largo
Visualización de un texto largo Visualisation d’un texte long z L’écran à cristaux liquides ne peut afficher que 8 caractères à z La pantalla sólo puede mostrar 8 caracteres del la fois. monograma cada vez. Si le texte est coupé à l’écran, appuyez sur la touche Édition Si no aparece su texto completo, pulse el botón de ou la touche Aide pour faire défiler le texte. -
Page 161: Inserting A Letter (Character)
Inserting a letter (character) Example: To insert a space between “B” and “C” in “ABCD” z Press the edit key to shift the cursor under letter “C”. x Select the space ( ) pattern 67. c Press the memory button and a space will be inserted before letter “C”. -
Page 162: Introducción De Una Letra (Carácter)
Introducción de una letra (carácter) Insertion d’une lettre (caractère) Ejemplo: Para introducir un espacio entre “B” y “C” Exemple: Pour insérer un espace entre “B” et “C” dans en “ABCD”. “ABCD”. z Pulse la tecla de edición para poner el cursor bajo la z Appuyez sur la touche Édition pour déplacer le curseur sous la lettre “C”. -
Page 163: To Store And Call Stitch Pattern Combinations
To store and call stitch pattern combinations It is possible to retain a pattern combination for future use even if the machine is turned off. Simply save the pattern combination in one of the five memory addresses. A combination of up to 50 patterns can be saved in each memory address. -
Page 164: Combinaciones De Patrones De Puntadas
Guardado en memoria y recuperación de Enregistrement et rappel des combinaisons combinaciones de patrones de puntadas de motifs de points Es posible conservar una combinación de patrones para Une combinaison de motifs peut être conservée pour usage utilizarla más adelante, aunque se apague la máquina. ultérieur même si la machine est mise hors tension. -
Page 165: Recalling A Stored Combination
Recalling a stored combination Select mode 2, 3 or monogramming z Press the stock/call key to select the desired memory address.. x Press the turnover memory key to recall the stored combination. Deleting a stored combination z Press the stock/call key to select the desired memory address. -
Page 166: Recuperación De Una Combinación Guardada
Recuperación de una combinación guardada Rappel d’une combinaison enregistrée Seleccione modo 2, 3 o monogramas. Sélectionnez le mode 2, 3 ou broderie monogramme z Pulse la tecla de memoria/recuperación para z Appuyez sur la touche Enregistrer/Rappeler pour sélectionner seleccionar la dirección de memoria que desee. l'adresse de mémorisation souhaitée. -
Page 167: Correcting Distorted Stitch Patterns
Correcting distorted stitch patterns The sewing results of the stretch patterns may vary depending upon the sewing conditions, such as sewing speed, type of the fabric, number of layers etc. Always test sew on a scrap piece of the fabric that you wish to use. -
Page 168: Corrección De Patrones De Puntadas Distorsionados
Corrección de patrones de puntadas Correction des motifs de points déformés distorsionados Los resultados de la costura con patrones elásticos Les résultats obtenus avec les motifs stretch peuvent varier selon pueden variar dependiendo de las condiciones de la les conditions de couture (vitesse de couture, type de tissu, costura, como la velocidad de costura, el tipo de tela, el nombre d’épaisseurs, etc.). -
Page 169: Care And Maintenance Cleaning The Hook Race And Feed Dog
CARE AND MAINTENANCE Cleaning the hook race and feed dog WARNING: Turn the power switch off and unplug the machine before cleaning. NOTE: Do not dismantle the machine in any way other than what is explained in this section. z Remove the needle and presser foot. Remove the setscrews and remove the needle plate. -
Page 170: Limpieza De La Carrera Del Portabobinas Y Los Dientes De Arrastre
CUIDADOS Y MANTENIMIENTO SOINS ET ENTRETIEN Limpieza de la carrera del portabobinas y los Nettoyage du logement du crochet et de la dientes de arrastre griffe d’entraînement AVERTISSEMENT: ATENCIÓN: Apague y desenchufe la máquina antes de limpiarla. Coupez l'alimentation et débranchez la machine avant de procéder à... -
Page 171: Replacing The Light Bulb
Replacing the light bulb WARNING: Turn the power off before replacing the light bulb. The bulb could be HOT, wait until it has cooled down before touching it. To remove: Remove the cap q. Remove the setscrew w. Remove the face cover e. Pull out the bulb t from the lamp socket r. -
Page 172: Cambio De La Bombilla
Cambio de la bombilla Remplacement de l’ampoule AVERTISSEMENT: ATENCIÓN: Mettez la machine hors tension avant de remplacer l’ampoule. Apague la máquina antes de cambiar la bombilla. L’ampoule risque d’être BRÛLANTE. Attendez qu’elle ait refroidi La bombilla puede estar CALIENTE. Si es así, espere avant de la toucher. -
Page 173: Warning Messages
Warning Messages If a buzzer sounds and the LCD screen shows one of these messages, follow the guidance below. Message Problem/Cause Try this • The machine is started with the presser foot up. Lower the presser • The machine will stop if the presser foot is raised foot and restart while sewing. -
Page 174: Audible Signals
Message Problem/Cause Try this Turn OFF the power The foot control is disconnected while sewing. and connect the foot control. • The start/stop button is pressed after the foot Disconnect the foot control has been connected. control and restart the machine. •... -
Page 175: Mensajes De Advertencia
Mensajes de advertencia Si se oye una señal acústica y en pantalla aparece uno de estos mensajes, siga estas instrucciones: Mensaje Problema/causa Intente lo siguiente: • Se ha encendido la máquina con el prensatelas Baje el pie y vuelva a elevado. -
Page 176: Señal Acústica
Mensaje Problema/causa Intente lo siguiente: • El pedal está desenchufado mientras se Ponga el interruptor en trabaja. OFF y conecte el pedal. • Se ha pulsado el botón de inicio/parada Desconecte el pedal y después de haber conectado el pedal. arranque la máquina otra vez. -
Page 177: Messages D'avertissement
Messages d'avertissement Si un avertisseur sonore se déclenche et qu'un des messages suivants s'affiche sur l'écran à cristaux liquides, suivez les conseils suivants. Message Problème/Cause Essayez ceci Abaissez le pied, puis • La machine est démarrée alors que le pied presseur est en position rélevée. -
Page 178: Signaux Sonores
Message Problème/Cause Essayez ceci • La pédale s’est détachée pendant la couture. Coupez l’alimentation électrique, puis rebranchez la pédale. • La touche de marche/arrêt est sélectionnée Déconnectez la après avoir raccordé la pédale. pédale et redémarrez la machine. • L'interrupteur d'alimentation a été mis sous Relâchez la pédale. -
Page 179: Troubleshooting
Troubleshooting Condition Cause Reference 1. The needle thread is not threaded properly. See page 44 The needle thread 2. The needle thread tension is too tight. See page 50 breaks. 3. The needle is bent or blunt. See page 34 4. -
Page 180: Detección Y Solución De Problemas
Detección y resolución de problemas Problema Causa Referencia El hilo de la aguja 1. El hilo de la aguja no está correctamente enhebrado. Consulte la página 45. se rompe. 2. El hilo de la aguja está demasiado tenso. Consulte la página 51. 3. - Page 181 Dépistage des pannes Anomalie Cause Références 1. Le fil d’aiguille n’est pas bien enfilé. Voir en page 45. Le fil d'aiguille se casse 2. Le fil d’aiguille est trop tendu. Voir en page 51. 3. L’aiguille est déformée ou émoussée. Voir en page 35.
- Page 182 847-800-074 (E/S/F) Printed in Taiwan...