
Related Manuals for Janome MC11000SE


Summary of Contents for Janome MC11000SE
- Page 1 Instruction Manual Memory Craft 11000 Special Edition *Please Note: This version is only a partial manual. Visit your local Janome Dealer for a full version.
-
Page 2: Names Of Parts
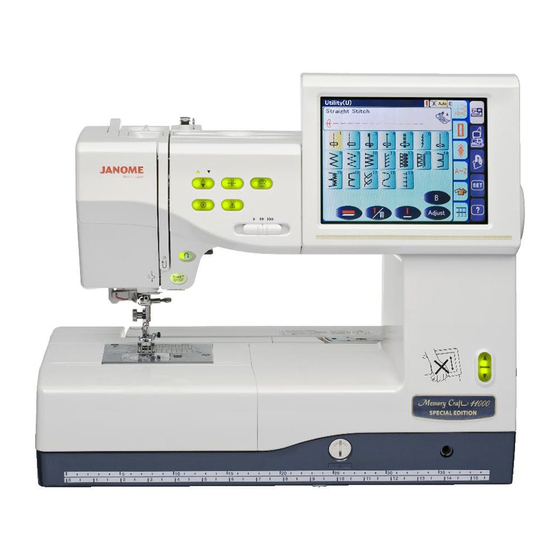
GETTING READY TO SEW 18 19 Names of Parts Bobbin winder spindle Bobbin winder stopper Bobbin thread cutter Visual touch screen Screen up/down button Knee lifter socket Feed balancing dial Extension table (accessory storage) Hook cover release button Hook cover plate Needle plate Automatic needle threader Thread cutter/holder... - Page 3 1 Carrying handle 2 Power switch 3 Machine socket 4 Carriage release lever 5 USB port (for direct PC link) 6 USB port (for CD-ROM drive/USB memory key) 7 Foot control jack 8 Card ejecting button 9 Card slot 10 Hand wheel 11 Buttonhole lever 12 Retractable carriage arm 13 Hard cover (accessory storage)
-
Page 4: Standard Accessories And Storage
Standard Accessories and Storage The embroidery hoops, foot control, power supply cord, knee lifter etc. can be conveniently stored in the hard cover. 1 Embroidery hoop-ST (with template) 2 Embroidery hoop-SQ (with template) 3 Foot control 4 Power supply cord 5 Knee lifter 6 Set of red tip needles 7 Bobbin thread for embroidery... - Page 5 The extension table provides a handy compartment for storing various accessories. 1 Overcasting foot C 2 Rolled hem foot D 3 Zipper foot E 4 Satin stitch foot F 5 Blind hemming foot G 6 Cording foot H 7 Overedge foot M 8 1/4”...
-
Page 6: Extension Table
Extension Table The extension table provides an extended sewing area and can be removed for free arm sewing. 1 Extension table To detach: Draw the table out to the left. To attach: Slide the table on the base and push the table to the right. -
Page 7: Connecting The Power Supply
Connecting the Power Supply First mak sure the power switch is off and then insert the foot control plug into the jack on the machine if you wish to use foot control. Insert the machine plug of the power supply cord into the machine socket. -
Page 8: Machine Operating Buttons
Machine Operating Buttons Auto-lock button When sewing stitch pattern U1, U2, U8 or U9, the machine will immediately sew locking stitches and automatically stop when the auto-lock button is pressed. When sewing all other stitches, the machine will sew to the end of the current pattern, sew locking stitches and stop automatically. -
Page 9: Controlling Sewing Speed
Screen up/down button The visual touch screen can be raised to open (clear) the space for handling fabrics etc. Utility(U) Straight Stitch Pressing the button raises the screen, while pressing the button lowers the screen. CAUTION: Be sure to store the visual touch screen in the lowest position before carrying or storing the machine to prevent the screen from damage by impact. - Page 10 NOTE: Use the Janome plastic bobbins for horizontal hook (marked with “J”). Using other bobbins, such as prewound paper bobbins, may cause stitching problem...
-
Page 11: Inserting The Bobbin
7 Press the bobbin winding button again When the bobbin is fully wound, the bobbin winder stopper returns to the original position and the machine will stop automatically. Cut the thread with the thread cutter. Inserting the Bobbin 1 Place the bobbin in the bobbin holder with the thread running off counterclockwise. -
Page 12: Threading The Machine
Threading the Machine Raise the presser foot. Press the needle up/down button twice to raise the needle. Turn the power switch off. 1 Draw the thread from the spool. Hold the thread with both hands and pass the thread under the thread guide plate. -
Page 13: Using The Automatic Needle Threader
Pull the loop of thread to the back. NOTES: The automatic needle threader works well on the needles Nos. 11-14, sewing threads Nos. 50-90 and Janome embroidery threads. Thick threads, Nos. 20 and 30, are not suitable for the automatic needle threader. -
Page 14: Drawing Up The Bobbin Thread
Drawing Up the Bobbin Thread 1 Raise the presser foot lifter. 2 Hold the needle thread with your finger and press the up/down needle button twice to pick up the bobbin thread. 3 Draw up the needle thread to bring up a loop of the bobbin thread. -
Page 15: Changing Needles
Changing Needles CAUTION: Always make sure to turn the power switch off and disconnect the machine from power supply before changing the needle. Raise the needle by pressing the up/down needle button and lower the presser foot. Turn the power switch off. Loosen the needle clamp screw by turning it counter- clockwise. -
Page 16: Raising And Lowering The Presser Foot
Raising and Lowering the Presser Foot The presser foot lifter raises and lowers the presser foot. 1 Presser foot lifter You can raise the presser foot about 6 mm (1/4") higher than the normal up position by exerting more pressure when lifting the presser foot lifter. This helps you to place the layers of thick fabrics or embroidery hoops under the foot. -
Page 17: Removing And Attaching The Presser Foot
Removing and Attaching the Presser Foot WARNING: Turn the power switch off before changing the presser foot. Removing the presser foot Raise the needle to its highest position and raise the presser foot lifter. Press the red button on the back of the foot holder. The presser foot will drop off. -
Page 18: Mode Selection
Mode Selection Utility(U) Straight Stitch When you turn on the power switch, the visual touch screen will show the opening “welcome” window, then the ordinary sewing mode will appear after a few seconds. The machine will be set for straight stitch sewing. NOTE: After turning on the power, it takes several seconds for the pattern selection window to be displayed on the... -
Page 19: Machine Settings
Machine Settings Utility(U) Straight Stitch Set mode key When you press the set mode key, you can customize the machine settings. Press one of the 4 setting mode keys to select the mode to customize. 1 Common setting mode SET1 SET1 Screen Contrast In this mode, the machine settings or function for both... - Page 20 Common settings SET1 SET1 Screen Contrast 1 Screen contrast The contrast of the visual touch screen can be adjusted with “+” or “–“ key. Sewing Light Eco Mode 2 Sound 10 mim 10 mim The buzzer sound can be adjusted with the “+” or “–“ key.
- Page 21 1 Inch/mm options SET2 SET2 You can set your machine's measuring unit to either inch inch/mm inch or millimeter by pressing the “inch” or “mm” key. Touch Screen Calibration The default unit setting is millimeter. Format Built-in Memory ATA PC Card USB Memory Reset all to defaults Register...
- Page 22 Ordinary sewing mode settings SET1 Auto Tension 1 Auto thread tension Auto The auto thread tension level can be adjusted with the “+” or “–“ key. Remaining Bobbin Thread 2 Low bobbin thread warning The low bobbin thread warning level can be adjusted Feed Dog with the “+”...
- Page 23 Embroidery mode settings SET1 Auto Tension 1 Auto thread tension Auto The auto thread tension level can be adjusted with the “+” or “–“ key. Remaining Bobbin Thread 2 Low bobbin thread warning The low bobbin thread warning level can be adjusted with the “+”...
- Page 24 Color options Press the key to select one of the 3 colors for the pattern selection keys, which will display in the color shown. To change the screen background color, press the key to open the custom color window. Resume Mode Refer to page 22.
- Page 25 On-screen Help Movie Winding the bobbin Winding the bobbin Sensor Buttonholes Sensor Buttonholes Embroidery settings Embroidery settings Press the help key to open the help movie menu. You can view 7 topics of essential operations of the machine. Threading the machine Threading the machine Adjusting patterns Adjusting patterns...