Table of Contents
Advertisement
Advertisement
Table of Contents

Related Manuals for Britax Marathon Classic


Summary of Contents for Britax Marathon Classic
- Page 1 Classic Marathon User Guide...
-
Page 2: Table Of Contents
Harness Buckle ....................35 Adjusting Harness Slot Height ................35 Securing Your Child ....................36 Care and Maintenance ..................38 Warranty .......................42 ©2012 Britax Child Safety, Inc. All rights reserved. Printed in U.S.A P404400_R2:04.12 This product and its components are subject to change without notice. -
Page 3: Warnings
• To prevent injury due to deterioration or hidden damage, • The use of non-Britax Child Safety, Inc. covers, inserts, toys, discontinue use of a child seat that is older than six years or has accessories, or tightening devices is not approved by Britax. -
Page 4: Important Notes
Send your name, address, and placing heavy objects on top of it. the child seat’s model number and manufacturing date to Britax Child • Do not leave children alone in a vehicle, even for a short time. -
Page 5: Important Harness Adjustments
• the top of the child’s ears are below the top of the child seat and • the harness straps are in the nearest slots at or above the child’s Britax strongly recommends that children ride rear-facing to the shoulders, parallel to level ground (Fig. B). -
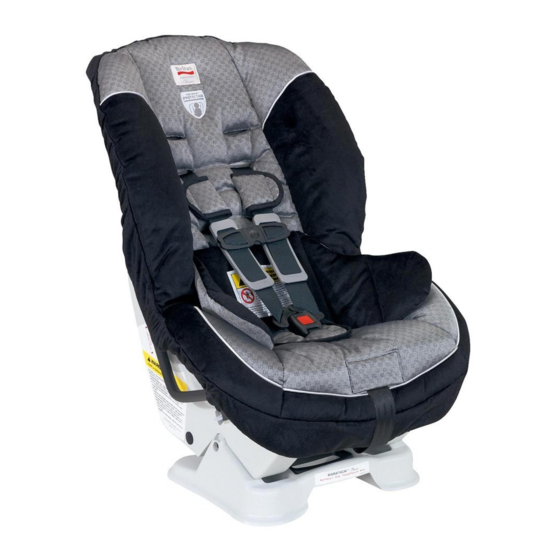
Page 6: Child Seat Features
Child Seat Features Child Seat Features Cover 11 Harness Holders 19 Serial Number & Manufactured 25 Forward-Facing Lock-off Date Label (under cover) LATCH Strap 12 HUGS (Harness Ultra Guard 26 Forward-Facing Belt Path ™ System) Chest Pads 20 Versa-Tether (Top Anchorage Strap) ®... -
Page 7: Vehicle Compatibility Compatible Vehicle Seat Belts
Vehicle Compatibility Vehicle Compatibility Compatible Vehicle Seat Belts 2. ELR (Emergency Locking Retractor) with Locking Latch Plate Has a latch plate that does NOTE: The information in this section only applies to installation with not allow the lap part of the vehicle safety belts. - Page 8 Vehicle Compatibility Vehicle Compatibility 4. ELR (Emergency Locking Retractor) with a Sliding Latch Plate Tightens feeding belt webbing back into the Has a latch plate that freely retractor. slides along the vehicle belt webbing. Has a retractor that locks only in an emergency situation such as sudden stop or crash.
-
Page 9: Incompatible Vehicle Belts
Vehicle Compatibility Vehicle Compatibility Incompatible Vehicle Seat Belts Vehicle Buckle Positions WARNING! WARNING! The position of the vehicle The following types of vehicle seat belts are NOT belt buckle can adversely affect the stability of compatible with this child seat. If any of the belt types listed below are in the the child seat. -
Page 10: Installation: Rear-Facing Latch Installation
Installation: Rear-Facing Installation: Rear-Facing LATCH Installation 6 Align each LATCH strap on the LATCH bar with the “LATCH Strap Here Rear-Facing” • Figure illustrates rear-facing LATCH label on each side of the child seat. (Figs. E installation. and F). • Verify that your vehicle is equipped with LATCH 7 Push the child seat firmly into the vehicle seat anchors. -
Page 11: Lap-Shoulder Belt Installation
Installation: Rear-Facing Installation: Rear-Facing Lap-Shoulder Belt Installation 7 Position the shoulder portion of the vehicle belt through the open lock-off, tighten belt, • Figure A illustrates a rear-facing, lap-shoulder close the lock-off arm (Fig. F), and replace the belt installation. cover. -
Page 12: Lap Belt Installation
Installation: Rear-Facing Installation: Rear-Facing Lap-Belt Installation • If your vehicle is equipped with an automatic locking retractor (ALR), use of the lock-offs is not • Figure A illustrates a rear-facing, lap-belt required as long as the ALR is locked. Check installation. -
Page 13: Installation: Forward-Facing Latch Installation
Installation: Forward-Facing Installation: Forward-Facing LATCH Installation 6 Attach the remaining LATCH connector to its adjacent vehicle LATCH anchor (Fig. D) in an • Figure A illustrates a forward-facing LATCH upright position (Fig, C). installation. • An audible click confirms attachment. •... -
Page 14: Lap-Shoulder Belt Installation
Remove all slack from the tether to IMPORTANT: Britax recommends that the Versa-Tether be secure. Store excess webbing in the tether used at all times. Using the tether will improve the stability pouch. -
Page 15: Lap Belt Installation
IMPORTANT: Britax recommends that the Versa-Tether be used at all times. seating location. Using the tether will improve the stability of the child seat and reduce the risk of injury. -
Page 16: Installation: Aircraft
IMPORTANT: If the aircraft lap belt is too short, ask the flight attendant for a belt • Britax recommends that the tether be used at all times. Using the extender. tether will improve the stability of the child seat and reduce the risk Rear-Facing Installation of injury. -
Page 17: Using The Versa-Tether
Installation: Versa-Tether Installation: Versa-Tether ® ® Using the Versa-Tether Tether Connector Strap Forward-Facing 1 Consult your vehicle owner’s manual for designated tether anchorage locations. WARNING! Only use the tether connector strap for a rear- 2 Locate the tether on the rear of the child seat facing tether installation as illustrated in Figure B on page 30. -
Page 18: Energy-Absorbing Versa-Tether
NOTE: Child seats are shipped from Britax with the the child seat during a crash. A secondary benefit of the energy- LATCH connectors in the storage slots. -
Page 19: Chest Clip
Child Seat Functions Child Seat Functions Chest Clip Harness Buckle Fastening the Chest Clip Fastening the Harness Buckle Fasten the chest clip by pushing the two halves 1 Hold the harness buckle with one hand. 2 Use your other hand to insert one buckle tongue together until a positive click is heard (Fig. -
Page 20: Securing Your Child
Securing Your Child Securing Your Child Buckling and Tightening the Harness 7 Slide the HUGS™ chest pads down towards the buckle. Important checklist before tightening the harness: 1 Loosen the harness by lifting the harness Check for proper harness height (see pages 6 – 7). adjuster release lever located on the front Remove slack from around the child’s upper thighs. -
Page 21: Care And Maintenance
Care and Maintenance Care and Maintenance Cover Removal Cleaning the Cover • HAND WASH using cold water and mild soap. WARNING! Do not take apart the harness. Never • LINE or LIE-FLAT DRY to prevent the cover from shrinking. remove the buckle tongues from the harness. They •... - Page 22 Care and Maintenance Care and Maintenance Harness Buckle Removal Cleaning the Harness Buckle 1 Fully recline the child seat. If a child eats and drinks while in the child seat, 2 Locate the metal buckle strap retainer on the the harness buckle may need to be periodically bottom of the child seat.
-
Page 23: Warranty
The warranty and remedies as set forth above are exclusive and in lieu of all others, oral or written, express or implied. In no event will Britax, or the retailer selling this product, be liable for any damages, including incidental or consequential damages, arising out of the use or inability to use this product. - Page 24 Notes Notes...
- Page 25 Make sure the chest clip is properly fastened and positioned in the middle of the child’s chest at armpit level. Britax Child Safety, Inc. Tel 1.888.427.4829 13501 South Ridge Drive Charlotte, NC 28273 www.BritaxUSA.com A Britax Childcare Group Limited company...