Table of Contents
Advertisement
Advertisement
Table of Contents

Related Manuals for John Lewis JLLFW1809


Summary of Contents for John Lewis JLLFW1809
- Page 1 JLLFW1809 Refrigerator Instruction manual...
-
Page 2: Important Safety Information
These warnings have been provided in the interest of safety.You MUST read them carefully before use of installation by a qualified person. If you are unsure of the meanings of these warnings contact the John Lewis branch from which you purchased the appliance. Installation •... - Page 3 Environmental information • After installation, please dispose of the packaging with due regard to safety and the environment. • When disposing of an old appliance, make it unusable, by cutting off the cable. Remove any door catches, to prevent small children being trapped inside. •...
-
Page 4: Table Of Contents
Ambient temperature function Child lock function Shopping function Eco mode function Quick chill function Holiday function Using the refrigerator Fresh food refrigeration Normal operating sounds Quick chill shelf Bottle and can holder Dismantling of the Bottle and can holder Installation of the carbon filter... -
Page 5: Description Of The Appliance
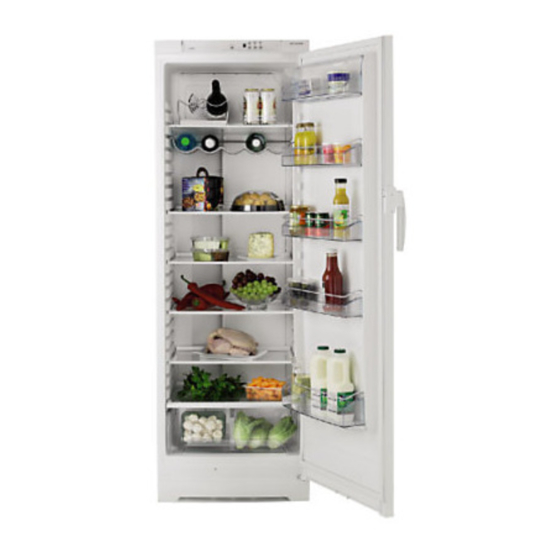
Description of the appliance 1 Dairy compartments 2 Can storage shelves 3 Bottle storage shelf 4 Control panel 5 Light 6 Ventilator 7 Cold air exit 8 Bottle and can holder 9 Storage shelves 10 Bottle holder 11 Salad crispers 12 Water discharge hole... -
Page 6: Control Panel
Display If on, the temperature indicated is the ambient temperature Positive Temperature indicator Temperature indicator When the refrigerator is first installed Warning Allow the appliance to stand for 2 hours after installation. After inserting the plug into the power outlet, if the display is not illuminated, press key (A) , to turn the appliance on . -
Page 7: Temperature Control
Shopping function to chill the products more rapidly and to avoid warming the other food which is already in the refrigerator. The Shopping function is activated by pressing key D (several times if necessary) until the corresponding... -
Page 8: Holiday Function
E, (you will hear the buzzer) or by waiting for a few seconds (you will not hear the buzzer). The refrigerator is now in the Holiday function in the energy- saving mode and the display shows the letter H. -
Page 9: Using The Refrigerator
Do not cover the shelves with any protective material, such as paper, cardboard or plastic, which may obstruct the air circulation through them. To help you use your refrigerator correctly, here are some more useful hints: Raw meat (beef, pork, lamb & wild fowl): wrap in polythene bags and place in the meat drawer above the salad crispers. -
Page 10: Dismantling Of The Bottle And Can Holder
Dismantling of the bottle and can holder 1. Take out the Quick Chill Shelf with holder from the cabinet. 2. To loosen the holder from the shelf, bend the hooks/brackets that surround the backside of the shelf. Installation of the carbon filter On delivery the carbon filter is placed in a plastic bag to secure the length of life of the carbon filter. -
Page 11: Movable Shelves
Movable shelves The walls of the refrigerator have runners so that the shelves can be positioned as desired . For better use of space, the front half-shelves can lie over the rear ones. Positioning the door shelves To allow the storage of food packages of various sizes, the door shelves can be adjusted in height.To... -
Page 12: Hints And Tips
• Do not push food together too much, try to allow air to circulate around each item. • Do not store food uncovered. • Remove suspect food from your refrigerator and clean, refer to ‘Maintenance and Cleaning’. Energy saving advice •... -
Page 13: Maintenance And Cleaning
V shaped drip collector at the back of the refrigerator compartment behind the fruit and vegetable drawer. Use the defrost cleaner provided which you will find already inserted into the discharge hole. -
Page 14: Something Not Working
Something not working If the appliance is not working correctly, please carry out the following checks, before contacting your local Service Force repair agent. IMPORTANT: If you call out an engineer to a fault listed below, or to repair a fault caused by incorrect use or installation, a charge will be made even if the appliance is under guarantee. -
Page 15: Repairs - After Sales Service
Repairs carried out by inexperienced persons may cause injury or serious malfunctioning. Contact our extended warranty administrators on 0870 0107887 who will give you details for your local Service Force Repair Agent. Always insist on genuine spare parts. JLLFW1809... -
Page 16: Installation
Installation It is dangerous to alter the specifications or attempt to modify this product in any way. Care must be taken to ensure that the appliance does not stand on the electrical supply cable. Technical data Dimensions Height Width Depth Fridge Gross capacity Fridge Net capacity Any electrical work required to install this... -
Page 17: Electrical Connection
Electrical connection Any electrical work required to install this appliance should be carried out by a qualified electrician or competent person WARNING: THIS APPLIANCE MUST BE EARTHED. Should the appliance power supply cable need to be replaced, this must be carried out by a Service Force agent (see page 15). -
Page 18: Positioning
Warning IF YOU ARE DISCARDING AN OLD APPLIANCE THAT HAS A LOCK OR CATCH ON THE DOOR, YOU MUST ENSURE THAT IT IS MADE UNUSABLE TO PREVENT YOUNG CHILDREN BEING TRAPPED INSIDE. Depending upon the position which you choose for your appliance, you may wish to reverse the way in which the door opens.To do this, refer to instructions on “Door reversal directions”. -
Page 19: Shelf Holders
Shelf holders Your appliance is equipped with shelf retainers that make it possible to secure the shelves during transportation. To remove them proceed as follows: Move the shelf holders in the direction of the arrow, raise the shelf from the rear and push it forward until it is freed and remove the retainers. - Page 20 Reposition, level the appliance, wait for at least two hours and then connect it to the power socket. In case you do not want to carry out the above operations, contact the nearest After Sales Service Force.The After Sales Service specialist will carry out the reversibility of the doors at your cost.
- Page 24 John Lewis Partnership 171 Victoria Street London SW1E 5NN www.johnlewis.com 04/08 2223 448-61...