Table of Contents
Advertisement
Advertisement
Table of Contents

Related Manuals for John Lewis JLBILIC07


Summary of Contents for John Lewis JLBILIC07
- Page 1 JLBILIC07 User manual...
-
Page 2: Table Of Contents
Contents Helpful hints and tips Location Positioning Hints for energy saving Electrical Connection Hints for fresh food refrigeration Hints for refrigeration Installing the appliance Control panel Environmental concerns Display Repairs - after sales service Switching on Switching off Temperature regulation Drinks Chill function Fan function Child Lock function... -
Page 3: Helpful Hints And Tips
Helpful hints and tips Normal Operating Sounds Hints for refrigeration • You may hear a faint gurgling and a bubbling Useful hints: sound when the refrigerant is pumped Meat (all types) : wrap in polythene bags and through the coils or tubing. This is not a fault place on the glass shelf above the vegetable with the appliance and is a completely normal drawer. -
Page 4: Control Panel
Control panel Functions ON/OFF button Functions button It is possible to change predefined sound of Display buttons to a louder one by pressing together the Temperature warmer button Functions button and Temperature colder Temperature colder button button for some seconds. Change is reversible. OK button Display Timer function... -
Page 5: Temperature Regulation
To disconnect the appliance from the The Drinks Chill indicator goes off. power disconnect the mains plug from the It is possible to change the time at any time power socket. during the countdown and at the end by pressing the Temperature colder button and the Temperature regulation Temperature warmer button. -
Page 6: Intensive Cooling Function
Intensive Cooling function To switch off the function: Press the Functions button until the Holiday If you need to insert a large amount of warm indicator flashes. food, for example after doing the grocery Press the OK button to confirm. shopping, we suggest activating the Intensive The Holiday indicator goes off. -
Page 7: First Use
First use Cleaning the interior Before using the appliance for the first time, wash the interior and all internal accessories with lukewarm water and some neutral soap so as to remove the typical smell of a brand-new product, then dry thoroughly. Important! Do not use detergents or abrasive powders, as these will damage the finish. -
Page 8: Daily Use
Daily use Use of the fridge compartment • how often the door is opened • the quantity of food stored The temperature of this compartment may be • the location of the appliance. regulated between +2°C and +8°C. During normal functioning the indicator shows Important! If the ambient temperature is the temperature inside the fridge. -
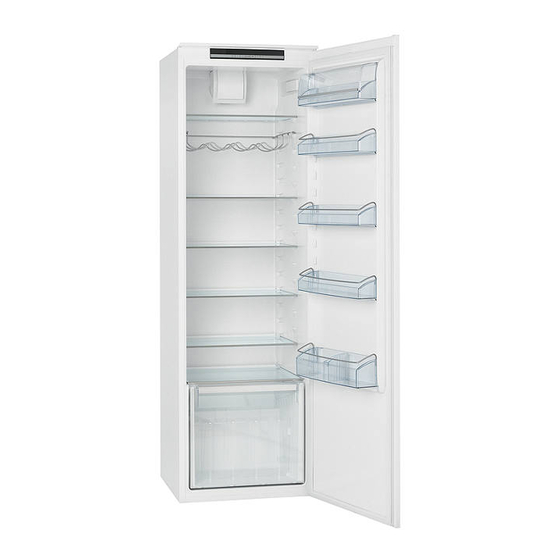
Page 9: Positioning The Door Shelves
Positioning the door shelves To permit storage of food packages of various sizes, the door shelves can be placed at different heights. To make these adjustments proceed as follows: gradually pull the shelf in the direction of the arrows until it comes free, then reposition as required. - Page 10 Important! The Fan stops when the door is open and restarts immediately after the door closing. user manual...
-
Page 11: Helpful Hints And Tips
Helpful hints and tips Normal Operating Sounds Hints for refrigeration • You may hear a faint gurgling and a bubbling Useful hints: sound when the refrigerant is pumped Meat (all types) : wrap in polythene bags and through the coils or tubing. This is not a fault place on the glass shelf above the vegetable with the appliance and is a completely normal drawer. -
Page 12: Care And Cleaning
Care and Cleaning Many proprietary kitchen surface cleaners Caution! Unplug the appliance contain chemicals that can attack/damage the before carrying out any plastics used in this appliance. For this reason it maintenance operation. is recommended that the outer casing of this appliance is only cleaned with warm water with This appliance contains hydrocarbons a little washing-up liquid added. -
Page 13: Periods Of Non-Operation
It is important to periodically clean the defrost water drain hole in the middle of the refrigerator compartment channel to prevent the water overflowing and dripping onto the food inside. Use the special cleaner provided, which you will find already inserted into the drain hole. Periods of non-operation When the appliance is not in use for long periods, take the following precautions:... -
Page 14: What To Do If
What to do if… Warning! Before Important! There are some sounds troubleshooting, disconnect the during normal use (compressor, mains plug from the mains refrigerant circulation). socket. Only a qualified electrician or competent person must do the troubleshooting that is not in this manual. -
Page 15: Replacing The Lamp
Problem Possible cause Solution Water flows on the The melting water outlet does not Attach the melting water outlet to the ground. flow in the evaporative tray above evaporative tray. the compressor. The temperature in the The temperature regulator is not set Set a higher temperature. -
Page 16: Technical Information
Technical Information Dimension Width 560 mm Height 1780 mm Depth 550 mm Further technical information are situated in the rating plate on the internal left side of the appliance. user manual... -
Page 17: Installation
Installation In this case, the space behind the top Read the "Safety Information" cupboard must be at least 50 mm deep. carefully for your safety and correct operation of the appliance before installing the Positioning appliance. Warning! If you are discarding an Location old appliance that has a lock or catch on the door, you must... -
Page 18: Door Reversibility
Check that no cut, or stray strands of wire Warning! This appliance must be is present and the cord clamp is secure earthed. over the outer sheath. The manufacturer declines any liability should these safety Make sure the electricity supply voltage is measures not be observed. -
Page 19: Installing The Appliance
Install the spacer. Drill the unit using a Ø 2.5 mm drill (10 mm max. penetration). Install the door. Fix the square fitting to the appliance. Tighten the upper pin. 13mm Installing the appliance Caution! Make sure that the mains cable can move freely. Do the following steps: Install the appliance in the niche. - Page 20 Remove the correct part from the hinge cover (E). Make sure to remove the part Adjust the appliance in the niche. DX, in the case of right hinge, SX in Make sure that the distance between the opposite case. appliance and the cupboard front-edge is 44 The lower hinge cover (in the accessories bag) makes sure that the distance between the appliance and the kitchen furniture is...
- Page 21 ca. 50 mm Disconnect the parts (Ha), (Hb), (Hc) and ca. 50 mm (Hd). 10. Push the part (Hc) on the part (Ha). Install the part (Ha) on the inner side of the kitchen furniture. 11. Open the appliance door and the kitchen furniture door at an angle of 90°.
- Page 22 Do a final check to make sure that: • All screws are tightened. 8 mm • The sealing strip is attached tightly to the cabinet. • The door opens and closes correctly. 12. Align the kitchen furniture door and the appliance door by adjusting the part Hb.
-
Page 23: Environmental Concerns
Environmental concerns The symbol on the product or on its packaging indicates that this product may not be treated as household waste. Instead it should be taken to the appropriate collection point for the recycling of electrical and electronic equipment. By ensuring this product is disposed of correctly, you will help prevent potential negative consequences for the environment and human... -
Page 24: Repairs - After Sales Service
An authorised service engineer should service and information contained within this instruction this product, and only genuine spare parts manual, the next step is to contact John Lewis should be used. Under no circumstances should technical support on: you attempt to repair the appliance yourself. - Page 25 John Lewis, Stratford (Opening 2011) John Lewis, Cribbs Causeway 0117 959 1100 John Lewis at home, Swindon 01793 733180 John Lewis at home, Croydon 020 8662 4730 John Lewis, Trafford 0161 491 4040 John Lewis, Edinburgh 0131 556 9121 John Lewis at home, Turnbridge Wells...
- Page 26 user manual...
- Page 27 user manual...
- Page 28 222339578-A-082013...