Table of Contents
Advertisement
Advertisement
Table of Contents

Related Manuals for John Lewis JLLFW 1805


Summary of Contents for John Lewis JLLFW 1805
- Page 1 JLLFW 1805 fridge Instruction manual...
-
Page 2: Important Safety Information
Important Safety Information It is most important that this instruction book should be retained with the appliance for future reference. Should the appliance be sold or transferred to another owner, or should you move house and leave the appliance, always ensure that the book is supplied with the appliance in order that the new owner can get to know the functioning of the appliance and the relevant warnings. - Page 3 Ecological hints To save energy and help protect the environment, we recommend that you follow these hints. D Do not install the appliance close to sources of heat such as a boiler or radiator. D Locate the appliance in a well ventilated room and make sure that any air openings of the appliance are not obstructed.
-
Page 4: Table Of Contents
Contents For the User Important Safety Information • Installation Description of the Appliance Before use The Control Panel Using the fridge Hints and Tips Maintenance and Cleaning • Removing the ventilation grill • Cleaning • Defrostning the fridge • Changing the light bulb •... -
Page 5: Description Of The Appliance
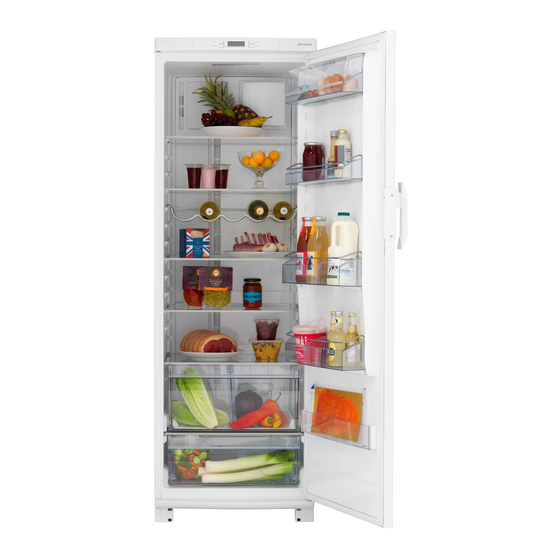
Description of the Appliance glass shelf quick chill shelf bottle- and can holder grid vegetable/sallad drawer ventilation grill butter compartment door shelf egg holder 10. bottle shelf 11. wine rack 12. air circulation fan and regulator... -
Page 6: Installation
Installation It is dangerous to alter the specifications or attempt to modify this product in any Care must be taken to ensure that the appliance does not stand on the electrical supply cable. Any electrical work required to install this appliance should be carried out by a qualified electrician or competent person. -
Page 7: Installation And Changing The Carbon Filter
Unpacking Remove all packaging before positioning the appliance. Remove the tape and the transport supports from D the door sides D inside the door hinges D the shelves Remove the transport support on the glass shelf by pushing the support forward along the edge of the shelf until it stops. - Page 8 To obtain the best performance from the fridge, ensure : D the fridge is placed in a dry, cool place and is not exposed to direct sunlight. D the fridge is not placed close to a source of heat, e.g. a cooker or dishwasher.
-
Page 9: Door Reversal
Door Reversal 1. Close the fridge and remove the plug from the electrical socket. 2. Remove the ventilation grille. There is a part on the grille that can be removed. Remove and reposition it on the other side. 3. Put the fridge on a wooden board when it is laid down. Later, when raising the fridge, it will be easier to grip under the fridge thanks to the board. -
Page 10: Before Use
Before inserting the power plug into the outlet and switching on the freezer for the first time, leave it standing upright for about 4 hours. This time will allow the oil sufficient time to return to the compressor. Otherwise the... -
Page 11: Electrical Connection
Electrical connection Any electrical work required to install this appliance should be carried out by a qualified electrician or competent person WARNING: THIS APPLIANCE MUST BE EARTHED. Should the appliance power supply cable need to be replaced, this must be carried out by a Service Force agent (see page 18). -
Page 12: The Control Panel
The control panel ACTION COOL 4 5 6 7 1. Refrigerator power switch Switches the refrigerator on and off. 2. Temperature display Shows the average temperature inside the refrigerator. 3. Temperature adjustment button/thermostat Used to set the temperature in the refrigerator. 4. -
Page 13: Using The Fridge
Using the fridge To start the fridge and setting the correct temperature Switching on: Switch on the fridge by pressing the power switch. Setting the temperature Press the buttons until the desired temperature flashes in the temperature display (The temperature can be set between +2°C and +8°C.) "+"... -
Page 14: Switching Off
Chilling of cans/bottles: When cans and bottles are placed on the shelf (see under section; bottle and can holder and Quick chill shelf) the air regulator should be turned to it's maximum position, then press the Quick chill button. This will be indicated in the symbol window with a "C" and by the yellow lamp being lit. -
Page 15: Hints And Tips
Bottle and can holder The bottle and can holder is moveable sliding to the left or right, or front to back to enable a more flexible placement of cans and bottles in front of the grid. To allow the holder to be moved easier, when moving sideways, press the shelf backwards. -
Page 16: Maintenance And Cleaning
Then pull t he g r ill str a ig ht out t o completely remove it. Cl eani n g Clean the freezer at regular intervals. Don't use detergents, abrasive powders, high perfumed cleaning products, wax polishes or cleaning products containing bleach or alcohol when cleaning the product Disconnect the appliance from electricity supply. -
Page 17: Something Not Working
Something Not Working If your Refrigerator is not working correctly, before contacting the John Lewis extended warranty administrators, check the following point. IMPORTANT: If you call out an engineer to a fault listed below, or to repair a fault caused by incorrect use or installation, a charge will be made even if the appliance is under guarantee. -
Page 18: Repairs - After Sales Service
Repairs - After Sales Service In the unlikely event of your appliance requiring service, or if you wish to purchase spare parts, please contact our local Service Force Centre by telephoning: 0870 010 7887 They will give you details for your local Service Force Centre. - Page 20 John Lewis Partnership 171 Victoria Street London SW1E 5NN www.johnlewis.com 8183856--00/3 05/06...