Table of Contents
Advertisement
Owners &
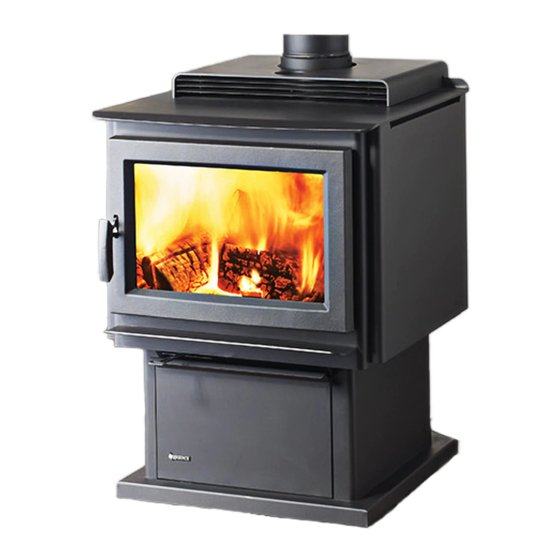
Freestanding Woodstove
Installation Manual
www.regency-fi re.com
MODEL:
F5100
F5100 Video
Tested by:
Installer: Please complete the details on the back cover
and leave this manual with the homeowner.
Homeowner: Please keep these instructions for future reference.
919-168
FPI FIREPLACE PRODUCTS INTERNATIONAL LTD. 6988 Venture St., Delta, BC Canada, V4G 1H4
04/08/13
Advertisement
Table of Contents

Related Manuals for Regency F5100


Summary of Contents for Regency F5100
- Page 1 Owners & Freestanding Woodstove Installation Manual www.regency-fi re.com MODEL: F5100 F5100 Video Tested by: Installer: Please complete the details on the back cover and leave this manual with the homeowner. Homeowner: Please keep these instructions for future reference. 919-168 FPI FIREPLACE PRODUCTS INTERNATIONAL LTD. 6988 Venture St., Delta, BC Canada, V4G 1H4...
- Page 2 Note: Due to the high effi ciency of the F5100 unit, This unit requires the use of double wall pipe from the stove top to either wall or roof exit.
-
Page 3: Table Of Contents
TABLE OF CONTENTS Door Gasket ..............24 Safety Label for F5100 ..........4 Glass Maintenance ............24 Unit Dimensions ............5 Wood Storage ..............24 Residential Installation...........6 Glass Replacement .............24 Modular Installation Options ..........6 Catalytic combustor ............25 Room Air Important............6 Bypass door gasket replacement .......27 Stove Assembly Prior To Installation ......7... -
Page 4: Safety Label For F5100
SAFETY LABEL FOR F5100 LISTED ROOM HEATER, SOLID FUEL TYPE, ALSO DO NOT REMOVE THIS LABEL FOR USE IN MOBILE HOME INSTALLATION MODEL: REGENCY FREESTANDING STOVE - F5100 OMNI-Test Laboratories, Inc. TESTED TO: UL-1482 -2011 / ULC-S627-00 Report #219-S-16-2 INSTALL AND USE ONLY IN ACCORDANCE WITH THE MANUFACTURER'S INSTALLATION AND OPERATING INSTRUCTIONS. -
Page 5: Unit Dimensions
DIMENSIONS UNIT DIMENSIONS 16 " [792mm] 16 " [735mm] " 8 " [689mm] [181mm] 3" [76mm] 29" [727mm] F5100 Regency Freestanding Woodstove... -
Page 6: Residential Installation
WARNING: ONLY USE SPECIFIED COMPONENTS. The following items are required when assembling your Regency Stove. F5100 unit - the Rear Heat Defl ector is supplied with the stove, but if you choose not to use it you must use the Airmate instead. -
Page 7: Stove Assembly Prior To Installation
The F5100 unit requires the pedestal attached corner of the wall. The rear heat defl ector is installed on top of to the base. The F5100 stove requires either pedestal cover the rear heat shield, as shown in Diagram 4. -
Page 8: Minimum Clearance To Combustible Materials
572mm" Minimum Alcove Clearance to Combustible Materials The Regency Freestanding models have been alcove approved and must be installed with a listed double wall connector to the ceiling level. Note: Minimum alcove ceiling height - 83" (2108 mm) Vertical Termination} H = Maximum depth of alcove - 48"... -
Page 9: Wall Exit Clearance Factory Built Chimney
Minimum vertical of 36" before any offset. [152mm] Horizontal Maximum of 36" with 1/4" rise per foot. NOTE: Recommend using 2-45º instead of 90º to improve draft and performance. Min. 36" Vertical Max. 36" Rise Horizontal 10" [254mm] F5100 Regency Freestanding Woodstove... -
Page 10: Masonry Fireplace
Minimum vertical of 36" before any offset. Horizontal Maximum of 36" with 1/4" rise per foot. NOTE: Recommend using 2-45º instead of 90º to improve draft and performance. 6" [152mm] Min. 36" Vertical Max. 36" Horizontal Rise 10" [254mm] F5100 Regency Freestanding Woodstove... -
Page 11: Combustible Wall Chimney Connector Pass-Throughs
Cover opening with and support chimney section on both sides with 24 gage minimum sheet metal supports. See that the supports are fastened securely to wall surfaces on all sides. Make sure fasteners used to secure chimney fl ue liner. F5100 Regency Freestanding Woodstove... - Page 12 49-1/8" 8" 49-1/8" 8" Canada 53-1/8" 8" 53-1/8" 8" 53-1/8" 8" The rear clearance to combustibles is less than 6" (for corner installations the rear corners may be angled to take advantage of the closer clearances. F5100 Regency Freestanding Woodstove...
-
Page 13: Step-By-Step Chimney And Connector Installation
6. Fasten the raincap with spark screens (if required) to the top of your chimney. 7. For optimum effi ciency when installing into a masonry chimney, size accordingly, i.e. the 8" (203.2mm) fl ue dia. is 50.3 sq.in. Horizontal Installation (1272.62mm). F5100 Regency Freestanding Woodstove... -
Page 14: Recommended Heights For Woodstove Flue
16.0 18.5 20.0 7000-8000 15.5 16.5 19.0 20.5 8000-9000 16.0 17.0 20.0 21.0 9000-10000 16.5 17.5 20.5 22.0 NOTE: No more than one offsets (two elbows) allowed. Two 45 elbows equal one 90 elbow. Table 1 F5100 Regency Freestanding Woodstove... -
Page 15: Mobile Home Installation
11. WARNING: DO NOT INSTALL IN A SLEEP- ING ROOM OF A MOBILE HOME. 12. Use silicone to create an effective vapour barrier at the location where the chimney or other component penetrates to the exterior of the structure. F5100 Regency Freestanding Woodstove... -
Page 16: Optional Outside Air Kit
Mark the position of your unit as outlined in the "General Information" and "Clearances to Combustibles" section of the manual. Pipe fresh air into the pedestal area by using a minimum 4" duct pipe with a mesh grill at the outside termination. Rear View F5100 Regency Freestanding Woodstove... -
Page 17: Listed Components For Mobile Home Installation
Square Ceiling support 11" INSTALLATION 9248 Rain Cap 9249V 0/12 - 6/12 Flashing The Regency F5100 Freestanding pedestal 9959 Storm collar units are approved for installation in a Mobile 9217 36" Chimney length (also in Home if one of the following pipe systems is used. -
Page 18: Stainless Steel Smoke Defl Ector Installation
Incorrect Install: Return edge of smoke defl ector seated under glass wash. Ensure defector is seated so bolts are situated at the top of the keyhole before tightening. Hand tighten bolts only. F5100 Regency Freestanding Woodstove... -
Page 19: Brick Installation
4-1/2" x 9" 2" x 9" 3-1/2" x 4-1/2" 1-3/4" x 4-1/2" 2" x 7" AD brick NOTE: The "AD" brick covers the Ash Dump hole that is used when the Ash Drawer Kit is installed. Final Install F5100 Regency Freestanding Woodstove... -
Page 20: Fan Installation
FAN INSTALLATION Fan assembly for use only with the room heater marked to indicate such use. Neutral Manual/ Green Live Ground Auto 120V AC Switch Switch 60 Hz Fan Thermodisc (normally open) Black Black Black Ground F5100 Regency Freestanding Woodstove... -
Page 21: Operating Instructions
- slide to the left to open, and to decrease - slide to fully open position, add two or three seasoned the right closed. The F5100 unit has a secondary logs to your fi re. Form a trench in the ash bed 12. -
Page 22: Fan Operation
fi re. Switching from "AUTO" to "MAN" or "HIGH" to 7. Your Regency stove can be very hot. You may be "LOW" may be done anytime. seriously burned if you touch the stove while it is operating, keep children, clothing and furniture HOT WHILE IN OPERATION. - Page 23 fi re has been started to burn off the soot accumulation. Burning coal will cause a sulfur-based compound to coat the catalyst. Revert to burning wood and fi re the combustor to elevated temperatures for one hour. F5100 Regency Freestanding Woodstove...
-
Page 24: Maintenance
If the door gasket requires replacement 5/8" diameter form creosote. The creosote vapours condense in material must be used. Regency uses a gasket rope the relatively cool chimney fl ue of a slow burning 5/8" Medium Density (Part #936-060). A proper high fi... -
Page 25: Catalytic Combustor
– off has been achieved, to the amount of smoke leaving the chimney when the smoke is not routed (by- pass open) through the combustor. F5100 Flamegaurd & Catalyst F5100 Regency Freestanding Woodstove... - Page 26 NOTE: Replacement combustors can be retrieved from Applied Ceramics or Contact your local Regency Dealer for details. DO NOT OPERATE THE APPLIANCE IF COMBUSTOR BECOMES INACTIVE - DO NOT OPERATE WITHOUT COMBUSTOR.
-
Page 27: Bypass Door Gasket Replacement
5. Reverse steps to reinstall - ensure the pass rod is seated with the channel on the pass door. (Unit viewed as transparent to facilitate view) Channel Pass rod Loosen 3 rear bolts F5100 Damper Assembly Draft F5100 Regency Freestanding Woodstove... -
Page 28: Secondary Air Tube Removal / Installation
Align tab on right side air channel with notch on right hand end of air tube. Firmly grip center of air tube with vise grips, use hammer to tap vise grips from left to right until the tube bottoms out into the air channel on right. F5100 Airtube Replacement F5100 Regency Freestanding Woodstove... -
Page 29: Side Baffl E Installation / Removal
fi rebox 3. Manoeuvre the side baffl e underneath the upper corner fi ller, then let the baffl e rest on the side of the combustor housing. 4. Repeat process on other side. Corner fi ller F5100 Regency Freestanding Woodstove... - Page 30 Use only high temperature anti seize lube. (ie. never seize) Check glass for cracks Replace if required. Clean blower motor Disconnect power supply. Remove and clean blower. *DO NOT LUBRICATE* Inspect and clean chimney Annual professional chimney cleaning recommended. F5100 Regency Freestanding Woodstove...
-
Page 31: F5100 Stove Main Assembly
PARTS LIST F5100 STOVE MAIN ASSEMBLY Part # Description Part # Description 051-538 Removable Arm Assembly 051-539 Cast Door Assembly 051-018 Handle Holder 051-004 Side Heat Shield RH 051-530 Catalytic Combustor Assembly (not shown) 051-005 Side Heat Shield LH 063-954 Airtube 1"... -
Page 32: F5100 Stove Brick Layout
PARTS LIST F5100 STOVE BRICK LAYOUT 051-960 Brick Set Complete Fire bricks Size 4-1/2" x 9" 2" x 9" 3-1/2" x 4-1/2" 1-3/4" x 4-1/2" 2" x 7" AD Brick F5100 Regency Freestanding Woodstove... -
Page 33: Door Assembly
SCREW 1/4-20 x 3/8 TUSS HD PHIL ZINC PD (ea) 940-384/P GLASS CERAMIC 904-146 SCREW #10 x 1/2 SELF TAP PAN HD PHILIPS (ea) 936-243 TAPE 7/8 WINDOW ADHESIVE 0904-513 HEX BOLT 1/4-20 x 3/4 LG. (ea) 051-057 SIDE GASKET BRACKET (ea) F5100 Regency Freestanding Woodstove... - Page 34 The authorized selling dealer is responsible for all in-fi eld service work carried out on your Regency product. FPI will not be liable for results or costs of workmanship from unauthorized service persons or dealers.
-
Page 35: Warranty
Any and all claims for catalytic combustor must be fi led directly with APPLIED CERAMICS (full address below). FPI/Regency does not handle these claims. Please follow the instructions below for returning your catalytic converter under warranty. To learn more about the care and maintenance or the catalytic converter, please visit our website: www.fi... - Page 36 Dealer Name & Address: ______________________________________________ ___________________________________________________________________ Installer: ___________________________________________________________ Phone #: ___________________________________________________________ Date Installed: ______________________________________________________ Serial No.: __________________________________________________________ F5100 Video Regency is a trademark of FPI Fireplace Products International Ltd. © Copyright 2013, FPI Fireplace Products International Ltd. All rights reserved. Printed in Canada...