Jøtul GI 450 DV Installation And Operation Instructions Manual
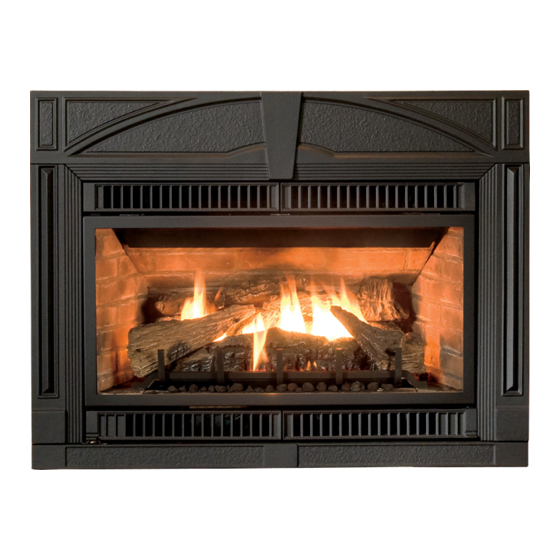
Katahdin gas fireplace insert
Hide thumbs
Also See for GI 450 DV:
- Brochure & specs (28 pages) ,
- Installation and operation instructions manual (36 pages) ,
- Installation and operation instructions manual (28 pages)
Table of Contents
Advertisement
Installation
and
Operation
Instructions
WARNING:
IF THE INFORMATION IN THESE INSTRUC-
TIONS ARE NOT FOLLOWED EXACTLY, A FIRE
OR EXPLOSION MAY RESULT CAUSING PROP-
ERTY DAMAGE, PERSONAL INJURY OR LOSS
OF LIFE.
FOR YOUR SAFETY:
DO NOT STORE OR USE GASOLINE OR OTHER
FLAMMABLE VAPORS AND LIQUIDS IN THE
VICINITY OF THIS OR ANY OTHER APPLIANCE.
INSTALLATION:
INSTALLATION AND SERVICE MUST BE PER-
FORMED BY A QUALIFIED INSTALLER, SER-
VICE AGENCY OR LICENSED GAS SUPPLIER.
WHAT TO DO IF YOU SMELL GAS:
• DO NOT TRY TO LIGHT ANY APPLIANCE.
• DO NOT TOUCH ANY ELECTRICAL SWITCHES.
• DO NOT USE THE PHONE IN YOUR BUILDING.
IMMEDIATELY CALL YOUR GAS SUPPLIER FROM
A NEIGHBOR'S PHONE.
• FOLLOW YOUR GAS SUPPLIER'S INSTRUCTIONS.
• IF YOU CANNOT REACH YOUR GAS SUPPLIER,
CALL THE FIRE DEPARTMENT.
AVERTISSEMENT:
ASSUREZ-VOUS DE BIEN SUIVRE LES IN-
STRUCTIONS DANS CETTE NOTICE POUR
REDUIRE AU MINIMUM LE RISQUE D'INCENDIE
OU POUR EVITER TOUT DOMMAGE MATERIEL,
TOUTE BLESSURE OU MORTALIT'E.
NE PAS ENTREPOSER NI UTILISER D'ESSENCE
NI OU LIQUIDES INFLAMMABLES DANS LE
VOISINAGE DE CET APPAREIL OU DE TOUT
AUTRE APPAREIL.
L'INSTALLATION LE SERVICE DOIVENT
ETRE EXECUTES PAR UN INSTALLATEUR
QUALIFIE, AGENCE DE SERVICE OU LE
FOURNISSEUR DE GAZ.
QUE FAIRE SI VOUS SENTEZ UNE ODEUR DE
GAZ.
• NE PAS TENTER D'ALLUMER L'APPAREIL
• NE TOUCHEZ A AUCUM NTERRUPTEUR.
• NE PAS VOUS SERVIR DES TELEPHONES SE
TROUVANT DANS LE BATIMENT OU VOUS
VOUS TROUVEZ.
• APPELEZ IMMEDIATEMENT VOTRE
FOURNISSEUR DE GAZ CHEZ UN VOISIN.
SUIVEZ LES INSTRUCTIONS DU FOURNISSEUR.
• SI VOUS NE POUVEZ REJOINDRE LE
FOURNISSEUR DE GAZ, APPELEZ LE SERVICE
DES INCENDIES.
1
Advertisement
Table of Contents

Related Manuals for Jøtul GI 450 DV


Summary of Contents for Jøtul GI 450 DV
- Page 1 WARNING: IF THE INFORMATION IN THESE INSTRUC- TIONS ARE NOT FOLLOWED EXACTLY, A FIRE OR EXPLOSION MAY RESULT CAUSING PROP- ERTY DAMAGE, PERSONAL INJURY OR LOSS OF LIFE. FOR YOUR SAFETY: DO NOT STORE OR USE GASOLINE OR OTHER FLAMMABLE VAPORS AND LIQUIDS IN THE VICINITY OF THIS OR ANY OTHER APPLIANCE.
- Page 2 We’ve been making fine quality cast iron stoves and fireplaces continuously since 1853. The Jøtul GI 450 DV Katahdin Gas Fireplace Insert combines advanced gas technology with the warm, traditional elements of cast iron. With proper care and use, your fireplace will provide you with many years of safe, dependable and satisfying service.
-
Page 3: Table Of Contents
Jøtul GI 450 Katahdin Table of Contents: Direct Vent Gas Fireplace Insert Specifications ..............4 Manufactured and Distributed by: Jøtul A.S.A. General Information ............ 5 Fredrikstad, Norway Minimum Fireplace Dimensions ......6 Jøtul North America Installation Requirements ......... 6 Portland, Maine Masonry Fireplace Installation ......... -
Page 4: Specifications
20 1/2” GI 450 DV Katahdin 6 1/4” Specifications 15 3/8” MEASUREMENTS INCLUDE THE FRONT GRILL ASSEMBLIES AND ARE NOT TO SCALE. 31 1/4” 32 9/32” 14 5/8 ” 29 1/4” 20 ” 13 1/4” 20 13/16” 16 9/16” 15”... -
Page 5: General Information
General Requirements THIS HEATER MUST BE INSTALLED AND MAINTAINED BY Ne pas se servir de cet appareil s’il a ete’ plonge dans A QUALIFIED SERVICE AGENCY. l’eau, completement ou en partie. Appeler un technicien qualifie pour inspecter l’appareil et The installation and repair of this appliance must be remplacer toute partie du syste’me de controle et done by a qualified service person. -
Page 6: Minimum Fireplace Dimensions
Minimum Fireplace Requirements The GI 450 DV Katahdin has been specifically designed SEE PAGE 19 FOR SURROUND AND RISER BAR to be installed into a solid fuel-burning prefabricated INSTALLATION INSTRUCTIONS. fireplace OR a code-approved solid fuel-burning ma- sonry fireplace with a tile flue liner. -
Page 7: Vent Guidelines
Vent Guidelines Vent Installation Procedure • All vent components must be installed in accordance The GI 450 DV Katahdin gas insert must be vented with the terms of their listing and manufacturer’s through dual 3” flexible gas aluminum liners listed for instructions. -
Page 8: Masonry Fireplace Installation
Exhaust to the Exhaust collar on the insert. Both Intake and Exhaust collars are labelled. 11. Secure the ducts to the collars with sheet metal GI 450 DV screws or hose clamps. No silicone or sealant is KATAHDIN required. -
Page 9: Prefabricated (Factory-Built) Installation
1 2 3 4 5 6 1 2 3 4 5 6 1 2 3 4 5 6 1 2 3 4 5 6 Air Inlet Collar GI 450 DV Warning: KATAHDIN Failure to position the parts in accordance with Exhaust... -
Page 10: Clearance Requirements
Clearance Requirements Hearth Requirements The following clearances and hearth specifications are Flush Hearth: requires a non-combustible hearth in front the minimum requirements for installing the GI 450 of the fireplace that extends a minimum of 18” (457mm) Katahdin Insert into a solid fuel-burning fireplace. See and is a minimum of 32”... -
Page 11: Gas Conversion
Gas Conversion IMPORTANT: Be sure to unplug the blower before proceeding with The GI 450 Katahdin gas insert is shipped from the this conversion. The gas supply must be turned off and factory equipped to use NATURAL GAS. A conversion kit disconnected from the valve. -
Page 12: Gas Supply Connection
See fig. 11 and 12. head screwdriver, remove the three specialty screws For your convience the GI 450 DV Katahdin is from the front of the valve regulator. See fig. 10. shipped with a short piece of 3/8” iron and a 24” length 13. -
Page 13: Gas Pressure
Figure 11. Valve inlet centerline. Gas Pressures Correct gas pressure is essential for efficient and safe operation of the Katahdin gas insert. It is important that the correct pressure is established at the time of the installation. Proper gas pressure provides a consistent flow of gas to the appliance and is instrumental in checking for gas leaks.The gas control valve on the insert is equipped with pressure test points for gauge connections. -
Page 14: High Altitude Adjustment
Symptoms of incorrect gas pressure include: HIGH ALTITUDE INSTALLATIONS: 2000 ft. to 4500 ft. installations (or 610m - 1370m) Insufficient gas pressure: See table 1. • Small pilot flame which can result in insufficient millivolts. For high altitude installations consult the local gas distributor or the authority having jurisdiction for •... -
Page 15: Flame Adjustment
Flame Adjustment / Air Shutter To adjust the air shutter 1. Remove the burner tube and using a phillips head screwdriver loosen the screw at the air shutter and THE KATAHDIN GAS INSERT IS SHIPPED FROM THE adjust accordingly. FACTORY EQUIPPED FOR USE WITH NATURAL GAS. 2. -
Page 16: Blower Operation
Blower Operation The GI 450 DV Katahdin is equipped with a 125 cfm heat-activated blower. A ten foot power cord is in- stalled in the rear of the valve compartment under the firebox. Open the Lower Grill and fully unwrap the power cord. -
Page 17: Optional Remote Control
Optional Remote Control BLOWER #129706 The optional Jøtul remote can be installed on the Katahdin gas insert. Using the wires supplied with POWER SUPPLY the remote, it is best to wire the remote directly to SNAP STAT the gas control valve of the insert. Connect one receiver lead to the terminal LO OFF HI labelled TH. -
Page 18: Surround Panel Installation
Surround Panel Installation Stabilizer Bracket 6 mm nuts Complete the venting and gas line installation before installation of the surround and riser bar. RISER BAR: The 2” riser bar is used in conjunction with the standard surround, and is only needed in the event that the fireplace opening is between 27 1/2”... -
Page 19: Checking The System
8. Slide the surround down into the mounting holes. Checking the System Be sure all four mounting tabs engage securely with the adjacent bracket holes. See fig. 26. 1. PURGING THE GAS LINE: When lighting the appli- 9. Secure the two sections of the riser bar together ance for the first time it will take a few moments to with a washer and bolt and slide the assembled clear the gas line of air. -
Page 20: Fireplace Operation
Fireplace Operation IMPORTANT: ALWAYS TURN OFF THE GAS SUPPLY TO THE 1. The GI 450 DV Katahdin gas insert is equipped with INSERT AND UNPLUG THE FORCED AIR BLOWER an On/Off/T-stat rocker switch to control burner BEFORE ANY SERVICE WORK IS PERFORMED ON functions. -
Page 21: Service Log
RETAIN THIS MANUAL FOR REFERENCE AND MAKE Second Year IT AVAILABLE TO ANYONE USING OR SERVICING THE INSERT. Name of Technician________________________ MODEL NAME: GI 450 DV Katahdin Gas Insert Company Name____________________________ SERIAL NUMBER:__________________________ Date of service_____________________________ DATE OF PURCHASE:_______________________ Work Performed____________________________... -
Page 22: Illustrated Parts Diagram
Figure 31. Illustrated Parts Breakdown - GI 450 DV Katahdin... -
Page 23: Replacement Parts
GI 450 DV Katahdin Parts List Glass Assembly, Complete ......154902 Spud Plate Assembly, NG ....... 154901 Glass Panel ............129662 Spud Gasket ............129669 Glass Frame ..........12961792 Valve- NG ............3902159 Glass Panel w/ gasket ........154986 Valve- LP ............3902160 Glass Gasket - 8ft. -
Page 24: Antique Brick Panel Kit
CAUTION! Tools Required: 10 mm socket wrench THE BRICK PANELS AND LOG PARTS Safety glasses and gloves ARE EXTREMELY FRAGILE. USE BOTH HANDS TO SUPPORT EACH PIECE AS Kit Contents Upper Rear Panel, 220622 YOU HANDLE THEM. Left Side Right Side Panel, Panel, Lower Rear... - Page 25 Figure 35. Install Left Side Panel. Figure 36. Install Upper Rear Panel.
-
Page 27: Lighting Instructions
LIGHTING INSTRUCTIONS FOR YOUR SAFETY, READ BEFORE LIGHTING. WARNING: IF YOU DO NOT FOLLOW THESE INSTRUCTIONS EXACTLY, A FIRE OR EXPLOSION MAY RESULT CAUSING PROPERTY DAMAGE, PERSONAL INJURY, OR LOSS OF LIFE. A. This appliance has a pilot which must be lit •... - Page 28 This appliance must be installed in conformance with local and national building regulations. Before beginning the installation, it is important that the these instructions be carefully read and understood. Jøtul maintains a policy of continual product development. Consequently, products may differ in specification, color or type of accessories from those illustrated or described in various publications.