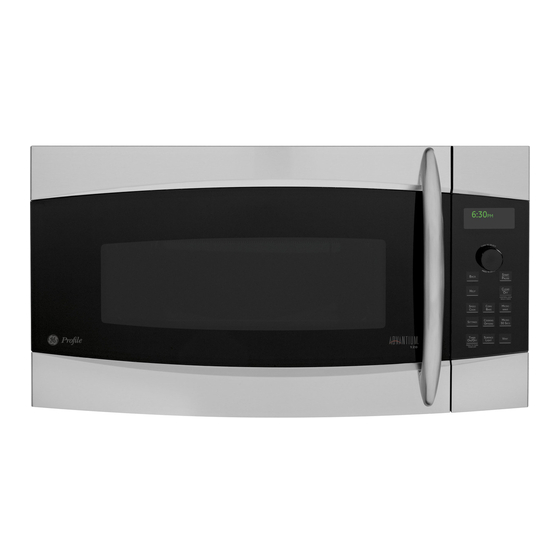
GE Advantium PSA1200R Technical Service Manual
Advantium 120 v (atc)
Hide thumbs
Also See for Advantium PSA1200R:
- Owner's manual (80 pages) ,
- Dimensions and installation information (3 pages)
Table of Contents
Advertisement
GE Appliances
Technical Service Guide
OCTOBER 2010
PSA1200R
PSA1201R
CSA1201R
31-9204
GE Appliances
General Electric Company
Louisville, Kentucky 40225
Advantium 120 V (ATC)
Profile
– 1 –
S
TART
B
ACK
P
AUSE
C
LEAR
H
ELP
O
FF
CONTROL LOCK
HOLD 3 SECS
S
C
M
PEED
ONV
ICRO
C
OOK
B
AKE
W
AVE
M
C
OOKING
ICRO
S
ETTINGS
O
PTIONS
30 SECS
T
S
IMER
URFACE
V
ENT
O
O
L
N/
FF
IGHT
PRESS TO TURN
TIMER OFF
Advertisement
Table of Contents

Related Manuals for GE Advantium PSA1200R


Summary of Contents for GE Advantium PSA1200R
- Page 1 GE Appliances Technical Service Guide OCTOBER 2010 Advantium 120 V (ATC) PSA1200R PSA1201R CSA1201R TART AUSE LEAR CONTROL LOCK HOLD 3 SECS PEED ICRO OOKING ICRO ETTINGS PTIONS 30 SECS Profile IMER URFACE IGHT PRESS TO TURN TIMER OFF 31-9204...
- Page 2 If grounding wires, screws, straps, clips, nuts, or washers used to complete a path to ground are removed for service, they must be returned to their original position and properly fastened. GE Appliances Technical Service Guide Copyright © 2010 All rights reserved. This service guide may not be reproduced in whole or in part in any form without written permission from the General Electric Company.
- Page 3 PRECAUTIONS TO BE OBSERVED BEFORE AND DURING SERVICING TO AVOID POSSIBLE EXPOSURE TO EXCESSIVE MICROWAVE ENERGY. A. DO NOT OPERATE OR ALLOW THE OVEN TO BE OPERATED WITH THE DOOR OPEN. B. IF THE OVEN OPERATES WITH THE DOOR OPEN, INSTRUCT THE USER NOT TO OPERATE THE OVEN AND CONTACT THE MANUFACTURER IMMEDIATELY.
-
Page 4: Table Of Contents
Table of Contents Air Tunnel Cover ................................26 Air Tunnel Inlet ...................................25 Air Tunnel Outlet ................................26 Bottom Cover ..................................24 Bottom TCO (Thermal Cut Out) ...........................38 Capacitor and Diode ...............................65 Component Access Chart ............................20 Component Locator Views ............................17 • Front View ..................................17 •... - Page 5 Noise Filter ..................................35 Nomenclature ..................................6 Operating Charts ................................66 Operating Modes ................................8 • Speedcook ..................................8 • Microwave ..................................9 • Convection ..................................10 • Broil ....................................11 • Toast ....................................12 • Warm ....................................12 • Proof ....................................13 • Idle ....................................13 Outer Cover ..................................21 Oven Lamp (Cavity) ................................53 Oven Lamp (Cavity) Assembly ............................54 Oven Removal ..................................21...
-
Page 6: Nomenclature
P S A 1 2 0 0 R W W Brand C = Café™ P = Profi le Product Color BB = Black GE Speedcook Technology SS = Stainless Steel WW = White Confi guration A = Above the cooktop Model Year Designator... -
Page 7: Introduction
Introduction The Advantium 120 V ATC is an "Above The Cooktop" oven that has the functionality of a microwave, convection, and speedcook oven. Four heat sources are available for cooking. A 500-watt halogen light and 700-watt ceramic heater are located at the top of the unit. A convection system, located behind the right- side of the oven cavity, provides a 1550-watt heat source and fan to circulate cavity air. -
Page 8: Operating Modes
Operating Modes Speedcook for load operation in Speedcook. Load Algorithm Chart To use the SPEEDCOOK feature: 1. Press the SPEEDCOOK pad. 2. Turn the selector dial to select the type of food category you want, then press the dial to enter. 3. -
Page 9: Microwave
Microwave Microwave cooking options include cooking by time, cooking by food, and defrosting. for load operation in Microwave. Load Algorithm Chart To cook by time: 1. Press the MICROWAVE pad. 2. Turn the dial to select Cook by Time, then press the dial to enter. 3. -
Page 10: Convection
To defrost by food type: 1. Remove meat from the package and place it on a microwave-safe dish. Bread should be left in the package with any metal twist-ties removed. 2. Press the MICROWAVE pad. 3. Turn the dial to Defrost, then press the dial to enter. 4. -
Page 11: Broil
To start cook time after preheat: 1. Select Start Preheat. The oven will signal once the oven reaches the cooking temperature. 2. Place the food in the oven, then press the START/PAUSE pad. The cook time will begin to count down. •... -
Page 12: Toast
Toast for load operation in Toast. Load Algorithm Chart How to Toast: 1. Press the COOKING OPTIONS pad. 2. Turn the dial to Toast, then press the dial to enter. 3. Turn the dial to set the toast time, and place the food in the oven, then select START or press the START/ PAUSE pad to start. -
Page 13: Proof
Proof for load operation in Proof. Load Algorithm Chart The proofi ng feature automatically provides an appropriate temperature for the proofi ng process, and therefore does not have a temperature adjustment. 1. Press the COOKING OPTIONS pad. 2. Turn the dial to select Proof, then press the dial to enter. 3. -
Page 14: Control Features
Control Features With your Advantium oven, you can cook with high-intensity halogen lights, ceramic heaters, convection heating element, and/or conventional microwave energy. DISPLAY Shows feature selections and information about the oven when in use. START/PAUSE Press this pad to start or pause any cooking function. -
Page 15: Demo Mode
Demo Mode The sales demo mode will allow dealers to demonstrate all oven functionality with one exception. (See #1 below.) The sales demo mode can only be entered during the initial Clock: Set hour display that occurs when the unit powers up after a long (greater than 60 seconds) power outage. Clock: Set hour Clock: Set hour 0:00... -
Page 16: Installation
fi ll in the gap between the oven and the cabinets. Filler panel kits available from GE The power cord of this appliance is equipped with are: White - JX52WH, and Black - JX52BL. These fi ller... -
Page 17: Component Locator Views
Component Locator Views Front View Control Panel Assembly Convection Heater Assembly Turntable Right Side View Magnetron TCO Magnetron Magnetron Fan Motor Convection Heater TCO Convection Motor Convection Heater Relay PCB Thermistor Capacitor Diode Bottom TCO High Voltage Hood TCO Transformer (Continued Next Page) –... -
Page 18: Top View
Top View Upper Heater Assembly Power Supply Board Vent Motor Capacitor Ventilation Blower and Motor Air Tunnel Cover Air Tunnel Inlet Air Tunnel Outlet Oven Lamp Noise Filter (Cavity) Cover Humidity Sensor Bottom View Turntable Motor Lower Heater Assembly – 18 –... -
Page 19: Control Boards And Panel Connections
Control Boards and Panel Connections Control Panel Assembly (rear view) Glass Touch Assembly VFD Board Smart Board Relay Board Note: The Selector Board, not visible, is located behind the Relay Board. – 19 –... -
Page 20: Component Access Chart
Components Component Access Chart WARNING: Serviceability - Unit Removed • The oven is heavy and requires two people to remove from the Air Tunnel Cover cabinet. Care should be taken when Air Tunnel Inlet removing and installing. Air Tunnel Outlet •... -
Page 21: Grill
Oven Removal Grill The oven is hooked on metal tabs at the bottom of To remove the Grill: the wall mounting plate and fastened to the cabinet 1. Remove 2 Phillips-head screws that attach the with 4 top cabinet bolts. Grill to the top of the Outer Cover. -
Page 22: Control Panel Assembly
3. Remove 6 Phillips-head screws from the back of Control Panel Assembly the oven. The Control Panel Assembly consists of a Relay Board, Smart Board, frame, and a touch pad/ escutcheon. The Control Panel Assembly is attached to the oven with a Phillips-head screw and 6 tabs. To remove the Control Panel Assembly: 1. -
Page 23: Door Assembly
To disassemble the door: Door Assembly 1. Place the door, face down on a protective The door is available as a complete assembly or as surface. individual parts. 2. Using a putty knife, carefully pry the choke cover away from the door frame. Choke Cover A microwave leakage test must be performed any time a door is removed, replaced, disassembled, or... -
Page 24: Bottom Cover
6. Remove the 3 Phillips-head screws that attach Bottom Cover the door handle to the door frame. It is necessary to remove the Bottom Cover to remove the Turntable Motor, Lower Heater Ceramic, and High Voltage Transformer. To remove the Bottom Cover: 1. -
Page 25: Air Tunnel Inlet
7. Remove the rear Phillips-head screw underneath Air Tunnel Inlet the ventilation motor receptacle. The Air Tunnel Inlet must be removed to access the 8. Using long nose pliers, squeeze the tabs on each Damper Motor, damper door switch, and damper side and push the ventilation motor receptacle door assembly. -
Page 26: Air Tunnel Cover
16. Lift up the Air Tunnel Inlet, then remove wiring from the 2 retainers. Retainer Retainer 17. Push wiring through the entry hole, then remove the Air Tunnel Inlet. 5. Lift the cover and disconnect the light bulb wire harness. Harness Air Tunnel Cover The Air Tunnel Cover must be removed when... -
Page 27: Power Supply Board
Power Supply Board CN103 Air Tunnel Outlet Note: Callout arrows identify location of pin #1. Humidity Sensor • Location (See Top View • Generates all DC voltages. 4. Lift and turn the Air Tunnel Outlet over, then • 120 VAC input at CN1 pins 1 and 3. disconnect the oven TCO wires. -
Page 28: Relay Board
3. Check voltage between Smart Board CN103 pins Relay Board 1 and 5 (18 VDC), pins 2 and 5 (12 VDC), pins 3 and 5 (12 VDC), pins 4 and 5 (5 VDC). • If all voltages are correct, the Power Supply CN01 is operating properly. - Page 29 • Non-heat source relays require: Note: For situations where the above-mentioned 5 VDC is not present, some relays operate loads that ◊ Relay Operating Voltage (12 VDC between can be controlled by the consumer from the Glass CN01 pins 2 and 4.) Touch Assembly.
-
Page 30: Smart Board
Disassembly Smart Board To remove the Relay Board: CN101 1. Disconnect power to the oven. CN20 2. Remove the Control Panel Assembly. CN102 (See Control Panel Removal CN09 CN10 3. Remove the 5 Phillips-head screws. Carefully unplug the Relay Board from the Smart Board. CN103 CN15 CN02... - Page 31 Troubleshooting Disassembly 1. If Buzzer and Backlight Operating Voltage is To remove the Smart Board: missing, go to step 4. 1. Disconnect power to the oven. 2. If Relay Operating Voltage is missing, go to 2. Remove the Control Panel Assembly. step 7.
-
Page 32: Glass Touch Assembly
3. Disconnect Smart Board CN15 (Selector Board). Glass Touch Assembly Test the Glass Touch Assembly. • If keys are working correctly, replace the Selector Knob. • If keys are not working correctly, go to step 4. 4. Reconnect Smart Board CN15. 5. - Page 33 4. Position the selector knob between detents, Selector Board check the resistance between pins 1 and 2. • If resistance is infi nite, replace the Selector Board. • If resistance is approximately 0 Ω, go to step 5. 5. With the selector knob positioned so that it is not between detents, check the resistance between pins 2 and 3.
-
Page 34: Vfd Board (Vacuum Florescent Display)
Disassembly VFD Board (Vacuum Florescent Display) To remove the Selector Board: 1. Disconnect power to the oven. 2. Remove the Control Panel Assembly. (See Control Panel Removal 3. Remove the Relay Board. (See Relay Board Removal 4. Remove the Smart Board. (See Smart Board Removal 5. -
Page 35: Noise Filter
4. Check voltage between Smart Board CN10 pins Noise Filter 13 and 14. • If 5 VDC is present, check the harness between the Smart Board and VFD. If OK, replace VFD and Smart Board. • If 5 VDC is not present, see Smart Board troubleshooting step 12. -
Page 36: Upper Heaters' Tco (Thermal Cut Outs)
8. Check resistance between Noise Filter line in and Upper Heaters' TCO (Thermal Cut Out) line out, and Noise Filter neutral in and neutral out. • Location - Attached to the Upper Heater Assembly. (See Top View • If both resistance readings are approximately 0 Ω, problem is with house •... -
Page 37: Oven Tco (Thermal Cut Out)
Troubleshooting Convection Heater TCO (Thermal Cut Out) 1. Disconnect power to the oven. • Location (See Right Side View 2. Remove the Control Panel Assembly. (See • Interrupts line voltage to the convection heater Control Panel Removal in the event of excessive temperatures. 3. -
Page 38: Magnetron Tco (Thermal Cut Out)
4. Remove the Phillips-head screw attaching the Disassembly TCO to the metal plate and slide the TCO out To remove the Magnetron TCO: from the tab. 1. Pivot the Control Panel Assembly out from the oven. (See Control Panel Removal. 2. - Page 39 3. Check voltage between the double wire in the Hood Thermal Cutout (TCO) connector that connects to RY14 and both sides of the Bottom TCO. • Location (See Right Side View • If 120 VAC is present on both sides of the •...
-
Page 40: Door Sensing Switch
4. While the door is closed, check voltage between Monitor Switch the double wire in the harness that connects to RY14 and the output of the Primary Interlock • Location (See picture in Door Switch Removal Switch (brown and red wires). section.) •... -
Page 41: Damper Switch
Door Switch Removal Damper Switch 1. Remove the Control Panel Assembly. (See • Location - Behind the Control Panel Assembly next to oven cavity. Control Panel Removal 2. Disconnect wiring to the door switches. • Part of the Damper Assembly. 3. -
Page 42: Damper Assembly
Damper Motor Damper Assembly • Location - Behind control panel next to oven The Damper Assembly consists of inlet and outlet cavity. damper doors, Damper Motor, and Damper Switch. The inlet damper door, Damper Motor, and Damper • Part of the Damper Assembly. Switch are located below the Air Tunnel Inlet. -
Page 43: Humidity Sensor
To remove the Damper Assembly: Humidity Sensor 1. Remove the Outer Cover. (See Outer Cover 2. Remove the Control Panel Assembly. (See Control Panel Removal 3. Remove the latch bracket. 4. Remove the Air Tunnel Inlet. (See Air Tunnel Inlet Note: The Damper Motor is attached to the top of the Damper Assembly with 2 Phillips-head screws. -
Page 44: Outer Cover
Disassembly Troubleshooting To remove the Humidity Sensor: • To test the upper thermistor, check resistance between the blue and white wires. Resistance at 1. Remove the Outer Cover. (See Outer Cover room temperature is 100 K Ω. 2. Remove the Air Tunnel Cover. •... - Page 45 4. To gain better access to components, remove Upper Heater Halogen the wires that plug into the large relays on the Relay Board. (See .) Cut the wire tie Relay Board that the Smart Board CN103 wire harness (See .) is routed through. Smart Board 5.
- Page 46 4. To gain better access to components, remove Upper Heater Ceramic the wires that plug into the large relays on the Relay Board. (See .) Cut the wire tie Relay Board that the Smart Board CN103 wire harness (See .) is routed through. Smart Board 5.
-
Page 47: Upper Heater Assembly
Disassembly Note: Insulation is positioned underneath the heater shield. In the following step, note the position of the To remove the Upper Heater Assembly: insulation for proper placement when installing the heater shield. 1. Remove the Air Tunnel Cover. (See Air Tunnel Cover 9. -
Page 48: Lower Heater Ceramic
13. Carefully lift the heater from the oven. Lower Heater Ceramic • Location (See Bottom View • 375 Watts • Approximately 3 Amps • Approximately 38 Ω Bottom View of Upper Heater Assembly • For operating algorithms, see Lower Heater Ceramic Heater Ceramic in the Load Algorithm Chart... - Page 49 6. Start Speedcook cycle. While unit is running, Disassembly check resistance between the 2 terminals on To remove the Lower Heater Ceramic: Relay Board RY11. Note: This step requires checking resistance of relay contacts while the 1. Remove the Bottom Cover. (See Bottom Cover unit is running.
-
Page 50: Convection Heater
5. Set oven for Convection Bake, 350°F. (See Convection Heater for set up instructions.) Operating Modes 6. Start Convection Bake cycle. While unit is running, check resistance between the 2 terminals on Relay Board RY12. Note: This step requires checking resistance of relay contacts while the unit is running. -
Page 51: Convection Fan Motor
Disassembly Convection Fan Motor To remove the Convection Heater Assembly: 1. Remove the Outer Cover. (See Outer Cover 2. Remove the Door. (See Door Assembly 3. Remove the Control Panel Assembly. (See Control Panel Removal 4. Remove the latch board. (See Door Interlock Switches 5. - Page 52 12. Remove the Phillips-head screw that attaches 15. Remove the 3 Phillips-head screws that attach the Power Supply Board ground wire to the the Damper Assembly to the Convection Heater chassis. Assembly. (See Damper Assembly 13. Remove the 5 Phillips-head screws from the top 16.
-
Page 53: Oven Lamp (Cavity)
Convection Heater Oven Lamp (Cavity) • Location (See T op View • Part of the Oven Lamp (Cavity) Assembly • 120 VAC • 20 Watts • Halogen • For operating algorithms, see Load Algorithm Chart Troubleshooting If it has been verifi ed that the issue is not with the bulb, and that 120 VAC is not present at the socket, The convection heater perform the following steps:... -
Page 54: Cooktop Lamp
Cooktop Lamp Oven Lamp (Cavity) Assembly • Location - Bottom of microwave To remove the Oven Lamp (Cavity) Assembly: • Part of the 1. Remove the Grill. (See Cooktop Lamp Assembly Grill • 120 VAC 2. If present, remove the optional charcoal fi lter. Slide the fi... -
Page 55: Cooktop Lamp Assembly
Troubleshooting Cooktop Lamp Assembly 1. Disconnect power to the oven. To remove the Cooktop Lamp Assembly: 2. Pivot the Control Panel Assembly out from the 1. Remove the Bottom Cover. (See Bottom Cover oven. (See Control Panel Removal 2. Remove the Phillip-head screw and the light 3. -
Page 56: Oven Removal
12. If motor starts up by rotating the blades, 6. Lift up the Ventilation Motor and place it on top disconnect power, pull the two yellow wires of the oven as shown below off the Motor Capacitor, and check resistance between the 2 yellow wires. -
Page 57: Ventilation Motor Capacitor
Ventilation Motor Capacitor Magnetron Fan Motor • Location - The Ventilation Motor Capacitor is • Location (See Right Side View.) located on the right side of the Air Tunnel Inlet, to the right of the Power Supply Board. (See • 120 VAC View •... -
Page 58: Magnetron Fan Assembly
4. Check voltage between either side of the Bottom Air Guide TCO and Relay Board CN6 pin 9. Access Hole (1 of 2) • If 120 VAC is present, problem is with Magnetron Fan Motor or wiring to motor. (See Wiring Diagram •... -
Page 59: Stirrer Motor
6. Push the top of the fan cover toward the rear of Stirrer Motor the oven and carefully remove it from the oven. Note: In the following step, the fan blade is fi rmly attached to the D-shaped motor shaft. It may be helpful to use 2 fl... -
Page 60: Stirrer Assembly
The stirrer motor has an approximate resistance Stirrer Assembly value of 120 . The Stirrer Assembly consists of a motor, blade, To remove the stirrer motor: and cover. The blade is motor-driven and rotates on a pin embedded in the stirrer cover. The Stirrer Note: It is not necessary to remove the stirrer blade Assembly is located at the top of the oven cavity. -
Page 61: Turntable Motor
Disassembly Turntable Motor To remove the Turntable Motor: 1. Remove the turntable, turntable support, and the Bottom Cover. 2. Remove the 2 Phillips-head screws. • Location (See Bottom View Disconnect • 120 VAC • Approximately 2.6 K Ω. Troubleshooting 1. Disconnect power to the oven. Note 2. -
Page 62: High Voltage Transformer
Disassembly High Voltage Transformer To remove the High Voltage Transformer: 1. Remove the Outer Cover. (See Outer Cover 2. Remove the Bottom Cover. (See Bottom Cover 3. Remove the 4 Phillips-head screws that attach the transformer to the baseplate. • Location (See Right Side View •... -
Page 63: Magnetron
3. Pivot the Control Panel Assembly out from the Magnetron oven. (See Control Panel 4. To gain better access to components, remove the wires that plug into the large relays on the Relay Board. (See .) Cut the wire tie Relay Board that the Smart Board CN103 wire harness (See .) is routed through. - Page 64 Disassembly Note: The 2 front screws are recessed from the top of the metal shield. Access holes are provided. A To remove the Magnetron: magnetic screwdriver is necessary to capture these screws. 1. Remove the Outer Cover. (See Outer Cover 5.
-
Page 65: Capacitor And Diode
Before disconnecting the wires and diode from the Capacitor and Diode capacitor, note the locations. The wire and diode connectors are fi rmly attached and DO NOT use releasing locking tabs. WARNING: Always be certain the capacitor is discharged before servicing. Use electrician's discharge pliers and electrician's gloves under Kevlar gloves (or equivalent protective gloves) when discharging the capacitor. -
Page 66: Operating Charts
Operating Charts Load Algorithm Chart Microwave Speedcook* Convection Broil** Toast** Warm Proof Upper Not Available Cycles by PL Not Available Heater (See PL Chart) Available Available Halogen Upper Not Available Cycles by PL Not Available Heater (See PL Chart) Available Available Ceramic Lower... -
Page 67: Pl (Power Level) Chart
PL (Power Level) Chart The programming on the smart board which controls the upper halogen lamps (pair) and the lower ceramic heater, as well as the high voltage/magnetron circuits, operates on a duty cycle of 32 seconds. This means the power level you select for each component controls the percentage of ON time during each 32-second period of time. -
Page 68: Thermal Compensation
Voltage Compensation Thermal Compensation Note: Voltage compensation only occurs when Note: Thermal compensation only occurs once and using a preselected menu item in Speedcook. These only when using a preprogrammed menu item in items require compensation for accurate and Speedcook. These items require compensation for consistent cooking results. -
Page 69: Sensor And Keypanel Failure Detection
Diagnostics and Service Information Microwave Leak Test Standard Test Load The standard test load is one liter (1000 ml) water with starting temperature of 59°F ~ 75°F in a 1000 ml beaker. (DO NOT USE ANY OTHER LOAD OR DISH AS RESULTS WILL VARY FROM STANDARD.) PERFORMANCE TEST FOR MICROWAVE 1. -
Page 70: Service Test Mode
8. The control shall turn on the vent fan motor at Service Test Mode the HIGH for 5 seconds. Remove any trays (metal or glass) from the oven 9. The control shall turn on the vent fan motor at before starting the diagnostic mode and make sure the MEDIUM for 5 seconds. -
Page 71: Primary Interlock Switch
Schematics and Wiring Diagrams Schematic AC 120V/60Hz Noise Fuse 20A Fuse 20A Filter GROUND W/GY UPPER HEATER HALOGEN Upper Heaters TCO Upper Heater Halogen INRUSH RELAY (320F/ 32F) UPPER HEATER CERAMIC Upper Heater Ceramic Oven TCO Vacuum (320F/ 32F ) LOWER HEATER RY11 Florescent... -
Page 72: Wiring Diagram
Wiring Diagram WARNING RI S K OF ELEC TRI C SHOCK. CAN CAUSE INJURY OR DE ATH : POWE R M US T BE DISC ONNE CTED BEF OR E SE RVICING THI S APPLI ANCE AND R ECO NNEC T A LL GRO UNDING DEV ICE S. COLOR SYMBER OVEN T.C.O... -
Page 73: Warranty
USA. If the product is located in an area where service by a GE Authorized Servicer is not available, you may be responsible for a trip charge or you may be required to bring the product to an Authorized GE Service Location for service. In Alaska, the warranty excludes the service calls to your home.