Table of Contents
Advertisement
Advertisement
Table of Contents
Troubleshooting

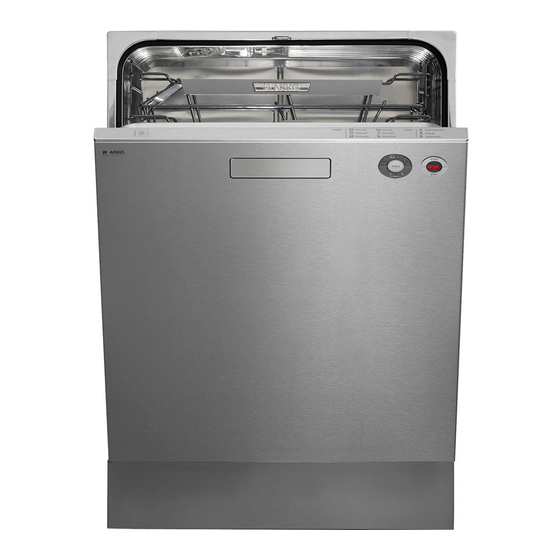
Related Manuals for Asko DW90 Series


Summary of Contents for Asko DW90 Series
- Page 1 Service manual Dishwasher - DW90...
- Page 2 Service manual DW90...
-
Page 3: Table Of Contents
Wiring diagram ............................................18 Program flow description........................................20 Troubleshooting .............................................. 22 Dishwashing results ..........................................22 Common faults ............................................22 Water level DW90 ..........................................23 Fault indicators ............................................24 Fault and information codes ......................................25 DW90.1 ..............................................25 DW90.2 ..............................................26 DW90.3 .............................................. -
Page 4: Updates
Service manual DW90 Updates Date Description Initials 2011-04-15 First version 2011-05-12 Front display 90.2, service menu 90.1 and 90.2 and also some minor text updates 2011-05-27 90.1 OTHER included 2011-06-08 Instruction for ”Increased working space during service” updated 2011-11-29 Updated wiring diagram and added information about Anti siphon 2012-02-02 Updated service menu for 90.2. -
Page 5: Introduction
The DW90 dishwasher series is available in three different basic models, designated DW90.1, DW90.2 and DW90.3. In the Types section, we present the various panels found on each type, making it easy to identify the different machines. The different models are named differently in different markets. -
Page 6: Troubleshooting Strategy
Service manual DW90 Troubleshooting strategy Troubleshooting is an important part of the service callout, and as such we have drawn up a troubleshooting strategy that describes, in broad terms and step by step, what you need to do to find and diagnose faults arising in our machines. -
Page 7: Types
S T O P DW90.1 - BRAND OTHER 5454 Variant 6OEM Auto + Time Saver - DW90.1PanelCylinda5OptionsAutoProgrammeTimeSaver The machine has 6 set programs and 2, 3 or 5 options that can vary depending on the variant. The touch buttons and display are found on the front of the panel. The main power switch is on... -
Page 8: Technical Data
Service manual DW90 Technical data Height: 823-870 mm (32-1/4” to 35-1/2”) = for 820 mm machines (XL) 863-910 mm (33-3/4” to 36”) = for 860 mm machines (XXL) Width: 596 mm (23-5/8”) Depth: 550 mm (22”) Weight (freestanding): 56 kg/59 kg (124 lbs/130 lbs) with water softener (XL) -
Page 9: Component Description
Service manual DW90 Component description Components and measurement values The specified resistance values apply at room temperature (about 20°C/68°F) Values within ±10% are considered normal. Article no. Position Component Measurement value 8073779 EMC-filter with inductor 680 kohm 8083041 Filter with screwplint... -
Page 10: Components And Function Description
Accelerometer The control unit in DW90.2 contains an accelerometer, a sensor that senses position and acceleration. It controls the touch buttons and the brightness of the light. The... - Page 11 Service manual DW90 Component description Spray arm diverter The spray arm diverter is under the spray arm hub on the underside of the cleaning compartment. Flow meter The water from the circulation pump flows through the spray arm diverter, which alternates the flow of water between the upper and lower spray arms.
- Page 12 Service manual DW90 Component description The fan is fitted to the top edge of the inner Drain pump door and comprises a fan motor, a fan housing, The drain pump is fitted to the bottom drain and a venting duct, a double-sided impeller, a can be replaced from the front of the machine.
-
Page 13: Door Switch
On the DW90.2 the main power switch is electronic and is integrated with the control unit. The machine switches to standby when the main... - Page 14 Service manual DW90 Component description Thermistor The thermistor for temperature measurement is located at the front edge of the bottom drain. The thermistor measures and controls the water temperature, which can be up to 70°C (158°F). If the thermistor short-circuits or...
- Page 15 Service manual DW90 Component description Pressure sensor Turbidity sensor The pressure sensor is connected to the Machines with an auto program have a turbidity pressure chamber in the bottom drain. It sensor that measures how cloudy the water is. The measures the pressure, which corresponds to sensor comprises an LED and a phototransistor.
- Page 16 Service manual DW90 Component description Status Light™ To the right at the bottom edge of the door is a light that communicates in three different colours to indicate the machine’s status. BLUE - The program has started, but you can still load more dishes into the machine (no detergent in the machine).
- Page 17 Service manual DW90 Component description Anti siphon Dishwashers equipped with Anti-Siphon device can be installed in an elevated installation. The drainage hose can run to a lower level than the bottom of the dishwasher without emptying the dishwasher of water during the wash cycle.
-
Page 18: Programs And Control Unit
CP IV GS TS FM FN 1 1 2 3 CIRCUIT DIAGRAM DW90.1, DW90.1OEM, DW90.2, DW90.C, DW90.3 This document must not be copied without our written pemission, and the contents thereof must not be imparted to a third party 80 840 68-01 nor be used for any unauthorized purpose. - Page 19 Service manual DW90 KD/CD: COMBI DISPENSER CIRCULATION PUMP DIV: WATER DIVERTER VALVE AP/DP: DRAIN PUMP DOOR HE (PTC) LB/DS: DOOR SWITCH FILTER FLOW METER FL/FN 1: FAN DOOR FAN/FN 2: FAN BOTTOM FLOAT SWITCH EL/HE: HEATING ELEMENT HE (PTC): HEATING ELEMENT PTC...
-
Page 20: Program Flow Description
If the component test in the service menu is not sufficient to identify a fault you can run a program and compare the results with the flow description below. If they are in agreement this indicates a correctly functioning control unit. Presented below is the Daily wash program, no options selected (DW90.1). Step Component... - Page 21 Inlet process 255 sec Maximum time. Inlet time is controlled by a flow meter** Circ. pump 3 sec Pause 30 sec If water temperature is >30°C ECO program starts (DW90.1) Circ. pump 30 sec Pause 5 sec If ECO is Circ.pump...
-
Page 22: Troubleshooting
Service manual DW90 Troubleshooting Dishwashing results Common faults Check the following points if the dishes are not If the dishwasher does not work, you should clean (always begin by checking any fault codes first check whether this is due to a simple fault, and the most recent fault indication in the something that the customer can rectify. -
Page 23: Water Level Dw90
Service manual DW90 Troubleshooting Water level DW90 When servicing a DW90 dishwasher it is important to check the water level in the machine. This is particularly important when programming the time-controlled water intake. Too low or too high water level can cause poor dishwashing results. -
Page 24: Fault Indicators
I1:1 S T O P I1:2 I11 I9 M2,1 M2,8 5454 Variant 6OEM Auto + Time Saver - DW90.1PanelCylinda5OptionsAutoProgrammeTimeSaver DW90.1 - BRAND OTHER D1, I5, D2, D3 I1, I2 I3, I4 L = LED, S / T = Push button, F = Fault code or plain text on display, D = Display, I = Indication... -
Page 25: Fault And Information Codes
Service manual DW90 Troubleshooting Fault and information codes DW90.1 Audible signal sounds when a fault is indicated on the display. Display Cause Action The door is open Close the door Temp stop fault Check F:41 Temperature increase less than Element, thermistor, water level, circulation 5°C (41°F) in ten minutes. - Page 26 Service manual DW90 Troubleshooting Fault and information codes DW90.2 Audible signal sounds when a fault is indicated on the display. Display Cause Action The door is open Close the door Temp stop fault Check F:41 Temperature increase less than Element, thermistor, water level, circulation 5°C (41°F) in ten minutes.
- Page 27 Service manual DW90 Troubleshooting Fault and information codes DW90.3 Audible signal sounds when a fault is indicated on the display. Display Cause Action Close the door The door is open Close the door Temp stop fault Temp stop fault Check Temperature increase less than 5°C...
-
Page 28: Dw90.1
Service manual DW90 Service menu DW90.1 - BRAND ASKO DW90.1 - BRAND OTHER OEM - DW90.1PanelCylinda2Options 5454 Variant 6OEM Auto + Time Saver - DW90.1PanelCylinda5OptionsAutoProgrammeTim D1, I5, D2, D3 START STOP D1, I5 I1, I2 P R O G D2,D3... - Page 29 Service manual DW90 Service menu DW90.1 - BRAND ASKO DW90.1 - BRAND OTHER M - DW90.1PanelCylinda2Options 5454 Variant 6OEM Auto + Time Saver - DW90.1PanelCylinda5OptionsAutoProgrammeTimeSa D1, I5, D2, D3 START STOP D1, I5 I1, I2 P R O G D2,D3...
-
Page 30: Service Menu Dw90.2
Service manual DW90 Service menu DW90.2 D1, I5, LCD1 D2, D3 Variant 1 Variant 2 Variant 3 Variant 4 Opening the service menu Open the door, put the machine in standby mode by pressing the main power switch (T8). Activate the machine again by pressing the button (T8), press and hold the program selector (T1) and (T2) for 5 sec. -
Page 31: Dw90.2
Service manual DW90 Service menu DW90.2 cont. D1, I5, LCD1 D2, D3 Variant 1 Variant 2 Variant 3 Variant 4 Menu step/Turn/Push Comments/instructions Variant Variant 1, default setting (Temperature, Drying) Variant 2 (Temperature, Drying, Delayed start) PROG Variant 3 (Temperature, Drying, Delayed start, Time program) -
Page 32: Service Menu Dw90.3
Service manual DW90 Service menu DW90.3 M1,1 M1,28 S TA R T P R O G I1:1 S T O P I1:2 I11 I9 M2,1 M2,8 Opening the service menu Check that the machine is switched off. Otherwise switch off the main power by pressing the button (S5). -
Page 33: Dw90.3
Service manual DW90 Service menu DW90.3 cont. M1,1 M1,28 S TA R T P R O G I1:1 S T O P I1:2 I11 I9 M2,1 M2,8 Menu step/Turn/Push Comments/instructions Water intake Normal water intake, default setting Water volume 0... -
Page 34: Settings
7281370 Hose clamp pliers, Oetiker 8801424 Universal tool, adapter DW90.2 - Store program (in shops, at trade water softener shows etc.) Start by power off/on by plug. Press within 3 secounds (T1) and T3). The status lights (LEDs) change colour every five seconds, switching between blue, red and green. - Page 35 Service manual DW90 PERSONAL NOTES...
-
Page 36: Service And Installation
Service manual DW90 Service and installation Increased working space during service In order to facilitate servicing the machine you can open up the motor compartment by freeing the cleaning compartment along the rear edge and tipping it forward to create more space to work with. -
Page 37: Overflow Guard Wiring
Service manual DW90 Service and installation Ensure that both door springs are attached so If the machine has door springs that can be that the door does not open and tip the machine. adjusted from the front and is fitted with a water softener, the right door spring may need to be fully tensioned. - Page 38 Service manual DW90 PERSONAL NOTES...
- Page 39 Service manual DW90 PERSONAL NOTES...
- Page 40 www.asko.com...