Table of Contents
Advertisement
Quick Links
Advertisement
Table of Contents

Related Manuals for CDA vk700


Summary of Contents for CDA vk700
- Page 1 Grill Manual for Installation, Use and Maintenance Customer Care Department • The Group Ltd. • Harby Road • Langar • Nottinghamshire • NG13 9HY T : 01949 862 012 F : 01949 862 003 E : service@cda.eu W : www.cda.eu...
- Page 2 Keep the oven door closed when in use. Appliance information: Please enter the details on the appliance rating plate below for reference, to assist CDA Customer Care in the event of a fault with your appliance and to register your appliance for guarantee purposes. Appliance Model...
- Page 3 CE Declarations of Conformity: This oven has been designed, constructed and marketed in compliance with safety requirements of EEC Directive 2006/95/EEC (Low voltage) and requirements of EMC Directive 2004/108/EEC. This appliance has been manufactured to the strictest standards and complies with all applicable legislation, including Electrical safety (LVD) and Electromagnetic interference compatibility (EMC).
- Page 4 Important • Read the user instructions carefully before using the oven for the first time. • Follow the instructions for first use of the oven. • Clean the oven regularly. • Remove spills as soon as they occur. • Always use oven gloves when removing shelves and trays from the oven.
- Page 5 • When opening the appliance, take great care that hot water which may have collected in the drip tray does not overflow, as this may cause injury. • Do not come into contact with hot steam and do not touch the hot oven sides.
- Page 6 Drip tray The drip tray can be slid into its location underneath the shelf to collect the juices from grilling or the condensate from steam cooking (Fig. 2). To remove it, lift slightly and slide it Fig. 2 toward you. To reinsert it, slide it back until it is correctly seated.
-
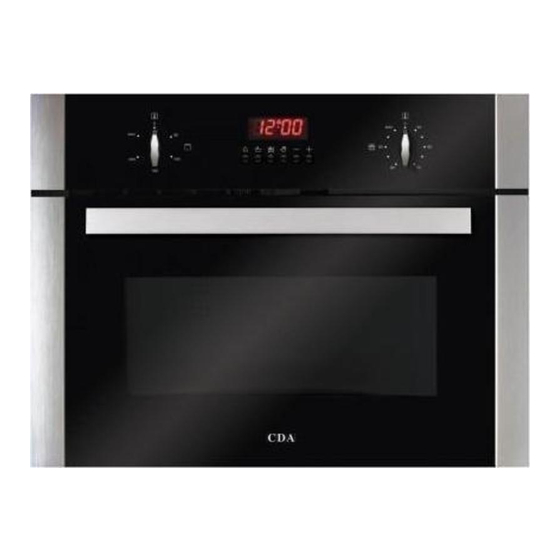
Page 7: The Control Panel
The Control Panel Fig. 4 Grill warning light Steam oven knob Grill knob Steam oven warning light Electronic timer The Timer Fig. 5 Timer button Duration button End button Manual button - button + button... -
Page 8: Before First Use
Before First Use Cleaning Before using the oven for the first time we recommend that you clean it with soapy water, rinse carefully and then heat on the grill setting at maximum temperature for 30 minutes, with no accessories in the oven. - Page 9 General Settings & Use Grill Note: The grill function can not be used at the same time as the steam oven function. To turn the grill on To turn the grill on, rotate the “Grill” knob (either way) to select the temperature setting required.
- Page 10 Preparation for steam cooking The metal shelf, perforated tray and drip tray should be fitted into the oven as described on pages 5 & 6. To turn the steam oven on To turn the oven on, rotate the “Steam oven” knob (either way) to select the cavity temperature as required.
- Page 11 Timer and Minute Minder Programming the steam oven or grill Timer - Cooking time This function sets the oven to switch off after a period of time you set, up to a maximum of 10:00 hours. Use either the “Grill” knob or the “Steam oven” knob to set the cooking function you require.
-
Page 12: Minute Minder
Press the “End” button : The word “AUTO” lights up in the display and the separator dot flashes. While the display is still flashing, use the “+” and “-” buttons to set the cooking time: Once the separator dot stops flashing the end time is set. When the end time is reached the oven will switch off and the beeper will sound. - Page 13 flashing, use the “+” and “-” buttons to set the alarm time: Once the separator dot stops flashing the alarm time is set and the countdown starts. During the countdown the display switches back to showing the time of day. If you want to see how much time is left before the beeper sounds, press the “Timer”...
-
Page 14: Steam Cooking Advice
Steam Cooking Advice Defrosting Defrosting small portions will be faster than large portions When partly defrosted, you can turn over the portions. Protect pastries from water droplets with cling film, or their original packaging. Patties (spinach. etc.) place on dish 25 min In blocks place on dish... - Page 15 Vegetables Time Preparation Artichokes (small) 40 to 45 min. placed upside down in the dish Asparagus 35 to 40 min. for the tips, reduce the cooking time Broccoli 18 min. in little flowerets Carrots 20 to 22 min. in fine slices Celeriac 25 to 30 min.
-
Page 16: Error Codes
If the error persists, isolate the appliance and contact CDA Customer Care. The green light flashes Probe or potentiometer Isolate the appliance and contact CDA once every 5 seconds fault. Customer Care. and continous fast beeper sounding. -
Page 17: Care And Maintenance
Care and Maintenance IMPORTANT: Always disconnect the appliance from the power supply before undertaking any cleaning or maintenance. You should always allow the oven to cool fully after use before undertaking any cleaning or maintenance. Changing the oven lamp • Remove all shelves and the grill pan from the oven. - Page 18 Proprietary stainless steel cleaners are available. We recommend the CDA E-Cloth available from the CDA Sales Team for cleaning stainless steel surfaces. Inside the oven...
- Page 19 Grill When used regularly, the grill element does not need cleaning as the intense heat will burn off any splashes. The interior ceiling may need regular cleaning, which should be done with warm water, detergent and a sponge. If the grill is not used regularly, it should be run for 10 minutes every month to burn off any splashes, in order to reduce the risk of fire.
-
Page 20: Installation
Installation The appliance can be installed under a worktop or in a wall unit (open or closed) with the appropriate dimensions for recessed installation. Centre the oven in the unit so as to ensure a minimum distance of 10mm between the appliance and the surrounding unit. The material of the unit supporting the appliance must be heat resistant (or covered with a heat resistant material). - Page 21 Fig. 8 Fig. 9...
-
Page 22: Mains Electricity Connection
Mains Electricity Connection Warning! This appliance must be earthed Fig. 10 We recommend that the appliance is connected by a qualified electrician, who is a member of the N.I.C.E.I.C. and who will comply with the I.E.T. and local regulations. This appliance is intended to be connected to fixed wiring and is not suitable for connection to a 13A plug or 13A supply. - Page 23 This appliance is supplied with a 3 core mains cable; the wires are in accordance with the following code: Green and Yellow = Earth FUSE SPUR OUTLET Blue = Neutral Brown = Live Please note: • The mains cable must only be replaced by a qualified electrician or service engineer USE A 13 AMP FUSE...
- Page 24 Please contact our Customer Care Department for Service on the details below. Customer Care Department • The Group Ltd. • Harby Road • Langar • Nottinghamshire • NG13 9HY T : 01949 862 012 F : 01949 862 003 E : service@cda.eu W : www.cda.eu...