
Related Manuals for CDA SG121SS


Summary of Contents for CDA SG121SS
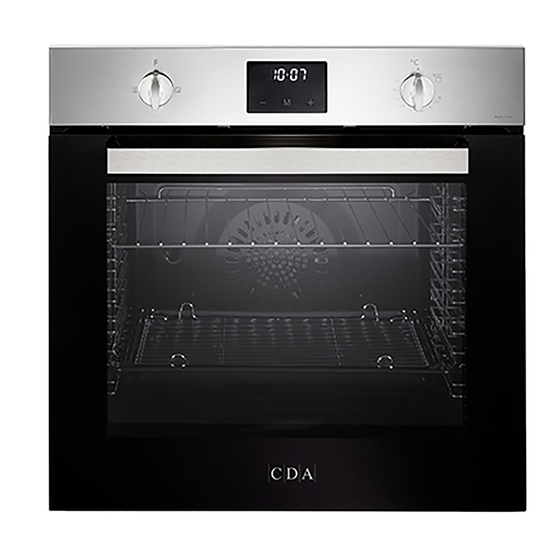
- Page 1 SG121SS Built-in Gas Oven with Electric Grill Installation, Use and Maintenance www.cda.eu...
-
Page 2: Declaration Of Ce Conformity
The CDA Group Ltd cannot be held responsible for injuries or losses caused by incorrect use or installation of this product. Please note that CDA reserve the right to invalidate the guarantee supplied with this product following incorrect installation or misuse of the appliance. -
Page 3: Important Safety Precautions And Recommendations
IMPORTANT SAFETY PRECAUTIONS AND RECOMMENDATIONS IMPORTANT: This appliance is designed and manufactured solely for the cooking of domestic (household) food and is not suitable for any non domestic application and therefore should not be used in a commercial environment. The appliance guarantee will be void if the appliance is used within a non domestic environment i.e. - Page 4 Do not attempt to modify the technical characteristics of the • appliance as this may become dangerous to use. The manufacturer declines all responsibility for any inconvenience resulting from the inobservance of this condition. CAUTION: this appIiance must only be installed in a permanently •...
- Page 5 a safe way and understand the hazards involved. Children shall not play with the appliance. Cleaning and user maintenance shall not be made by children without supervision. The manufacturer declines all liability for injury to persons or • damage to property caused by incorrect or improper use of the appliance.
- Page 6 Always use oven gloves when removing the shelves and food • trays from the oven whilst hot. • Do not hang towels, dishcloths or other items on the appliance or its handle – as this could be a fire hazard.Clean the oven regularly and do not allow fat or oils to build up in the oven base or tray.
- Page 7 Care should be taken to avoid touching heating elements. Children less than 8 years of age shall be kept away unless continuously supervised. OVEN DOOR GUARD: The glass on the oven door reaches high • temperatures during operation. For child safety, a door guard can be fitted to prevent contact with the hot glass.
-
Page 8: Advice For The Installer
ADVICE FOR THE INSTALLER Important • The appliance is designed and approved for domestic use only and should not be installed in a commer- cial, semi commercial or communal environment. A marine application is not to be considered as a domestic enviroment. Your product will not be guaranteed if installed in any of the above environments and could affect any third party or public liability insurances you may have. - Page 9 Fig. 1 Fig. 2...
- Page 10 To ensure internal ventilation, aeration channels must be provided as illustrated in the figures 3 and 4. Fig. 4 50 mm Fig. 3 30 mm...
-
Page 11: Fixing The Oven
FIXING THE OVEN Introduce the oven into the furniture opening and fix it with 2 screws (not supplied) as figure 5. It is essential that the oven rests on a surface which will support its weight, as the screw fixing is only complementary. - Page 12 Provision for Ventilation The appliance should be installed into a room or space with an air supply in accordance – with BS 5440-2: 2000. For rooms with a volume of less than 5m - permanent ventilation of 100cm free area will be –...
-
Page 13: Gas Section
Gas Section Important Note This appliance is supplied for use on NATURAL GAS or LPG (check the gas regulation label attached on the appliance). Appliances supplied for use on NATURAL GAS: they are adjusted for this gas only and cannot –... - Page 14 Installation to Natural Gas Installation to Natural Gas must conform to the Code of Practice, etc. The supply pressure for Natural Gas is 20 mbar. The installation must conform to the relevant British Standards. Installation to LP Gas When operating on Butane gas a supply pressure of 28-30 mbar is required. When using Propane gas a supply pressure of 37 mbar is required.
- Page 15 Installing the Test Point Adaptor Appliance gas inlet pipe Nipple G 1/2 cylindrical (ISO 228-1) male Gasket G 1/2 cylindrical (ISO 228-1) female Conical adaptor R 1/2 conical (ISO 7-1) male Rc 1/2 conical Test point adaptor (ISO 7-1) female Test point Rc 1/2 conical (ISO 7-1) female...
- Page 16 Maintenance and Conversion to Natural Gas or to LPG Table for the Choice of the Injectors Cat: II 2H3+ Natural Gas G30 (28-30 mbar) G20 (20 mbar) Nominal Reduced G31 (37 mbar) BURNERS power power Ring Ring [kW] [kW] Ø injector Ø...
-
Page 17: Oven Burner
OPERATIONS TO BE EXECUTED FOR THE REPLACEMENT OF THE INJECTOR OF THE OVEN BURNER Some models are provided with a set of injectors for the various types of gas. If the injectors are not supplied they can be obtained from the “Service Centre”. Select the injectors to be replaced according to the “Table for the choice of the injectors”... - Page 18 REGULATION OF AIR SUPPLY TO OVEN BURNER To regulate the air supply it is necessary to remove the burners from their housings (fig. 11). Using a cross-head screwdriver, slacken the screws “ ” securing the air flow regulation collar • “...
-
Page 19: Adjustment Of The Oven Burner Minimum
Flame Flame Flame correct Flame faulty in with excess correct primary air primary air short and flong, yellow clear sharp too blue Flame faulty in interior blue interior cone primary air trembling cone tending to detach CAUSE Flame with excess air regulating correct air regulating... -
Page 20: Electrical Installation
Electrical Installation IMPORTANT: The appliance must be installed in accordance with the manufacturer’s instructions. Incorrect installation, for which the manufacturer accepts no responsibility, may cause damage to persons, animals or property. The connection of the appliance to earth is mandatory. The manufacturer declines all responsibility for any inconvenience resulting from the inobservance of this condition. -
Page 21: Connection Of The Power Supply Cable
CONNECTION OF THE POWER SUPPLY CABLE WARNING: If the power supply cable is damaged, it must be replaced only by an authorised service agent in order to avoid a hazard. • Unhook the terminal board cover by inserting a screwdriver into the two hooks “A” (fig. 17). •... - Page 23 ADVICE ADVICE for the for the USERS USERS...
-
Page 24: Control Panel
Control Panel Fig. 20 CONTROLS DESCRIPTION Oven light / fan motor / electric grill control knob Electric grill on indicator light Digital electronic clock with timer (with “Touch-control” keys) Gas oven thermostat control knob NOTE: The knob and symbols may vary. Notes: •... -
Page 25: How To Use The Fan Oven
How to use the fan oven TECHNICAL FEATURES The oven is furnished completely clean. It is advisable however, upon first use, to turn the oven on to the maximum temperature for 30 minutes to eliminate possible traces of grease from the oven burner. The same operation shall be done with the electric grill. - Page 26 IMPORTANT NOTES: THERMOSTAT • Do not use the appliance in case of power The numbers printed on the control panel or on failure or if the cooling fan motor is the knob (fig. 22) indicate the increasing oven damaged. The appliance may overheat temperature value (see table below).
- Page 27 Lighting of the burner IMPORTANT: The oven door must be open during this operation. To light the oven burner: 1 – Open the oven door to the full extent. If this operation is not performed you should not proceed to light the oven. 2 –...
-
Page 28: Electric Grill
Electric Grill For safety reasons, it is not allowed to use the oven NOTES: The knob and symbols may vary. burner and the electric grill together, at the same time. The electric grill only operates when the oven “O” or thermostat knob is on position “... -
Page 29: Fan Motor
Cooking with gas oven Once the oven gas burner has been lit, close the oven door and preheat the oven for at least 15 minutes. Preheating should always be carried out with the oven empty: Remove the trays and racks from the oven cavity. Once the oven has been preheated, insert the food you intend to cook. -
Page 30: Use Of The Electric Grill
USE OF THE ELECTRIC GRILL (Without ventilation) Switch on the electric grill and preheat the oven for about 5 minutes with the door closed. Introduce the food to be cooked, positioning the rack as close to the grill as possible. The dripping pan should be placed under the rack to catch the cooking juices and fats. -
Page 31: Cooking Guide
Cooking Guide Your gas oven is a newly designed oven which incorporates an indirect burner located under the oven base plate. If you have previously been used to cooking with gas you may need to slightly alter your cooking methods. The bottom of the oven is hot and is ideal for browning the underside of shallow pastry dishes and pizzas. -
Page 32: Clock And Timer With "Touch-Control" Keys
Clock and Timer with “Touch-Control” Keys Keys: NOTES: The symbols may vary. Touched simultaneously (for more than 2 seconds): • setting the clock; • setting timer “ ” and “ ” volume (by touching once, along with the “MODE” key). Function selection (touched for more than 2... -
Page 33: Setting The Clock
SETTING THE CLOCK When first connected, or after a power failure, the digits will flash on the display. To set the clock, touch the “ ” key, for more than 2 seconds, and then the “ ” or “ ” keys. MODE To set the clock, with the appliance already connected, touch the “... -
Page 34: Care And Maintenance
Care and Maintenance IMPORTANT: Before any operation It is advisable to clean when the appliance is cold and especially for cleaning of cleaning and the enamelled parts. maintenance Avoid leaving alkaline or acidic substances (lemon juice, vinegar, etc.) on the disconnect the surfaces. - Page 35 OVEN FITTING OUT Assembly of the side runner frames – Slide the rear prongs of the side rack into the holes “A” at the rear of the oven (fig. 31). – Slide the front prong of the side rack into the holes at the front of the oven (fig.
- Page 36 Replacing the Oven Light WARNING: Ensure the appliance is switched off before replacing the lamp to avoid the possibility of electric shock. – Allow the oven cavity and the heating elements to cool down; – Switch off the electrical supply; –...
- Page 37 REMOVING AND REPLACING THE INNER AND MIDDLE DOOR GLASS PANES FOR CLEANING If you wish to clean the inner pane of glass of the door, make sure you follow the precautions and instructions very carefully. Replacing the glass pane and the door incorrectly may result in damage to the appliance and may void your warranty.
-
Page 38: Oven Doors
Oven Doors Removing the Oven Doors The oven doors can easily be removed as follows: – Open the door to the full extent (fig. 35a). – Open the lever A completely on the left and right hinges (fig. 35b). – Hold the door as shown in fig. - Page 39 To remove the Inner Pane – Touch the glass retainer tabs in on both sides of the door and remove the glass retainer (figs. 36, 37). – Gently lift and pull out the inner pane of glass by releasing it from the bottom retainers. Do not angle the pane too much as you may damage the glass (fig.
- Page 40 After cleaning replace the door glass panes When replacing the glass panes make sure that: – you replace the inner pane correctly as shown. The pane must be in the position described below in order to fit into the door and to ensure that the oven operates safely and correctly; –...
-
Page 41: For Your Safety
Do’s and do not’s − Do always grill with the oven door closed. − Do read the user instructions carefully before using the oven for first time. − Do allow the oven to heat for about two hours, before using for the first time, in order to expel any smell from the new oven insulation, without the introduction of food. -
Page 43: Appliance Servicing
Appliance Servicing CDA provide a quality and effective after-sales service to cover all your servicing needs. Please attach your receipt to this page for safekeeping. Please help us to help you by having the following information available when booking a service-call: Model type, make and model –... - Page 44 Please contact our Customer Care Department for Service on the details below Customer Care Department Group Ltd. • Harby Road • Langar • Nottinghamshire • NG13 9HY T : 01949 862 012 F : 01949 862 003 E : customer.care@cda.eu www.cda.eu Copyright © CDA 2017...