
Related Manuals for LevelOne FCS-4010


Summary of Contents for LevelOne FCS-4010
- Page 1 LevelOne FCS-4010 Day/Night Speed Dome Pro Network Camera User’s Manual Ver 1.0.0 – 0811...
-
Page 2: Table Of Contents
Table of Contents OVERVIEW......................4 Package contents ..................5 Physical description ................6 INSTALLATION.....................10 Hardware installation................10 Network deployment................11 How to Use Installation Wizard.............14 ACCESSING THE NETWORK CAMERA .............30 Using RTSP players ................32 Using 3GPP-compatible mobile devices..........33 Using recording software..............34 MAIN PAGE....................35 CLIENT SETTINGS ..................39 CONFIGURATION..................41 System ....................41 Security....................43... - Page 3 JOYSTICK SETTINGS ..................79 APPENDIX.....................83 URL Commands of the Network Camera ..........83 Technical Specifications ..............109 Technology License Notice..............110 GNU GENERAL PUBLIC LICENSE............112...
-
Page 4: Overview
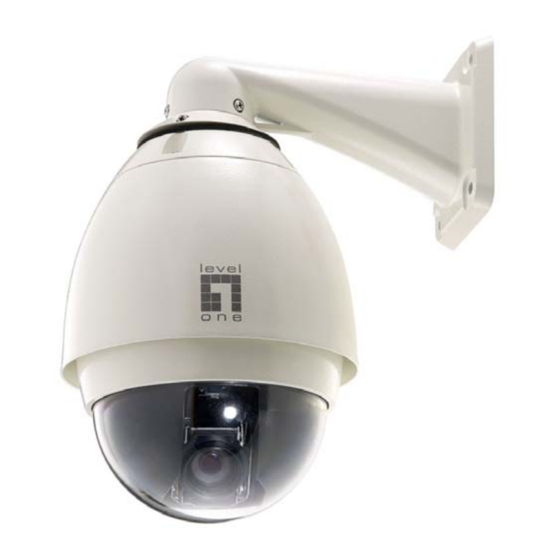
Overview LevelOne FCS-4010, equipped with an 18x optical zoom lens, is a high performance day/night speed dome network suitable for professional surveillance applications. It is another significant addition to LevelOne’s high-end network camera portfolio of progressive-series. Adopting Sony 18x optical zoom lens plus progressive CCD sensor, this... -
Page 5: Package Contents
URL Commands of the Network Camera section serves to be a helpful reference to customize existing homepages or integrating with the current web server. Package contents ■ FCS-4010 ■ Power adapter ■ Wall mount bracket ■ Dome cover ■... -
Page 6: Physical Description
Physical description Inner view Outer view... - Page 7 General I/O Terminal Block This Network Camera provides a general I/O terminal block which is used to connect external input / output devices. The pin definitions are described below. GND: Ground DI4: Digital Input DI3: Digital Input DI2: Digital Input DI1: Digital Input GND: Ground N.O.
- Page 8 DI/DO Diagram Refer to the following illustration for connection method. Status LED The color of LED indicates the status of the Network Camera.
- Page 9 Hardware Reset There is a reset button on the inner side of the Network Camera. It is used to reboot the Network Camera or restore the Network Camera to factory default. Sometimes rebooting the Network Camera could set the Network Camera back to normal state.
-
Page 10: Installation
Installation Hardware installation Follow the steps below to install the Network Camera to the ceiling: 1. Attach the alignment sticker to the wall. 2. Drill four pilot holes into the wall. 3. Attach the black cover to the Network Camera using the supplied four black screws. -
Page 11: Network Deployment
Network deployment Setup the Network Camera over the Internet This section explains how to configure the Network Camera to Internet connection. 1. If you have external devices such as sensors and alarms, make connection from general I/O terminal block. 2. Use the supplied RJ45 female/female coupler to connect the Network Camera to a switch. - Page 12 Internet connection via a router Before setting up the Network Camera over the Internet, make sure you have a router and follow the steps below. 1. Connect your Network Camera behind a router, the Internet environment is illustrated as below. About how to get your IP address, please refer to Software installation section for details.
- Page 13 If you have changed the port numbers on the Network section, please open the ports accordingly on your router. For information on how to forward ports on the router, please refer to the user’s manual of your router. 3. Find out the public IP address of your router provided by your ISP (Internet Service Provider).
-
Page 14: How To Use Installation Wizard
Internet connection via PPPoE (Point-to-Point over Ethernet) Choose this connection type if you are connected to the Internet via a DSL Line. Please refer to PPPoE section for details. Software installation At the end of the hardware installation, users can use Installation Wizard program included in the product CDROM to find the location of the Network Camera. - Page 15 STEP 2: Please read the license agreement first, and then click on “I Agree” to continue the installation process. The install process will go on and then the below window will appear. This page is for you to select the additional component you want to install.
- Page 16 dialog. After completed the installation, please click on the “Close” button. Completed Using Installation Wizard User Interface Once you run the Installation Wizard, after a short searching time, you will see the user interface as below. “Manual Setup” button, a “Refresh Devices”...
- Page 17 User interface of Installation Wizard Installation Wizard allows you to setup one device at one time and upgrade multiple devices (of the same model) at the same time. If you selected different models, then the “Firmware Upgrade” button would be disabled.
- Page 18 User interface of Installation Wizard after clicking on the arrow button...
- Page 19 Action buttons Refresh devices Clicking on the “Refresh Devices” button will refresh the device list and search all devices on the LAN again. Refreshing the device list will take several seconds. If you want to link to your device, double-clicking it on your device list will lead you to the browser for operating your device.
- Page 20 Function buttons Function buttons Click on this button to modify the setting of the selected devices. For more detail, please refer to 0 Manual Setup. Click on this button to upgrade the firmware of the selected devices. For more detail, please refer to 0 Upgrade Click on this button to restore the selected device to factory default.
- Page 21 Manual Setup When you select one device in the selection list, the “Manual Setup” button will be enabled. Click on it to modify the settings of the selected device. After clicked on the “Manual Setup” button, Installation Wizard would try to connect to the selected device. The default Administrator’s password is blank and the Network Camera initially will not ask for any password.
- Page 22 System Setting After connected to the selected device, the Installation Wizard will switch to system setting page as below. System setting page Click on this button to cancel the setup progress. Click on this button to keep the present setting and go to the next page. Change Host Name The “Hostname”...
- Page 23 “Password” and “Confirm Password” text boxes identically. What is typed will be displayed as asterisks for security purposes. The maximum password depends on the server you connected. Adjust date and time Date/Time setup There are three ways to adjust system date and time: "Synchronize with computer time": The easiest way is to make device synchronized with your computer time.
- Page 24 Network Setting The Installation Wizard can help you to setup the network connection with LAN or PPPoE. After you clicked on the “Next” button on the System section, the Installation Wizard would lead you to the PPPoE setting page. If you want to connect your server to Internet via PPPoE, please click on “Yes”...
- Page 25 the PPPoE setting page. In this page, you can input the “PPPoE username” and “PPPoE password” provided by your ISP, and then the server will be set to PPPoE mode rather than LAN mode when the setup is completed. If you don’t know the account information, please contact your ISP.
- Page 26 "Get IP by DHCP Server automatically" checkbox and assign a valid IP address, subnet mask, default gateway and DNS server for the device. Apply to selected device After configuring all the settings, the apply page will show up. Click on “Apply”...
- Page 27 Upgrade When you select one device or multiple devices (of the same model), the “Firmware Upgrade” button will be enabled. Click on it to upgrade the firmware of the selected device(s). After click on the “Firmware Upgrade” button, Installation Wizard will try to connect the selected device(s) and lead you to the firmware upgrade page.
- Page 28 Device information Multiple devices information Firmware Information The selected firmware information will show the information about the file that you selected. Firmware version: The version number of the selected firmware. Select Firmware You can use the “Select firmware” button to browse the file that you want upgrade onto the selected device(s).
- Page 29 Select firmware Firmware Information Warning message for unmatched firmware Start Upgrade Clicking on the “Start Upgrade” button to upgrade the firmware of the selected device(s), and it will be a pop-up dialog window to show the progress of the upgrading process. Usually, it will take about 5 to 10 minutes to finish the firmware upgrading.
-
Page 30: Accessing The Network Camera
Update progress After the upgrade process had been done, you could see the dialog window as below. Please click on the button “OK” to finish it. Upgrade Done Accessing the Network Camera This chapter explains how to access the Network Camera through web browsers, RTSP players, 3GPP-compatible mobile devices, and recording software. - Page 31 ► If you see a dialog box indicating that your security settings prohibit running ActiveX® Controls, please enable your ActiveX® Controls for your browser. 1. Choose Tools > Internet Options > Security > Custom Level. 2. Look for Download signed ActiveX® controls; select Enable or Prompt. Click OK.
-
Page 32: Using Rtsp Players
Using RTSP players To view the MPEG-4 streaming media using RTSP players, you can use one of the following players that support RTSP streaming. Quick Time Player Real Player VLC media player mpegable Player pvPlayer 1. Launch a RTSP player. 2. -
Page 33: Using 3Gpp-Compatible Mobile Devices
Using 3GPP-compatible mobile devices To view the streaming media through 3GPP-compatible mobile devices, make sure the Network Camera can be accessed from the Internet. To utilize this feature, please check the following settings on your Network Camera: 1. Because most players on 3GPP mobile phones do not support RTSP authentication, make sure the authentication mode of RTSP streaming is set to disable. -
Page 34: Using Recording Software
Using recording software The product software CD also contains recording software-IP CamSecure, allowing simultaneous monitoring and video recording for multiple Network Cameras. Please install the recording software; then launch the program to add the Network Camera to the Channel list. For detailed information about how to use IP CamSecure, please refer to the user’s manual of the software or download it at http://global.level1.com. -
Page 35: Main Page
Main Page This chapter explains the layout of the main page. It is composed of the following four sections: Logo of LevelOne, Menu, Host Name, and Live Video Window. Logo of LevelOne. Click this logo to visit LevelOne website. Menu Snapshot: Click this button to capture and save still images. -
Page 36: Host Name
again to stop it. Stop: Click this button to stop the auto Pan and auto Patrol function. Patrol: Click this button to command the camera to keep patrolling between the preset positions on the Patrol List. Go to: Once the Administrator has determined the preset positions; you can aim the camera using this control. - Page 37 MPEG-4 protocol and media options: The transmission protocol and media options for MPEG-4 video streaming. For more information, please refer to Client Settings section. Video and audio control buttons: Depending on the Network Camera model and Network Camera configuration, some buttons may not be available. Digital zoom edit: Deselect Disable digital zoom to enable the zoom operation.
- Page 38 The following window is displayed when the video mode is set to MJPEG: Video title: The video title can be configured. For more information, please refer to Video settings section. Time: Display the current time. For more information, please refer to Video settings section. Title and time: Video title and time can be stamped on the streaming video.
-
Page 39: Client Settings
Client Settings This chapter explains how to select the streaming source, transmission mode and saving options at local computer. It is composed of the following four sections: Stream Options, MPEG-4 Media Options, MPEG-4 Protocol Options and MP4 Saving Options. When completed with the settings on this page, click Save on the page bottom to take effect. -
Page 40: Mp4 Saving Options
better video quality. Nevertheless, the downside with this protocol is that its real-time effect is not as good as that of the UDP protocol. HTTP: This protocol allows the same quality as TCP protocol and you don’t need to open specific port for streaming under some network environments. -
Page 41: Configuration
Configuration Only Administrators can access the system configuration page. Each category in the left menu will be explained in the following sections. System This section explains how to configure the basic settings for the Network Camera, such as the host name and system time. - Page 42 Camera’s operation from being noticed. System Time Enable Daylight Saving Time: Select this option to enable daylight saving time (DST). During DST, the system clock moves one hour ahead. Note that to utilize this feature, please set the time zone for your Network Camera first.
-
Page 43: Security
DI and DO Digital input: There are 4 sets of digital input. Select High or Low to define normal status of the digital input. The Network Camera will report the current status. Digital output: Select Grounded or Open to define normal status of the digital output. -
Page 44: Https
page. Manage User Here you can change user’s access rights or delete user accounts. 1. Pull down the user list to find an account. 2. Make necessary changes and then click Save or Delete to take effect. HTTPS This section explains how to enable authentication and encrypted communication over SSL. - Page 45 3. Here is an example of a CSR: 4. Look for a trusted certificate authority that issues digital certificates. Enroll the Network Camera. Wait for the certificate authority to issue a SSL certificate; then upload the issued certificate to the Network Camera.
-
Page 46: Network
Certificate Information Here display the certification information. Users may click Property for details. To remove the signed certificated, uncheck the Enable HTTPS secure connection and click Remove. Network This section explains how to configure wired network connection for the Network Camera. It is composed of the following five columns: Network Type, HTTP, Two way audio, FTP and RTSP Streaming. - Page 47 Enable UPnP port forwarding: To access the Network Camera from the Internet, select this option to allow the Network Camera to open ports on the router automatically so that video streams can be sent out from a LAN. To utilize of this feature, make sure that your router supports UPnPTM and it is activated.
- Page 48 3. In the Windows Components Wizard dialog box, select Networking Services and then click Details. 4. In the Networking Services dialog box, select Universal Plug and Play and then click OK. 5. Click Next in the following window. 6. Click Finish. UPnPTM is enabled. ►...
- Page 49 HTTP Authentication: Depending on your network security requirements, the Network Camera provides two types of security settings for a HTTP transaction: basic and digest. If basic authentication is selected, the password is sent in plain text format; there can be potential risks of being intercepted.
- Page 50 NOTE ► To utilize the HTTP authentication, make sure that your have set a password for the Network Camera first; please refer to Security section for details. ► Microsoft® Internet Explorer does not support server push technology; therefore, using http://<ip address>:<http port>/<access name for stream1 or stream2> will fail to access the Network Camera.
- Page 51 To stop talking, click again. The FTP server allows the Network Camera to utilize LevelOne Installation Wizard 2 to upgrade firmware. By default, the FTP port is set to 21. Also, it can be assigned with another port number between 1025 and 65535.
- Page 52 Quick Time player Real Player Disable Basic Digest O indicates that the authentication mode is supported by the RTSP player. X indicates that the authentication mode is NOT supported by the RTSP player. Access name for stream 1 / Access name for stream 2: The access name is used to differentiate the streaming source.
-
Page 53: Ddns
If the RTP ports are incorrectly assigned, the following warning message is displayed: Multicast settings for stream 1 / Multicast settings for stream 2: Select the Always multicast to enable multicast for stream 1 or stream Unicast video transmission delivers a stream through point-to-point transmission;... -
Page 54: Access List
We offer other DDNS providers, such as Dyndns.org(Dynamic), Dyndns.org(Custom), TZO.com, DHS.org, dyn-interfree.it. Note that to utilize this feature, please apply a dynamic domain account first. Refer to the following links to apply a dynamic domain account when selecting other DDNS providers: ■... -
Page 55: Audio And Video
Audio and video This section explains how to cofigure audio and video performances of the Network Camera. It is composed of the following two columns: Video settings and Audio settings. Video settings Video title: Enter a name that will be displayed on the title bar of the live video. - Page 56 Color: Select to display colorful or black/white video streams. Power line frequency: Set the power line frequency in consistent with local utility settings to eliminate uncomfortable image flickering associated with fluorescent lights. Note that after the power line frequency is changed, it is required to disconnect and reconnect the power cord of the Network Camera in order for the new setting to take effect.
- Page 57 White balance: Adjust the value for best color temperature. ■ Auto The Network Camera automatically adjusts the color temperature of light in response to different light sources. The white balance setting defaults to Auto and works well in most situations. ■...
- Page 58 same screen. ► If you want to use Go to, the preset positions should be set in advance. For detailed configurations, please refer to the Preset Position section. ■ To modify the privacy mask windows, follow the steps below: 1. Choose one of the privacy mask windows on the list you want to modify. 2.
- Page 59 appropriate shutter speed and gain to obtain the correct exposure. Adjust the iris in seventeen steps from F1.4 (largest size of lens aperture opening) ~ F22 (smallest size of lens aperture opening). ■ Manual Select this option to adjust the desired shutter speed, iris and gain.
- Page 60 If the power line frequency is set to 50Hz, the frame rates are selectable at the following rates: 1fps, 2fps, 3fps, 5fps, 8fps, 10fps, 15fps, 20fps and 25fps. If the power line frequency is set to 60Hz, the frame rates are selectable at the following rates: 1fps, 2fps, 3fps, 5fps, 8fps, 10fps, 15fps, 20fps, 25fps and 30fps.
-
Page 61: Motion Detection
Mute: Select this option to disable audio transmission from the Network Camera to all clients. Note that if mute mode is turned on, no audio data will be transmitted to all clients even though the audio transmission is enabled in the Client Settings page. In that case, the following message is displayed. - Page 62 4. Click Save to take effect. 5. Select Enable motion detection to enable this function. For example: The Percentage Indicator will rise or fall depending on the image variation. When motions are detected by the Network Camera and are judged to exceed the defined threshold, a red bar rises.
-
Page 63: Camera Control
There are two parameters for setting the motion detection: Sensitivity and Percentage. In the illustration above, frame A and frame B are two sequential images. Pixel differences between the two frames are detected and highlighted in gray (frame C), and will be compared with the sensitivity setting. - Page 64 Dwelling time (sec) Set the stop time of each preset location during auto patrol of the network camera. Return to home position after seconds Enter a number to set the Network Camera to return to home position after it has been motionless for seconds.
-
Page 65: Application
■ Click Go to: The Network Camera will move to the preset position. ■ Click Patrol: The Network Camera will patrol among the selected preset positions (from right to left) for once. Application This section explains how to configure the Network Camera to react in response to particular situations. - Page 66 To start plotting an event, it is suggested to configure server and media columns first so that the Network Camera will know what action shall be performed when a trigger is activated. Media Settings In Media Settings column, click Add to open the media setting page.
- Page 67 ■ File Name Prefix Enter the text that will be put in front of the file name. ■ Add date and time suffix to the file name Select this option to add date and time to the file name suffix. For example: Video Clip: Select to send video clips when a trigger is activated.
- Page 68 remove a media setting from the list, select a media name from the drop-down list and then click Delete. Note that only when the media setting is not being applied to an event setting can it be deleted. Server Settings In the Server column, click Add to open the server setting page.
- Page 69 FTP: Select to send the media to a FTP server when a trigger is activated. ■ Server address: Enter the domain name or IP address of the FTP server without ftp:// Example: myftpserver.net. ■ Server port By default, the FTP port server is set to 21. Also, it can be assigned with another port number between 1025 and 65535.
- Page 70 ■ Network storage location: Enter the path of the network storage. ■ Workgroup: Enter the workgroup for network storage. ■ User name: Enter the user name. ■ Password: Enter the password. To verify if the network storage settings are correctly configured, click Test. The result will be shown in a pop-up window.
- Page 71 Event name: Enter a descriptive name for the event setting. Enable this event: Select this option to enable this event setting. Priority: Select the relative importance of this event (High, Normal, and Low). Events with higher priority setting will be executed first. Detect next event after seconds: Enter the duration in seconds to pause motion detection after a motion is detected.
-
Page 72: Recording
the server when a trigger is activated. When completed, select Enable this event. Click Save to take effect and then click Close to quit this page. The new event name will appear in the event drop-down list on the application page. -
Page 73: System Log
Source: Select the recording source (stream 1 or stream 2). Recording Schedule: Specify the recording duration. ■ Select the days on weekly basis. ■ Select the time for recording in 24-hr time format. Destination: Specify a storage destination for the recorded video files. Note that the destination field is empty by default. -
Page 74: View Parameters
Follow the steps below to set up the remote log: 1. In the IP address text box, enter the IP address of the remote server. 2. In the port text box, enter the port number of the remote server. 3. When completed, select Enable remote log and click Save to take effect. Current Log This column displays the system’s log in chronological order. -
Page 75: Maintenance
Maintenance This chapter explains how to restore the Network Camera to factory default, upgrade firmware version, etc. Reboot This feature allows you to turn off and then turn on the Network Camera. It takes about one ~ two minutes to complete the process. - Page 76 Network Type: Select this option to retain the Network Type settings (please refer to Network Type section). Daylight Saving Time: Select this option to retain the Daylight Saving Time settings (please refer to System section) If none of the options is selected, all settings will be restored to factory default. The following message is displayed during the restoring process.
- Page 77 In the example below, the DST begins each year at 2:00 a.m. on the second Sunday in March and ends at 2:00 a.m. on the first Sunday in November. 3. In the Upload Column, click Browse… and specify the XML file. If the incorrect date and time is assigned, you will see the following warning message when uploading the file to the Network Camera.
- Page 78 Note that do not power off the Network Camera during the upgrade. Follow the steps below to upgrade firmware: 1. Download a new firmware file from LevelOne website. The file is in pkg file format. 2. Click Browse… and specify the firmware file.
-
Page 79: Joystick Settings
Joystick Settings This chapter explains how to remotely control the Network Camera with CAS-4200, a USB joystick (optional). It is easy to install and configure using USB interface in IE browser. Installation Connect the USB plug of the joystick to a USB port on your computer. Supported by the plug-in in the main page (Microsoft’s DirectX), once the plug-in in the main page is loaded, it will automatically detect if there is any joystick on the computer. - Page 80 1. Move your mouse cursor on the Live video window in the main page and click once with your right mouse button, which will pop up a menu of joystick settings. Click Joystick Settings to open a setting dialog. 2. If your joystick is functioning properly, it will show up on the drop-down list. Select the joystick you want to configure for your Network Camera, and then click Configure Buttons to open a Buttons configuration list to assign actions to the buttons on your joystick.
- Page 81 5. The Assigned Action (Snapshot) will appear beside Button 1 in the right column as the following diagram. Click Apply to enable this function. Note that a button can only be assigned with an action. 6. Press Button 1 on your joystick to test your setting. If the setting is successful, a snapshot window will pop up.
- Page 82 9. When completed, click OK to save the settings and quit the page of Burrons configuration or click Cancel without any change. NOTE ► If you want to assign Preset actions to your joystick, the preset locations should be set up in advance.
-
Page 83: Appendix
Appendix URL Commands of the Network Camera Overview For some customers who already have their own web site or web control application, Network Camera/Video server can be easily integrated through convenient URLs. This section specifies the external HTTP based application programming interface. - Page 84 Syntax: http://<servername>/cgi-bin/<subdir>[/<subdir>...]/<cgi>.<ext>[?<parameter>=<value>[&<parameter>=<value>...]] Example: Setting digital output #1 to active http://mywebserver/cgi-bin/dido/setdo.cgi?do1=1 Security level SECURITY SUB-DIRECTORY DESCRIPTION LEVEL anonymous Unprotected. 1 [view] anonymous, viewer, dido, camctrl 1. Can view, listen, talk to camera 2. Can control dido, ptz of camera 4 [operator] anonymous, viewer, dido, Operator’s access right can modify most of camera’s camctrl, operator...
- Page 85 If you omit this parameter, it will redirect to an empty page. (note: The return page can be a general HTML file(.htm, .html) or a LevelOne server script executable (.vspx) file. It can not be a CGI command. It can not have any extra parameters.
- Page 86 <parameter>=<value>\r\n [<parameter pair>] Only the parameters that you set and readable will be returned. Example: Set the IP address of server to 192.168.0.123 Request: http://myserver/cgi-bin/admin/setparam.cgi?network_ipaddress=192.168.0.123 Response: HTTP/1.0 200 OK\r\n Content-Type: text/html\r\n Context-Length: 33\r\n \r\n network.ipaddress=192.168.0.123\r\n Available parameters on the server Valid values: Valid values Description...
- Page 87 Indicate timezone and area -480: GMT-12:00 Eniwetok, Kwajalein timezoneindex -440: GMT-11:00 Midway Island, Samoa -400: GMT-10:00 Hawaii -489 ~ 529 -360: GMT-09:00 Alaska -320: GMT-08:00 Las Vegas, San_Francisco, Vancouver -280: GMT-07:00 Mountain Time, Denver -281: GMT-07:00 Arizona -240: GMT-06:00 Central America, Central Time, Mexico City, Saskatchewan -200: GMT-05:00 Eastern Time, New York, Toronto -201: GMT-05:00 Bogota, Lima, Quito, Indiana...
- Page 88 restore Restore the system parameters to default value after <value> <positive seconds. integer> reset Restart the server after <value> seconds if <value> is <positive non-negative. integer> restoreexceptnet <Any value> Restore the system parameters to default value except (ipaddress, subnet, router, dns1, dns2, pppoe). restoreexceptdst <Any value>...
- Page 89 user_i0_name string[64] User’s name of root user_i<1~20> string[64] User’s name _name user_i0_pass password [64] Root’s password user_i<1~20> password [64] User’s password _pass user_i0_privilege admin Root’s privilege user_i<1~20> viewer, User’s privilege _ privilege operator, admin Group: network Name Value Security Description (get/set) type lan,...
- Page 90 port 443, 1025~65535 https port Subgroup of network: rtsp Name Value Security Description (get/set) port 554, RTSP port 1025 ~ 65535 authmode disable, RTSP authentication mode basic, digest s0_accessname string[32] RTSP access name for stream 1 s1_accessname string[32] RTSP access name for stream 2 s0_audiotrack <integer>...
- Page 91 allow_i<0~9> 1.0.0.0 ~ 255.255.255.255 Allowed starting IP address for RTSP connection _start allow_i<0~9> 1.0.0.0 ~ 255.255.255.255 Allowed ending IP address for RTSP connection _end deny_i<0~9> 1.0.0.0 ~ 255.255.255.255 Denied starting IP address for RTSP connection _start deny_i<0~9> 1.0.0.0 ~ 255.255.255.255 Denied ending IP address for RTSP connection _end Group: videoin...
- Page 92 shutterpriority 0~15 Indicate exposure time when choosing shutter priority in “exposurecontrol” 0 => 1/2 1 => 1/4 2 => 1/8 3 => 1/15 4 => 1/30 5 => 1/60 6 => 1/90 7 => 1/125 8 => 1/250 9 => 1/500 10 =>...
- Page 93 gain 1~15 Indicate gain of input 1 => 0dB 2 => 2dB 3 => 4dB 4 => 6dB 5 => 8dB 6 => 10dB 7 => 12dB 8 => 14dB 9 => 16dB 10 => 18dB 11 => 20dB 12 => 22dB 13 =>...
- Page 94 s<0~(m-1)>_ Set maximum frame rate in fps (for MPEG-4). mpeg4_ 1 => 1 fps maxframe 2 => 2 fps 3 => 3 fps 5 => 5 fps 8 => 8 fps 10 => 10 fps 15 => 15 fps 30 (only for 20 =>...
- Page 95 s<0~(m-1)>_ 16000, Set AAC4 bitrate in bps aac4_bitrate 32000, 16000 => 16 Kbps 48000, 32000 => 32 Kbps 64000, 48000 => 48 Kbps 96000 64000 => 64 Kbps 128000 96000 => 96 Kbps 128000 => 128 Kbps s<0~(m-1)>_ 4750, Set AMR bitrate in bps gamr_bitrate 5150, 4750 =>...
- Page 96 <provider>_ string[64] Your user or email to login ddns service provider usernameemail <provider>_ string[64] Your password or key to login ddns service provider passwordkey <provider>_ string[128] The server name for safe100. (This field only exists for provider is servername customsafe100) Group: upnppresentation Name Value...
- Page 97 defaulthome 0 => user define home 1 => default home patrol_i<0~39>_ string[40] The name of patrol location name Group: capability Name Value Security Description (get/set) api_http_version 0200a The HTTP API version. bootuptime <positive integer> The server bootup time Number of IR interface <positive integer>...
- Page 98 protocol_spush_ <boolean> Indicate whether to support server mjpeg push motion jpeg protocol_snmp <boolean> Indicate whether to support snmp videoin_type 0 => Interlaced CCD 1 => Progressive CCD 2 => CMOS videoin_ <a list of the available Available resolutions list resolution resolution separates by comma>...
- Page 99 name string[40] The identification of this entry enable To enable or disable this event. 0 => Disable 1 => Enable priority Indicate the priority of this event. 0 => indicates low priority. 1 => indicates normal priority. 2 => indicates high priority. delay 1~999 Delay seconds before detect next event.
- Page 100 type email, Indicate the server type. ftp, email => email server. http, ftp => ftp server. http => http server. ns => network storage. http_url string[128] The url of http server to upload. http_username string[64] The username to login in the server. http_passwd string[64] The password of the user.
- Page 101 Name Value Security Description (get/set) name string[40] The identification of this entry enable To enable or disable this recoding. 0 => Disable 1 => Enable priority Indicate the priority of this recoding. 0 => low priority. 1 => normal priority. 2 =>...
- Page 102 http://<servername>/cgi-bin/dido/setdo.cgi?do1=<state>[&do2=<state>][&do3=<state>][&do4=<state>][&return=<return page>] Where state is 0, 1. “0” means inactive or normal state while “1” means active or triggered state. Parameter Value Description do<num> 0 => inactive, normal state 1 => active, triggered state return <return Redirect to the page <return page> after the parameter is assigned. The <return page> page>...
- Page 103 Query status of the digital output Note: This request requires the privilege of viewer. Method: GET/POST Syntax: http://<servername>/cgi-bin/dido/getdo.cgi?[do0][&do1][&do2][&do3] If no parameter is specified, all the status of digital output will be returned. Return: HTTP/1.0 200 OK\r\n Content-Type: text/plain\r\n Content-Length: <length>\r\n \r\n [do0=<state>]\r\n [do1=<state>]\r\n...
- Page 104 Return: HTTP/1.0 200 OK\r\n Content-Type: image/jpeg\r\n [Content-Length: <image size>\r\n] <binary JPEG image data> Account management Note: This request requires administrator privilege Method: GET/POST Syntax: http://<servername>/cgi-bin/admin/editaccount.cgi?method=<value>&username=<name>[&userpass=<value>][&privilege=<v [&return=<return page>] Parameter Value Description method Add an account to server. When using this method, “username” field is necessary. It will use default value of other fields if not specified.
- Page 105 Server will return the up-to-date system log. Return: HTTP/1.0 200 OK\r\n Content-Type: text/plain\r\n Content-Length: <syslog length>\r\n \r\n <system log information>\r\n Upgrade firmware Note: This request requires administrator privilege Method: POST Syntax: http://<servername>/cgi-bin/admin/upgrade.cgi Post data: fimage=<file name>[&return=<return page>]\r\n \r\n <multipart encoded form data> Server will accept the upload file named <file name>...
- Page 106 speedapp 1 ~ 5 Set the auto pan/patrol speed auto Auto pan patrol Auto patrol stop Stop camera zoom wide To zoom for larger view with current speed tele To zoom for farer view with current speed sethome define Set current position as home position default Using default home position calibrate...
- Page 107 Parameter Value Description Model system.firmwareversion Model name of server. Ex:IP3133-VVTK-0100a CapVersion MMmm, MM is major version from 00 ~ 99 The capability field version mm is minor version from 00 ~ 99 ex: 0100 Preset Locations Note: This request requires operator privilege Method: GET/POST Syntax: http://<servername>/cgi-bin/operator/preset.cgi?[channel=<value>][&addpos=<value>][&delpos=<value>][&return=<return...
- Page 108 adddeny Add a set of deny IP address range to server. Start and end parameters must be specified. If the index parameter is specified, it will try to add starting from index position. deleteallow Remove a set of allow IP address range from server. If start and end parameters are specified, it will try to remove the matched IP address.
-
Page 109: Technical Specifications
Technical Specifications Video Specifications Compression Mode MJPEG/MPEG4 dual stream Simultaneous dual-streaming MPEG-4 streaming over UDP, TCP, or HTTP MPEG-4 multicast streaming MJPEG streaming over HTTP Supports 3GPP mobile surveillance Max. Resolution 640x480 pixels at 30/25 fps Video Resolution Up to 30/25 frames at 176x144 Up to 30/25 frames at 320x240 Up to 30/25 frames at 640x480 Camera Specification... -
Page 110: Technology License Notice
Operating System Microsoft Windows 2000/XP/Vista Browser Mozilla, Firefox, Netscape, IE 6.x or above 3GPP Player Real Player 10.5 or above Quick Time 6.5 or above Networking Ports 1 x RJ-45 10/100 Mbps port Hardware & Environment 64MB SDRAM 8MB Flash ROM Digital Input/Output Connector 1xIn,1xOut Supported Protocols... - Page 111 RESPECT TO THE USE OF THIS PRODUCT, THE FOLLOWING LICENSORS’ PATENTS MAY APPLY: TELEFONAKIEBOLAGET ERICSSON AB: US PAT. 6192335; 6275798; 6029125; 6424938; 6058359. NOKIA CORPORATION: US PAT. 5946651; 6199035. VOICEAGE CORPORATION: AT PAT. 0516621; BE PAT. 0516621; CA PAT. 2010830; CH PAT.
-
Page 112: Gnu General Public License
GNU GENERAL PUBLIC LICENSE Version 2, June 1991 Copyright (C) 1989, 1991 Free Software Foundation, Inc. 59 Temple Place, Suite 330, Boston, MA 02111-1307 USA Everyone is permitted to copy and distribute verbatim copies of this license document, but changing it is not allowed. - Page 113 disclaimer of warranty; keep intact all the notices that refer to this License and to the absence of any warranty; and give any other recipients of the Program a copy of this License along with the Program. You may charge a fee for the physical act of transferring a copy, and you may at your option offer warranty protection in exchange for a fee.
- Page 114 conditions. You may not impose any further restrictions on the recipients' exercise of the rights granted herein. You are not responsible for enforcing compliance by third parties to this License. 7. If, as a consequence of a court judgment or allegation of patent infringement or for any other reason (not limited to patent issues), conditions are imposed on you (whether by court order, agreement or otherwise) that contradict the conditions of this License, they do not excuse you from the conditions of this License.
- Page 115 If you would like a copy of the GPL or other open source code in this software on a physical CD medium, LevelOne (Digital Data Communications) offers to mail this CD to you upon request, for a price of US$9.99 plus the cost of shipping.