Nordyne iQ Drive Installation Instructions Manual
Nordyne iq drive split system air conditioner - installation instructions
Hide thumbs
Also See for iQ Drive:
- User manual (16 pages) ,
- User manual (8 pages) ,
- User manual (20 pages)
Table of Contents
Advertisement
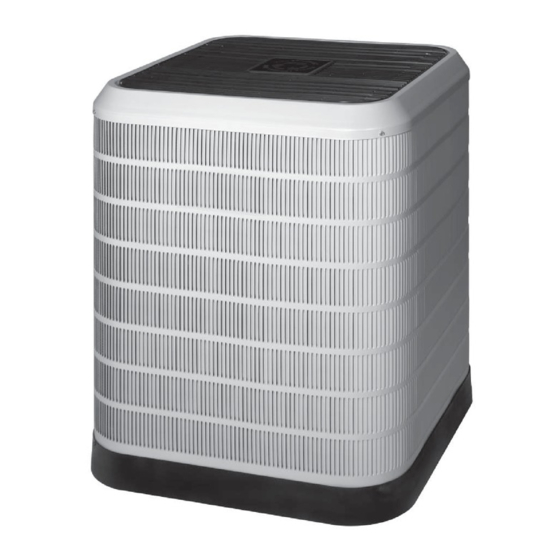
Installation Instructions
Split System Air Conditioner
®
The iQ Drive
air conditioner operates as part of a larger intercommunicating system which provides temperature, air fl ow,
and humidity control for a residence or other similarly sized building. This system includes this outdoor unit, the dedicated
iQ controller (thermostat), and an iQ system-compatible indoor unit, typically an air handler with electric strip heat or a
gas furnace. The system will function only if these components are matched and intended for use within this system. A
complete list of compatible equipment by model and serial number is available in NORDYNE document 709031, iQ Field
Wiring Installation Instruction. Accessory equipment which may be used with this system includes humidifi ers, electric or
electronic air cleaners, and U/V (ultraviolet) sterilizing lamps.
Refer to the System Operation section below for a complete description of how to use the various features of the system.
In addition to providing the means for operation, the controller also serves as the means for initial system confi guration and
setup, and it provides a considerable amount of information for troubleshooting the system and diagnosing problems.
OTHER REFERENCE DOCUMENTS
•
Installation instruction documents for indoor equipment (furnace or air handler, optional humidifi er, etc.)
•
iQ Field Wiring Installation Instruction, document 709031, provided in the iQ thermostat/controller kit
•
iQ Thermostat/Controller User's Manual, document 709063, provided in the iQ thermostat/controller kit
•
local wiring and building codes
•
Nordyne Application Guideline for Refrigerant Lines Over 75 Feet document 044B-0600
Advertisement
Table of Contents
Troubleshooting

Related Manuals for Nordyne iQ Drive


Summary of Contents for Nordyne iQ Drive
-
Page 1: Installation Instructions
The system will function only if these components are matched and intended for use within this system. A complete list of compatible equipment by model and serial number is available in NORDYNE document 709031, iQ Field Wiring Installation Instruction. Accessory equipment which may be used with this system includes humidifi ers, electric or electronic air cleaners, and U/V (ultraviolet) sterilizing lamps. -
Page 2: Table Of Contents
TABLE OF CONTENTS PREPARATION ..............................3 Slab Mounting ..............................3 Roof Mounting ..............................3 ELECTRICAL CONNECTIONS ........................... 3 Electrical Power Wiring ........................... 3 Control Circuit Wiring ............................4 Recheck Wiring ............................... 4 REFRIGERANT LINE CONNECTIONS ....................... 4 Line Design and Routing ..........................4 Brazing ................................ -
Page 3: Preparation
® • maximum elevation difference, compressor base to Before proceeding with installation of iQ Drive air conditioner indoor coil base (compressor higher): 50 feet An oil trap equipment, consult with the distributor and homeowner to is required for elevations exceeding 50 feet confi... -
Page 4: Control Circuit Wiring
Table II. Control Wiring to Outdoor iQ A/C Unit and source of the 24 VAC is located within the indoor unit (air ® handler or furnace). Refer to iQ Drive System Field Wiring Recheck Wiring Instructions, NORDYNE document 709031 shipped with the... -
Page 5: Brazing
Replace the stem caps and tighten. Proceed with will need to have an oil trap installed in the vapor line. Refer Refrigerant Charging section. to Nordyne Application Guideline for Refrigerant Lines Over 75 Feet (document 044B-0600) for piping details. WARNING A fi... -
Page 6: Alternate Procedure For Refrigerant Charging Based On Subcooling
Alternate Procedure for Refrigerant Charging Based on conditioning system. NOTE: This guideline is not intended to Subcooling: ® be a comprehensive substitute for proper iQ Drive system While charging based on weight is preferred, this method is training (required). acceptable. Use this method when the outdoor temperature is 60°F or higher to verify the correct charge in cooling mode. -
Page 7: Installer Settings
MENU Installer Settings The words under OUTDOOR SYSTEM and WITH describe ® Using procedures explained in iQ Drive training, go to the the system components as automatically detected by the INSTALLER SETTINGS menu screen. controller. Both entries under COMMUNICATION should show “OK”. -
Page 8: Accessories
3. Dealer Information Use the keys to select DEALER INFORMATION. O U T D O O R S Y S T E M A I R C O N D Press the key to enter the dealer information summary C A PA C I T Y ( T O N S ) screen, and submenus and screens. -
Page 9: The Service Information Screens
(speed), INTERMED(iate speed), and MIN (speed). MAX speed is the same as that used in charge mode. S E R V I C E T E S T S The screen backlight will blink red when anything but C H A R G E M O D E OFF is selected and saved. -
Page 10: Other Confi Guration Entries
F A U LT S TAT U S C O M M U N I C AT I O N D ATA A C T I V E F A U LT B L O W E R L O W P R E S S U R E S W I T C H O U T D O O R B A D F A U LT H I S T O R Y... -
Page 11: Auto Changeover Time
selection of programmable schedule versus non- • Press the key multiple times to return to the Main programmable Screen. usage of dehumidifi cation (enabled by default) humidity settings 2. Date and Time. usage of Smart Recovery (disabled by default) Setting date and time early in the installation process not only saves the homeowner from having to do it, but provides an •... -
Page 12: Dehumidifi Cation
SCHED EVENTS/DAY”, and “2 EVENTS/D BUSINESS”. In order to set the humidity setpoint(s), do the following: Then press the key to save the setting. (The difference between “2 EVENTS/D BUSINESS” and “2 SCHED • From the Main Screen, press the key to select EVENTS/DAY”... -
Page 13: System Operation: Quick Start
• Use the key to select OPTIONS, then press the 1. Install system hardware as described in the individual key to enter the Options screen. component installation instructions. • Use the key to select the value under SMART 2. Install power and control wiring to all system components, RECOVERY, then press the key to allow changing the including the controller, in accordance with the iQ Field... -
Page 14: System Diagnosis And Troubleshooting
TESTS from the INSTALLER SETTINGS menu. Follow Controller: the refrigerant charge adjustment procedure explained Normal - As soon as 24 vac power is applied, the blue above. backlight of the controller should light up. The “iQ” splash screen will display the software version. If the System 10. -
Page 15: Indoor Unit Interface Board
Abnormal –The red LED on the inverter is not lit. In this case, Indoor Unit Constant CFM Motor Control Board: power is not being provided to the inverter. Check that line Normal – The red LED near the top of the board should voltage is being applied to the bottom of the contactor. -
Page 16: Maintenance
The Outdoor Fan Does Not Shut Off When the Compressor MAINTENANCE Does IMPORTANT: • For normal operation the outdoor fan is designed to run for 30 seconds after the compressor shuts off. Be certain the electrical power to the outdoor unit and the furnace or air handler In Cooling, the Blower Slows Down and the Unit Is Not Responding to Room Temperature is disconnected before doing the following... -
Page 17: Figures And Diagrams
FIGURES DIAGRAMS... - Page 18 EXTERIOR WALL 18" 18" 18" CONTROL PANEL 18" Figure 1. Unit Envelope Dimensions...
- Page 19 Red Inverter Inverter (Black Plastic Case) Contactor Low Voltage Control Wiring Compartment Figure 2. iQ Drive Air Conditioning Control Panel...
- Page 20 Figure 3. Power Wiring Connections...
- Page 21 Figure 4. iQ Drive Air Conditioning Wiring Diagram...
- Page 22 Figure 5. Low Voltage Control Wiring Compartment...
- Page 23 Wire Color Scheme 2 24 VAC CONTROL PANEL iQ OUTDOOR UNIT iQ COMMUNICATIONS TO INVERTER TO CONTACTOR COIL THROUGH YEL/BLK HIGH PRESSURE SWITCH Wire Color Scheme 1 Wire Color Scheme 1 24 VAC Figure 6. iQ Drive Air Conditioning Control Wiring Connections...
- Page 24 SINGLE LOOP SHOWN Figure 7. Wire Looping Through a Toroidial Choke Liquid Service Valve Vapor Service Valve Figure 8. Service Ports and Valves (Below Control Panel)
- Page 25 2, 3, and 4 Ton IQ Drive Charging Chart Remove refrigerant when above the curve Add refrigerant when below the curve Liquid Temperature (F) Figure 9. Charging Chart for iQ Drive Air Conditioning...
- Page 28 INSTALLER: PLEASE LEAVE THESE INSTALLATION INSTRUCTIONS WITH THE OWNER. ¢709079P¤ 7090790 Specifi cations and illustrations subject to change without notice and without incurring obligations. O’Fallon, MO 7090790 Printed in U.S.A. (08/09)