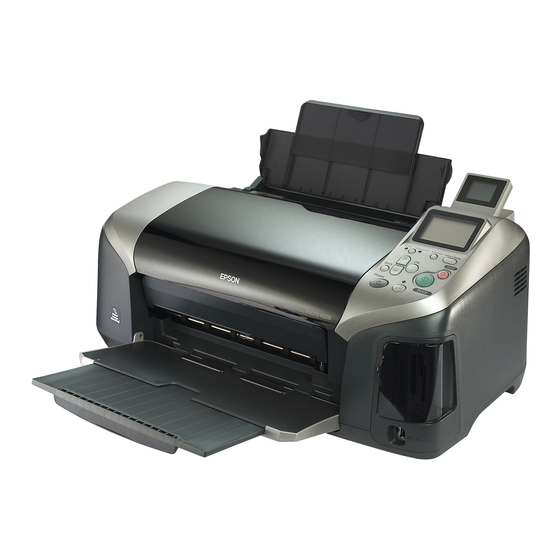
Epson Stylus Photo R320 Service Manual
Color inkjet printer
Hide thumbs
Also See for Stylus Photo R320:
- Manual (108 pages) ,
- Printer basics manual (90 pages) ,
- Product information (13 pages)
Table of Contents
Advertisement
Quick Links
Advertisement
Table of Contents
Troubleshooting

Related Manuals for Epson Stylus Photo R320


Summary of Contents for Epson Stylus Photo R320
-
Page 1: Service Manual
SERVICE MANUAL Color Inkjet Printer EPSON Stylus Photo R320 SEIJ04005... - Page 2 The contents of this manual are subject to change without notice. All effort have been made to ensure the accuracy of the contents of this manual. However, should any errors be detected, SEIKO EPSON would greatly appreciate being informed of them.
- Page 3 REPAIRS ON EPSON PRODUCT SHOULD BE PERFORMED ONLY BY AN EPSON CERTIFIED REPAIR TECHNICIAN. MAKE CERTAIN THAT THE SOURCE VOLTAGES IS THE SAME AS THE RATED VOLTAGE, LISTED ON THE SERIAL NUMBER/RATING PLATE. IF THE EPSON PRODUCT HAS A PRIMARY AC RATING DIFFERENT FROM AVAILABLE POWER SOURCE, DO NOT CONNECT IT TO THE POWER SOURCE.
-
Page 4: About This Manual
Provides preventive maintenance procedures and the lists of C A U T I O N condition that, if not strictly observed, could result in damage to, Epson-approved lubricants and adhesives required for or destruction of, equipment. servicing the product. APPENDIX... - Page 5 Revision Status Revision Issued Date Description September 3, 2004 First Release September 27, 2004 Revised Contents [Chapter 2] • Checkpoint (page 37) : Newly added • Page 47, 48, 52, 54, 55, 68, 69 : Corrected errors • Adjustment item for PF Timing Belt (page 80) : Deleted...
-
Page 6: Table Of Contents
EPSON Stylus Photo R320 Revision B CONTENTS Chapter 1 TROUBLESHOOTING Chapter 3 ADJUSTMENT 1.1 Overview ......................8 3.1 Adjustment Items and Overview ................ 83 3.1.1 Servicing Adjustment Item List ..............83 1.2 Troubleshooting with LED/LCD Indications and Status Monitor 3 Message ..9 3.1.2 Replacement Part-Based Adjustment Priorities ........ - Page 7 C H A P T E R TROUBLESHOOTING...
-
Page 8: Chapter 1 Troubleshooting
EPSON Stylus Photo R320 Revision B 1.1 Overview Table 1-1. Motor, Coil Resistance Motor Location Check Point Resistance This chapter describes how to identify troubles in two levels: unit level repair and PF Motor ± Pin 1 and 3 component level repair. Refer to the flowchart in this chapter to identify the defective 3.0Ω... -
Page 9: Troubleshooting With Led/Lcd Indications And Status Monitor 3 Message
EPSON Stylus Photo R320 Revision B 1.2 Troubleshooting with LED/LCD Indications and Status Monitor 3 Message This section describes the LED/LCD indication, the STM3 message and the error condition when the printer detects an error in each operation such as the power on, the paper loading/feeding and the ink absorption operation. - Page 10 2. The Ink Cartridge is faulty. (CSIC memory Ink out data error) Black: T0481 Ink Out Error For best results, use genuine EPSON (Note) ink. Even in the Ink Out Error status, a small amount of ink still remains in the Ink Cartridge to protect the Print Head from printing without ink.
- Page 11 EPSON Stylus Photo R320 Revision B Table 1-3. LED/LCD Indication and STM3 Maintenance Printer status LCD indication STM3 message Condition for error detection LED indication This error is detected when the leading edge of Paper load error. Load correctly and...
- Page 12 EPSON Stylus Photo R320 Revision B Table 1-3. LED/LCD Indication and STM3 Maintenance Printer status LCD indication STM3 message Condition for error detection LED indication This error is detected when ; 1. Paper is present in "ASF Assy.", and "CDR Guide Assy."...
- Page 13 EPSON Stylus Photo R320 Revision B Table 1-3. LED/LCD Indication and STM3 Maintenance Printer status LCD indication STM3 message Condition for error detection LED indication This error is detected when ; 1. "Carriage Unit" cannot move correctly by the System error. Press and hold both external force in each operation.
-
Page 14: Unit Level Troubleshooting
PC. Cable". displayed on STM3 even transferring the printing job to the printer. 1. Check if the Stylus Photo R320 Printer Driver is used 1. Install the Stylus Photo R320 Printer Driver on Printer Driver for the printer job. - Page 15 EPSON Stylus Photo R320 Revision B Table 1-5. Check Points for Error Before the Initial Ink Charge, Error Before Ink Cartridge Replacement Cleaning and No Ink Cartridge Error Occurrence Timing Faulty Part/ Phenomenon Detail Check Point Remedy Position of CR Part Name 1.
- Page 16 EPSON Stylus Photo R320 Revision B Table 1-6. Check Points for Paper Out Error to Each Phenomenon Occurrence Timing Faulty Part/ Phenomenon Detail Check Point Remedy Position of CR Part Name 1. Check if "Roller, Retard Assy." operates properly while 1.
- Page 17 EPSON Stylus Photo R320 Revision B Table 1-6. Check Points for Paper Out Error to Each Phenomenon Occurrence Timing Faulty Part/ Phenomenon Detail Check Point Remedy Position of CR Part Name 1. Check if "Compression Spring, 2.36" of "Lever, Change"...
- Page 18 EPSON Stylus Photo R320 Revision B Table 1-7. Check Points for Paper Jam Error to Each Phenomenon Occurrence Faulty Part/ Timing Phenomenon Detail Check Point Remedy Part Name Position of CR 1. Check if "PF Motor Connector Cable" is connected to 1.
- Page 19 EPSON Stylus Photo R320 Revision B Table 1-7. Check Points for Paper Jam Error to Each Phenomenon Occurrence Faulty Part/ Timing Phenomenon Detail Check Point Remedy Part Name Position of CR 1. Check if "Torsion Spring, 0.22" for "PE Sensor Lever" is 1.
- Page 20 EPSON Stylus Photo R320 Revision B Table 1-7. Check Points for Paper Jam Error to Each Phenomenon Occurrence Faulty Part/ Timing Phenomenon Detail Check Point Remedy Part Name Position of CR 1. Check if "Paper Guide, Upper" has not come off from 1.
- Page 21 EPSON Stylus Photo R320 Revision B Table 1-8. Check Points for CD/DVD Guide Error to Each Phenomenon Occurrence Timing Faulty Part/ Phenomenon Detail Check Point Remedy Position of CR Part Name 1. Check if the contact point of "Housing, Middle" with 1.
- Page 22 EPSON Stylus Photo R320 Revision B Table 1-9. Check Points for CD/DVD Tray Error to Each Phenomenon Occurrence Timing Faulty Part/ Phenomenon Detail Check Point Remedy Position of CR Part Name 1. Check if the contact point of "CDR Tray" with "CDR 1.
- Page 23 EPSON Stylus Photo R320 Revision B Table 1-10. Check points for Memory Card Error to Each Phenomenon Occurrence Timing Faulty Part/ Phenomenon Detail Check Point Remedy Position of CR Part Name 1. Check if the Memory Card is compliant. 1. Replace the Memory Card with a compliant one.
- Page 24 EPSON Stylus Photo R320 Revision B Table 1-11. Check Points for Fatal Error to Each Phenomenon Occurrence Timing Faulty Part/ Phenomenon Detail Check Point Remedy Position of CR Part Name 1. Check if "CR Motor Connector Cable" is connected to 1.
- Page 25 EPSON Stylus Photo R320 Revision B Table 1-12. Check Points When More Than One Paper is Fed Constantly Without LED/STM3's Error Notifications Occurrence Timing Faulty Part/ Phenomenon Detail Check Point Remedy Position of CR Part Name 1. Check if "Roller, Retard Assy." works correctly while 1.
- Page 26 EPSON Stylus Photo R320 Revision B Table 1-14. Check Points for Defective Print Quality Occurrence Timing Faulty Part/ Phenomenon Detail Check Point Remedy Position of CR Part Name 1. Check if there is any foreign matter on the sealing rubber 1.
- Page 27 EPSON Stylus Photo R320 Revision B Table 1-14. Check Points for Defective Print Quality Occurrence Timing Faulty Part/ Phenomenon Detail Check Point Remedy Position of CR Part Name 7. Check if "Slider Lock Lever" is damaged. 7. Replace "Ink System" with a new one.
- Page 28 EPSON Stylus Photo R320 Revision B Table 1-14. Check Points for Defective Print Quality Occurrence Timing Faulty Part/ Phenomenon Detail Check Point Remedy Position of CR Part Name 1. Check if the surface of "Frame EJ Assy." is precisely 1. Replace "Frame EJ Assy." with a new one.
- Page 29 EPSON Stylus Photo R320 Revision B Table 1-14. Check Points for Defective Print Quality Occurrence Timing Faulty Part/ Phenomenon Detail Check Point Remedy Position of CR Part Name 1. Check if "Star Wheels" have come off. 1. Reassemble "Star Wheels" correctly.
- Page 30 EPSON Stylus Photo R320 Revision B Table 1-14. Check Points for Defective Print Quality Occurrence Timing Faulty Part/ Phenomenon Detail Check Point Remedy Position of CR Part Name 1. Check if there is any ink adhesion on "Frame EJ Assy.".
- Page 31 C H A P T E R DISASSEMBLY AND ASSEMBLY...
-
Page 32: Overview
EPSON Stylus Photo R320 Revision B 2.1 Overview Avant de commencer, assure vous que l’imprimante soit eteinte W A R N I N G et que le cordon d’alimentation soit debranche. This section describes procedures for disassembling the main components of Stylus Veillez a jeter les piles usagees selon le reglement local. -
Page 33: Tools
EPSON Stylus Photo R320 Revision B 2.1.2 Tools 2.1.3 Pre-Shipment Checks Use only specified tools to avoid damaging the printer. When returning this product to the user after servicing, check that the work is complete using the following table. Table 2-1. Tools Table 2-2. - Page 34 EPSON Stylus Photo R320 Revision B Table 2-2. Service Completion Pre-Shipment Check List Classification Item Check Point Status Checked Are all the lubrication made at the specified points? Not necessary Specified Lubrication Lubrication Checked Is the amount of lubrication correct?
-
Page 35: And How To Ensure The Quality Of Reassembled Product
EPSON Stylus Photo R320 Revision B 2.2 Caution regarding assembling/disassembling Management of the reference position for installation the printer mechanism, and how to ensure the [Reason] Accurate installation for each component of "Printer Mechanism" is on a basis quality of reassembled product of "Housing, Lower". - Page 36 EPSON Stylus Photo R320 Revision B How to install "ASF Assy.", "Main Board" and "Paper Guide, Upper" [Reason] When installing these three components, too much force can be given to "Frame, Main", therefore, it may be deformed and cause the defective print/ operation.
-
Page 37: Disassembly
EPSON Stylus Photo R320 Revision B 2.3 Disassembly The following flowchart shows the order of disassembling procedure. When disassembling any unit, refer to the page number shown in the flowchart. START C H E C K Since we used a mass production trial model for EHC destination... -
Page 38: Removing Paper Support Assy
EPSON Stylus Photo R320 Revision B 2.3.1 Removing Paper Support Assy. Parts/Units which should be removed before removing "Paper Support Unit" None External View Procedure for Removing Release the dowels (x2) which secure "Paper Support Assy.". Then remove Paper Support Assy. -
Page 39: Removing Preview Monitor Unit
EPSON Stylus Photo R320 Revision B 2.3.2 Removing Preview Monitor Unit Parts/Units which should be removed before removing "Preview Monitor Unit" External View None Procedure for Removing Preview Monitor Unit C.B.P 3x8 (2-4kgf•cm) Raise the "Preview Monitor Unit". Remove the screw(x1) which secure "Preview Monitor Unit". -
Page 40: Removing Housing, Upper
EPSON Stylus Photo R320 Revision B 2.3.3 Removing Housing, Upper Parts/Units which should be removed before removing "Housing, Upper" Paper Support Assy./Preview Monitor Unit External View Procedure for Removing Housing, Upper Printer Cover C.B.P 3x8 (4-6kgf•cm) Release the dowels(x2) of "Printer Cover". Then remove the "Printer Cover"... -
Page 41: Removing Housing, Middle
EPSON Stylus Photo R320 Revision B 2.3.4 Removing Housing, Middle Procedure for Removing Pull out "Panel FFC" from "Ferrite Core". External View Take off the two-sided tape which fixing the "Panel FFC" from "Housing Fixed spring, Core Housing, Middle C.B.S 3x8 (6-8kgf•cm) Middle". - Page 42 EPSON Stylus Photo R320 Revision B When removing "Housing, Middle", the grounding spring may Make sure that "Panel FFC" is securely set and it is not reaching detach and drop from "Main Board Unit". If this occurs, the upper edge of the rib of "Housing, Middle" as shown in the reattach it to its original position referring to the following figure.
-
Page 43: Removing Porous Pad, Paper Guide, Front, Left, Support
EPSON Stylus Photo R320 Revision B 2.3.5 Removing Porous Pad, Paper Guide, Front, Pars/Units which should be removed before removing "Porous Pad, Paper Guide, Front" Left, Support Paper Support Assy./Preview Monitor Unit/Housing, Upper"/"Housing, Middle External View Procedure for Removing Remove the following 3 types of porous pads from "Paper Guide, Front"... - Page 44 EPSON Stylus Photo R320 Revision B Reinstalling "Porous Pad, Paper Guide, Front"/"Porous Pad, Paper Guide, Front, Support" Fold perpendicularly left and right sides of "Porous Pad, Paper Guide, Front, Support" at the marks and install it to "Paper Guide, Front". Make sure that the slit engages with the rib located on the side of "Paper Guide, Front"...
-
Page 45: Removing Panel Board
EPSON Stylus Photo R320 Revision B 2.3.6 Removing Panel Board Parts/Units which should be removed before removing "Panel Board" Paper Support Assy./Preview Monitor Unit/Housing, Upper External View Procedure for Removing Board Assy., Panel Remove the screws (x4) which secure "Board Assy., Panel". Then, remove "Board Assy., Panel". -
Page 46: Removing Stacker Assy
EPSON Stylus Photo R320 Revision B 2.3.7 Removing Stacker Assy. Parts/Units which should be removed before removing "Stacker Assy." Paper Support Assy./Preview Monitor Unit/Housing, Upper/Housing, Middle External View Procedure for Removing Release the dowel which secures "Stacker Assy." by using a flat-blade screwdriver or alike. -
Page 47: Removing Main Board
EPSON Stylus Photo R320 Revision B 2.3.8 Removing Main Board Parts/Units which should be removed before removing "Main Board" Paper Support Assy./Preview Monitor Unit/Housing, Upper/Housing, Middle External View Procedure for Removing Main Board Disconnect the connector cables below from "Main Board". - Page 48 EPSON Stylus Photo R320 Revision B External View Remove the screws (x2) which secure "Housing, Support Slot Assy.". Then, remove "Housing, Support Slot Assy.". Housing, Support Slot Assy. Remove the screw(x1) which secure "Positioning spring, M/B". Then remove C.B.P 3x6 (4-6kgf•cm) the "Positioning spring, M/B".
- Page 49 EPSON Stylus Photo R320 Revision B Reattaching the Main Board Assy When having replaced "Main Board", implement the A D J U S T M E N T R E Q U I R E D adjustment in the following order. (Refer to Chapter 3 Connector cable for "Star Wheels/CDR Sensor"...
-
Page 50: Removing Asf Assy
EPSON Stylus Photo R320 Revision B 2.3.9 Removing ASF Assy. Parts/Units which should be removed before removing "ASF Assy." Paper Support Assy./Preview Monitor Unit/Housing, Upper/Housing, Middle/ External View Main Board Unit Procedure for Removing C.B.S 3x6 (5-7kgf.cm) C.B.S (P4) 3x8 (8-10kgf•cm) C.B.S (P4) 3x8 (5-7kgf•cm) - Page 51 EPSON Stylus Photo R320 Revision B External View Open "Hopper" and then remove "Compression Spring, 2.51". Bow slightly down "Paper Back Lever" and release the dowels (x2) on the both sides in the order of . Then, remove "Paper Back Lever".
- Page 52 EPSON Stylus Photo R320 Revision B When reassembling "ASF Assy." Reinstalling "ASF Assy." Make sure that "Extension Spring, 0.45" is hooked on Install "Compression Spring, 2.51" on "Hopper", then "Frame, ASF" and "Roller, Retard Assy.". check if "Hopper" moves smoothly.
-
Page 53: Removing Holder, Shaft Assy
EPSON Stylus Photo R320 Revision B 2.3.10 Removing Holder, Shaft Assy. Parts/Units which should be removed before removing "Holder, Shaft Assy." Paper Support Assy./Preview Monitor Unit/Housing, Upper/Housing, Middle/ External View Main Board Unit/ ASF Assy. Cable, Head Procedure for Removing Move "Carriage Unit"... - Page 54 EPSON Stylus Photo R320 Revision B External View Removing "LD Roller" Release the dowels (x2) which secure "Paper, Block". Then, remove "Paper, Paper, Block Block". Release the dowels (x2) which secure "Shaft, LD Roller". Then, remove Dowel Dowel "Shaft, LD Roller" and "Clutch" together from "Holder, Shaft, LD Roller".
- Page 55 EPSON Stylus Photo R320 Revision B Reinstalling "Clutch" Reinstalling "Holder, Shaft Assy." Make sure that the dowel of "Shaft, LD Roller" is fitted in Check if the hooks (x2), the dowel and the ribs (x5) of the installing hole of "Clutch".
-
Page 56: Removing Cr Motor
EPSON Stylus Photo R320 Revision B 2.3.11 Removing CR Motor Procedure for Removing Disconnect the connector cable of "CR Motor" from the connector (CN8) of External View "Main Board". Release the carriage lock with the tweezers or alike, then move "Carriage Carriage Unit Unit"... -
Page 57: Removing Apg Assy
EPSON Stylus Photo R320 Revision B 2.3.12 Removing APG Assy. Parts/Units which should be removed before removing "APG Assy." Paper Support Assy./Preview Monitor Unit/Housing, Upper/Housing, Middle External View Procedure for Removing Disconnect the connector cable of "PG Motor" from CN7 of "Main Board". - Page 58 EPSON Stylus Photo R320 Revision B Make sure that the hooks (x2) and the dowels (x2) of "APG Assy." are securely attached to "Frame, Main". Check if the part indicated in the following figure is inserted in the slits of "Frame, Main".
-
Page 59: Removing Print Head
EPSON Stylus Photo R320 Revision B 2.3.13 Removing Print Head Slightly inflect the lower part of "Holder, FFC", release the hooks (x3) by sliding it downward. Then, remove "Holder, FFC". External View Release the hooks (x2) which secure "Holder, IC", and remove "Holder, IC"... -
Page 60: Removing Carriage Unit
EPSON Stylus Photo R320 Revision B 2.3.14 Removing Carriage Unit Parts/Units which should be removed before removing "Carriage Unit" Paper Support Assy./Preview Monitor Unit/Housing, Upper/Housing, Middle/ External View Main Board Unit/APG Assy./Print Head Procedure for Removing Guide Plate, CR Remove "Fixed Spring, CR Shaft, Left" by releasing it from the hook of "Frame, Main". - Page 61 EPSON Stylus Photo R320 Revision B External View Remove the E ring, "Holder, Scale Right" and "Cam, CR, Right" from the right side of "CR Guide Shaft". E Ring Holder, Scale Left Bushing, Holder, Scale, Right Remove the screw which secures "Bushing, Parallel Adjust, Right", Then,...
- Page 62 EPSON Stylus Photo R320 Revision B External View 16. Remove the screw which secures "Bushing, Parallel Adjust, Left". Then, remove "Bushing, Parallel Adjust, Left". Bushing, Parallel C.B.S (P4) 3x6 Holder, FFC ; B 17. Remove "Timing Belt" from "Carriage Unit".
- Page 63 EPSON Stylus Photo R320 Revision B External View Removing "PW Sensor Board" Release the hooks (x3) which secure "Cap, PW Sensor". Then, remove "Cap, PW Sensor". Cap, PW Sensor PW Sensor Board C A U T I O N Connector When removing "Cap, PW Sensor", "PW Sensor Board"...
- Page 64 EPSON Stylus Photo R320 Revision B Reinstalling "Guide, IC" Reinstalling "Carriage Unit" Screw in the order as shown in the figure. Check if "Timing Belt" is correctly set to the installing groove of "Carriage Unit". Reinstalling "CSIC Board" Check if "Grounding Plate, Head" is installed to the proper Check if "CSIC Board"...
- Page 65 EPSON Stylus Photo R320 Revision B When replacing the following parts or components with new A D J U S T M E N T R E Q U I R E D ones, apply specified grease in its adequate dose. (Refer to Chapter 4 "MAINTENANCE")
-
Page 66: Removing Paper Guide, Upper
EPSON Stylus Photo R320 Revision B 2.3.15 Removing Paper Guide, Upper Parts/Units which should be removed before removing "Paper Guide, Upper" External View Paper Support Assy./Preview Monitor Unit/Housing, Upper/Housing, Middle/ Main Board Unit/ASF Assy./Holder, Shaft Assy. Paper Guide, Upper Procedure for Removing Torsion Spring, 122.2... -
Page 67: Removing Printer Mechanism/Housing, Lower
EPSON Stylus Photo R320 Revision B 2.3.16 Removing Printer Mechanism/ Housing, Lower External View 2 ± 1mm C.B.S 3x6 (6-8kgf•cm) C.B.P 3x10 (6-8kgf•cm) C.B 3x6 (4-5kgf•cm) Acetate Tape Hook Hooks Handling Position C.B.P 3x8 (4-5kgf•cm) Paper Guide, CDR C.B.P 3x10 (6-8kgf•cm) Figure 2-45. - Page 68 EPSON Stylus Photo R320 Revision B When lifting up "Printer Mechanism", "Lever, Change" and Reinstalling "Printer Mechanism" C A U T I O N "Combination Gear, 27.2, 19.2" may detach and drop. Take care For this printer, "Housing, Lower" is the standard to not to drop and damage them.
- Page 69 EPSON Stylus Photo R320 Revision B Make sure that "Waste Ink Pads" (x6) are set correctly to the rib and the dowel of "Housing, Lower". Waste Ink Pad, Upper (Top) Waste Ink Pad, Small Waste Ink Pad, Lower (Bottom) Figure 2-49. Reinstalling "Waste Ink Pads" (2) After checking "Waste Ink Tube"...
- Page 70 EPSON Stylus Photo R320 Revision B Screw "Printer Mechanism" and "Paper Guide, CDR" in the order as shown in the figure. Make sure that "Waste Ink Tube" is not squashed or pressed. Check if "Cap Assy." moves smoothly. When having replaced "Waste Ink Pads" with new ones,...
-
Page 71: Removing Power Supply Unit
EPSON Stylus Photo R320 Revision B 2.3.17 Removing Power Supply Unit Procedure for Removing Remove the screw which secures "Power Supply Unit". Then, Remove External View "Power Supply Unit". Remove the screws (x5) which secure "Shield Plate, Upper". Shield Plate, Upper Release the hooks (x2) which secure "Shield Plate, Upper", and then remove... -
Page 72: Removing Cdr Guide Assy
EPSON Stylus Photo R320 Revision B 2.3.18 Removing CDR Guide Assy. Hooks External View C.B.P 3x6 (5-7kgf•cm) Support Plate, Frame, Main C.B.S 3x6 (7-9kgf•cm) CDR Guide, Lower Hooks Figure 2-53. Removing "CDR Guide Assy." (2) Acetate Tape Connector Cable Parts/Units which should be removed before removing "CDR Guide Assy."... - Page 73 EPSON Stylus Photo R320 Revision B External View Remove "Compression Spring, 5.1" and "Lock, Stacker" from "CDR Guide, Upper". Release the connector cable of "Star Wheel/CDR Sensor" from the groove of "CDR Guide, Upper". Reinstalling "Star Wheel/CDR Sensor" Match the Shaft (x2) of "CDR Guide, Upper" and the positioning hole of "Star Wheel/CDR Sensor".
-
Page 74: Removing Ink System
EPSON Stylus Photo R320 Revision B 2.3.19 Removing Ink System Parts/Units which should be removed before removing "Ink System" Paper Support Assy./Preview Monitor Unit/Housing, Upper/Housing, Middle/ External View Main Board Unit/ASF Assy./Holder, Shaft Assy./Printer Mechanism Procedure for Removing Support Plate,... - Page 75 EPSON Stylus Photo R320 Revision B External View Remove "Extension Spring, 0.441" from the hooks of "Slider, Cap" and "Frame, Cap" by using the tweezers. 10. Remove "Extension Spring, 0.788" from the hooks of "Lever, Lock, Slider" Lever, Lock, Slider...
- Page 76 EPSON Stylus Photo R320 Revision B Set all of the gears on the shaft of "Pump Frame" correctly, and then check if they move smoothly. Make sure that the ink tube is not squashed or pressed. Install the ink tube to the grooves (x2) at the bottom surface of "Cap Frame".
-
Page 77: Removing Paper Guide, Front/Roller Ej Assy
EPSON Stylus Photo R320 Revision B 2.3.20 Removing Paper Guide, Front/Roller EJ Assy. Parts/Units which should be removed before removing "Paper Guide, Front"/"Roller EJ Assy." External View Paper Support Assy./Preview Monitor Unit/Housing, Upper/Housing, Middle/ Main Board Unit/ASF Assy./Holder, Shaft Assy./APG Assy./Print Head/ Spur Gear,37.242... - Page 78 EPSON Stylus Photo R320 Revision B External View Remove "Extension Spring, Push Up, Plate, Right" from the hooks (x2) of "Guide, Shaft, Frame EJ, Right". Guide, Shaft, Frame EJ, Right 10. Release the hook which secures "Paper Guide, Front", then remove "Paper Guide, Front".
- Page 79 EPSON Stylus Photo R320 Revision B External View 12. Remove "Grounding Spring, EJ Left (Right)" from "Roller EJ Assy.". 13. Release the dowels of both left and right "Bushing, 5" which secure "Roller EJ Assy.", then turn them in the direction of the arrow.
- Page 80 EPSON Stylus Photo R320 Revision B Reinstalling "Paper Guide, Front" When replacing "Roller EJ Assy.", apply G-26 grease in the A D J U S T M E N T R E Q U I R E D adequate dose to the specified points.
-
Page 81: Removing Pf Motor
EPSON Stylus Photo R320 Revision B 2.3.21 Removing PF Motor Procedure for Removing Remove "PF Timing Belt" from "Spur Gear, 37.242", then remove "Spur External View Gear, 41.48". Spur Gear, 37.242 Remove "Compression Spring, 1.27" and "Holder, Idle Roller" together with PF Timing Belt "Timing Belt". - Page 82 C H A P T E R ADJUSTMENT...
-
Page 83: Adjustment Items And Overview
EPSON Stylus Photo R320 Revision B 3.1 Adjustment Items and Overview This chapter describes adjustments to be made after the disassembly/reassembly of this product. 3.1.1 Servicing Adjustment Item List The adjustment items of this product are as follows. For details of the adjustment items, refer to the detailed procedures and sketches of the adjustment items. - Page 84 EPSON Stylus Photo R320 Revision B Table 3-1. Adjustment Items Function Item Purpose Method Outline Tool Used Media First Dot This adjustment is made to correct the First Dot Position in the Select and execute this function in the exclusive servicing program.
- Page 85 Paper (A4) Paper Print program CD-R Print Check if the center position of CDR is correct. This pattern is used to make a simple print check at the EPSON Exclusive Sheet, CD, service company. servicing Dummy program...
-
Page 86: Replacement Part-Based Adjustment Priorities
EPSON Stylus Photo R320 Revision B 3.1.2 Replacement Part-Based Adjustment Priorities Note: "Required" in this table indicates the adjustment items that must be implemented when the corresponding parts/units have been removed or replaced. "Recommended", on the other hand, indicates those which are recommended the adjustment after removing or replacing The following table shows the adjustment items and their order for the replacement them. - Page 87 EPSON Stylus Photo R320 Revision B Performance Priority Offset Input Head EEPROM Market USB ID Waste Ink Head ID First dot PW Sensor Bi-d for CR Motor Ink Charge Angular Data Copy Setting Input Pad Counter Input Adjustment Adjustment Adjustment...
-
Page 88: Adjustment By Using Adjustment Program
EPSON Stylus Photo R320 Revision B 3.2 Adjustment by using adjustment program 3.2.1 Market Setting [Adjustment Procedure] The procedures of the adjustment items will be explained here. The intended item is as follows. Select the Market Setting of the Adjustment Program. -
Page 89: Head Angular Adjustment
EPSON Stylus Photo R320 Revision B 3.2.4 Head Angular Adjustment 3.2.5 Bi-d Adjustment [Adjustment Procedure] [Adjustment Procedure] Select Head Angular Adjustment in the Adjustment Program. Select Bi-D Adjustment in the Adjustment Program. Click the [Print] button to print Head Angular Adjustment Pattern. -
Page 90: Pw Sensor Adjustment
EPSON Stylus Photo R320 Revision B 3.2.6 PW Sensor Adjustment 3.2.7 First Dot Adjustment [Adjustment Procedure] [Adjustment Procedure] Select PW Sensor Adjustment in the Adjustment Program. Select First Dot Adjustment in the Adjustment Program. Click the [Print] button to print PW Sensor Adjustment Pattern. -
Page 91: Offset Input For Cr Motor Calorific Limitation
EPSON Stylus Photo R320 Revision B 3.2.8 Offset Input for CR Motor Calorific Limitation [Adjustment Procedure] Select Offset Input for CR Motor Calorific Limitation in the Adjustment Program. Check each box of the replaced parts/units checklist and then click the [OK] button. -
Page 92: Adjustment Except Adjustment Program
EPSON Stylus Photo R320 Revision B 3.3 Adjustment Except Adjustment Program [Adjustment Procedure] Make both sides of the two Thickness Gauge (1.15mm and 1.31mm) clean by Following is adjustment except Adjustment Program. wiping with Bemcot with a little alcohol. To make the PG position minus (-), turn the gear of "APG Assy." and match the 3.3.1 PG Adjustment... - Page 93 EPSON Stylus Photo R320 Revision B Move "Carriage Unit" to the left edge of the printer, then set the Thickness Gauge Remove the Thickness Gauge and move "Carriage Unit" to the right edge. Then, (1.15mm) on the left ribs (X3) of "Paper Guide, Front".
- Page 94 EPSON Stylus Photo R320 Revision B After finishing PG Adjustment on the right, move "Carriage Unit" to the left edge 11. Check PGs on both the left and right according to the flowchart in the Figure 3-12. again, then check PG according to the flowchart in the Figure 3-11.
-
Page 95: Firmware Updating
EPSON Stylus Photo R320 Revision B 3.4 Firmware Updating Automatic execution of updating Updating is executed automatiaclly, After updating start operation executed. The Controller Firmware (Direct Print section, Storage section) of this printer can be updated using a memory card* (CF/Smart Media/Memory Stick/xD-Picture Card). -
Page 96: Abnormal Updating Termination
EPSON Stylus Photo R320 Revision B 3.4.2 Abnormal Updating Termination If a Firmware updating was unsuccessful for some reason, an error is displayed by factor. Table 3-6. Errors and Remedies Error Details Display Remedy Memory Card The initialization of the memory card inserted is 1. -
Page 97: Chapter 4 Maintenance
C H A P T E R MAINTENANCE... -
Page 98: Overview
EPSON Stylus Photo R320 Revision B 4.1 Overview 4.1.2 Service Maintenance If print irregularity (missing dot, white line, etc.) has occurred or the printer indicates This section provides information to maintain the printer in its optimum condition. "Maintenance Error", take the following actions to clear the error. - Page 99 EPSON Stylus Photo R320 Revision B Select EPSON Status Monitor 3 in the Printer Driver Utility. Then make sure that Maintenance Request Error the printer connected to Status Monitor 3 is on standby status. If it is on standby, Ink is used for operations such as Head Cleaning as well as printing. In that case, the following will be displayed.
-
Page 100: Lubrication
4.1.3 Lubrication Refer to the following figures for the lubrication points. The lubrication used for the components of Stylus Photo R320 has been decided on <Lubrication Point> based on evaluation carried out by Epson. As a result, the specified amount of lubricant 1. - Page 101 EPSON Stylus Photo R320 Revision B <Lubrication Point> <Lubrication Point> Back of contact point between 1. Contact point between "Frame, "Roller, PF" and hook of "Paper EJ" and its shaft inside "Guide, Paper Guide, Front Guide, Front" Shaft, Frame EJ Left"...
- Page 102 EPSON Stylus Photo R320 Revision B <Lubrication Point> <Lubrication Point> Contact point between "Guide 1. Surface of contact point Shaft Frame EJ Rjght" and "Paper between upper side of "Cam, Cam, CR, Left Guide, Front" CR, Left" and "Frame, Main"...
- Page 103 EPSON Stylus Photo R320 Revision B <Lubrication Point> <Lubrication Point> 1. Groove on the right side of "CR Contact point between left side of Guide Shaft" (Groove for "CR Guide Shaft" and "Fixed "Fixed Spring, Shaft CR, Left") Spring, Shaft CR, Left"...
- Page 104 EPSON Stylus Photo R320 Revision B <Lubrication Point> <Lubrication Point> Specified points on "Holder, 1. Upper surface of curving area Holder, Scale, Right Upper surface Scale, Right" in the figure on the of "Holder, Idle Roller" left 2. Lower surface of curving area of "Holder, Idle Roller"...
- Page 105 EPSON Stylus Photo R320 Revision B <Lubrication Point> <Lubrication Point> Grounding Plate, Head "CR Guide Shaft" outside the Contact point between bearing of the Carriage "Grounding Plate, Head" and "Carriage" <Lubrication Type> <Lubrication Type> G-63 G-63 <Lubrication Amount> <Lubrication Amount>...
- Page 106 EPSON Stylus Photo R320 Revision B <Lubrication Point> <Lubrication Point> Point shown in the figure of 1. Point shown in the figure left. Paper Back Lever "Paper Back Lever" set in "ASF 2. Contacted site of "Paper Back Assy." Lever" with the dowel.
-
Page 107: Chapter 5 Appendix
C H A P T E R APPENDIX... -
Page 108: Exploded Diagram
5.1 Exploded Diagram 5.2 Electrical Circuits An exploded diagram is not provided in the Stylus Photo R320 Service Manual. If The electric circuit diagrams below are provided on the following pages: consultation of an exploded diagram is necessary, see the Exploded Diagram attached to Main Board (1) (C582MAIN) the Stylus Photo R320 Parts List. - Page 109 Model : PM-D770/Stylus Photo R320 Board : C582MAIN Rev. : C Sheet : 1/2...
- Page 110 Model : PM-D770/Stylus Photo R320 Board : C582MAIN Rev. : F Sheet : 2/2...
- Page 111 Model : PM-D770/Stylus Photo R320 Board : C536PSB Rev. : C Sheet : 1/1...
- Page 112 Model : Stylus Photo R320 Board : C536PSE Rev. : D Sheet : 1/1...
- Page 113 Model : PM-D770/Stylus Photo R320 Board : C582PNL Rev. : A Sheet : 1/1...
- Page 114 Model : PM-D770/Stylus Photo R320 Board : C582SUB Rev. : B Sheet : 1/1...