
Related Manuals for Apex Digital AP-7S118

Summary of Contents for Apex Digital AP-7S118
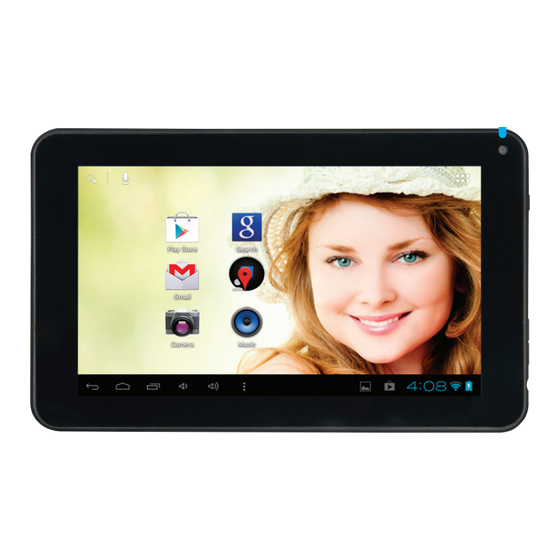
- Page 1 Text for Line Tablet 7 Model #AP-7S118 - 7” Internet Tablet Instruction Manual v1.0 11/25/13...
-
Page 2: Table Of Contents
Table of Contents Important Safety Instructions and Notices What’s Inside the Box First Use Recharge the Battery Functions and Controls At-a-Glance Powering the Tablet ON/OFF Start-up Screen Basic Operation Unlocking the Unit Home Screen and Widgets Standby Mode Touch to Move, Change, etc. Text Entry Common Finger Gestures Notifications... -
Page 3: What's Inside The Box
• The tablet functions, hardware, software, and warranty information may be improved or modified by the manufacturer or their respective owners, and is subject to change without notice. What’s in the Box • The APEX AP-7S118 Tablet 7 • AC Adapter • Quick Start Guide • USB Cable... -
Page 4: First Use
First Use Charging the Battery The Tablet 7 has a built-in battery that may not be fully charged on first use. It is highly recommended to fully charge the battery upon first use. Included in the Table 7 package is an AC power adaptor to connect to AC power outlet as well as a USB cable to connect to a powered PC. - Page 5 First Use (Continued) Turn the Tablet Power ON and OFF To power on the Tablet 7, press and hold the POWER button located on the side for a few seconds and then release it. The Apex logo screen will appear while it starts up. After the powering procedure has finished, the tablet will stop at the locked Start-up screen.
-
Page 6: Basic Operation
Touch to Move, Select and Change Information The AP-7S118 tablet screen is designed for you to touch it to move, select and manipulate information. To select an item on the screen, simply tap it once with your fingertip or stylus. -
Page 7: Common Finger Gestures
Basic Operation (Continued) Other Common Finger Gestures • Touch and Hold: Touching and keeping your finger on an on-screen item, until a light glow appears around it, may activate a separate menu or other options for that item. This is often used for deleting an item from the tablet. •... -
Page 8: Changing The Screen Orientation
Basic Operation (Continued) Changing the Screen Orientation The tablet default setting is for “Auto-rotate screen” to be enabled; the screen will automatically rotate based on the vertical/ horizontal orientation it is currently being held in. To “lock” an orientation, simple deselect the “Auto-rotate screen” option in Settings > Accessibility. -
Page 9: Connecting To The Internet
Connecting to the Internet The AP-7S118 utilizes Wi-Fi networks to connect to the internet. Wi-Fi technology can provide wireless internet access at distances over 300 feet, however, this distance can be affected by your surrounding environment and a Wi-Fi router. -
Page 10: Wi-Fi
Basic Operation (Continued) To assure that you are making the correct text entry, make sure to enable “Show Password” selection below the password entry. Wireless Networks under “More” Airplane mode is the setting that, when activated, suspends many of the device’s signal transmitting functions, thereby disabling the device’s capacity to place or receive calls or use text messaging –... - Page 11 Applications (Apps) Some applications, known as “Apps”, have been installed on your tablet to help get you started. Here are tips on how to access and manipulate Apps: • You can touch the All Apps icon (show All Apps icon) at the bottom on any home screen to view more Apps than what you can see on the initial Home screen.
- Page 12 Apps (Continued) • Email - Quick access to set up email accounts (if you use something other than Gmail). You will need the email address and password to set up the new email account. Show email/pw screenshot, then show Manual, then Next setup screenshots. Music, Video and Photos: •...
- Page 13 Apps (Continued) • Gallery - Displays and manages photos and image files. Gallery is used to view pictures and play videos that you’ve taken, downloaded, or copied. You can perform basic photo editing tasks, set images as your wallpaper, contact photos, share photos and videos with your friend.
-
Page 14: File Manager
Apps (Continued) Tablet and Application Management • File Manager - Allows for the management and access of data files, including files such as music, video, and data (ie. PDFs) from internal storage, memory cards or externally connected storage. • Play Store – The Google Play™ store, where you will be able to download more apps, music, movies and widgets for use on your tablet. - Page 15 Apps (Continued) • Calculator - A simple and convenient calculator. • Calendar - A robust calendar app that allows for custom scheduling and reminder setting. • Clock - A standard clock/alarm. You can either set the time manually or, when connected to Wi-Fi, the clock will automatically update to the correct local time (assuming the correct time zone has been set).
-
Page 16: Settings
Settings The Settings section allows you to adjust many of the functions of the Tablet 7. The following are some of the available sections and features that you can view and/or modify: Under “Wireless and Networks” Menu • Wi-Fi Turn Wi-Fi ON/OFF : Shows available Wi-Fi signals and allows for establishing connectivity. -
Page 17: Storage
Settings (Continued) Power button has been pressed, and the screen has gone to sleep. You have several security options as follows: SCREEN SECURITY Screen lock - The tablet has several methods for locking/unlocking the screen. Locking the screen prevents unauthorized users from accessing the tablet. -
Page 18: About Tablet
Settings (Continued) Under “Accounts” • Google: Google account information and privacy settings. • Add Accounts: Allows user to view email accounts linked and accessible by the tablet, and synchronize features such as calendar and contacts. You may require additional details from the system administrator about the service to which the account will be connecting to (account domain, server address, etc.). -
Page 19: Connecting Memory Via The Usb Transfer Port
Transferring Data and Optional Devices Connect the Tablet to a Windows-based Computer via USB You can use the included USB cable to connect your tablet to a PC in order to transfer documents and media files to and from each device. When you connect the tablet to the PC, a brief message will appear stating “Connected as an Installer”. - Page 20 Transferring Data and Optional Devices (Continued) Connecting Optional Keyboards, Mice and Other Devices You may also connect a keyboard, mouse, joystick, gamepad or other input device to your tablet via USB and use it just as you would with a PC. You may need a special adapter to connect the keyboard or other device to your tablet’s micro USB port.
-
Page 21: One Year Limited Warranty
Warranty ONE YEAR LIMITED WARRANTY TMAX Digital Inc. warrants this product against defects in material or workmanship for a period of one (1) year from the date of which starts with the date of original purchase (“Limited Warranty period”), at its own option either (a) repair your product with new or refurbished parts, or (b) replace it with a new or a refurbished product. - Page 22 Commonly Asked Questions Q1: Why won’t the Tablet 7 power on? Answer: • The tablet may need to be recharged. Insure that the AC adaptor is plugged-in correctly, and allow the tablet to charge. • If you are aware that the tablet is charged, try resetting it by pressing the RESET button. Q2: I’m not hearing any sound in my headphones/earphones.
- Page 23 Commonly Asked Questions (Continued) Q7: I am unable to open a web page. Answer: • Check to ensure the tablet has a Wi-Fi connection. • It is possible the website that you tried to link to does not exist any longer or is under maintenance.
- Page 24 Commonly Asked Questions (Continued) Q13: Can TMAX repair my Tablet 7 if it breaks, or I drop it in water? Answer: Please read the Warranty statement at the end of this instruction manual. If the damage is not covered by the APEX warranty, you can contact APEX Customer Service to learn of options that may be available to you.
- Page 25 Commonly Asked Questions (Continued) Q19: My tablet does not connect to my computer via USB. What can be the problem? Answer: It seems that your computer is reading the Tablet 7 as a media device instead of USB mass storage. Please follow these steps: •...
- Page 26 4401 Eucalyptus Ave., Suite 120 Chino, CA. 91710 www.tmaxdigital.com P: 909-923-8686 Copyright © 2013 TMAX Digital Inc. Apex Digital and the Apex Digital logo are registered trademarks of TMAX Digital Inc. All Rights Reserved. Specifications subject to change. More information at www.tmaxdigital.com...
Need help?
Do you have a question about the AP-7S118 and is the answer not in the manual?
Questions and answers