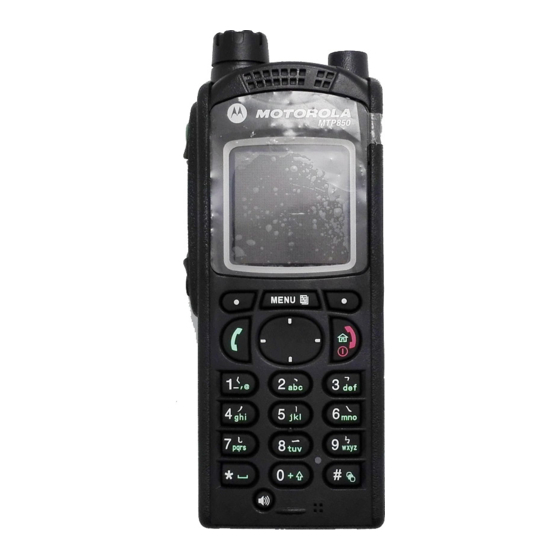
Motorola MTP850 User Manual
Handportable terminal
Hide thumbs
Also See for MTP850:
- Feature user manual (402 pages) ,
- Basic user's manual (334 pages) ,
- Service manual (118 pages)

Related Manuals for Motorola MTP850


Summary of Contents for Motorola MTP850
- Page 1 MTP850/MTP850 S/MTP850 FuG TETRA Handportable Terminal Feature User Guide When printed by Motorola...
-
Page 3: Table Of Contents
Powering On with Transmit Inhibit (TXI) Active ..Unlocking the MTP850 ...... - Page 4 Modifying the Type of Call ......Receiving Calls ....... . . Pre-emptive Calling .
- Page 5 Making a DMO Group Call via Repeater ....Making a DMO Group Call via Gateway and Repeater . . . Receiving a DMO Group Call ..... . . DMO Private Call .
- Page 6 Options Pane ........100 Image Pane ........100 Text Input Pane .
- Page 7 Index ........198 © Motorola Inc., 2010 MOTOROLA and the stylized M Logo are registered in the U.S. Patent and Trademark Office. All other product or service names are...
-
Page 9: General Information
Product Safety and RF Exposure booklet 6864117B25. The MTP850 is restricted to occupational use only to satisfy ICNIRP RF energy exposure requirements. Before using the products, read the RF energy awareness information and... -
Page 10: Copyright Information
Motorola. Furthermore, the purchase of Motorola products shall not be deemed to grant either directly or by implication, estoppel, or otherwise, any licence under the copyrights, patents, or patent applications of Motorola, except for the normal non-exclusive licence to use that arises by operation of the law in the sale of a product. -
Page 11: Icon Conventions
Icon Conventions The document set is designed to give the reader more visual clues. The following graphic icons are used throughout the documentation set. These icons and their associated meanings are described below. The signal word Warning with the associated safety icon implies information that, if disregarded, could result in death or serious injury, or serious product damage. -
Page 12: Getting Started
English. For more information, please see “Setting the Display’s Working Language” on page 129. How to Use this Guide This guide describes the MTP850 features as setup and pre- programmed at the factory. Your Service Provider or your organisation may have customised your MTP850 to optimise its use for your individual needs. -
Page 13: Installing The Battery
Example Description Indicates a prompt or message configured <User Defined> by your Service Provider. Installing the Battery 1. Remove the battery from its protective clear plastic case. 2. Insert the battery top into the compartment as illustrated. 3. Carefully press the battery bottom downward until it clicks into place. -
Page 14: Charging The Battery
2. The MTP850 displays the Charger Connected message only if the MTP850 is On when connecting the charger. If the MTP850 is Off, the display shows an icon of the battery in charging. Remove the MTP850 from the charger only when the display goes off. - Page 15 Battery Capacity Information Information Description Green icon Full (50% - 100% capacity) Yellow icon Middle (20% - 50% capacity) Red icon Low (10% - 20% capacity) Empty icon Very low (5% - 10% capacity) Low Battery message Less than 5% capacity...
- Page 16 The performance of the rechargeable battery delivered with your terminal depends on the way the battery is treated. Therefore, to comply with the Motorola warranty for batteries and to assure high performance and a long life cycle of your Motorola rechargeable battery, please read and follow the maintenance rules stated below.
-
Page 17: Attaching The Antenna
Attaching the Antenna Turn the MTP850 Off before installing or removing the antenna. Insert the bottom of the antenna into the screw-in base on the top of the MTP850. Turn clockwise until snug. Do not force. Turn clockwise to attach... -
Page 18: Controls And Indicators
9. Alphanumeric 13. Speaker Keypad (under keypad) 9a. Keypad 12. Speaker Backlight Sensor Control Key 10. Bottom 11. Accessory Connector Microphone (at the base of the MTP850) 22. Side Connector (at the side of the MTP850 S / MTP850 FuG) - Page 19 Group Calls. External Antenna Connector Used with the digital car kit to connect the RF signal to the external antenna. (At the back of the MTP850) Color Display Provides alphanumeric text and images within 65,536 colours and 130 x 130 pixels with backlighting and scalable fonts.
- Page 20 Press and hold to enter Emergency mode, and send Emergency Alarms (as programmed). Press and hold to start an Emergency Private Call (Simplex or Duplex). When the MTP850 is Off, press and hold to power on in Emergency Operation or in standard mode (as programmed).
-
Page 21: Powering On/Off (On-Off/End/Home Key)
Before using your MTP850 for the first time, remove the plastic lens protector from the display, and charge battery overnight to ensure battery is initialised to it’s full capacity. Take care to clean the bottom connector frequently and particularly prior to the programming procedure e.g. with a soft brush (do not use fluids). -
Page 22: Unlocking The Mtp850
Ensure you have left the RF sensitive area before deactivating Transmit Inhibit. Press the Yes key to deactivate the TXI Mode. If the MTP850 was previously used in Trunked Mode, it will register to the network. If the MTP850 was previously used in Direct Mode, it will remain in Direct Mode. -
Page 23: Rua/Rui
Group, Phone and Private Calls are Simplex calls and can be placed in high or low audio. Phone, PABX, and Duplex Private Calls are placed in low audio. The speakerphone feature allows to hold Phone, PABX, and Duplex Private Calls via the MTP850 internal speaker. - Page 24 Use in Low Audio (Phone, PABX, and Duplex Private Calls) When placing or receiving a call and while speaking, hold your MTP850 as you would a telephone. Speak into the bottom microphone. Listen via the earpiece. Keep antenna at least 2.5 centimetres from your head and body.
- Page 25 During the call, label of the soft key indicates the next possible change. Accessory default setup: High/Low audio Soft key label setting Spkr Main speaker (HIGH Audio icon) Erpce Earpiece (LOW audio icon) Personal Hands Free (LOW audio icon) Getting started •...
-
Page 26: Looking After Your Mtp850
Speakerphone Use Place the MTP850 30 to 60 centimetres away from you. In a noisy environment, you may want to move the MTP850 closer to you for better transmission. Looking after your MTP850 Never leave your MTP850 or battery in extreme temperatures (over 60 °C) - Page 27 25%, 50%, 75%, or 100% bandwidth. Direct Mode Operation Signal Strength (DMO) Indicates an incoming Direct Mode Group Call. Direct Mode Displayed when the MTP850 is in Direct Mode. Repeater Mode Displayed when the terminal is switched to work as a repeater in Repeater mode.
- Page 28 General Icons All Tones Off / Duplex & Simplex Ring Muted Indicates that all alert tones are off in the MTP850 or both Simplex Ring volume is set to 0 and Duplex Ring volume is set to 0.
- Page 29 Indicates the High RF Power is enabled. Shows the signal strength. More bars indicate a stronger signal. Emergency Appears while the MTP850 is in Emergency Operation. List Scrolling Displayed to indicate that the Rotary knob use is list scrolling, as long as this use is selected.
-
Page 30: The Led Status Indicator
Indicates the Man Down device failed. Kaypad Lock Indicates that the keypad is locked. The LED Status Indicator The LED indicator shows the in-service states of your MTP850. Please refer to the table below. Indicator Status Solid GREEN In use / Repeating Calls... -
Page 31: Key, Knob, And Button Overview
MENU • The menu (when there is no on-going activity). The MTP850 menus allow you to control your MTP850 settings. Menus are organised in a hierarchy. See “List of Menu Items” on page 112. The menu options provide access to a further list of options called a sub-menu. -
Page 32: Function Keys
“Rotary Knob” on page 143. Emergency Button Press and hold this button to enter Emergency Operation. When the MTP850 is powered down, press and hold this button to power On in Emergency Operation (if configured by your Service Provider). See “Emergency Operation” on page 75. - Page 33 Rotary Knob, see “Rotary Knob” on page 143. Programmable Keys (0-9, * and #) The MTP850 supports the one-touch feature that allows you to select/activate commonly used features by pressing and holding an assigned key. Your Service Provider should program the keys with the relevant features.
- Page 34 Feature Description Talkgroup Switch Switches to a specific talkgroup Previous Talkgroup Switches to the previous talkgroup Switch (even if the operation mode was different) Talkgroup Scan Toggles on/off the Talkgroup Scan function (TMO only) DMO/TMO Toggles between DMO and TMO Status Message Sends a dedicated status message to a dedicated address...
- Page 35 It is available if the display is in idle mode of TMO, DMO, TXI, Covert and Repeater. *) Those features are available only for MTP850S and MTP850 FuG. **) Applicable only for the * and # keys. ***) Those features are available only for MTP850 FuG.
-
Page 36: Aliases (Names)
* In an Emergency Group Call, the voice sounds from the speaker regardless of the speaker setting. Keypad Backlight Sensor The MTP850 keypad can be illuminated whenever the display’s backlight is on. The keypad backlight sensor determines whether there is a need to light up the keypad backlight, by measuring the ambient light intensity. -
Page 37: Screen Saver
Service Provider to send special <Home display text messages to your MTP850 display. text> The message is displayed when your Optns Contcs MTP850 is idle. The message will stay on your MTP850 display until a new message is received. -
Page 38: Time & Date
While your MTP850 is disabled, it will look and act like it is turned Off. If you try to turn your MTP850 On when it is disabled, it will operate as described above. If your MTP850 is found, your Service Provider can re-enable it. -
Page 39: Selecting Tmo Or Dmo Operation
Selecting TMO or DMO Operation General In Trunked Mode Operation (TMO) the MTP850 is used with the infrastructure services within system coverage. In Direct Mode Operation (DMO) the MTP850 is used without infrastructure services required. While operating in DMO the propagation travels directly from the transmitting terminal antenna to the receiving terminal antenna, with no assistance from any base station or tower. - Page 40 You can make and receive Group Calls when the MTP850 operates in Direct Mode (DMO). This includes Emergency Group and Private Calls. The MTP850 returns to the Home display when there is no activity for a few seconds. Repeater Mode This feature is available only for MTP850 FuG.
-
Page 41: Ptt Double Push
Gateway Mode Operation, Repeater Mode Operation. For security and operational reasons combining these modes is not possible. Entering Repeater Mode When your MTP850 is in DMO enter Repeater Mode in one of the following ways: • From the Home display press Optns and Entering Repeater select Repeater Mode. -
Page 42: Individual Call
If not allowed a special indication is given to the user. Incoming Calls During Dialing The MTP850 remains affiliated to the last Talk Group and receives all the group calls. An incoming call is indicated to the user and the dialling process is interrupted. Non- emergency call does not suspend dialling but the user is able to hear the tone of incoming call. -
Page 43: Modifying The Type Of Call
Inactivity Revert Mode will occur if configured by your Service Provider. Your MTP850 alerts you of an incoming call depending on the setting you selected in the Vibrate menu option (see page 126) and the Tones menu option (see page 132). -
Page 44: Pre-Emptive Calling
To place a PPC, see the Emergency Operation and Private Call sections in the user guide. Your MTP850 receives the call via speaker or earpiece, according to the setting used when the PPC is received. For call alert, see settings in the Vibrate menu option (page 126) and the Tones menu option (page 132) Receiving a PPC is explained in the following paragraphs. -
Page 45: Broadcast Call
A PPC Call with Emergency Call priority will be displayed on the screen as “Emergency” (instead of “Priority”). Simplex Private PPC Received Call Preempted Priority Priority <Any> in Use Private Call Prvt In Use Press David David 2234 2234 Duplex Private PPC Received Call Preempted <animation>... -
Page 46: Ambience Listening (Al)
Mute Spkr display shows Speaker HIGH. 2. Place the MTP850 30 to 60 cm away from you. In a noisy environment, you may want to move the MTP850 closer to you for better transmission. 3. To de-activate speakerphone, press Erpce. The display... -
Page 47: Covert Mode
If configured by your Service Provider the Covert Mode gives to you the ability to completely shut down all visible and audible MTP850 alerts and notifications. This feature makes the MTP850 effectively unnoticeable even in a silent and dark environment. To Enter the Covert Mode: •... -
Page 48: Local Area Service
• Any call in progress is dropped upon entering Local Area Service mode. If configured by your Service Provider, this message/alert is periodically repeated to remind you that the MTP850 is still operating in Local Area Service mode. The following features are available while the MTP850 is in Local Area Service: •... -
Page 49: Packet Data
For transferring data from a standard computer over the air connect the computer via the Active Data Cable FKN4897 with your MTP850. Your Service Provider has to setup additional applications on your computer. If set up by your Service Provider it is possible to accelerate the transmission by using the Multi-Slot Packet Data (MSPD) Service (refer to “Packet Data”... -
Page 50: Tmo Group Call
Sales, Service, Electricians, Talkgrp10). Talkgroups can be divided into many folders. Each folder may contain several talkgroups. For ease of use, your MTP850 also provides the ability to: • Perform an alphabetical search of the talkgroup aliases. Scroll through the entire talkgroup list. -
Page 51: Dual Microphone Feature
Provider should advise what talkgroups are associated with which Announcement Talkgroup. Your MTP850 will always monitor the Group Calls in the ATG scan list. To place an Announcement Call, you must first select the specified Announcement Talkgroup as advised by your Service Provider, otherwise you will only be able to participate when an Announcement Talkgroup is received. - Page 52 Using the Rotary Knob (If configured by your Service Provider) From the Home display, press shortly on the Rotary knob and rotate until the requested group appears. Group selection occurs: • After a time-out • By pressing Select (if configured by your Service Provider) •...
- Page 53 Using the Numeric Keypad - Speed Dial From the Home display, you can dial a group by entering its speed number via the keypad. This feature is called Talkgroup Speed Dialing. The speed number is pre- configured in the terminal. You can view a speed number attributed to a group, if it exists.
-
Page 54: Selecting A Group Using Navigation Keys/ Alphabetic Search
Selecting a Group on Receiving a Call If you select a group and a call is incoming, MTP850 display remains unchanged while you hear the call. During the selection you cannot see calling party information. -
Page 55: Group Scrolling Configuration
Selecting My Groups From the Home display, press to quickly access the folder. Adding/Deleting Groups For more information, see “My Groups (TMO/DMO)” on page 150. Group Scrolling Configuration Your Service Provider can configure scrolling via rotary knob or navigation key as follows: •... -
Page 56: Activating/Deactivating Scanning
Receiving a Group Call General Unless it is engaged in a call, your MTP850 will receive the Group Call.To talk back, press and hold PTT. Your MTP850 shows the Group name and the caller’s private number or name if previously stored in your contact list. - Page 57 (if configured by your Service Provider). Receiving a Group Call in Idle Screen with Scan Off You can receive a group call from the selected talkgroup or from the associated ATG only. Your MTP850 will receive the Group Call. Group In Use ID: David Optns...
- Page 58 Receiving a Group Call in Idle Screen with Scan On With Scan On, you can receive a group call from the scan list you set up, in addition to receiving a group call from the selected Group In Use talkgroup or from the associated ATG. ID: David Receiving the scan call functions as receiving Optns...
-
Page 59: Transmit Inhibit
MTP850 transmission radiation. Radiation of the MTP850 is only suppressed if the TXI Mode is activated or the MTP850 is separated from power supply. In TXI Mode the MTP850 will not transmit under any circumstances, except for the Emergency Call, which can be initiated even if the MTP850 is in TXI Mode. -
Page 60: Dynamic Group Number Assignment (Dgna)
MTP850. Your Service Provider can gather some Talkgroups under one Super-group and transmit it to your MTP850 as a DGNA. In such a case, you will be able to participate in calls to/from all the groups in the Super-group. - Page 61 If the DGNA message is received to delete all Talkgroups, your MTP850 will display the following: All Talkgroups Deleted DGNA Reception without Notification Message Back If DGNA notification was not configured by your Service Provider, you will get a tone indication and notification message only and only if a selected group was changed by the DGNA.
-
Page 62: Dmo Group Call
DMO Group Call General In DMO, the MTP850 can be used without your Service Provider’s infrastructure. Direct Mode allows communication with other terminals also operating in Direct Mode, which are on the same frequency and talkgroup as your MTP850. In DMO it is only possible to place Group Calls, Emergency Group Calls and Private Simplex Calls. -
Page 63: Dual Microphone Feature
Dual Microphone Feature See “How to Hold Your MTP850” on page 15. Favorite Folders You can organise your favorite groups into three folders. Selecting the My Groups Folder From the Home display, press to quickly access the folder. Default name for the first favorite folder is “My Groups”. -
Page 64: Gateway/Repeater Selection
Gateway/Repeater Selection Use the DMO Config sub-menu for setting the Gateway and Repeater options. DMO Folder 1 1. Press Optns to enter the options menu in Police Hello DMO. Optns Contcs DMO Options sub-menu Folder TG by Folder TG by abc Trunked Mode 1 Automatic 1 MS - MS... - Page 65 2. Scroll to Gateway and press Select. 3. The display shows the last gateway selection method. Use the navigation key to scroll to your selection and press Ok: Automatic the MTP850 will use the first – available gateway for that talkgroup. The GW Options:...
- Page 66 MTP850 will use the first – available gateway for that talkgroup. The Select Back Gateway icon and the Repeater icon will flash upon selecting that option. Specific the MTP850 will use only the Gateway with the – specified Gateway address for that talkgroup.
-
Page 67: Making A Dmo Group Call (Ms To Ms)
Enter an address via the keypad, and press Ok. The Gateway and Repeater icons will flash upon selecting the gateway. When the MTP850 detects the appropriate gateway and/or the repeater, the Gateway and/or Repeater icons will turn solid, DMO Folder 1 Police respectively. -
Page 68: Making A Dmo Group Call Via Gateway
• If you press PTT while the selected gateway is available, but the call is MS-MS Call rejected by the gateway, your MTP850 will sound a tone and display the following screen, informing you that the call will be setup without gateway. The Gateway icon will disappear. -
Page 69: Making A Dmo Group Call Via Gateway And Repeater
• If you press PTT while both gateway and repeater are available, a gateway call will be attempted. > If it is successful your MTP850 will start a DMO call with gateway. The Gateway icon will be solid. The Repeater icon will disappear. -
Page 70: Receiving A Dmo Group Call
MS - MS mode immediately with the MS-MS Call message. Receiving a DMO Group Call You can receive a DMO Group Call only when your MTP850 is in DMO. Your MTP850 will display the caller’s private number or alias, and the talkgroup name. -
Page 71: Dmo Private Call
When an InterMNI call is received, you can press Network to see the Network alias and/or number. Receiving a Group Call (via Gateway / Repeater) Group In Use Group In Use Group In Use Folder 1 ID:124 ID: David Optns Folder Optns Folder... -
Page 72: Emergency Group Call
Emergency Group Call For detailed information, see “Emergency in DMO” on page 85. Exiting DMO To exit DMO, press Optns and select Trunked Mode. For other ways, see “Selecting TMO or DMO Operation” on page 31. -
Page 73: Private Call
Contacts list. For operating the MTP850 in RF sensitive areas, see “Transmit Inhibit” on page 51. -
Page 74: Other Ways Of Dialing
) or by entering up to 12 characters. If no name is stored under a letter, the MTP850 automatically searches forward, alphabetically, until the next name is found. If more than one name in the list begins with the same letter, you can scroll to view other names or type up to 12 letters. - Page 75 Your MTP850 will automatically complete the number and send it over the air based on your own MTP850's identity. For example: 1. Dial 456 (instead of 4282456, the full number).
-
Page 76: Receiving A Private Call In Tmo
If configured by your Service Provider it is possible to make and receive a Private Call in DMO. You can make or receive a DMO Private Call only when your MTP850 is in DMO. Private Calls via DMO Repeater and/or DMO Gateway are not supported. - Page 77 Making a Private Call in DMO 1. From the Home display enter a number. Dialing via Private #: • Contact List or • Recent Calls Lists 2234 works like described in “Other Ways of CType Delete Dialing” on page 66. 2.
-
Page 78: Dialing On Receiving A Call
The MTP850 will remain in queue for a pre-programmed period of time. If the resources become available, the call will proceed. If there are no resources after a certain period of time, the MTP850 will end the call. -
Page 79: Phone And Pabx Calls
In this publication we use “phone number” when referring to these numbers. Both calls have the same dialing features. For operating the MTP850 in RF sensitive areas, see “Transmit Inhibit” on page 51. While Transmit Inhibit is activated, an incoming Phone or PABX Call is indicated, but it is not possible to answer the call. -
Page 80: Other Ways Of Dialing
If no name is stored under a letter, the MTP850 searches forward, alphabetically, until the next name is found. If more than one name in the list begins with the same letter, press up to 12 letters. - Page 81 (1-9). 1. Press and hold the required key for a few seconds. Your MTP850 will display the number and dial it. 2. To hang up, press If programmable one-touch keys are enabled, one-touch dial is disabled (see page 25).
-
Page 82: Answering A Phone Or Pabx Call
Dialing on receiving a call See “Dialing On Receiving a Call” on page 70. Answering a Phone or PABX Call 1. The MTP850 switches to the incoming Phone/PABX Call. 2. To answer the incoming call, press or any other key if programmed (except Home/End/On-Off key). -
Page 83: Emergency Operation
MTP850 to transmit. When entering Emergency Operation the MTP850 should not be within the RF sensitive area any longer! • The MTP850 interrupts the AL call when you press the Emergency button. • For call alert, see settings in the Vibrate menu option... - Page 84 An Emergency Group Call is configured as non-tactical or tactical: • A non-tactical call initiates on a talkgroup designated by your Service Provider. The group might be different than the one displayed on the terminal screen when starting the call. After exiting from non-tactical emergency mode the terminal will be attached to the group that was selected before initiating the non-tactical call.
-
Page 85: Emergency In Tmo
If both types are not selected, alarm will be send to the address given by Service Provider. Emergency in TMO Overview Please check with your Service Provider for the configuration of your terminal. Your terminal may be configured with one of the following: Emergency Group Call The terminal will enter Emergency Mode when you press and hold the Emergency button. - Page 86 Emergency Mode until you exit it. Press and hold the Emergency button to enter Emergency Mode. Emergency Folder 1 When the MTP850 is Off, press this button to Talkgroup 1 power the MTP850 On in Emergency Mode Hello (if configured).
- Page 87 Your MTP850 will send an Emergency Alarm to the dispatcher (if configured by your Service Provider): • Automatically, upon entering Emergency Mode. • If you press the Emergency button while the MTP850 is in Emergency Mode. • If you change group while in Emergency Mode.
- Page 88 Group Call. Hot Microphone Feature in TMO If the Hot Microphone feature was programmed into your MTP850 by your Service Provider, you can make an Emergency Group Call without the need to press and hold the PTT. The following will happen upon entering Emergency Mode: 1.
- Page 89 Optns Exit For Mic message will be displayed. During this pending time the MTP850 microphone is not active until the Emgcy Mic On message is displayed again. Hot Microphone feature is available in DMO and TMO modes. Receiving an Emergency Group Call...
- Page 90 The caller’s voice will always sound via the speaker (unless an external earpiece is connected to the terminal). If configured by your Service Provider, the screen background will be red. Making an Emergency Private Call 1. Press and hold the Emergency button. 2.
-
Page 91: Silent Emergency Mode
Silent Emergency Mode Silent Emergency mode is a type of emergency services that provides no audible indications and no keypad tones at the entrance. Silent Emergency alarm is sent to the group or a user defined by the Service Provider. All the screen indications are kept as it is for the normal mode but the radio cannot use any of the services except: •... - Page 92 Silent Emergency and TMO/DMO Mode As the Silent Emergency is only available in TMO, radio will change the mode from DMO to TMO. When the user is in a private or group call, Silent Emergency waits until any of the calls is ended to change the mode and enter the Silent Emergency Mode.
-
Page 93: Emergency In Dmo
Emergency in DMO Overview You can initiate an Emergency Group Call to a group. You can receive an Emergency Group Call: • From the selected talkgroup • From other users within talkback range (if configured by your Service Provider). This is called an InterMNI call. •... - Page 94 3. Wait for the talk permit tone (if configured) and talk. 4. Release PTT to listen. Your MTP850 enters TMO by pressing the Emergency button (if configured by your Service Provider). The terminal attaches to the predefined talkgroup and starts the Emergency Group Call. If the predefined talkgroup is invalid the terminal attaches to the last selected talkgroup.
-
Page 95: Using The Browser
Using the Browser The WAP (Wireless Application Protocol) browser provides services (such as database access) to the terminal. Check with your Service Provider for the availability of this feature. Icons Icon Description Browsing via Wireless Transport Security (WTLS) to https://... site In non-secure browser session, the Packet Data icons are displayed. - Page 96 • browser menu, if Packet Data is not available. See “Disabled Packet Data Service” on page 90. 4. Start browsing using the keypad, four-way navigation key, and soft keys. 5. To de-activate the browser, press , or power off the terminal.
- Page 97 Or select Menu and select an option: • Save - confirms the bookmark creation. • Edit - allows to edit the title, folder choice, and URL of the created bookmark. • Cancel - cancels the operation. Creating a Bookmark via Bookmarks Pane > New Bookmark 1.
- Page 98 Using a Hotkey 1. Enter the browser. 2. Press and hold a hotkey to download the corresponding bookmark from the web. Saving a Page Save a page (snapshot) for off-line browsing. 1. Enter the browser and browse to the required page. 2.
- Page 99 Disabled Browser Entry Browser entry is disabled: • during any type of voice call, except ambience listening call • in DMO mode • during Emergency mode • during PIN lock • if the Service Provider has not configured this feature •...
-
Page 100: Browser Menu Pane Contents
Browser Menu Pane Contents 1 Home Navigate 2 Open Page 3 Search 4 Mark Page 5 Forward 1 Settings... 1 Downloads 6 Reload 2 Scroll Mode Advanced... 3 Key Press Timer 4 Set Proxy 1 WAP Proxy 1 2 WAP Proxy 2 3 WAP Proxy 3 5 Circuit Prompt 6 Resend Data... -
Page 101: Keys Usage
Keys Usage When the browser is active, the usage described below occurs inside or outside the editor. Key Press Action Press: • In the editor: enters a digit and/or character depending on the text entry mode selected. • Outside the editor: in a numbered list, selects wxyz the required item list. -
Page 102: Browser Menu Panes Overview
Key Press Action Moves to the next pane. In the editor: moves cursor to the right and inserts space if at the end of the word. Press and hold Functions as Forward. Press and hold at the centre Auto-repeat Brings up the browser menu. MENU Press to de-activate the browser. -
Page 103: Navigate Pane
The following panes are displayed according to the context: Displayed only when there are additional options Options for the pane or page. Displayed only when an image is selected. Provides access to image details, storage, and Image display use. Displayed only in text entry mode. Provides Input Text access to text entry mode (e.g.: symbol) Navigate Pane... - Page 104 • Scroll Mode for setting the scrolling mode and speed. – • Key Press Timeout for setting key press timeout. – This timeout is used for text entry. • Set Proxy Select the WAP Proxy (1, 2, 3). The – browser connects to the web via the selected proxy or gateway.
-
Page 105: Bookmarks Pane
• Send Referrer for turning ON/OFF sending of the – HTTP Referrer header as part of HTTP requests. The Referrer header provides the URL of the link source to the server. • Authentication for turning ON/OFF the caching of – HTTP Authentication credentials. - Page 106 Working with the Options Pane for a Selected Bookmark 1. From the Bookmarks pane select More... 2. Scroll to a bookmark. 3. Select Menu to open the Options pane for that bookmark. 4. Select an option: • Back for displaying the page associated with the –...
-
Page 107: History Pane
• Cancel for exiting this pane and returning to the last – page displayed. History Pane This pane displays the list of recently-visited pages (up to nine history entries can be listed). Each history entry shows its title, if present. (Otherwise, “No Title” is displayed.) To navigate to a recently visited URL: 1. -
Page 108: Options Pane
• Copy Text for copying text from the current document – to the terminal’s clipboard. Options Pane This pane is specific to the page or pane being displayed. Image Pane This pane appears in the browser menu if you enabled the download of images via Navigate pane >... -
Page 109: Wap Box
Enter WAP Box This feature needs to be enabled by your Service Provider and it is unavailable in DMO. MTP850 is able to receive the notifications sent from your Service Provider. It contains WAP Box Low Priority the URL to the service, which can be loaded... - Page 110 The following icons indicate the status of messages in the WAP Box. WAP Box Description Icon WAP Message Icon Displayed next to the priority in the message list view. WAP Message Title Icon Displayed next to the title along with the text. WAP Message - Created Displayed next to the create date.
- Page 111 New WAP Message Received Types of the WAP Messages and their priorities: Service Provider sets the priority of the message. • Push Message - > High animation and the icon (blinking) are displayed – with the New WAP Message tone >...
-
Page 112: Gps Location Service
GPS Location Service Your terminal’s GPS Location feature uses information from Global Positioning System (GPS) satellites orbiting the Earth to determine the approximate geographical location of your terminal. The availability and accuracy of this location information (and the amount of time that it takes to calculate it) will vary depending on the environment in which you are using the terminal. -
Page 113: Enhancing Gps Performance
• Under any other metal or concrete roof or structure • Near a powerful radio or television tower • When your GPS antenna is covered (for example, by your hand or other object) or facing the ground • Ιn temperature extremes outside the operating limits of your terminal Even where location information can be calculated in such situations, it may take longer to do so. -
Page 114: Gps Icon
• Stand still. If possible, stand still until your terminal is finished determining your location. Moving your terminal at a walking pace while your terminal is calculating your approximate location may substantially decrease GPS performance. • In a car. When using the GPS feature in a car, position your terminal so that the GPS antenna has good access to GPS signals. -
Page 115: Entering Gps Location Service
• Setting Accuracy allows you to select high location accuracy or the energy optimised mode for GPS location service if the MTP850 is not connected to a charging device (Digital Car Kit or charger etc.). Scroll to your selection and press Select to access the next display. - Page 116 • The longitude expressed in degrees, minutes, and seconds • The number of satellites used to calculate the location. In general, more satellites make for better accuracy. The maximum is twelve satellites. To calculate your location again, press Refresh. For the users from United Kingdom and Ireland there are two letters (for UK) or 1 Position <Time>...
- Page 117 Better position accuracy is combined with less – power consumption optimization. The MTP850 works automatically in the high accuracy mode if connected to a charging device (Digital Car Kit or charger etc.) This feature is only available if set up by your Service Provider.
-
Page 118: The Menu
(This will select the item or return to previous level.) In a list press and hold for automatic scrolling. To Return to the Previous Level Press Back or To Exit the Menu Items Press Your MTP850 may exit if no key presses are detected for a time- out period. -
Page 119: Menu Icons
Security Lets you turn On/Off and verify security features, and change passwords. Setup Allows you to customize your MTP850. More... Contains more customisable menu items. Scroll Bar Indicates navigation among items that occupy more than one screen. If all items appear in one... -
Page 120: List Of Menu Items
List of Menu Items Messages New Message Inbox Outbox CO Box WAP Box Templates Predefined Send Status Contacts <New Contact> <Name 1> <Name 2> Security PIN Protect Change Code Keylock Setup Lock Keypad Auto. Lock Delay Start Locked AirEncrypt K Validity TMSCK Validity DMSCK Validity DMO SCK... - Page 121 Setup Ring Style Duplex <9 styles> Simplex <10 styles> Set Volume Language English <User Defined> Data Setup Voice Only Data Only Voice & Data Audio Audio Profile Profile 1 Howling Supr Enabled Disabled Audio Toggle Always Loud Spkr Cntrl Volume Adj. Mode Individual Common Tones...
- Page 122 Setup Time & Date Display Time & Date Time Only Date Only Format Format Time Format Date Set Time Time Offset Set Date System Update Time Only Time & Offset Energy Economy EE Status EE Selection RF Power HI RF Power Normal RF Pwr Accry Setup CORE RSM/PHF...
- Page 123 More... Group Setup Scan Scanning On/Off Select List Active List Scan List <40 lists> My Groups [New Folder] <FolderName> <FolderName> My Info My Private Num My Phone Num Radio Info Recent Calls Dialed Received Missed Shortcuts [New Entry] <shortcut name> Log on Log off Networks...
-
Page 124: Messages
Messages Refer to “Messages” on page 166 for details. Contacts General Contacts stores Private, Phone, and PABX numbers. Each Contacts entry can store several numbers. A Contacts entry contains: • A Name A name is required if you are storing more than –... - Page 125 Contact Icon Description Home Phone Number Work Phone Number PABX Number Other Phone Number Pickers Indicate more than one number is stored with the contact. Creating a Contact Contacts 1. From the Home display, press Contcs. [New Contact] Select [New Contact]. David Or - from the main menu select 2255...
- Page 126 Editing a Contact 1. From the contact list, scroll to the entry you want to edit. 2. Press to enter Contacts Menu. Select Edit. The MENU entry details screen displays. 3. Follow the instructions in “Creating a Contact” on page 117 to edit the various fields.
-
Page 127: Security
Unit Unlocked you entered the correct code. The display – returns to the Security sub-menu and shows the active setting: Off To unlock the MTP850 after powering on, enter the code at the prompt. The MTP850 enters the Home display. - Page 128 Incorrect Code Entered You are prompted to try again. – After failing, your MTP850 will be blocked. Please check with your Service Provider how many failed attempts are allowed. How to unblock the MTP850 The display shows Unit Blocked. You can only send an Emergency Call.
- Page 129 Locking/Unlocking the Keypad To prevent accidental key/button presses: Keylock Setup Press to lock/unlock the keypad. MENU Lock Keypad Auto. Lock: ON Service Provider can choose the notification Delay: 5 min Start Locked:Off for the Keypad lock and if to lock the PTT. Select Back The Emergency button is not locked.
- Page 130 Call encryption provides service confidentiality between you and the system. If encryption is on and you receive a clear call (unencrypted), the MTP850 will display a Call & Data Not Encrypted message. You cannot manually disable Air Encryption (if fitted) from the menu.
- Page 131 From the main menu, select Security > K Validity. K (Key) is a secret key the infrastructure uses to authenticate the MTP850 in the system. It is part of the authentication that provides service confidentiality between your MTP850 and the system.
- Page 132 Air interface encryption provides service confidentiality between your MTP850 and the system. Your MTP850 is provided with a set of SCKs. To verify SCK validity for DMO, press Select. The display will show one of the following messages: •...
-
Page 133: Man Down
• Select On to restore all vibrations. Man Down From the main menu, select Man Down. This feature is available only for MTP850 S and MTP850 FuG. Set Man Down to On Man Down Select On. The Man Down feature monitors the state in which the terminal is. -
Page 134: Setup
1. From the main menu, select Setup Select Back > Vibrate. 2. Scroll through the settings. 3. Select required setting, and press Back to exit. The Vibrate settings mentioned above apply for all calls. Your MTP850 can associate different Vibrate settings for different calls. - Page 135 If you choose Group Call, the settings available are Vibe On or Vibe Off only. Setting the Ring Style This sub-menu allows you to set the incoming Duplex call ring style. Your MTP850 features nine for British Duplex and ten for Simplex selectable ring Style 2 Style 3 styles.
-
Page 136: Setting The Volume
Upon entry into this sub-menu, the display shows the current ring style used. Scroll to the desired style and press Select. You will hear the new ring style immediately for a few seconds. If necessary, adjust the volume level. Setting the Volume Volume This sub-menu allows you to adjust the Duplex Vol: 0_... - Page 137 Setting Up the Data Function You can connect the MTP850 to an external device (such as a laptop or desktop PC). The MTP850 will then be capable of transmitting and receiving data from the external device. To connect the MTP850 accessory connector to the external device, use cable FKN4897.
- Page 138 The Data Transmit/Receive icon is displayed to indicate data is being transferred to/received from the external device. The MTP850 ends the Ambience Listening (AL) call and the microphone is closed when the MTP850 is in one of the following states: • Entering the out-of-service area •...
- Page 139 To select an Audio Profile: 1. From the main menu, select Setup > Audio > Audio Profile. 2. Scroll and choose your required profile. Setting Howling Suppression Howling Suppression is a mode of operation that eliminates howling effect. To enable or disable Howling Suppression: 1.
- Page 140 Setting Tones From the main menu, select Setup > Tones. Tones This sub-menu allows you to activate/ Keypad Tone deactivate the MTP850 tones. All Tones Talk Permit Clear to send For a detailed list of tones, see “Tones” on Periodic Alert page 194.
- Page 141 3. Choose required setting, and press Select, or press Back to exit. When all tones are disabled, your MTP850 switches into covert mode, and all audio is routed to the earpiece, instead of the speaker for low audio operation. Remember to disable this feature, when your covert operation is complete, to return your MTP850 to high audio operation.
- Page 142 Setting Periodic Alert Periodic alert indicates the missed calls, the unread messages and low battery. For each indication the unread message tone is played with the amber LED color. To activate/deactivate the Periodic Tone: 1. From the main menu, select Setup > Tones > Periodic Alert >...
- Page 143 3. Date Only The MTP850 displays date only. Format Time – sub-menu is disabled. 4. Off The MTP850 does not display time nor date. Format – menu is disabled. Scroll to the desired setting and press Select. Press Back to exit.
- Page 144 Setting Time To set time: 1. From the main menu, select Setup > Time & Date > Set > Set Time. 2. Enter time using navigation key and/or numeric keypad, and press Done. Press Cancel to exit. Setting Date To set date: 1.
- Page 145 – • Screen Saver covers the MTP850 display after the – MTP850 stays idle for a pre-programmed period of time (if configured by your Service Provider). • Backlight backlight lights the display and keypad when –...
- Page 146 When this feature is activated, the content of the display is flipped upside down.The feature is particularly useful for a user who has to wear the MTP850 on shoulder, belt, or lapel and at the same time wishes to read the display upside down.
- Page 147 Scrolling left and right using the navigation key: To exit display flip: From the main menu, select Setup > Display > Flip Display > Off. Setting the Text Size 1. From the main menu, select Setup > Display > Text Size. 2.
- Page 148 The menu options will display the Screen Saver if your Service Provider pre-programmed this feature. Setting the Backlight Your MTP850 has the following backlight settings: Auto: In this mode the backlight is triggered by turning on the radio, by pressing any key on device or on the accessory that is connected to it.
- Page 149 Energy Economy (EE) is a mode of operation where in order to save battery life Energy Economy EE Status the MTP850 does not monitor all downlink EE Selection time slots of the Main Control Channel. If the terminal is in the charger, Energy Economy...
- Page 150 2. Select required setting (On/Off). 3. Press Back to exit. Transmission Power Class Transmission Power feature enables MTP850 to choose whether to transmit with RF Power Hi RF Power Class 3L or Class 4, that is respectively High Normal RF Pwr or Normal RF Power.
- Page 151 Accry Setup This feature is available only for MTP850 S and MTP850 FuG. You can choose which of the accessory is connected to the radio. It automatically Accry Setup CORE RSM/PHF applies the audio mode and option buttons CORE Earpiece RSM Earp: Con...
- Page 152 Rotary Lock Your options are: • Locked - locks Rotary Knob, you can unlock it by selecting Unlocked or by pressing and holding Rotary Knob. • Unlocked - unlocks Rotary Knob, you can lock it by selecting Locked or by pressing and holding Rotary Knob. •...
-
Page 153: Entering More
Confirm TG Sel. If it is set to On, you need to confirm the talkgroup selection by pressing Select or pressing PTT to immediately start a call on a new talkgroup. Otherwise the radio attaches to the selected talkgroup without any additional prompt. Function Keys Your options are: •... -
Page 154: Entering Scan
This sub-menu allows you to activate/deactivate the scanning of a list of pre-defined groups programmed in the MTP850. The MTP850 will join any group call as long as this group is defined in the scan list and scan is turned on. - Page 155 Selecting a List with Scanning On 1. Select Select List. Scan Lists 2. To select a list other than the highlighted Network List one, scroll and press Select. The display Scan List 1 Scan List 2 shows (for example) the Scanning Scan Scan List 3 List 1 message.
- Page 156 Viewing the Active Scan List This sub-menu allows you to view the active scan list (Scan List 1 in this example). 1. From the main menu, select More... > Group Setup > Scan > Active List. Press View. The display will show one of the following states: •...
- Page 157 Editing Scan Lists Scan Lists Scan Menu 1. From the main menu, Rename Scan List 1 Capacity select More... Scan List 2 Clear List Network List > Group Setup Add Group Edit > Scan > Scan Lists. View Back Select Back 2.
-
Page 158: My Groups (Tmo/Dmo)
> To set a priority to a group, scroll through the priority list: high, medium, or low. A call from a high priority group will interrupt an on- going call with a medium and low priority. A call from a medium priority group will interrupt an on-going call with a low priority. - Page 159 Deleting a Group 1. From the main menu, select More... > Group Setup > My Groups > <FolderName>. 2. Highlight talkgroup name that you want to delete and select Delete. 3. Select Yes to confirm. Deleting All Groups 1. From the main menu, select More... > Group Setup > My Groups >...
-
Page 160: Viewing/Modifying Personal Information
The displayed private number cannot be modified. To modify the displayed phone number, press Edit. Edit the number and select Ok to confirm. The new phone number does not modify the MTP850 number in the system. Radio Info stores information about: • Manufacturer... -
Page 161: Recent Calls
A number dialed more than once, will appear only once in the list. Upon receiving a missed call notification, the MTP850 will display the missed calls prompt. When a call is received during an active call, 1 missed call the number is written to the missed calls list. - Page 162 Viewing Recent Calls 1. From the main menu, select More... > Recent Calls. 2. Scroll to the desired list (Dialed, Received, or Missed) and press Select. To get more information on a recent call: From the recent calls list, select the call you want information on.
-
Page 163: Shortcuts
A call that was missed or received without a calling number, will be stored in the list as “unknown”. You cannot start a call to such a number. 2. After completing the call, the MTP850 will exit the received/ missed/dialed list. From the Home display press to access the list of the last dialled calls. - Page 164 Creating Menu Shortcut For example, let’s create a shortcut to the All Tones options. 1. From the main menu, select Menu > Setup > Tones, then highlight All Tones. 2. Press and hold until a confirmation screen appears. MENU Press Yes to confirm. 3.
-
Page 165: Rui
Deleting All Shortcuts 1. From the main menu, select More... > Shortcuts. 1. Scroll to the shortcuts. 2. Press and select Delete All. Press Yes to delete MENU shortcuts. Press No to cancel. Shortcut Display Messages The display might show one the following messages for a few seconds: •... - Page 166 Radio States • Full Service user Log On/Book On was successful. – Radio has full functionality. • Limited Service user not logged on. Specified by the – service provider. • Pseudo Log On Radio has full functionality available (depending on the service provider) except some services like forwarding calls.
- Page 167 • to choose your User ID from the list highlight the correct one and press User ID List [New User ID] Select Peter Mark Select Back You can press MENU anytime to view the detailed list (useful for the long User ID’s that are not fully displayed). Press MENU again to go back to the previous list.
-
Page 168: Networks
Entering the Networks Sub-menu From the main menu, select More... > Networks. Network Networks Sel This sub-menu allows you to select the Trunked Mode Direct Mode network your MTP850 registers to, and what Repeater Mode TXI Mode mode it operates on. Select Back... - Page 169 3. Return to the Home display. The display shows the network ID or alias. It is up to your Service Provider to ensure your own MTP850 identity is allowed to register on other networks in your list. Some groups may not be available on other networks.
- Page 170 Select Back 2. The MTP850 switches to Direct Mode Setting Repeater Mode This sub-menu allows you to select the mode your MTP850 will be operating on. 1. From the main menu, select More... > Networks > Repeater Mode. 2. The MTP850 switches to Repeater Mode This feature is available only for MTP850 FuG.
-
Page 171: Location
1. From the main menu, select More... > Networks > TXI Mode. 2. Select Deactivate. The MTP850 sounds the “Transmit Inhibit” tone and exits TXI. Location Refer to “GPS Location Service” on page 104 for details. Packet Data This menu item allows to display statistical values related to a packet data connection. - Page 172 • Data encryption status. Data services are only available in TMO. The data option must be set to Voice&Data or Data Only. (Refer to “Setting Up the Data Function” on page 129). Viewing Sent Data Statistics 1. Select Sent Data in the Packet Data sub-menu. The number of KBytes sent since current packet data activation is displayed.
- Page 173 Your Service Provider has set the maximal number of time slots to allocate to 1, 2, 3, or 4. The bandwidth percentage refers to the possible number of slots (1, 2, 3, or 4) as 100%. Example: 50% is displayed, if 2 of 4 possible slots are allocated. 100% is displayed, if 4 of 4 possible slots are allocated.
-
Page 174: Messages
The predefined templates are programmed into your MTP850 by your Service Provider. The user defined templates can be Inbox messages or new Outbox messages that you choose to store in your MTP850 memory. User defined messages may also be programmed into your MTP850. -
Page 175: Entering The Messages Sub-Menu
If configured, a message will alert you of an incoming Group/ Emergency/Broadcast call, of your joining it, or of its end. In DMO text messages are sent on the frequency of the current talkgroup. Make sure you select the desired talkgroup before sending a message. -
Page 176: New Message
Your MTP850 can receive calls while in the Messages sub-menu. New Message Creating a Message 1. From the main menu, select Messages > New Message. An empty screen will Edit open. Message: 2. Type/edit your message using the keypad. (For details on text editor use, see “Writing... -
Page 177: Using The Inbox
Back message. More about “Store & Forward” on page 178. After sending the message, your MTP850 will return to the templates list or to the message editor screen. It is recommended to wait for the message acknowledge before sending a new message. - Page 178 4 lines of the text message. You will hear the “New Mail Received” alert tone when a new message is received while your MTP850 is engaged in a call (if configured by your Service Provider). • For message alert, see settings in the Vibrate menu option (page 126) and the Tones menu option (page 132) •...
- Page 179 Displaying Long Text Messages In the message view screen, press More to read the next page, and Back to return to the Inbox. You can view your message line by line using keys. Handling Messages When in the inbox or after reading the message, press and select one of the MENU...
-
Page 180: Calling A Number In A Message
Immediate Message New Message: When the new Immediate Message is From: <Text> received, radio plays the New Mail Received tone and displays the content overlaping your Time Stamp previous screen. All Immediate Messages Back are stored in the Inbox. If the radio is in PIN Lock state, Immediate Message is displayed after correct PIN is entered. - Page 181 Outbox All sent messages are stored in Outbox. To go to Outbox press > Messages > Outbox. MENU Submenu of the Outbox includes: • Select Store and press Select to store the message as a template in the template list. Outbox Menu Store •...
-
Page 182: User Defined Templates
All the messages are described by three icons: Outbox Icon Description Delivery in Progress Delivery Accomplished Delivery Failed Delivery report is saved in Inbox and in the associated message in Outbox. However it is deleted from Inbox after viewing it. User Defined Templates The user defined mail templates are received, new, sent or programmed... -
Page 183: Predefined Templates
3. Send the template. See “Sending the Message” on page 168. Predefined Templates Predefined mail templates are templates that are programmed into your MTP850 by your Predefined 1) My IP address.. Service Provider. You are allowed to perform 2) Meeting at... - Page 184 • Message Failed the message was not received. – 3. After sending the message, your MTP850 will return to the predefined template list or to the message editor screen. It is recommended to wait for the message acknowledge before sending a new message.
-
Page 185: Sending A Status Message To A Group
Sending a Status Message to a Group 1. Switch to the desired talkgroup, to which you want to send a status message. 2. From the main menu, select Messages > Send Status. 3. In this example, Lunch is the last sent status. -
Page 186: Long Text Messages
If you enter the status menu from a busy talkgroup, audio is momentarily suspended to allow transmission of your status message. If an Emergency call is received, the MTP850 immediately joins the Emergency call. If set up by your Service Provider it is not possible to send a status message to a private number that is not in the Contacts List. - Page 187 • Normal call-out • Storm plan it is sent to a group several – time to raise reliability. User can only Storm Plan 1 accept the Call-Out by pressing any button Test Group and is moved to information phase (soft Car accident keys are not labelled).
-
Page 188: Wap Box
• Information phase user is still in the call-out mode and he – can receive more detail information about the incident that occurred via subsequent text or the voice message. The user can query for more information using voice group call or Call-Out text function which enables the user to send a text message to the Service Provider. -
Page 189: Writing Text
Writing Text Selecting the Text Entry Mode Text entry modes make it easy for you to enter names, numbers, and messages. In the text entry screen, select > Entry Mode, and MENU then select one of the following modes: • Primary for entering alphanumeric characters –... -
Page 190: Icons
In the text entry screen, select > Entry Setup, and MENU then change to one of the methods and its related language (for example: TAP English). Icons In the text entry screen, icons tell you which text entry mode and method you are using. A character counter icon indicates the number of entered characters. -
Page 191: Tap Display
TAP Display Press a key and the display shows the following information: • The icon indicating the current Tap icon Edit Counter Message: text writing method see icons. – Main text area • The main text entry area that will hold your message after Send Delete you selected the desired words. - Page 192 Alphanumeric Mode (TAP/iTAP) Press to cycle through single shift, caps lock, and lower case. ’ ” € . , ? ! 0 1 @ - ( ) / : _ ; + & % * = < > £ $ ¥ ×...
- Page 193 List of Keys and Characters in Symbol Mode Symbol Mode * / \ [ ] = < > § # × ’ ” € . , ? ! @ - ( ) / : _ ; + & % * = < > £...
- Page 194 Other Keys Description Any numeric • In TAP press any key to reject word completion and continue with text entry A new completion will be displayed, if available, after the time-out for TAP expires. • Press and hold to enter Numeric mode from TAP or iTAP alphanumeric.
-
Page 195: Writing In Itap Alphanumeric
Writing in iTAP Alphanumeric For example, let’s write “David 232!”. 1. In the text entry screen, select > Entry Setup, and MENU then change to iTAP English. Press Back to return to the text entry screen. 2. In the text entry screen, select >... -
Page 196: Writing In Numeric Mode
Word Locking You can use the partial or full word-lock feature to add words that are not in the dictionary and/or to narrow down the list of alternates to those that begin with a particular prefix. 1. Try to enter the word. Scroll the alternate line for a word option. -
Page 197: Writing In Tap Alphanumeric
Writing in TAP Alphanumeric 1. In the text entry screen, select > Entry Setup, and MENU then change to TAP and its related language. Press Back to return to the text entry screen. 2. In the text entry screen, select >... -
Page 198: What To Do If
...-Rcvd Call received but not answered, or rejected. Attachment Failed The MTP850 could not perform talkgroup attachment. The MTP850 keeps on trying. If it does not succeed, try another talkgroup. Authenticate The MTP850 could not register on an Authenticated system... - Page 199 You have less than five minutes of talk time. Message Delivered Indicates mail successfully delivered. Message Failed Indicates mail delivery failure. The MTP850 is outside coverage. Return to coverage. Mode No Service My Groups is You cannot view/delete groups when the My Groups folder is Empty empty.
- Page 200 The MTP850 turns off. Keep it turned off for five minutes. Party Busy The called MTP850 is busy. Party Not Available • The called MTP850 is out-of-range. Please try again later. • The called MTP850 is turned off. Please try again later. Please Try Again The MTP850 could not place the call.
- Page 201 Unit is OK Self-test error. A minor fault has been detected with your Warn... MTP850. The MTP850 is still fully operative. Should this error recur, note the error code and contact service. Unit Not Attached The MTP850 could not attach to the system. The talkgroup...
-
Page 202: Tones
• Back to full service Clear to send Once • Bad key press Once • Good key press Once • MTP850 self-test fails at power up • From out-of-service to in-service In Call • Call clear warning Once • Call modified... - Page 203 Status message is not Once acknowledged by the dispatcher and the timer expires Status message is Once acknowledged Incoming Calls Your MTP850 received a Once Group Call without gateway. (setup only) High Priority Group Call Once received Emergency Alarm sent or Twice...
- Page 204 = High Tone; = Low Tone Description Type Repeated Phone ring (reception) According to the Ring Style Until you answer or Duplex Private Call sub-menu setting. the call is rejected Private Call received According to the Ring Style Until you answer or sub-menu setting.
- Page 205 = High Tone; = Low Tone Description Type Repeated Man Down pre-alert Once Man Down device Until you disable failure the feature. Double PTT - Single Tone Once Double PTT - Double Once Tone Double PTT - Triple Tone Once GPS in coverage Once GPS out of coverage...
-
Page 206: Index
Index accessory connector call dial, one-touch adjusting volume call queuing air encryption calls key deletion duplex alias simplex alphanumeric key certificate authority (CA) entering text (letters and cleaning your unit digits) code changing ambience listening (AL) connectors announcement talkgroup (ATG) accessory antenna attaching/detaching audio accessory... - Page 207 text size setup scroll to next vertical flip setup selection wallpaper setup stay in displaying long text messages forced call DMO (direct mode operation) four-way navigation key DMO group call gateway making global positioning system receiving (GPS) DMO SCK GPS (global positioning DMO/TMO, one-touch system) DTMF overdial...
- Page 208 earpiece connected four-way navigation emergency menu on-off/end/home high audio icon programmable numeric inbox programmable side list scrolling send low audio icon soft menu speaker control new message arrived knob new message(s) in inbox end-stop rotary knob no service scrolling repeater rotary RF power RUI pseudo log on...
- Page 209 mute/unmute bottom open group microphone Openwave mobile browser my info sub-menu PABX (private automatic branch network list exchange) networks sub-menu PABX call non-tactical call packet data (PD) service notations PD (packet data) numeric key, programmable phone call one-touch dialing speed dial one-touch phone number audio profiles...
- Page 210 programmable side keys speaker control key proxy speakerphone PUK (personal unblocking handsfree key) speed dial push-to-talk button (PTT) speed number status message sending received call history targeting receiving calls status message, one-touch recent calls sub-menu repeater RF power tactical call one-touch talkgroup ring style of incoming call...
- Page 211 making security) receiving TMO/DMO one-touch tones setting ’clear to send’ setting all tones setting keypad tone setting talk permit tone tones setup top microphone transmission power class transmit inhibit (TXI) mode one-touch trunked mode operation (TMO) TXI (transmit inhibit) unblocking the terminal unlocking the terminal unmute/mute bottom microphone...
- Page 214 6866537D80- @6866537D80@ www.motorola.com/tetra...