IBM BladeCenter Management Module User Manual
Hide thumbs
Also See for BladeCenter Management Module:
- Installation and user manual (184 pages) ,
- Installation manual (82 pages) ,
- Manual (43 pages)
Table of Contents
Advertisement
Quick Links
Advertisement
Table of Contents

Related Manuals for IBM BladeCenter Management Module


Summary of Contents for IBM BladeCenter Management Module
- Page 1 ERserver BladeCenter Management Module User’s Guide...
- Page 3 ERserver BladeCenter Management Module User’s Guide...
- Page 4 Note: Before using this information and the product it supports, read the general information in Appendix B, “Notices,” on page 59. Fourth Edition (February 2004) © Copyright International Business Machines Corporation 2004. All rights reserved. US Government Users Restricted Rights – Use, duplication or disclosure restricted by GSA ADP Schedule Contract with IBM Corp.
-
Page 5: Table Of Contents
Safety ......v Chapter 1. Introducing the BladeCenter management module ..1 Management module controls and indicators . - Page 6 Japanese Voluntary Control Council for Interference (VCCI) statement . . . 63 Index ......65 BladeCenter Management Module: User’s Guide...
-
Page 7: Safety
Vor der Installation dieses Produkts die Sicherheitshinweise lesen. Prima di installare questo prodotto, leggere le Informazioni sulla Sicurezza. Les sikkerhetsinformasjonen (Safety Information) før du installerer dette produktet. Antes de instalar este produto, leia as Informações sobre Segurança. © Copyright IBM Corp. 2004... - Page 8 2. First, remove power cords from outlet. 3. Attach signal cables to connectors. 3. Remove signal cables from connectors. 4. Attach power cords to outlet. 4. Remove all cables from devices. 5. Turn device ON. BladeCenter Management Module: User’s Guide...
- Page 9 Statement 8: CAUTION: Never remove the cover on a power supply or any part that has the following label attached. Hazardous voltage, current, and energy levels are present inside any component that has this label attached. There are no serviceable parts inside these components.
- Page 10 BladeCenter Management Module: User’s Guide...
-
Page 11: Chapter 1. Introducing The Bladecenter Management Module
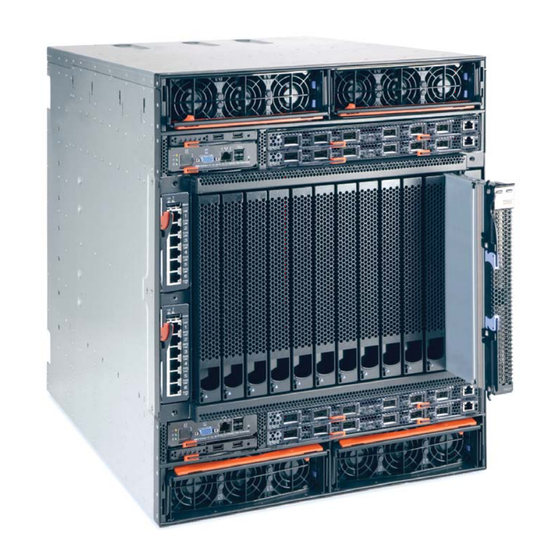
Chapter 1. Introducing the BladeCenter management module This Management Module User’s Guide contains information about configuring the ERserver ® management module and managing components installed in the IBM ™ BladeCenter unit. Your BladeCenter unit comes with one hot-swap management module in management-module bay 1. -
Page 12: Management Module Controls And Indicators
For additional information, see the “Light path diagnostics” section in the Hardware Maintenance Manual and Troubleshooting Guide on the IBM BladeCenter Documentation CD. v Power-on: When this green LED is lit, the management module has power. -
Page 13: Management Module Input/Output Connectors
Video connector Your BladeCenter management module contains one standard video connector. Use this connector to connect a compatible SVGA or VGA video monitor to the BladeCenter unit. Blade server integrated video controllers share the management-module video connector through the BladeCenter KVM interface. -
Page 14: Keyboard Connector
Remote management and console Ethernet connector Your BladeCenter management module contains one 10/100 Mb Ethernet connector that provides the remote connection to the network management station on the network. Use this port to establish connections with the remote management and remote console features of the BladeCenter unit. -
Page 15: Chapter 2. Configuring The Management Module And Bladecenter Unit
The Web browser that you use must be Java -enabled, must support JavaScript 1.2 or later, and must have the Java 1.4.1 Plug-In installed. ® v Microsoft Internet Explorer 5.5 (with latest Service Pack installed), or later © Copyright IBM Corp. 2004... - Page 16 You also can use the management-module Web interface and management-module command-line interface to view some of the blade server configuration settings. See Chapter 3, “Using the management-module Web interface,” on page 11 and the IBM Eserver BladeCenter Management-Module Command-Line Interface Reference Guide for more information.
-
Page 17: Setting Up The Remote Connection
Setting up the remote connection To configure and manage BladeCenter components, you must first set up the remote connection through the external Ethernet port on the management module. Cabling the Ethernet port Complete the following steps to connect the Ethernet cable to the management module: 1. -
Page 18: Configuring The Management Module For Remote Access
Note: If the IP configuration is assigned by the DHCP server, the network administrator can use the MAC address of the management module network interface to find out what IP address and host name are assigned. BladeCenter Management Module: User’s Guide... -
Page 19: Communicating With The Ibm Director Software
Console main window) that represents the BladeCenter unit. If the BladeCenter management module IP address is known, the network administrator can create an IBM Director managed object for the unit. If the IP address is not known, the IBM Director software can automatically discover the BladeCenter unit (out-of-band, using the Ethernet port on the BladeCenter management module) and create a managed object for the unit. - Page 20 BladeCenter Management Module: User’s Guide...
-
Page 21: Chapter 3. Using The Management-Module Web Interface
“Blade and I/O Module Power/Restart Access” authority. Table 1. User authority relationships Authority required to change information or execute tasks Window System Status Event Log (view) Event Log (clear) LEDs Hardware VPD Firmware VPD © Copyright IBM Corp. 2004... -
Page 22: Starting The Management-Module Web Interface
1. Open a Web browser. In the address or URL field, type the IP address or host name assigned for the management-module remote connection (see “Configuring the management module for remote access” on page 8 for more details). BladeCenter Management Module: User’s Guide... - Page 23 The Enter Network Password window opens. 2. Type your user name and password. If you are logging in to the management module for the first time, you can obtain your user name and password from your system administrator. All login attempts are documented in the event log. Note: The initial factory-defined user ID and password for the management module are: v User ID: USERID (all capital letters)
-
Page 24: Management-Module Web Interface Options
BladeCenter unit. Blade Servers: v Bay - The lowest-number bay the blade server occupies. BladeCenter Management Module: User’s Guide... - Page 25 (Blade Tasks → On Demand), which changes the status from Standby to Active. Note: You must contact IBM within 14 calendar days after you activate an On Demand blade server. See your Agreement for Standby Capacity on Demand for additional information.
-
Page 26: Event Log
The maximum capacity of the event log is 750 entries. When the log is 75 percent full, the BladeCenter Information LEDs light. When the log is full, new entries overwrite the oldest entries, and the BladeCenter Error LEDs light. If you do not BladeCenter Management Module: User’s Guide... -
Page 27: Leds
want the management module to monitor the state of the event log, deselect the Monitor log state events checkbox at the top of the event log page. You can sort and filter entries in the event log. See the event log help for more information. -
Page 28: Hardware Vpd
The VPD for the firmware in the management modules also includes the file name of the firmware components. (Selecting the Firmware VPD choice takes up to 30 seconds to refresh and display information.) BladeCenter Management Module: User’s Guide... -
Page 29: Blade Tasks
Blade Tasks Select the choices in the Blade Tasks section to view and change the settings or configurations of blade servers in the BladeCenter unit. Power/Restart Select Power/Restart choice to perform the following actions on any blade server in the BladeCenter unit. Note: You cannot perform these actions on an On Demand blade server with a Standby status (identified by an X in the SCOD column). -
Page 30: On Demand
Servers link to activate the selected blade servers. Blade servers with an On Demand status of N/A are not On Demand blade servers. Note: You must contact IBM within 14 calendar days after you activate an On Demand blade server. See your Agreement for Standby Capacity on Demand for additional information. - Page 31 Select the Remote Control choice to: v View and change the current owners of the keyboard, monitor, and mouse (KVM), and of the CD-ROM drive, diskette drive, and USB port (Media tray). v View the details of any remote control session currently active (user ID, client IP address, start time).
-
Page 32: Firmware Update
Select the Firmware Update choice to update the service processor firmware on a blade server. Select the target blade server and the firmware file to use for the update; then, click Update. You can obtain the firmware files from the IBM Support Web site at http://www.ibm.com/pc/support/. -
Page 33: Configuration
Configuration Select the Configuration choice to: v Define a name for a blade server. v Enable or disable the following items on all blade servers in the BladeCenter unit: – Local power control – Local KVM control – Local media tray control –... -
Page 34: Serial Over Lan
SOL sessions are started and run using the management module command-line interface. See the IBM Eserver BladeCenter Management Module Command-Line Interface Reference Guide for information and instructions. BladeCenter Management Module: User’s Guide... -
Page 35: I/O Module Tasks
I/O Module Tasks Select the choices in the I/O Module Tasks section to view and change the settings or configuration on network-interface I/O modules in the BladeCenter unit. Note: Some choices do not apply to, and are not available for, some types of I/O modules such as pass-thru modules. -
Page 36: Firmware Update
Select the Firmware Update choice to update the firmware in a I/O module. Select the target I/O module and the firmware file to use for the update; then, click Update. You can obtain the firmware files from the IBM Support Web site at http://www.ibm.com/pc/support/. -
Page 37: General Settings
General Settings Select the General Settings choice to view or change the following settings: v The name of the management module v The name of the contact person responsible for the management module v The physical location of the management module v The real-time clock settings in the management module Some of the General Settings are used during SNMP and SMTP configuration. - Page 38 ID and password in a safe place. If you forget the management-module login ID and password, you must replace the management module. Click on View Configuration Summary to display the configuration settings for all BladeCenter users and components. BladeCenter Management Module: User’s Guide...
-
Page 39: Alerts
Select the Alerts choice to specify which alerts (from lists of Critical, Warning, and System alerts) are monitored, which alert notifications are sent to whom, how alert notifications are sent (SNMP, e-mail, IBM Director), whether to include the event log with the notification, and other alert parameters. -
Page 40: Network Interfaces
Port used for persistent remote disk (disk on card). 5900 Port used for the TCP VNC server applet 6090 Port used for IBM Director commands using TCP/IP 13991 Port used for IBM Director alerts using UDP Click on View Configuration Summary to display the configuration settings for all BladeCenter users and components. - Page 41 Changes). 2. For I/O module communication with a remote management station, such as the IBM Director server, through the management module external Ethernet port, the I/O module internal network interface and the management module internal and external interfaces must be on the same subnet.
-
Page 42: Network Protocols
BladeCenter users and components. Some of the Network Protocol settings are used during SNMP, SMTP, and LDAP configuration. See “Configuring SNMP” on page 35, “Configuring SMTP” on page 37, and “Configuring LDAP” on page 38 for additional information. BladeCenter Management Module: User’s Guide... -
Page 43: Security
Security Select the Security choice to view or change the secure socket layer (SSL) settings for the Web server and LDAP client, and view or change the Web server secure shell (SSH) settings. You can enable or disable (the default) SSL, and choose between self-signed certificates and certificates provided by a certificate authority (CA). -
Page 44: Configuration File
Management-module firmware is in several separate files that are installed independently; you must install all of the firmware update files. You can obtain the firmware files from the IBM Support Web site at http://www.ibm.com/pc/support/. Restore Defaults Select the Restore Defaults choice to restore the factory default configuration of the management module. -
Page 45: Restart Mm
(MIB) on your SNMP manager. The MIB supports SNMP traps. The MIB is included in the management-module firmware update package that you downloaded from the IBM Support Web site. Complete the following steps to configure your SNMP: 1. Log in to the management module where you want to configure SNMP. For more information, see “Starting the management-module Web interface”... - Page 46 SNMP managers. You must define at least one community. Each community definition consists of the following parameters: v Name v IP address If either of these parameters is not correct, SNMP management access is not granted. BladeCenter Management Module: User’s Guide...
-
Page 47: Configuring Smtp
Note: If an error message window opens, make the necessary adjustments to the fields listed in the error window. Then, scroll to the bottom of the page and click Save to save your corrected information. You must configure at least one community to enable this SNMP agent. 7. -
Page 48: Configuring Ldap
If left blank, the default value of 389 is used for non-secured LDAP connections. For secured connections, the default is 636. You must configure at least one LDAP server. BladeCenter Management Module: User’s Guide... - Page 49 Root DN The distinguished name for the root entry of the directory tree on the LDAP server. An example might look like dn=companyABC,dn=com. User Search Base DN As part of the user authentication process, it is necessary to search the LDAP server for one or more attributes associated with a particular user.
-
Page 50: Configuring The Ldap Client Authentication
1. In the navigation pane, click MM Control → Network Protocols. 2. Scroll down to the Lightweight Directory Access Protocol (LDAP) Client section and click Set search attribute names for LDAP based authentication. A page similar to the one in the following illustration is displayed. BladeCenter Management Module: User’s Guide... - Page 51 3. To configure the search attributes, use the following information. UID Search Attribute When the binding method selected is Anonymous authentication or Client authentication, the initial bind to the LDAP server is followed by a search request directed at retrieving specific information about the user, including the distinguished name, login permissions, and group ownerships of the user.
-
Page 52: Secure Web Server And Secure Ldap
Web server (HTTPS) and secure LDAP connection (LDAPS). The management module takes on the role of SSL client or SSL server depending on the type of connection. The following table shows that the management module BladeCenter Management Module: User’s Guide... -
Page 53: Configuring Security
acts as an SSL server for secure Web server connections. The management module acts as an SSL client for secure LDAP connections. Table 4. Management module SSL connection support Connection type SSL client SSL server Secure Web server Web browser of the user Management-module (HTTPS) (For example: Microsoft Internet Explorer) -
Page 54: Ssl Certificate Overview
SSL server, see “Generating a self-signed certificate” on page 45. If you want to use a certificate authority signed certificate for the SSL server, see “Generating a certificate signing request” on page 46. BladeCenter Management Module: User’s Guide... - Page 55 Generating a self-signed certificate: Complete the following steps to generate a new private encryption key and self-signed certificate: 1. In the navigation plane, click MM Control → Security. A page similar to the one in the following illustration is displayed. 2.
- Page 56 Read the information in the following sections for a description of each of the common fields. Required certificate data The following user-input fields are required for generating a self-signed certificate or a certificate signing request. BladeCenter Management Module: User’s Guide...
- Page 57 Country Use this field to indicate the country where the management module physically resides. This field must contain the 2-character country code. State or Province Use this field to indicate the state or province where the management module physically resides. This field can contain a maximum of 30 characters.
- Page 58 Web browser window, PEM format is usually expected. The command for converting a certificate signing request from DER to PEM format using OpenSSL is similar to the following: openssl req -in csr.der -inform DER -out csr.pem -outform PEM BladeCenter Management Module: User’s Guide...
- Page 59 7. Send the certificate signing request to your certificate authority. When the certificate authority returns your signed certificate it might be necessary to convert the certificate to DER format. (If you received the certificate as text in an e-mail or a Web page, it is probably in PEM format.) You can change the format using a tool provided by your certificate authority or using a third-party tool such as OpenSSL (http://www.openssl.org).
-
Page 60: Enabling Ssl For The Secure Web Server
1. In the navigation pane, select MM Control → Security. 2. In the SSL Client Configuration for LDAP Client section, make sure that the SSL client is disabled. If it is not disabled, select Disabled in the SSL Client field and then click Save. BladeCenter Management Module: User’s Guide... - Page 61 3. Scroll to the SSL Client Trusted Certificate Management section. A page similar to the one in the following illustration is displayed. 4. Click Import next to one of the Trusted CA Certificate 1 fields. A page similar to the one in the following illustration is displayed. 5.
-
Page 62: Enabling Ssl For The Ldap Client
You must create a server key before enabling the secure shell server. When you request a new server key, both a Rivest, Shamir, and Adelman (RSA) key and a DSA key are created to allow access to the management module from BladeCenter Management Module: User’s Guide... -
Page 63: Enabling The Secure Shell Server
either a SSH version 1.5 or SSH version 2 client. For security, the secure shell server private key is not backed-up during a configuration save and restore operation. The following third-party SSH clients are available. While some SSH clients have been tested, support or non-support of any particular SSH client is not implied. -
Page 64: Using The Secure Shell Server
Restore the management-module configuration Note: If you cannot communicate with a replacement management module through the Web interface or the IBM Director programs, the IP address might be different from the IP address of the management module just removed. -
Page 65: Restoring And Modifying Your Asm Configuration
changed or damaged. Use it as a base that you can modify to configure multiple management modules with similar configurations. Complete the following steps to back up your current configuration: 1. Log in to the management module where you want to back up your current configuration. - Page 66 8. Click OK to confirm that you want to restart your management module. 9. Click OK to close the current browser window. 10. To log in to the management module again, start your browser, and follow your regular login process. BladeCenter Management Module: User’s Guide...
-
Page 67: Appendix A. Getting Help And Technical Assistance
If you need help, service, or technical assistance or just want more information about IBM products, you will find a wide variety of sources available from IBM to assist you. This appendix contains information about where to go for additional information about IBM and IBM products, what to do if you experience a problem ®... -
Page 68: Getting Help And Information From The World Wide Web
Getting help and information from the World Wide Web On the World Wide Web, the IBM Web site has up-to-date information about IBM xSeries and IntelliStation products, services, and support. The address for IBM xSeries information is http://www.ibm.com/eserver/xseries/. The address for IBM IntelliStation information is http://www.ibm.com/pc/intellistation/. -
Page 69: Appendix B. Notices
Web sites. The materials at those Web sites are not part of the materials for this IBM product, and use of those Web sites is at your own risk. IBM may use or distribute any of the information you supply in any way it believes appropriate without incurring any obligation to you. -
Page 70: Trademarks
OS/2 WARP Lotus, Lotus Notes, SmartSuite, and Domino are trademarks of Lotus Development Corporation and/or IBM Corporation in the United States, other countries, or both. Intel, MMX, and Pentium are trademarks of Intel Corporation in the United States, other countries, or both. -
Page 71: Product Recycling And Disposal
IBM makes no representations or warranties with respect to non-IBM products. Support (if any) for the non-IBM products is provided by the third party, not IBM. Some software may differ from its retail version (if available), and may not include user manuals or all program functionality. -
Page 72: Industry Canada Class A Emission Compliance Statement
IBM cannot accept responsibility for any failure to satisfy the protection requirements resulting from a nonrecommended modification of the product, including the fitting of non-IBM option cards. This product has been tested and found to comply with the limits for Class A Information Technology Equipment according to CISPR 22/European Standard EN 55022. -
Page 73: Chinese Class A Warning Statement
Chinese Class A warning statement Japanese Voluntary Control Council for Interference (VCCI) statement Appendix B. Notices... - Page 74 BladeCenter Management Module: User’s Guide...
-
Page 75: Index
Ethernet management-module configuration configuring remote connection 8 reset 2 port, cabling 7 management-module Web interface Ethernet activity LED 2 starting 12 Ethernet connector, remote management and mouse connector 4 console 4 Ethernet-link status LED 2 © Copyright IBM Corp. 2004... - Page 76 SSL certificate overview 44 SSL client certificate management 50 SSL client trusted certificate management 50 SSL server certificate management 44 security 32, 33 security, configuring 43 serial over LAN 24 setting up LDAP client 38 BladeCenter Management Module: User’s Guide...
- Page 78 Part Number: 13N0318 Printed in USA (1P) P/N: 13N0318...