Table of Contents
Advertisement
Quick Links
Advertisement
Table of Contents

Related Manuals for Hitron CGN


Summary of Contents for Hitron CGN
- Page 1 USER’S GUIDE CGN RESIDENTIAL CABLE MODEM VERSION 4.0 - APR 2013...
-
Page 2: About This User's Guide
ABOUT THIS USER’S GUIDE INTENDED AUDIENCE This manual is intended for people who want to configure the CGN’s features via its Graphical User Interface (GUI). HOW TO USE THIS USER’S GUIDE This manual contains information on each the CGN’s GUI screens, and describes how to use its various features. -
Page 3: Document Conventions
HITRON CGN USER’S GUIDE DOCUMENT CONVENTIONS This User’s Guide uses various typographic conventions and styles to indicate content type: Bulleted paragraphs are used to list items, and to indicate options. Numbered paragraphs indicate procedural steps. NOTE: Notes provide additional information on a subject. -
Page 4: Table 1: Default Credentials
HITRON CGN USER’S GUIDE DEFAULT CREDENTIALS The CGN’s default login credentials are as follows. For more information, see Logging into the CGN on page 22. Table 1: Default Credentials Username cusadmin Password password Copyright 2012 Hitron Technologies. All rights reserved. All trademarks and registered trademarks used are the properties of their respective owners. -
Page 5: Compliances
HITRON CGN USER’S GUIDE COMPLIANCES FCC INTERFERENCE STATEMENT This equipment has been tested and found to comply with the limits for a Class B digital device pursuant to Part 15 of the FCC Rules. These limits are designed to provide reasonable protection against radio interference in a commercial environment. - Page 6 HITRON CGN USER’S GUIDE FCC Radiation Exposure Statement: This equipment complies with FCC radiation exposure limits set forth for an uncontrolled environment. This equipment should be installed and operated with minimum distance 20cm between the radiator & your body. This transmitter must not be co-located or operating in conjunction with any other antenna or transmitter.
-
Page 7: Table Of Contents
1.2 Hardware Connections ..............14 1.3 LEDs ....................17 1.4 IP Address Setup ................20 1.4.1 Manual IP Address Setup ............21 1.5 Logging into the CGN ................ 22 1.6 GUI Overview ..................23 1.7 Resetting the CGN ................24 Setup Wizard ................. 26 2.1 PASSWORD .................. - Page 8 HITRON CGN USER’S GUIDE 3.1.10 Modulation ................34 3.1.11 TDMA, FDMA and SCDMA ............ 35 3.2 The System Info Screen ..............35 3.3 The Initialization Screen ..............37 3.4 The CM Status Screen ..............38 3.5 The Password Screen ............... 41 WAN/LAN ..................
- Page 9 HITRON CGN USER’S GUIDE 5.6 The DMZ Screen ................71 Parental Control ................73 6.1 Parental Control Overview ..............73 6.1.1 Website Blocking ..............73 6.2 The Website Blocking Screen ............73 6.3 The Scheduling Screen ..............76 Wireless ..................78 7.1 Wireless Overview ................
- Page 10 HITRON CGN USER’S GUIDE Figure 1: Application Overview ................13 Figure 2: Hardware Connections ................15 Figure 3: LEDs ....................18 Figure 4: Login ....................23 Figure 5: GUI Overview ..................24 Figure 6: Setup Wizard > Password ..............27 Figure 7: Setup Wizard > Wireless ..............28 Figure 8: The Status >...
- Page 11 HITRON CGN USER’S GUIDE Table 1: Default Credentials ................4 Table 2: Hardware Connections ................16 Table 3: LEDs ....................18 Table 4: GUI Overview ..................24 Table 5: Private IP Address Ranges ..............30 Table 6: IP Address: Decimal and Binary ............31 Table 7: Subnet Mask: Decimal and Binary ............31 Table 8: The Status >...
-
Page 12: Introduction
Internet via the cable connection. Computers with a wired connection to the CGN are on the Local Area Network (LAN), computers with a wireless connection to the CGN are on the Wireless Local Area Network (WLAN) and the CGN connects to the service provider over the Wide Area Network (WAN). -
Page 13: Key Features
HITRON CGN USER’S GUIDE Figure 1: Application Overview 1.1.1 KEY FEATURES The CGN provides: Internet connection to cable modem service via CABLE port (F-type RF connector) Local Area Network connection via four 10/100/1000 Mbps (megabits per second) Ethernet ports Dynamic Host Configuration Protocol (DHCP) for devices on the LAN LAN troubleshooting tools (Ping and Traceroute) -
Page 14: Hardware Connections
HITRON CGN USER’S GUIDE Settings backup and restore Secure configuration interface, accessible by Web browser HARDWARE CONNECTIONS This section describes the CGN’s physical ports and buttons. Version 2.0, February 2012. Copyright 2012 Hitron Technologies Version 2.0, February 2012. Copyright 2012 Hitron Technologies... -
Page 15: Figure 2: Hardware Connections
HITRON CGN USER’S GUIDE Figure 2: Hardware Connections Version 2.0, February 2012. Copyright 2012 Hitron Technologies Version 2.0, February 2012. Copyright 2012 Hitron Technologies... -
Page 16: Table 2: Hardware Connections
CGN, the settings cannot be recovered. The CGN provides one USB 2.0 host port, allowing you to plug in a USB flash disk for mounting and sharing through the LAN interfaces via the Samba protocol (network neighborhood). -
Page 17: Leds
POWER Cable modem is plugged in to an electrical outlet and is and receiving power. LEDS This section describes the CGN’s LEDs (lights). Version 2.0, February 2012. Copyright 2012 Hitron Technologies Version 2.0, February 2012. Copyright 2012 Hitron Technologies... -
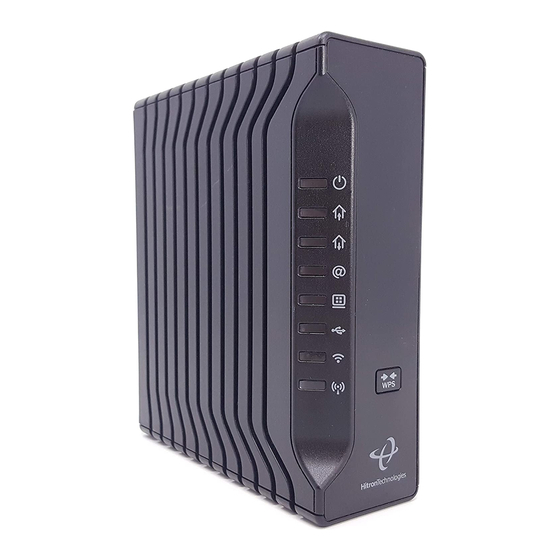
Page 18: Figure 3: Leds
HITRON CGN USER’S GUIDE Figure 3: LEDs Table 3: LEDs STATUS DESCRIPTION The WPS is not enabled. Green, steady The WPS is enabled. Red, blinking Error: Some error occurred which was not related to security, such as failed to find any partner or protocol prematurely aborted. - Page 19 Green, steady The CGN has successfully located and locked onto an upstream frequency on the CABLE connection. Blue, steady The CGN is engaged in channel bonding on the upstream connection. There is no upstream activity on the CABLE connection. Version 2.0, February 2012. Copyright 2012 Hitron Technologies Version 2.0, February 2012.
-
Page 20: Ip Address Setup
USB WIRELESS IP ADDRESS SETUP Before you log into the CGN’s GUI, your computer’s IP address must be in the same subnet as the CGN. This allows your computer to communicate with the CGN. NOTE: See IP Addresses and Subnets on page 29 for background information. -
Page 21: Manual Ip Address Setup
22). If the login screen displays, your computer is already configured correctly. If the login screen does not display, either the CGN’s DHCP server is not active or your computer is not configured correctly. Follow the procedure in... -
Page 22: Logging Into The Cgn
Click OK. The Internet Protocol (TCP/IP) window closes. In the Local Area Connection Properties window, click OK. Your computer now obtains an IP address from the CGN, or uses the IP address that you specified, and can communicate with the CGN. -
Page 23: Gui Overview
“Password”. Click Login. The System Info screen displays (see The System Info Screen page 35). GUI OVERVIEW This section describes the CGN’s GUI. Version 2.0, February 2012. Copyright 2012 Hitron Technologies Version 2.0, February 2012. Copyright 2012 Hitron Technologies... -
Page 24: Resetting The Cgn
Secondary Navigation Bar have their own section within a chapter. RESETTING THE CGN When you reset the CGN to its factory defaults, all user-configured settings are lost, and the CGN is returned to its initial configuration state. - Page 25 HITRON CGN USER’S GUIDE There are two ways to reset the CGN: Press the RESET button on the CGN, and hold it in for ten seconds or longer. Click WAN/LAN > Backup. In the screen that displays, click the Factory Reset button.
-
Page 26: Setup Wizard
HITRON CGN USER’S GUIDE SETUP WIZARD This chapter describes the Setup Wizard screens. These are simple steps to help users quickly setup the unit in majority of the cases. Users still have the option of going to each individual menu and make changes. It contains the following sections: on page PASSWORD... -
Page 27: Wireless
HITRON CGN USER’S GUIDE Figure 6: Setup Wizard > Password WIRELESS Wireless AP passphrase is another recommended change. The wireless screen shows the primary SSID and the security mode. Please select the security mode of your choice. For the security mode you select, please fill in the necessary info. You may refer to the Wireless session for more details.Click the Next once you’ve done. -
Page 28: Summary
HITRON CGN USER’S GUIDE Figure 7: Setup Wizard > Wireless SUMMARY This page just summarizes what have been set up in the previous pages. Simply click the Finish to wrap up the setup. Version 2.0, February 2012. Copyright 2012 Hitron Technologies Version 2.0, February 2012. -
Page 29: Status
DOCSIS The Data Over Cable Service Interface Specification (DOCSIS) is a telecommunications standard that defines the provision of data services) Internet access) over a traditional cable TV (CATV) network. Your CGN supports DOCSIS version 3.0. 3.1.2 IP ADDRESSES AND SUBNETS Every computer on the Internet must have a unique Internet Protocol (IP) address. -
Page 30: Ip Address Format
Local Area Network (LAN) and Wireless Local Area Network (WLAN), if enabled. You are free to assign IP addresses to computers on the LAN and WLAN manually, or to allow the CGN to assign them automatically via DHCP (Dynamic Host Configuration Protocol). IANA has reserved the following blocks... -
Page 31: Subnets
HITRON CGN USER’S GUIDE If you assign addresses manually, they must be within the CGN’s LAN subnet. 3.1.2.3 SUBNETS A subnet (short for sub-network) is, as the name suggests, a separate section of a network, distinct from the main network of which it is a part. A subnet may contain all of the computers at one corporate local office, for example, while the main network includes several offices. -
Page 32: Dhcp
By default, the CGN is a DHCP client on the WAN (the CATV connection). It broadcasts an IP address over the cable network, and receives one from the service provider. By default, the CGN is a DHCP server on the LAN; it provides IP addresses to computers on the LAN which request them. -
Page 33: Mac Addresses
(or other device). For example, if a single computer has an Ethernet card (to connect to your CGN via one of the LAN ports) and also has a wireless card (to connect to your CGN over the wireless interface) the MAC addresses of the two cards will be different. -
Page 34: Configuration Files
Internet from the service provider’s server, which specifies the settings that the CGN should use. It contains a variety of settings that are not present in the user-configurable Graphical User Interface (GUI) and can be specified only by the service provider. -
Page 35: Tdma, Fdma And Scdma
SCDMA allows multiple users to share the same frequency channel by assigning a unique orthogonal code to each user. THE SYSTEM INFO SCREEN Use this screen to see general information about your CGN’s hardware, its software, and its connection to the Internet. Click Status > System Info. The following screen displays. -
Page 36: Figure 8: The Status > System Info Screen
This displays a number that uniquely identifies the device. RF MAC This displays the Media Access Control (MAC) address of the CGN’s RF module. This is the module that connects to the Internet through the CATV connection. WAN IP This field displays the CGN’s IP address on the WAN (Wide Area Network) interface. -
Page 37: The Initialization Screen
This screen displays the steps successfully taken to connect to the Internet over the CABLE connection. Use this screen for troubleshooting purposes to ensure that the CGN has successfully connected to the Internet; if an error has occurred you can identify the stage at which the failure occurred. -
Page 38: The Cm Status Screen
Figure 9: The Status > Initialization Screen For each step: Process displays when the CGN is attempting to complete a connection step. Success displays when the CGN has completed a connection step. THE CM STATUS SCREEN Use this screen to discover information about: The nature of the upstream and downstream connection between the CGN and... -
Page 39: Figure 10: The Status > Cm Status Screen
This displays the name of the configuration file that the Name CGN downloaded from your service provider. This file provides the CGN with the service parameter data that it needs to perform its functions correctly. Network Access This displays whether or not your service provider allows you to access the Internet over the CABLE connection. - Page 40 When an upstram connection cannot be made on the specified channel, the CGN attempts to connect on the next channel. If you want the CGN to attempt to connect on a different channel, enter it in the field and click Apply. NOTE: Do not change the channel unless you have a good reason to do so.
-
Page 41: The Password Screen
DHCP server. THE PASSWORD SCREEN Use this screen to change the password with which you log in to the CGN. NOTE: If you forget your password, you will need to reset the CGN to its factory defaults. -
Page 42: Figure 11: The Status > Password Screen
Re-enter New Password Password Idle Time Enter the number of minutes of inactivity after which you should be automatically logged out of the CGN. Once this period elapses, you will need to log in again. Apply Click this to save your changes to the fields in this screen. -
Page 43: Wan/Lan
33). The LAN is a separate network from the Wide Area Network (WAN). In the case of the CGN, the WAN refers to all computers and other devices available on the cable connection. By default, computers on the WAN cannot identify individual computers on the LAN;... -
Page 44: Lan Ip Addresses And Subnets
Internet even if the IP address of the website’s server has changed. Similarly, the CGN allows you to define a Domain Suffix to the LAN. When you enter the domain suffix into your browser, you can reach the CGN no matter what IP address it has on the LAN. -
Page 45: The Ip Screen
Configure the CGN’s internal DHCP server Define how the CGN assigns IP addresses on the LAN See information about the network devices connected to the CGN on the LAN. Click WAN/LAN > IP. The following screen displays. Version 2.0, February 2012. Copyright 2012 Hitron Technologies Version 2.0, February 2012. -
Page 46: Figure 12: The Wan/Lan > Ip Screen (Assign Wan Ip Automatically)
HITRON CGN USER’S GUIDE Figure 12: The WAN/LAN > IP Screen (Assign WAN IP Automatically) NOTE: By default, WAN IP (subnet mask, gateway IP, and DNS server) is dynamically assigned. These fields are in grey which means they are not editable. -
Page 47: Figure 13: The Wan/Lan > Ip Screen (Assign Wan Ip Manually)
The WAN/LAN > IP Screen WAN Information Assign WAN IP Select this if you want the CGN to assign IP addresses to network devices on the WAN manually. Manually Deselect this if you wish to assign IP addresses to your computers and other network devices automatically. - Page 48 CGN uses to resolve domain names into IP addresses. Private LAN IP Setting Private LAN IP Use this field to define the IP address of the CGN on the Address LAN. Subnet Mask Use this field to define the LAN subnet. Use dotted decimal notation (for example, 255.255.255.0).
-
Page 49: The Shared Media Screen
Use this screen to manage and share data stored on devices connected to the CGN’s USB port. The CGN provides one USB 2.0 host port, allowing you to plug in a USB flash disk for mounting and sharing through the LAN interfaces via the Samba protocol (network neighborhood). -
Page 50: The Debug Screen
HITRON CGN USER’S GUIDE The following table describes the labels in this screen. Table 12: The WAN/LAN > Shared Media Screen Group ID Specify the name of the Network Neighborhood workgroup whose users may access the shared media on the USB device. -
Page 51: The Backup Screen
THE BACKUP SCREEN Use this screen to back up your CGN’s settings to your computer, to load settings from a backup you created earlier, to reboot your CGN, or to return it to its factory default settings. Click WAN/LAN > Backup. The following screen displays. -
Page 52: Figure 16: The Wan/Lan > Backup Screen
The following table describes the labels in this screen. Table 14: The LAN > Backup Screen Backup/Restore Setting Backup Settings Click this to create a backup of all your CGN’s settings Locally on your computer. Restore Settings Use these fields to return your CGN’s settings to those Locally specified in a backup that you created earlier. -
Page 53: Firewall
FIREWALL The term “firewall” comes from a construction technique designed to prevent the spread of fire from one room to another. Similarly, your CGN’s firewall prevents intrusion attempts and other undesirable activity originating from the WAN, keeping the computers on your LAN safe. You can also use filtering techniques to specify the computers and other devices you want to allow on the LAN, and prevent certain traffic from going from the LAN to the WAN. -
Page 54: Intrusion Detection System
Firewall > Local Logs screen. 5.1.3 PING The CGN allows you to use the ping utility on the LAN (in the WAN/LAN > Debug screen) and also on the WAN (in the Firewall > Firewall Options screen). For more information, see Debugging (Ping and Traceroute) on page 44. -
Page 55: Port Forwarding
You can set up a port forwarding rule for each application for which you want to open ports in the firewall. When the CGN receives incoming traffic from the WAN with a destination port that matches a port forwarding rule, it forwards the traffic to the LAN IP address and port number specified in the port forwarding rule. -
Page 56: Figure 17: The Firewall > Firewall Options Screen
Select this to turn the firewall on. Deselect this to turn the firewall off. NOTE: It is strongly recommended that you enable the CGN's firewall unless LAN protection is provided by another device or software. Intrusion Detection Select this to turn the intrusion detection system off. -
Page 57: The Filter Setting Screen
NOTE: To see a list of all the computers connected to the CGN on the LAN, click the Connected Computers button in the Firewall > IP Filtering, Forwarding, Port Triggering or Firewall Options screens. -
Page 58: Figure 18: The Firewall > Filter Setting Screen
HITRON CGN USER’S GUIDE Figure 18: The Firewall > Filter Setting Screen Version 2.0, February 2012. Copyright 2012 Hitron Technologies Version 2.0, February 2012. Copyright 2012 Hitron Technologies... -
Page 59: Table 16: The Firewall > Filter Setting Screen
Table 16: The Firewall > Filter Setting Screen MAC Filter Options MAC Filter Options Use this field to control whether the CGN performs MAC filtering. Select Allow-All to turn MAC filtering off. All devices may access the CGN and the network. - Page 60 Select Deny to add the device to the Deny Table. Manually-Added LAN Devices Device Name Enter the name to associate with a network device that you want to permit or deny access to the CGN and the network. NOTE: This name is arbitrary, and does not affect functionality in any way.
- Page 61 HITRON CGN USER’S GUIDE Table 16: The Firewall > Filter Setting Screen (continued) All IP Filtering Rules Use this to turn IP filtering on or off. Deselect the checkbox to enable IP filtering. Select the checkbox to disable IP filtering (default).
-
Page 62: Adding Or Editing An Ip Filtering Rule
HITRON CGN USER’S GUIDE Table 16: The Firewall > Filter Setting Screen (continued) Delete Select an IP filtering rule’s radio button ( ) and click this to remove the rule. The deleted rule’s information cannot be retrieved. Apply Click this to save your changes to the fields in the IP Filtering Options section. -
Page 63: Table 17: The Firewall > Filter Settings > Add/Edit Screen
To specify only a single port, enter its number in both fields. Protocol Use this field to specify whether the CGN should block communication via: Transmission Control Protocol (TCP) User Datagram Protocol (UDP) Both TCP and UDP. -
Page 64: The Forwarding Screen
HITRON CGN USER’S GUIDE THE FORWARDING SCREEN Use this screen to configure port forwarding between computers on the WAN and computers on the LAN. You can turn port forwarding on or off and configure new and existing port forwarding rules. - Page 65 These fields display the ports to which the rule applies: The Public field displays the incoming port range. These are the ports on which the CGN received traffic from the originating host on the WAN. The Private field displays the port range to which the CGN forwards traffic to the device on the LAN.
-
Page 66: Adding Or Editing A Port Forwarding Rule
HITRON CGN USER’S GUIDE Table 18: The Firewall > Forwarding Screen (continued) Cancel Click this to return the fields in this screen to their last- saved values without saving your changes. Help Click this to see information about the fields in this screen. -
Page 67: Table 19: The Firewall > Forwarding > Add/Edit Screen
Public Port Range Use these fields to specify the incoming port range. These are the ports on which the CGN received traffic from the originating host on the WAN. Enter the start port number in the first field, and the end port number in the second field. -
Page 68: The Port Triggering Screen
HITRON CGN USER’S GUIDE Table 19: The Firewall > Forwarding > Add/Edit Screen Apply Click this to save your changes to the fields in this screen. Cancel Click this to return the fields in this screen to their last- saved values without saving your changes. - Page 69 Target ports. The Target field displays the range of triggered ports. These ports are opened automatically when the CGN detects activity on the Trigger ports from computers on the LAN. Protocol This displays the protocol of the port triggering rule.
-
Page 70: Adding Or Editing A Port Triggering Rule
Trigger Port Range Use these fields to specify the trigger ports. When the CGN detects activity on any of these ports originating from a computer on the LAN, it automatically opens the Target ports in expectation of incoming traffic. -
Page 71: The Dmz Screen
Table 21: The Firewall > Port Triggering > Add/Edit Screen Target Port Range Use these fields to specify the target ports. The CGN opens these ports in expectation of incoming traffic whenever it detects activity on any of the Trigger ports. -
Page 72: Figure 24: The Firewall > Dmz Screen
LAN. Connected Computers Click this to see a list of the computers currently connected to the CGN on the LAN. To add a connected computer to the DMZ, click its Add button and click Apply in the screen that displays. -
Page 73: Parental Control
HITRON CGN USER’S GUIDE PARENTAL CONTROL This chapter describes the screens that display when you click Parental Control in the toolbar. It contains the following sections: Parental Control Overview on page The Website Blocking Screen on page The Scheduling Screen... -
Page 74: Figure 25: The Parental Control > Web Site Blocking Screen
HITRON CGN USER’S GUIDE NOTE: To apply the blocking filter only at certain times, use the Parental Control > Scheduling screen. Click Parental Control > Web Site Blocking. The following screen displays. Figure 25: The Parental Control > Web Site Blocking Screen The following table describes the labels in this screen. - Page 75 Click this to see a list of the computers that are currently Computers connected to the CGN. To add a computer to the New Computer MAC Address field, select its Add checkbox and click Apply in the screen that displays.
-
Page 76: The Scheduling Screen
HITRON CGN USER’S GUIDE THE SCHEDULING SCREEN Use this screen to control when the website blocking filter should be in effect. NOTE: To configure the website blocking filter, use the Parental Control > Web Site Blocking screen. Click Parental Control > Scheduling. The following screen displays. -
Page 77: Table 24: The Parental Control > Scheduling Screen
HITRON CGN USER’S GUIDE The following table describes the labels in this screen. Table 24: The Parental Control > Scheduling Screen Days of the Week Select the days of the week on which you want the website blocking filter to be in effect. -
Page 78: Wireless
7.1.1 WIRELESS NETWORKING BASICS Your CGN’s wireless network is part of the Local Area Network (LAN), known as the Wireless LAN (WLAN). The WLAN is a network of radio links between the CGN and the other computers and devices that connect to it. -
Page 79: Wireless Standards
The wireless clients connect to the access point in order to receive a wireless connection to the WAN and the wired LAN. The CGN is the access point, and the computers you connect to the CGN are the wireless clients. -
Page 80: Wireless Security
(signal scrambling so that only authenticated users can decode the transmitted data). The sophistication of each security method varies, as does its effectiveness. The CGN supports the following wireless security protocols (in order of effectiveness): WEP (the Wired Equivalency Protocol): this protocol uses a series of “keys” or data strings to authenticate the wireless client with the AP, and to encrypt data sent over the wireless link. -
Page 81: Wmm
THE BASIC SETTINGS SCREEN Use this screen to configure your CGN’s basic wireless settings. You can turn the wireless module on or off, select the wireless mode and channel, configure the wireless network’s SSID. -
Page 82: Figure 27: The Wireless > Basic Settings Screen
If in doubt, use 11B/G/N (default). Channel Select the wireless channel that you want to use, or select Auto to have the CGN select the optimum channel to use. NOTE: Use the Auto setting unless you have a specific reason to do otherwise. - Page 83 HITRON CGN USER’S GUIDE Table 25: The Wireless > Basic Settings Screen (continued) WPS ON/OFF This displays whether or not the CGN’s WPS is turn on. Security Mode This displays the type of security the CGN’s wireless network is currently using.
-
Page 84: Ip Setting
Select the SSID Network Mode for which you want to configure security. SSID IP Options IP Address This displays the CGN’s WAN IP address. This IP address is automatically assigned to the CGN Subnet Mask This field displays the CGN’s WAN subnet mask. -
Page 85: The Wps & Security Screen
THE WPS & SECURITY SCREEN Use this screen to configure your CGN’s WPS & security settings. You can run WPS and configure the wireless network’s SSID. You can also configure authentication and encryption on your wireless network. -
Page 86: Figure 29: The Wireless > Wps & Security Screen
HITRON CGN USER’S GUIDE Figure 29: The Wireless > WPS & Security Screen The following table describes the labels in this screen. Table 27: The Wireless > WPS & Security Screen Wi-Fi Protected Setup WPS ON/OFF Use this field to turn Wifi Protected Setup (WPS) on or off. -
Page 87: Figure 30: Wps Pin
Click the PIN button to begin the PIN configuration process. In the screen that displays, enter the WPS PIN that you want to use for the CGN, or the WPS PIN of the client device you want to add to the network. - Page 88 The CGN supports up to four WEP keys, of which you can select one as the default. You should input the same four keys, in the same order, in your network’s wireless clients.
- Page 89 Open System authentication is the more secure of the two authentication types, since while the Shared Key system appears more robust, it is possible to derive secure data by capturing the challenge messages. Select Automatic to have the CGN choose the authentication method. WPA_Personal NOTE: These fields display only when you select WPA-Personal from the Security Mode list.
-
Page 90: The Access Control Screen
To configure MAC address filtering on the wired LAN, see The Filter Setting Screen on page 57. You can set the CGN to allow only certain devices to access the CGN and the network wirelessly, or to deny certain devices access. -
Page 91: Figure 31: The Wireless > Access Control Screen
MAC Filtering SSID Select the SSID for which you want to configure wireless access control. NOTE: At the time of writing, the CGN supports a single SSID. Version 2.0, February 2012. Copyright 2012 Hitron Technologies Version 2.0, February 2012. Copyright... - Page 92 Delete Select a permitted or denied wireless device’s radio button ( ) and click this to remove the device from the list. The device may no longer access the CGN and the network. Wireless Devices Auto-Learned Wireless Devices Device Name This displays the name of each network device that has connected to the CGN on the wireless network.
- Page 93 The Wireless > Access Control Screen (continued) Device Name Enter the name to associate with a network device that you want to permit or deny access to the CGN and the network wirelessly. NOTE: This name is arbitrary, and does not affect functionality in any way.
-
Page 94: Troubleshooting
Using a power adaptor other than the one that came with your CGN can damage the CGN. Ensure that the power adaptor is connected to the CGN and the wall socket (or other power source) correctly. Ensure that the power source is functioning correctly. Replace any broken fuses or reset any tripped circuit breakers. - Page 95 I Forgot the CGN’s Admin Username or Password The default username is cusadmin, and the default password is password. If the default username and password do not work, you need to reset the CGN. Resetting the CGN on page 24. All user-configured data is lost, and the CGN is returned to its default settings.
- Page 96 Re-enter any security credentials (WEP keys, WPA(2)-PSK password, or WPS PIN). If you are using WPS’s PBC (push-button configuration) feature, ensure that you are pressing the button on the CGN and the button on the wireless client within 2 minutes of one another. Version 2.0, February 2012. Copyright 2012 Hitron Technologies Version 2.0, February 2012.
-
Page 97: Index
HITRON CGN USER’S GUIDE INDEX Numbers 802.11b/g/n access control access logs access point accounts, login address, IP address, IP, local attached network devices authentication backup backup and restore bar, navigation Basic Settings buttons cable connection cable connection status Version 2.0, February 2012. Copyright 2012 Hitron Technologies Version 2.0, February 2012. - Page 98 HITRON CGN USER’S GUIDE cable modem CATV cipher type clients, wireless configuration file connection process connection status, cable conventions, document customer support debugging default default IP address default username and password defaults De-Militarized Zone DHCP DHCP lease diagnostics DMZ De-Militarized Zone...
- Page 99 HITRON CGN USER’S GUIDE factory defaults factory reset fast Ethernet FDMA firewall forwarding, port frequencies, cable F-type RF connector Graphical User Interface graphical user interface GUI overview hardware host ID IANA ICMP IEEE 802.11b/g/n interface, user intrusion detection IP address...
- Page 100 HITRON CGN USER’S GUIDE IP address, default IP address, format IP address, local IP filtering IP Setting keyword blocking LAN 1~4 LAN IP LEDs lights Local Area Network local IP address logging in login accounts login screen logs, access MAC address...
- Page 101 HITRON CGN USER’S GUIDE Multiple-In, Multiple-Out navigation navigation bar network devices, attached network diagnostics network number network, local network, wide area network, wireless open system authentication overview, GUI parental control PASSWORD password password and username Password Screen on page 26...
- Page 102 HITRON CGN USER’S GUIDE push-button configuration QAM TCM QPSK radio coverage radio links reboot reset restore and backup RF connector RJ45 connectors routing mode rule, IP filtering rule, port forwarding SCDMA scheduled website blocking scheduling security security, wireless service set...
- Page 103 HITRON CGN USER’S GUIDE status, cable connection subnet subnet, IP support, customer TCP/IP TDMA The IP Setting Screen The IP Settings Screen on page 80 traceroute triggering, port trusted computers upstream transmission URL blocking user interface username username and password...
- Page 104 HITRON CGN USER’S GUIDE Windows XP wired security wireless wireless access point wireless clients wireless connection Wireless Local Area Network wireless networking standards wireless security wireless settings, basic WLAN WPA2 WPA2-PSK WPA-PSK WPS PBC XP, Windows Version 2.0, February 2012. Copyright 2012 Hitron Technologies Version 2.0, February 2012.