AT&T 1080 User Manual
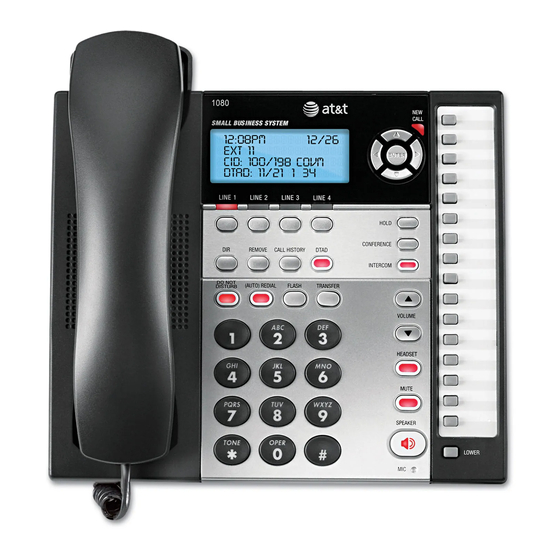
4-line small business system with digital answering system and caller id/call waiting
Hide thumbs
Also See for 1080:
- User manual (91 pages) ,
- Quick reference manual (19 pages) ,
- Installation manual (104 pages)

Related Manuals for AT&T 1080


Summary of Contents for AT&T 1080
- Page 1 User’s manual 1080 Corded telephone/ 4-Line small business small business system/ system with digital speakerphone/ answering system and answering system with caller ID/call waiting caller ID/ call waiting...
- Page 2 Congratulations on purchasing your new AT&T product. Before using this AT&T product, please read the Important product information on pages 91-92 of this manual. Please thoroughly read the user’s manual for all the feature operation and troubleshooting information you need to install and operate your new AT&T product.
-
Page 3: Installation Guide
STOP! Do you receive DSL (digital subscriber line) service for high- speed Internet access through your telephone line(s) from your telephone company? If so, you need to add either DSL splitters and/or microfilters to your installation. See page 9 of the installation guide. -
Page 4: Table Of Contents
User's manual 1080 4-line small business system with digital answering system and caller ID/call waiting Table of contents Getting started Introduction ............................1 Telephone overview ..........................2 Display screen messages .......................4 Indicator lights & tones ........................6 Indicator lights ..........................6 Alert tones ............................7 Directory card ............................8... - Page 5 Intercom ............................. 26 Make an intercom call with the handset ................ 26 Make an intercom call with the speakerphone or headset ........27 Answer an intercom call ......................28 End an intercom or page call ....................28 Voice page ............................29 Page a specific extension (single-phone page) ............
- Page 6 To store an entry to the directory or a one-touch key ..........56 To save an entry to the directory ..................56 To save an entry to a one-touch key .................56 Call waiting and message waiting ...................57 CID with call waiting ........................57 Message waiting and NEW CALL light ................57 COVM RESET ..........................58...
- Page 7 SYS EXT mailbox ..........................81 About system extension mailboxes ................... 81 REMOVE EXT MSGS........................82 To delete all messages from one SYS EXT telephone ..........82 Appendix A, Glossary ......................83 Appendix B, Time/date ......................86 Appendix C, Centrex operation ..................88 Set ring delay duration ......................88 Answer a delayed ring ......................88 Pick up another station’s line ....................88...
-
Page 8: Getting Started
99 messages. You can access the answering system from a remote non-system touch-tone telephone or from another system telephone. This 1080 telephone is equipped to function as an Auto Attendant in a multi- telephone system. An Auto Attendant telephone can pick up and redirect incoming calls to other extensions in your telephone system. -
Page 9: Telephone Overview
TRANSFER Press to transfer Press to store or dis- an outside call play directory entries to another (page 42). 1080, 1070, or Press again to quit. 1040 extension telephone (page 23). DO NOT DISTURB Press twice to turn on the Do Not... - Page 10 Getting started Telephone overview One-touch keys Navigation keys Press to make an Press to scroll up, down, intercom call (page left or right while in 26) or a one-touch the menu. outside call (page 38). VOLUME While the telephone ENTER is not in use, press Press until you see the to adjust the ringer...
-
Page 11: Display Screen Messages
5. To move to the next feature, press [ ]. -OR- To exit setup, press and hold [ENTER]. Flashes when this 1080 extension is an auto attendant. AC FAIL There is no AC power to the set. If a good battery is installed, basic phone operation (such as making and answering calls on the handset) is supported. - Page 12 Getting started Display screen messages Continued from previous page DTAD FULL! The recording memory is full. Delete some messages to make room for more. (EMPTY) The directory or one-touch location is empty. EXT BUSY-AA The auto attendant system is answering a call. EXT BUSY-REC The answering system is answering a call.
-
Page 13: Indicator Lights & Tones
Getting started Indicator lights & tones Indicator lights LINE Green: • On when the line is in use. • Flashes slowly when the line is on hold. • Flashes quickly when there is an incoming transferred call on the line. •... -
Page 14: Alert Tones
Getting started Indicator lights & tones NEW CALL • On when there are unreviewed calls. • Flashes when there are new voice mail messages. The screen displays COVM, with 1, 2, 3, and/or 4 under COVM, depending on which lines have messages waiting. -
Page 15: Directory Card
Getting started Directory card To write names and phone numbers on the directory card, follow the steps below: 1. Remove the clear plastic cover by inserting a small item such as paperclip into the hole on the lower right corner. 2. -
Page 16: Telephone Operation
Telephone operation Basic phone operation This phone comes programmed to use line 1 (default prime line) for calls when you do not press a line button. (To change the prime line, see PRIME LINE on page 39 of the installation guide.) When you answer a call, the phone automatically selects the ringing line. - Page 17 Telephone operation Basic phone operation Continued from previous page Handset • To make a call: Lift the handset. Dial a number. • To override automatic line selection, press the LINE button for the line you wish to select, then lift the handset. •...
- Page 18 Telephone operation Basic phone operation Continued from previous page Headset (purchased separately) You can use this phone hands-free when you install any industry-standard two-band 2.5mm headset or other compatible, electronically isolated headset (see page 17 of the installation guide). Purchase the headset separately. •...
-
Page 19: Switching Among Handset, Speakerphone And Headset Mode
Telephone operation Basic phone operation Switching among handset, speakerphone and headset mode To switch from handset to headset or speakerphone, press [HEADSET] or [ SPEAKER], then replace the handset. (In order to use the headset, it must be plugged in.) To switch from speakerphone to handset, lift the handset. -
Page 20: Volume Control
(1-5). While using the volume control, you will hear a triple-beep when you reach the minimum or maximum level. Your 1080 remembers the volume setting for each mode. Ringer volume • When the telephone is idle, press [ VOLUME] to sample and select the desired volume (1-4) for all ringers. -
Page 21: Ringer On/Off
Telephone operation Basic phone operation RINGER ON/OFF RINGER ON/OFF Use this feature to control whether there is an audible alert for outside calls on the designated line. L1 RINGER 1. Press [ENTER]. 2. Press [ ] or [ ] until you see PHONE SETTINGS. Press [ENTER]. -
Page 22: Do Not Disturb
Telephone operation Basic phone operation DO NOT DISTURB Use this feature to silence your telephone. When you activate the do not disturb (DND) function, you will not hear paging tones, voice paging, or incoming call rings. Instead, the LINE light flashes to signal an incoming call. -
Page 23: Last Number Redial
Telephone operation Basic phone operation Last number redial Use this feature to display the last dialed number from this extension. The last number dialed (up to 32 digits) is stored in the redial memory until you dial another number. Press [(AUTO) REDIAL] to see the most recently dialed number. -
Page 24: Redial Stack
Telephone operation Basic phone operation Redial stack Use this feature to review the numbers in the redial memory and dial one if you wish. (The last six numbers dialed from this extension are automatically stored in the redial memory stack.) 1. -
Page 25: Auto-Redial
Telephone operation Basic phone operation Auto-redial Use this feature to automatically redial a number up to ten times. When the phone automatically redials the number, if the prime line is available, the phone uses the prime line to dial the call. 1. -
Page 26: Call Waiting
Telephone operation Basic phone operation Call waiting Use this feature to control call-waiting calls. If you subscribe to a call waiting service with your local telephone company, there is a beep if there is an incoming call when you are already on a call on the same line. -
Page 27: Hold
Telephone operation Basic phone operation HOLD Use this feature to hold one line while accessing another, or as part of the conference and call transfer features. While on a call, press and release [HOLD]. The LINE light for the line on hold flashes slowly in green, and a double-beep sounds every 30 seconds to remind you that the call is on hold. -
Page 28: Switching Between Lines
Telephone operation Basic phone operation Switching between lines Use this feature to switch between lines during an outside call: 1. Press and release [HOLD] to maintain the connection to the call on the active line. 2. Press and release the LINE button of another line to make or answer another call. -
Page 29: Conference Calls
Telephone operation Basic phone operation Conference calls Use this feature to set up a three-party call by using two lines at the same time. You can also join an intercom call with a call on an outside line. The outside line call must be established first, because an intercom call cannot be placed on hold. -
Page 30: Call Transfer
Telephone operation Call transfer Transfer a call Use this feature to transfer a call to any other system phone. Once you transfer a call, it can be picked up at any other system phone, not just at the extension you called. NOTE: If a transferred call is not picked up within 20 minutes, the phone automatically disconnects the call. -
Page 31: Transfer A Call And Speak To The Receiving Party
Telephone operation Call transfer Transfer a call and speak to the receiving party 10:01AM 11/23 Use this feature to transfer a call and speak to the 00:30 receiving party. While on a call: 1. Press [INTERCOM]. The outside call is automatically put on hold and INTERCOM TO 10:01AM 11/23... -
Page 32: Intercom Operation
This 1080 telephone is fully compatible with any AT&T Four-Line Small Business System Speakerphone 1070 or 1040 phones you might have installed. You can use a total of 16 1080/1070/1040 phones together as extensions in your phone system. Each individual phone in your telephone system MUST be assigned a unique extension number for the intercom feature to work. -
Page 33: Intercom
Intercom operation Intercom Use this feature to make calls between system phones. Make an intercom call with the handset 1. If the one-touch preference is set to INTERCOM (page 35), skip to step 2. 10:01AM 11/23 -OR- EXT 11 If the one-touch preference is set to INTERCOM TO TELEPHONE (page 35), press [INTERCOM]. -
Page 34: Make An Intercom Call With The Speakerphone Or Headset
Intercom operation Intercom Make an intercom call with the speakerphone or headset 10:01AM 11/23 Use this feature to make an intercom call. With EXT 11 the handset in the telephone base: INTERCOM TO PAGE 1. If the one-touch preference is set to INTERCOM, skip to step 2. -
Page 35: Answer An Intercom Call
Intercom operation Intercom Answer an intercom call Use this feature to answer an intercom call. When you receive an intercom call, you hear a repeating 10:01AM 11/23 double-ring pattern and your screen displays EXT 12 INTERCOM FROM with the extension number of INTERCOM FROM 11 the caller. -
Page 36: Voice Page
Intercom operation Voice page Page a specific extension (single-phone page) Use this feature to send your voice to the speaker of the destination phone. The person you’ve called might be able to respond just by talking. See AUTO MUTE on page 35 of the installation guide. 1. -
Page 37: Answer A Single-Phone Page
Intercom operation Voice page Answer a single-phone page 10:01AM 11/23 Use this feature to answer a single-phone page. EXT 12 PAGE FROM 11 Auto-mute off When your extension receives a page, the phone beeps and the speakerphone automatically activates. Answer the call simply by speaking. If you are on the headset, answer the page by pressing [HEADSET] and speaking through the microphone of the headset. -
Page 38: Page All (System-Wide Page)
Intercom operation Voice page Page all (system-wide page) Use this feature to send your voice to the speakers of all phones in the system. 1. Press [INTERCOM], then [ ] to show PAGE ALL. 2. Press [ENTER]. The screen displays PAGE ALL. Once the page is automatically answered, speak towards the microphone. -
Page 39: Answer A System-Wide Page
Intercom operation Voice page Answer a system-wide page 10:01AM 11/23 Use this feature to answer a system-wide page. EXT 12 PAGE ALL FROM 11 NOTE: Only one extension can answer a [ENTER]: ANSWER system-wide page. When you receive a system-wide page, your 10:01AM 11/23 phone beeps and the screen shows PAGE ALL... -
Page 40: Room Monitor
Intercom operation Voice page Room monitor Use this feature to monitor a room. Make a single- 10:01AM 11/23 page call to a system phone to monitor the EXT 11 sounds from that room. To use this feature, the PAGING destination telephone auto-mute feature must be INTERCOM turned off (page 35 of the installation guide). -
Page 41: One-Touch Setup And Operation
One-touch setup and operation One-touch overview This telephone has 32 one-touch locations (speed dial locations) where you can store the phone numbers you wish to dial using fewer keys than usual. You can store up to 24 digits in each NOTE: Also use the location. -
Page 42: One Touch
One-touch setup and operation One touch Assign the buttons (one-touch keys) on the right side of the phone as intercom or outside call shortcut keys. You can enter and view the outside phone numbers through one-touch keys. PREFERENCE ONE TOUCH Use this feature to assign the one-touch keys as intercom or outside-call shortcut keys. -
Page 43: One-Touch Storage
One-touch setup and operation One-touch storage Use the following steps to program the one-touch keys. PROGRAM 1. Press [ENTER]. The screen displays ONE TOUCH. 2. Press [ENTER]. (ENTER NUMBER) PAUSE 3. Press [ ] or [ ] repeatedly until you see PROGRAM. - Page 44 One-touch setup and operation One-touch storage Continued from previous page 6. Press the desired one-touch key to store the telephone number in the normal location. -OR- [LOWER], Press then the desired one-touch key to store the telephone number in the lower location.
-
Page 45: To Dial A One-Touch Number
One-touch setup and operation To dial a one-touch number Use this feature to dial a one-touch number. The one-touch preference is preset to INTERCOM. NOTE: To change the one-touch preference, see PREFERENCE on page 35. If one-touch preference is set to INTERCOM: 1. -
Page 46: To View Or Delete A One-Touch Number
One-touch setup and operation To view or delete a one-touch number To view a one-touch number Use the following steps to view a one-touch VIEW SPD#15 5550100 number. 1. Press [ENTER]. CANCEL 2. Press [ ] or [ ] until you see ONE TOUCH. Press [ENTER]. -
Page 47: To Modify A One-Touch Number
One-touch setup and operation To modify a one-touch number Use the following steps to modify a one-touch number. VIEW SPD#01 1. When a one-touch telephone number displays, 5550100 press [ ] or [ ] to highlight MODIFY. MODIFY 2. Press [ENTER]. 3. - Page 48 One-touch setup and operation To modify a one-touch number Continued from previous page 4. Press the desired one-touch key to store the telephone number in a location. -OR- Press [LOWER], then the desired one-touch key to store the telephone number in the lower location.
-
Page 49: Directory
Directory Directory overview Pat Williams This 1080 telephone can store up to 200 names 5550100 and phone numbers in the directory. Names can have up to 16 characters and numbers can have up to 24 digits. Because directory entries are stored in alphabetical order, you might wish to enter names with the last name first. -
Page 50: Store A Name And Number In The Directory
Directory Store a name and number in the directory Use the following steps to store a name and DIRECTORY number in the directory. 1. Press [DIR] to begin working with the directory. VIEW ENTRIES 2. Press [ ] until the screen includes ADD ENTRY. 3. -
Page 51: Store A Pause In A Directory Number
Directory Store a name and number in the directory Pat Williams (ENTER NUMBER) Continued from previous page DONE 6. Use the dial pad keys to enter the desired phone number. -OR- Pat Williams 5550100 Press [(AUTO) REDIAL] to copy the last number dialed at this extension onto the screen. -
Page 52: Store A Temporary Tone Signal In A Directory Number
Directory Store a name and number in the directory Store a temporary tone signal in a directory number Pat Williams 5550100 If you have dial pulse (rotary) service, use this TONE feature to store tone signals in a directory number. You might need tone signals to use bank-by- phone and other services. -
Page 53: Review Directory Entries
Directory Review directory entries Use this feature to review directory entries. 1. Press [DIR] and then [ENTER] to begin working DIRECTORY with the directory entries. 2. Press [ ] or [ ] to scroll through the directory VIEW ENTRIES entries. -OR- Andrew 5556789... -
Page 54: Edit A Directory Entry
Directory Edit a directory entry When a directory entry displays, follow the steps below to edit the entry: Pat Williams 5550100 1. Press [ENTER]. 2. Press [ ] or [ ] to scroll to MODIFY. Press [ENTER] to edit the name. 3. -
Page 55: Dial And Remove An Entry From The Directory
Directory Dial and remove an entry from the directory Dial a number from the directory Pat Williams 5550100 Use the following steps to dial a number from the directory. DIAL 1. Find the entry for the number you wish to call by following the directions under Review directory entries on page 46. -
Page 56: Remove All Entries From The Directory
Directory Remove all entries from the directory Use the following steps to remove all entries from the directory. DIRECTORY 1. Press [DIR] to begin working with the directory. 2. Press [ENTER] to select VIEW ENTRIES. END OF LIST 3. Press [ ] or [ ] until the screen shows END OF LIST. -
Page 57: Caller Id Operation
Caller ID operation Caller ID operation About caller ID This telephone has a caller ID feature that works with caller identification service provided by your local telephone company. There is a fee for this service, and it might not be available in all areas. This telephone can provide information only if both you and the caller are in areas offering caller identification service, and if both telephone companies use compatible equipment. -
Page 58: How Caller Id Works
Caller ID operation Caller ID operation RING! How caller ID works 10:01AM 11/23 CHRISTINE SMITH If you subscribe to caller ID service provided by 19085550100 your local telephone company, information about LONG DISTANCE each caller is displayed between the first and second ring. -
Page 59: Calls Received On Two Or More Lines Simultaneously
Caller ID operation Caller ID operation Calls received on two or more lines simultaneously RING! 10:01AM 11/23 Your screen can display the caller ID information CHRISTINE SMITH for only one call at a time, but you can switch 5550100 between the information for two or more ringing lines by pressing [ ] or [ ]. -
Page 60: Call History
Caller ID operation Caller ID operation Call history 10:01AM 11/23 Information about the last 200 incoming calls is CHRISTINE SMITH stored in the call history. The most recent call 19085550100 has the highest entry number. (For example, if CL#002 two calls have been received, the call with the entry number 002 in the call history is the more recent.) You can review the call history to find out who has called, return the call or save the caller’s... -
Page 61: Reviewing The Call History And Returning Calls
Caller ID operation Reviewing the call history and returning calls CALL HISTORY To review the call history 200 CALLS 050 NEW Use the following steps to review the call history. 1. Press [CALL HISTORY]. The screen displays CALL HISTORY and the number of total calls 10:31AM 11/23 and new calls in the call history. -
Page 62: To Delete An Entry Or All Entries
Caller ID operation To delete an entry or all entries Changing the format of the caller ID number If you need to add or remove the area code or a 1 10:11AM 11/23 at the beginning of the number, do the following. Chris Thompson 1. -
Page 63: To Store An Entry To The Directory Or A One-Touch Key
Caller ID operation To store an entry to the directory or a one-touch key To save an entry to the directory 10:11AM 11/23 Use the following steps to save an entry. Chris Thompson 1. Press [CALL HISTORY]. 5550100 CL #198 2. -
Page 64: Call Waiting And Message Waiting
Caller ID operation Call waiting and message waiting CID with call waiting (CALL WAITING) L1 If you subscribe to caller ID with call waiting Chris Thompson service and you receive a call waiting call, not 5550100 only do you hear the normal call waiting tone, but (CALL WAITING) and the caller information for the incoming call appear on the screen. -
Page 65: Covm Reset
COVM RESET Use the Central Office Voice Mail Reset feature when the phone display and NEW CALL light indicate there is voice mail when you have none. You might have accessed your voice mail from 10:01AM 11/23 a remote location (while away from the phone). EXT 11 You might have received a false signal from your CID:50/200... -
Page 66: Auto Attendant Operation
MAILBOX and DTAD SETUP. See pages 52 of the installation guide and 65 of your user’s manual. Incoming messages If this 1080 telephone is not set up as an auto attendant, it stores only private messages. If this 1080 phone is an auto attendant, it can also store three kinds of messages on three separate lists, private messages, central messages or system extension messages. -
Page 67: About Auto Attendant Operation
(See Using multiple auto attendants on page 61 for further information.) Refer to page 46 of the installation guide to make a 1080 system telephone an auto attendant. See pages 46-51 and 65-73 of the installation guide to set its auto attendant answer delay time, operation time and record system announcements (day, night and directory announcements). -
Page 68: Using Multiple Auto Attendants
Auto attendant operation Using multiple auto attendants You might wish to set one or more additional 03:59PM 07/28 phones to act as auto attendant(s) when the EXT 11 primary auto attendant is turned off or busy. CID: 50/200 DTAD: 11/20 An auto attendant is busy when someone at that extension is doing any of the following: Total... -
Page 69: Auto Attendant Sequence For Callers
20 minutes or the call is dropped. The twenty minutes restarts each time the same call is placed on hold. • If the memory is full or the auto attendant is turned off on the 1080 system extension mailbox, no extension messages can be recorded in the 1080 system extension mailbox. -
Page 70: Auto Attendant Flow Chart
AA plays “Calling that ...” and calls DIR OGM message extension, which rings Person Normal call answers call? 1080 answers and Extension = 1080 or 1080 records private 1070 or 1040 message 1070, 1040 1070’s or 1040’s mailbox answers and records... -
Page 71: Answering System Operation
Answering system operation Answering system operation Incoming messages If this 1080 telephone is not set up as an auto attendant, it stores only private messages. If this 1080 phone is an auto attendant, it can store three kinds of messages in three separate lists: •... -
Page 72: Dtad Setup
ANSWER STATUS programmable. See ANSWER STATUS below for programming instructions. ANSWER STATUS Use this feature to set up the 1080 phone to record private messages (not the SYS EXT messages meant for the associated 1070 and 1040 phones). DTAD SETUP 1. -
Page 73: Answer Delay
Answering system operation DTAD setup ANSWER DELAY Use this feature to set the length of time this DTAD SETUP phone rings before the answering system picks up 15 SEC the call. One ring cycle lasts about six seconds. ANSWER DELAY 1. -
Page 74: Remote Code
Answering system operation DTAD setup REMOTE CODE Use this feature to select a three-digit number to enable remote access from another telephone DTAD SETUP (away from your home, page 59 of the installation guide) and internal access from the SYS EXT = 111 REMOTE CODE telephones (See the 1070 or 1040 user's manual... -
Page 75: Message Length
Answering system operation DTAD setup MESSAGE LENGTH DTAD SETUP Use this feature to set the maximum length of recorded messages. 1 MINUTE MESSAGE LENGTH You can select the maximum length for the messages callers can record. If you choose UNLIMITED, the caller can record a message of any length, up to the amount of time remaining for all messages, memos, and announcements. -
Page 76: Call Screening
Use this feature to choose whether private DTAD INTERCEPT incoming messages can be intercepted by other phones. Someone at the 1080 phone that is recording the message can always intercept the call. If DTAD intercept is on when a caller leaves a... -
Page 77: Dtad Features
Answering system operation DTAD features Setup the answering system in DTAD FEATURE menu. The DTAD FEATURE menu enables you to: • Play or remove incoming private messages, and record your outgoing announcement for your private mailbox. • Play or remove central messages. •... -
Page 78: Private Outgoing Announcement
The private outgoing announcement is played to callers who do not go through the auto attendant. If the 1080 is not an auto attendant, or if a call comes in on its private line, or if the ANSWER DELAY is shorter than the AUTO ATT DELAY... -
Page 79: To Play Your Outgoing Announcement
Answering system operation Private outgoing announcement To play your outgoing announcement 1 Press [DTAD]. PRIVATE OGM 2. Press [ ] or [ ] until you see PRIVATE MSGS. Press [ENTER]. PLAY 3. Press [ ] or [ ] until you see PRIVATE OGM. Press [ENTER]. -
Page 80: Private Message Playback
Answering system operation Private message playback To playback private messages PRIVATE MSGS 1. Press [DTAD]. 2. Press [ ] or [ ] until you see PRIVATE MSGS. 16 MESSAGES PLAY NEW MSGS Press [ENTER]. To playback new messages: a. Press [ ] or [ ] until you see PLAY NEW MSGS. -
Page 81: Options During Message Playback
Answering system operation Private message playback Options during message playback • To adjust the playback volume, press [ VOLUME]. PLAY ALL MSGS • To skip to the next message, press [ ]. MESSAGE #03 • To go back to the previous message, press PAUSE [ ] within three seconds of the start of the message playing. -
Page 82: To Record And Play Memos
Answering system operation To record and play memos Memos are messages you record yourself. They NOTE: If this are saved, played back, and deleted exactly like telephone is a system private incoming messages. You can record a memo extension mailbox, its as a reminder to yourself, or leave a message for system extensions can someone else using the same telephone system. -
Page 83: To Record And Play Two-Way Conversations
Answering system operation To record and play two-way conversations During an outside call, you can record the conversation as a private message in the answering system memory. It is saved, played back and deleted exactly like private incoming messages. To record a two-way conversation 05:10PM 08/09 01:56... -
Page 84: Remote Access
Answering system operation Remote access Use the remote access feature to access your answering system from any touch-tone telephone on a different telephone line (away from your home). A three-digit security code is required. This code is pre-set at 111; see REMOTE CODE (page 59 of the installation guide) to change it. - Page 85 Answering system operation Remote access Play all messages Press to play all messages. [1] [*] Play new messages Press to play new messages. Replay current message Press within three seconds of the message playing to and replay previous go back to the previous message. Press after three message seconds of the message playing to repeat the message currently playing.
-
Page 86: Central Message Playback
Answering system operation Central message playback About central messages If the 1080 telephone is an auto attendant, callers can leave central messages by pressing [9]. Each central message can be up to one minute. NOTE: The telephone plays back the preset out- going message, "Hello. -
Page 87: Information About Messages
Answering system operation Central message playback Information about messages • When playback begins, you will hear the total number of new or all messages. • Before each message, you will hear the day and time it was received. The message number currently playing will be displayed on the screen. -
Page 88: Sys Ext Mailbox
Answering system operation SYS EXT mailbox About system extension mailboxes If a 1080 telephone is an auto attendant, it can NOTE: If the 1080 be a system extension (SYS EXT) mailbox for 1070 phone is the SYS EXT and 1040 telephones in the system. When the... -
Page 89: Remove Ext Msgs
REMOVE EXT MSGS SYS EXT MAILBOX Use this feature to delete all messages for a specific 1070 or 1040 phone that uses this 1080 mailbox (follow the directions below). See the REMOVE EXT MSGS installation guide, page 56, for information on removing all messages for all 1070 and 1040 phones. -
Page 90: Appendix A, Glossary
If you subscribe to this service, you can use your 1080 telephone to see who’s calling even while on another call (as long as your caller is in an area with caller ID service and both telephone companies use compatible equipment). - Page 91 Memory loss protection: Even if the telephone has no AC power or battery, all programming and messages are retained. Navigation keys: These are the buttons you use to program your 1080 phone and for scrolling through feature options ([ENTER], [ ], [ ], [ ], [ ]).
- Page 92 Private message: This is a message that did not come through the auto attendant. If the 1080 is not an auto attendant, or if it has a private line, or if the ANSWER DELAY is shorter than the AUTO ATT DELAY, and if DTAD SETUP ANSWER STATUS is on, callers leave a private message.
-
Page 93: Appendix B, Time/Date
Appendix B Time/date When the telephone is idle, the screen displays the date and time. The time can be set manually or with incoming caller ID information. Even if you have caller ID, you must set the year once for voice messages to have the correct day of the week. - Page 94 Appendix B Time/date Continued from previous page • Setting the clock in this menu also sets the time for the answering system. Before playing each message, the answering system announces the day and time the message was received (page 73). Before using the answering system, use this menu to set the year.
-
Page 95: Appendix C, Centrex Operation
Centrex is a special subscriber service that might be available from your local telephone company for a fee. This 1080 telephone can be used with Centrex service to answer calls and pick up other lines. Contact your telephone company for more details about Centrex service. -
Page 96: Centrex Service Call Example
Appendix C Centrex operation Centrex service call example If you subscribe to In the example on the left, when the calls coming Centrex service provided from 555-1237 or 555-1238 are not answered, by your local telephone if you subscribe to the Centrex service provided company, you need by your local telephone company, these calls are to set up the system... -
Page 97: Appendix D, General Product Care
Appendix D General product care To keep your phone working well and looking good, follow these guidelines: • Avoid putting it near heating appliances and devices that generate electrical noise (for example, motors or fluorescent lamps). • DO NOT expose it to direct sunlight or moisture. •... -
Page 98: Appendix E, Important Product Information
Appendix E Important product information This symbol is to alert you to important operating or servicing instructions that may appear in this user’s manual. Always follow basic safety precautions when using this product to reduce the risk of injury, fire, or electric shock. -
Page 99: Especially About Corded Telephones
Appendix E Important product information Especially about corded telephones • Electrical power: The telephone base must be connected to a working electrical outlet. The electrical outlet should not be controlled by a wall switch. Calls cannot be made from the handset if the telephone base is unplugged or switched off, or if the electrical power is interrupted. -
Page 100: Appendix F, Fcc And Acta Information
Appendix F FCC and ACTA information If this equipment was approved for connection to the telephone network prior to July 23, 2001, it complies with Part 68 of the Federal Communications Commission (FCC) rules. If the equipment was approved after that date, it complies with the Part 68 rules and with the Technical Requirements for Con- nection of Equipment to the Telephone Network adopted by the Administra- tive Council for Terminal Attachments (ACTA). - Page 101 Appendix F FCC and ACTA information 4. Rights of the telephone company If this equipment is causing harm to the telephone network, the telephone com- pany may temporarily discontinue your telephone service. The telephone com- pany is required to notify you before interrupting service. If advance notice is not practical, you will be notified as soon as possible.
-
Page 102: Appendix G, Part 15 Of Fcc Rules
Appendix G Part 15 of FCC rules Some telephone equipment generates, uses, and can radiate radio-frequency energy and, if not installed and used properly, may cause interference to radio and television reception. This product has been tested and found to meet the standards for a class B digital device, as specified in part 15 of the FCC rules. -
Page 103: Appendix H, Limited Warranty
Appendix H Limited warranty The AT&T brand is used under license - any repair, replacement or warranty service, and all questions about this product should be directed to: In the United States of 1 (800) 222-3111 www.telephones.att.com America call or visit 1 (866) 288-4268 In Canada, call 1. - Page 104 Appendix H Limited warranty 4. What is not covered by this limited warranty? This limited warranty does not cover: • PRODUCT that has been subjected to misuse, accident, shipping or other physical damage, improper installation, abnormal operation or handling, neglect, inundation, fire, water, or other liquid intrusion; or •...
- Page 105 Appendix H Limited warranty 6. What must you return with the PRODUCT to get warranty service? You must: a. Return the entire original package and contents including the PRODUCT to the service location along with a description of the malfunction or difficulty; b.
-
Page 106: Appendix I, Technical Specification
Appendix I Technical specification Operating temperature 32°F — 122°F 0°C — 50°C Power adapter input AC120V 60Hz Power adapter output DC12V 500mA Backup battery Alkaline 9V, size 1604A (purchased separately) Headset jack 2.5mm, 32 - 150ohm Wiring limitation No more than 600 feet 0.3B System signal carrier 1.7 MHz... -
Page 107: Appendix J, Troubleshooting
Allow up to one minute for the telephone to synchronize. • This system is not compatible with any other AT&T 4-line small business telephones, except for the 1080, 1070 and 1040 telephones. System features, • This system is not compatible with any other (intercom, transfer, hold AT&T 4-line small business telephones, except... - Page 108 Appendix J Troubleshooting • If the wiring for your system is greater than 600 feet, some of the advanced features might not work properly. You might have to remove some of the phones from remote areas. • Check to make sure that each telephone set has a unique extension number.
- Page 109 Appendix J Troubleshooting • If you are using the speakerphone, eliminate any background noise. Noise from a television, radio, or other appliances might cause the telephone not to dial out properly. If you cannot eliminate the background noise, first try muting the telephone before dialing, or dialing from another room with less background noise.
- Page 110 Appendix J Troubleshooting • Check to make sure that each telephone set has a unique extension number. If the sets receive AC power at the same time, either at initial installation or after a power failure, the extension numbers might be the same. Refer to the EXTENSION NUMBER section (page 32 of the installation guide).
- Page 111 Appendix J Troubleshooting The call privacy feature • In some installations that have fiber optic service (digital service to the building, analog service does not work. within the building) the signals to the extensions might not support the call privacy feature. •...
- Page 112 Appendix J Troubleshooting • If you have DSL (digital subscriber line) service, and you have more than three telephone sets, and you have installed microfilters, you might need to have a DSL filter installed by your DSL service provider. The sound quality of the •...
- Page 113 CSL DELAY RING time on the same telephone (page 75 of the installation guide). • If a 1080 extension is on a phone call, or recording, or playing any type of message or announcement, it does not answer incoming calls.
- Page 114 Appendix J Troubleshooting • If HEADSET is selected in the AUTOMATIC MODE menu and a headset is connected on the telephone, you need to speak into the microphone of the headset to record the announcement (page 39 of the installation guide). •...
- Page 115 (page 59). correct number of rings. • Make sure the answering system answer delay time (ANSWER DELAY, page 66) of all 1080 telephones in the same system are longer than the auto attendant answer delay time (AUTO ATT DELAY, page 49 of the installation guide).
- Page 116 Appendix J Troubleshooting The auto attendant does • Make sure directory announcement is recorded not respond when callers correctly to suit your company’s needs (page 70 dial an extension. of the installation guide). • Make sure the caller is calling from a touch- tone telephone.
-
Page 117: Index
Index AC fail, 4 Ending calls, 10, 11 Alert tones, 7 Answer delay time, 66 Answering calls, 9 Answer status, 65 Area code, 50 FCC and ACTA, 93 Auto attendant operation, 59-63 Flash, 19 Auto attendant flow chart, 63 Auto-redial, 18 Greeting only, 68 Caller ID, 50 Call history, 53... - Page 118 Index Navigation keys, 3 Technical specifications, 99 Temporary tone dialing, 19 Names, Toll saver, 66 enter into directory, 43 Two-way conversation recording, search for, 46 Troubleshooting, 100-109 One-touch keys, 34 delete entries, 39 Volume control, 13 dial number, 38 Voice page, 29-33 new entries, 36 preference, 35 Warranty, 96...
-
Page 119: Remote Access Wallet Card
Delete all messages.......... # * End remote access call........hang up 4-Line small business system with digital answering system 1080 © 2008 Advanced American Telephones. All rights reserved. AT&T and the AT&T logo are trademarks of AT&T Intellectual Property II, L.P. d/b/a AT&T Intellectual Property licensed to Advanced American Telephones. - Page 120 www.telephones.att.com © 2008 Advanced American Telephones. All rights reserved. AT&T and the AT&T logo are trademarks of AT&T Intellectual Property II, L.P. d/b/a AT&T Intellectual Property licensed to Advanced American Telephones. Printed in China. Issue 9 AT&T 10/08.