Mitel 3300 Installation And Configuration Manual
3300 citellink gateway for meridian 1 phones
Hide thumbs
Also See for 3300:
- Technician's handbook (431 pages) ,
- General information manual (184 pages) ,
- Hardware technical reference manual (161 pages)
Table of Contents
Advertisement
Quick Links
Advertisement
Chapters
Table of Contents
Troubleshooting

Related Manuals for Mitel 3300


Summary of Contents for Mitel 3300
- Page 1 3300 CITELlink Gateway for Meridian 1 Phones Installation and Configuration Guide...
- Page 2 Mitel Networks™ Corporation (MITEL ). The information is subject to change without notice and should not be construed in any way as a commitment by Mitel or any of its affiliates or subsidiaries. Mitel and its affiliates and subsidiaries assume no responsibility for any errors or omissions in this document.
-
Page 3: Table Of Contents
Connect a Maintenance PC to the 3300 ICP Controller ......14... - Page 4 Installation and Configuration Guide...
-
Page 5: Introduction
Mitel 3300 Integrated Communications Platform (ICP). The unit connects to the 3300 ICP controller through a Layer 2 switch and to a maximum of 24 Meridian 1 sets through standard wiring, punchdown blocks, and connectors.(See FIGURE 1.) Meridian 1 sets are line powered from the gateway. -
Page 6: Supporting Documentation
The 3300 ICP supports any combination of Mitel and CITELlink-supported phones up to the maximum capacity of the 3300 ICP controller. A 700 -user controller, for example, supports a maximum of 29 gateways (700 limit ÷ 24 phones per gateway). -
Page 7: Before You Begin
A punchdown block and phone cables A PC with communications software (such as HyperTerminal) and an FTP utility An RS-232 straight-through cable for connecting the PC to the gateway or 3300 ICP controller 3300 ICP controller with Release 4.1 software or later... -
Page 8: Information Required
Check the part number on the bottom of each set to verify the model number. Feature Access Codes programmed on the Meridian 1 phone system. (Optional) It is recommended that you program the 3300 ICP with the same feature codes where possible. - Page 9 Multiline IP sets, see the System Administration tool or the OPS Manager Online Help. To program a Meridian 1 set (System Administration tool): 1. Launch the 3300 ICP System Administration Tool. For instructions, refer to the Technician’s Handbook. 2. Choose System Configuration from the Selection menu.
-
Page 10: Preparing Meridian 1 Users For Changes
Even if you are not installing new phones at the site, installation of the gateway will still have an impact on users. After installation, the Meridian 1 phones will operate like Mitel phones and users will have to reprogram personal keys such as personal speed dial buttons. - Page 11 Before You Begin Supported Mitel Features Most Mitel features are now available to Meridian 1 phone users. For a list of supported features, refer to “Appendix F: Supported Features” on page 35. Users should note that the following Mitel features are NOT supported: •...
-
Page 12: Installing The 3300 Citellink Gateway
Failure to follow all instructions may result in improper equipment operation and/or risk of electrical shock. Caution! After you plug in the unit, Do NOT unplug or otherwise interrupt the 3300 CITELlink Gateway unit until it has finished the boot up procedure. A power interruption may result in the gateway failing to boot properly. -
Page 13: Power Up The Gateway
2. Plug the power cord into the AC power source. The gateway begins its Boot up procedure. Caution! Do NOT unplug or otherwise interrupt the 3300 CITELlink Gateway unit while it is starting up. A power interruption may result in the gateway failing to boot properly. -
Page 14: Register Meridian 1 Phones With The Gateway
3. Test the feature keys and ensure that they are programmed and working correctly. Connect a Phone after the 3300 CITELlink Gateway is Powered Up 1. Program the phone on the 3300 ICP as required. See the section “Program Meridian 1 IP Sets on the 3300 ICP” on page 4. -
Page 15: Configuring The 3300 Citellink Gateway
Configuring the 3300 CITELlink Gateway Configuring the 3300 CITELlink Gateway The 3300 CITELlink Gateway can be installed and operated without any configuration required. By default, it uses DHCP IP addressing and will load updated firmware automatically on startup. The CITELlink gateway contains two Network Layer Processors (NLPs) referred to as NLPA and NLPB. -
Page 16: Connect A Maintenance Pc To The 3300 Citellink Gateway
A PC with a communications program such as “HyperTerminal” • An RS-232 straight-through cable Connect a Maintenance PC to the 3300 CITELlink Gateway 1. Connect an RS-232 straight-through cable from the gateway’s serial port to the serial port on a PC. -
Page 17: Change Configuration Settings
Configuring the 3300 CITELlink Gateway Change Configuration Settings 1. From the communication program, press Enter to display the default prompt, DCP[support]$ 2. Type su <ENTER> and supply the password (default is citel), to allow changes to the configuration settings. The new prompt is DCP*[support]$. -
Page 18: Upgrading 3300 Citellink Gateway Software
Mitel Online at http://www.ebiz.mitel.com. To download the software load, follow the instructions in the product bulletin. If you upgrade the 3300 ICP controller, check the new software load for a newer version of 3300 CITELlink Gateway software and upgrade if required. -
Page 19: Transfer The Software Load To The 3300 Icp Controller (Internal Tftp Server)
1. From the communications program, type tftpdShutDown <ENTER> to shut down the 3300 ICP TFTP server. 2. Using File Transfer Protocol software, connect to the 3300 ICP and log in using the admin- istrator level username and password. 3. Change to the tftp directory (/sysro/tftp) and set the transfer type to binary. -
Page 20: Troubleshooting The Installation
Installation and Configuration Guide Troubleshooting the Installation This chapter provides standard procedures to troubleshoot the most common problems. Important! It is assumed that the network and the 3300 CITELlink Gateway are configured to use DHCP. Before You Contact Technical Support If you cannot find the source of the problem in this chapter, please collect the required information listed in the applicable section(s) before calling Mitel Technical Support. -
Page 21: General Troubleshooting Steps
PING devices on your network. 5. For feature-related problems: Test the same feature (with identical COS) on Mitel IP or DNI sets. This test can help identify (or rule out) 3300 ICP controller problems. Verify that the feature is supported. Refer to “Appendix F: Supported Features” on page 35. - Page 22 ERROR: Header parse error ERROR: Application corrupt or not found. If found, follow the reflashing procedure provided on the 3300 ICP Release 4.1 software CD. If the problem persists, replace the unit. Startup On startup, the Static IP addresses...
- Page 23 • Ensure the port is not shut down and that there are link activity • Ensure the port is properly configured to allow access to the DHCP server and the 3300 ICP controller. It is recommended that you connect the gateway to an access port rather than a trunk port.
- Page 24 If using DHCP (with internal DHCP) version of firmware • Ensure that option 128 on the DHCP server is pointing to (tftpSendRequest the 3300 ICP controller (internal TFTP) or an external fails) TFTP server. • Ensure the gateway is properly configured - “autoUpdate”...
-
Page 25: Hardware Description
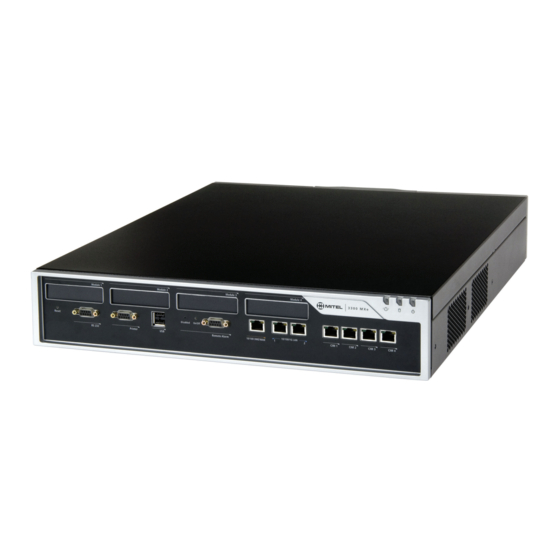
D-type 9-pin female RS-232 diagnostic port RJ-45 Ethernet connectors LAN/WAN protocol support 3300 ICP Release 4.1 software or later 10-Base-T Ethernet (1/2 duplex with no auto-negotiation) 3300 CITELlink Gateway Front Panel FIGURE 3 shows the front panel connectors and indicators. -
Page 26: Indicators
The front panel displays four unit and 24 channel indicators as shown in FIGURE 4. Figure 4: Unit and Channel Indicators The following tables list the indicator functions during startup and normal operation. Table 6: Indicator Functions During 3300 CITELlink Gateway Startup Indicator Name... -
Page 27: Connectors
Connectors RS-232 Connector The 9-pin D-type straight-through connector shown in FIGURE 5 allows Mitel Product Support to connect to the 9-pin RS-232 Diagnostic Port on the gateway and perform diagnostic tests. Figure 5: Diagnostic connector (RS-232) TABLE 8 shows the function of each pin on the connector. - Page 28 RJ21x Line Connector RJ21x line connector (shown in FIGURE 6) plugs into the 50-way male connector on the gateway front panel and allows up to 24 Meridian 1 phones access to the 3300 ICP through the 3300 CITELlink Gateway. Figure 6: Line Connector (RJ21x) The wire color code for each pin on the connector is listed in FIGURE 7.
-
Page 29: Phone Wiring Chart For Meridian 1 Phones
Phone Wiring Chart for Meridian 1 Phones Appendix D: Phone Wiring Chart for Meridian 1 Phones Table 9: Phone wiring chart RJ21x 50-way RJ21x 50-way Gateway Gateway line connector Wire color line connector Wire color Channel/Phone Channel/Phone pins pins White-Blue Black-Brown Blue-White Brown-Black... - Page 30 Installation and Configuration Guide...
-
Page 31: Phone Keys
This appendix shows the functions of keys on supported Meridian 1 phones when programmed for use on the 3300 ICP. Personal Key numbers refer to the button numbers in the Multiline Set Key Assignment form of the 3300 System Administration Tool interface. - Page 32 Installation and Configuration Guide Meridian 1 M2006 Device Type: CITELlink Type1 Button Label Function Cancel Hold Prime Line Personal Key with indicator Down Arrow Transfer Superkey Program (or Personal Key if no display on phone) Meridian 1 M2008 Device Type: CITELlink Type1 Button Label Function Cancel...
- Page 33 Phone Keys Meridian 1 M3310 Device Type: CITELlink Type1 Button Label Function Button Label Function Button Label Function Cancel Prime Line Superkey Hold 6 - 8 Personal Keys with Program indicators Handsfree Down Arrow Mute Transfer...
- Page 34 Installation and Configuration Guide Meridian 1 M3820 Device Type: CITELlink Type2 Button Label Function Button Label Function Button Label Function Cancel Prime Line Down Arrow Hold Menu left Personal Key with indicator Mute Personal Key with Transfer indicator Handsfree Menu middle Personal Key with indicator Personal Key 1...
- Page 35 Phone Keys Meridian 1 M3902 Device Type: CITELlink Type1 Button Label Function Personal Keys with indicators Handsfree Mute Cancel Hold Transfer Message Program Superkey Down Arrow Prime Line Meridian 1 M3903 Device Type: CITELlink Type1 Button Label Function Cancel Hold Handsfree Mute Headset...
- Page 36 Installation and Configuration Guide Meridian 1 M3904 Device Type: CITELlink Type1 Button Label Function Button Label Function Button Label Function Cancel Message Prime Line / Personal key with indicator Hold Local key Personal key with indicator Handsfree Transfer Personal key with indicator Mute Shift...
- Page 37 Phone Keys Meridian 1 M3901 Device Type: CITELlink Type1 Button Label Function Cancel Prime Line Hold Fx and 1 Personal Key Fx and 2 Personal Key Fx and 3 Personal Key Fx and 4 Personal Key Fx and 5 Transfer Meridian 1 M3110 Device Type: CITELlink Type1...
- Page 38 Installation and Configuration Guide...
-
Page 39: Supported Features
Supported Features Appendix F: Supported Features This section lists the 3300 ICP features supported on CITELlink Type 1 and 2 phones. Refer to the 3300 ICP System Administration Tool online help for more information on these features. Table 10: Mitel Features Supported on CITELlink Phones... - Page 40 Installation and Configuration Guide Table 10: Mitel Features Supported on CITELlink Phones (continued) Feature CITELlink Type1 CITELlink Type2 Call Forward Call Forward–Cancel All Call forward Delay Call Forward–Follow Me–End Chaining Call Forward–Follow Me–Reroute When Busy Call Forward–Forced Call Forward Group...
-
Page 41: Hold
Supported Features Table 10: Mitel Features Supported on CITELlink Phones (continued) Feature CITELlink Type1 CITELlink Type2 Dialing–Conflicting Numbers Direct-In Lines (DIL) Direct Inward Dialing (DID) Direct Page Direct Station Select/Busy Lamp Field (DSS/BLF) Disable Send Message Display Caller ID on all Lines... -
Page 42: Message
Installation and Configuration Guide Table 10: Mitel Features Supported on CITELlink Phones (continued) Feature CITELlink Type1 CITELlink Type2 Language Change Line Types and Appearances Line Appearance Ring Types Meet Me Answer Messaging Advisory Messaging-Callback Messaging-Dialed Message Waiting Display (displays MSG on phone) -
Page 43: Transfer
Supported Features Table 10: Mitel Features Supported on CITELlink Phones (continued) Feature CITELlink Type1 CITELlink Type2 Ringer Control Ringing–Discriminating Ringing Line Select Speak@Ease Softkey Support Speaker Volume Control Speed Call Keys Speed Call–Pause Speed Call–System Station-To-Station Dialing Swap Switchhook Flash Tag Call Telephone Directory–Privacy Option... - Page 44 Installation and Configuration Guide...
-
Page 45: Menu Structure
Menu Structure Appendix G: Menu Structure The Command Prompt When the user interface first starts the command prompt will be in the 'support' scope, and will look like this: DCP [support]$ _ This tells us which processor we are currently running (in this case the DCP - the number and types of processors present depend on the gateway board) and that we are in the 'support' scope. - Page 46 Installation and Configuration Guide DCP*[support]$ cd ../module/test/ DCP*[support]$ ../module/test/ will change the scope relative to the current position, while DCP*[support]$ cd /module/test/ DCP*[support]$ /module/test/ will change relative to the top level. If a command is preceded by a scope, either relative to the current position, or to the top level (as in this example), it is executed if access can be granted to the scope it is in.
- Page 47 Menu Structure /debug - the command line debugger is in here. /global - the 'built-in' commands are stored in this scope, and are always accessible. Complete Menu Tree Summary These are the commands available in each scope for reference. Most of these commands are detailed later in the document, except for commands in the 'module' and 'debug' scopes.
- Page 48 Installation and Configuration Guide global help support board ifconfig manuf restart route setcfg stats temp passwd trace wdog sys/trace flags Command Descriptions The 'module' and 'debug' commands are not covered here. Commands in the 'module' scope are likely to change depending on which software modules are present in the Handset Gateway software system, while the debugger is intended for engineering and advanced support use only, and is a large enough subject to command its own documentation.
- Page 49 Menu Structure help Usage: help [-h] Shows a list of the sub-scopes and commands available in the current scope, complete with a short reminder of the purpose of each command or scope. Usage: ls -h ls <path> This lists a scope contents. With no arguments, the contents of the current scope are displayed; otherwise the specified scope contents are shown.
- Page 50 Installation and Configuration Guide The 'support' Scope These commands have unrestricted access. The user interface opens in the 'support' scope by default. board Usage: board [-h] This displays simple identification data for the hardware and the running software. The software version string and build date are displayed, along with the board type number and CPLD version.
- Page 51 Menu Structure manuf Usage: manuf [-h] This displays tracking information which is logged after the board is manufactured. Usage: rcp [-h] This command queries the RCP and displays the result. The information displayed includes the last restart reason and the version number of the software running on the RCP. restart Usage: restart [-h]...
- Page 52 Installation and Configuration Guide setcfg Usage: setcfg [-h] This allows the network address information to be configured for the board. Invoking this command starts a series of interrogations by the board to set the IP address, netmask, default router, DNS IP address, the syslog IP address and the update/TFTP IP address. The board interfaces can also be set to use DHCP using this command.
- Page 53 Menu Structure nupdate Usage: nupdate [-h] Use this command to check for flash updates using TFTP. The configuration address from the network interface settings is queried for the file version that is stored. If that version is newer than the version currently stored in flash, then it is downloaded and written. To use the new version, you must reboot the card after the write to flash is complete.
- Page 54 Installation and Configuration Guide The 'sys' Scope Usage: mac -h mac <fixed|hw> This can force the handset gateway to use a fixed test MAC address for its network interfaces, or instruct it to use its own unique, hardware-stored MAC address. Normally the fixed MAC address is only used during post-production tests.
-
Page 55: Planning
Planning Appendix H: Planning This appendix includes forms you can use to capture site configuration details before decommissioning the Meridian 1 system. Feature Access Codes Meridian 1 Feature Access code Mitel Feature... - Page 56 Installation and Configuration Guide Meridian 1 Phone Information Internal directory # Interconnect number Meridian 1 Model Device type Meridian 1 model Device type: Meridian 1 model Device type: M2006 CITELlink Type1 A2008 CITELlink Type2 M2008 M2616 M3110 M3820 M3310 M3901 M3902 M3903 M3904...
-
Page 57: Sample Feature Cards
Sample feature cards Appendix I: Sample feature cards English CITELlink Features Code Speedcall–Store Speedcall–Invoke Speedcall–Clear Call Forwarding No Answer (Int & Ext) Cancel All Forwarding Do Not Disturb Do Not Disturb Cancel Save Last Number Redial Last Number Paging Campon Setup Campon Retrieve Cancel All Features Canadian French... - Page 58 Installation and Configuration Guide Spanish (Latin America) Funciones de CITELlink Código Marcado rápido—Almacenar Marcado rápido—Llamar Marcado rápido—Borrar Reenvío de llamada No responde (Int. y Ext.) Cancelar todo reenvío No molestar Cancelar No molestar Guardar último número Remarcar el último número Localización Campon Setup (Configuración de acampado) Campon Retrieve...
-
Page 59: Glossary
MAC address in the Multiline IP Set Configuration form after you enter the Set Registration Access code followed by the extension number. Multiline IP Set Configuration form–a form in the 3300 ICP System Administration Tool that allows you to assign directory numbers to IP phones. - Page 60 Installation and Configuration Guide...
-
Page 61: Index
8 tools required 3 troubleshooting 16 Cables, connecting 8 CAT 5 cable 3 CITELlink Gateway. See 3300 CITELlink Gateway. Layer 2 switch 1 Commands 12 LED indications 23 Configuring the 3300 CITELlink Gateway 11 Loading CITELlink Gateway software 15... - Page 62 2 troubleshooting 19 verifying operation 10 Set Registration Access code 10 wiring chart 25 Shutting down the 3300 ICP TFTP server 15 Meridian phones, registering 10 Software Mitel Online 14 loading on the CITELlink Gateway 15 requirements 2, 3...
- Page 63 Index Voltage input 21 Unsupported features 7 Upgrading CITELlink Gateway software 14 Username, for system admin 3 Warnings 2 Users, preparing for changes 6 risk of electrical shock 8 Weight 21 Wiring chart 25 Verifying Meridian 1 phone operation 10...
- Page 64 Installation and Configuration Guide...