Table of Contents
Advertisement
Quick Links
Advertisement
Table of Contents

Related Manuals for Comtech EF Data Radyne RCS11


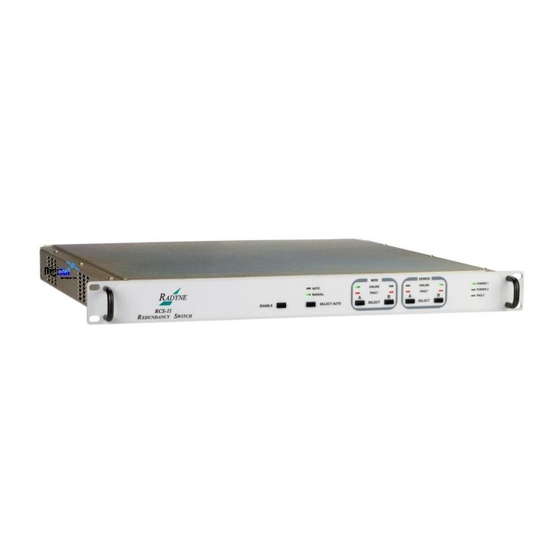
Summary of Contents for Comtech EF Data Radyne RCS11
- Page 1 RCS11 1:1 Redundancy Switch Installation and Operation Manual IMPORTANT NOTE: The information contained in this document supersedes all previously published information regarding this product. This manual is subject to change without prior notice. Part Number MN-RCS11 Revision 9...
- Page 3 Errata A Comtech EF Data Documentation Update Changes to Chapter 4. Connection Hardware for Tables 4-3, 4-4, 4-5 Subject: Alarm Fault Cable name. Date: July 9, 2010 Original Manual MN-RCS11 Rev 9 Part Number: Errata Number / ER-RCS11-EA9 Agile CO Number...
- Page 4 Errata ER-RCS11-EA9 Comtech EF Data Documentation Update DMD20, DMD50 or DMD2050 with HSSI Interface Figure 4-3 illustrates a 1:1 system using a RCS11 with the universal Interface connected to DMD20 or DMD50 Modems with 70/140 MHz option and G.703/HSSI Interfaces. Table 4-3 describes the connection hardware required.
- Page 5 Errata ER-RCS11-EA9 Comtech EF Data Documentation Update DMD20, DMD50 or DMD2050 ASI / DVB with RCS11 ASI HSSI Figure 4-4 illustrates a 1:1 system using a RCS11 with the HSSI / ASI Interface connected to DMD20 or DMD50 Modems with 70/140 MHz option utilizing the ASI DVB data Interfaces. Table 4-4 describes the connection hardware required.
- Page 6 Errata ER-RCS11-EA9 Comtech EF Data Documentation Update DMD20 HSSI Figure 4-5 illustrates a 1:1 system using a RCS11 with the HSSI / ASI Interface connected to DMD20 Modems with HSSI Interfaces. Table 4-5 describes the connection hardware required. Figure 4-5. RCS11 with HSSI/ASI Interface Connected to DMD20 Modems with HSSI Interfaces Table 4-5.
- Page 7 1:1 Redundancy Switch Installation and Operation Manual Part Number MN-RCS11 Revision 9 September 29, 2009 Copyright © 2009 Comtech EF Data. All rights reserved. Printed in the USA. Comtech EF Data, 2114 West 7th Street, Tempe, Arizona 85281 USA, 480.333.2200, FAX: 480.333.2161...
- Page 8 This page is intentionally blank.
-
Page 9: Table Of Contents
Table of Contents TABLE OF CONTENTS ......................III CHAPTER 1. INTRODUCTION ................... 1–1 1.1 Description ........................... 1–1 1.2 Redundant Power Supplies ......................1–1 1.3 Front Panel Controls ........................1–1 1.4 Power-Up Defaults ........................1–2 CHAPTER 2. THEORY OF OPERATION ..............2–1 2.1 ... - Page 10 RCS11 1:1 Redundancy SwitchTable of Contents Revision 9 Table of Contents MN-RCS11 3.3.1.2 ASI Interface with Optional Offline IF Monitor ............... 3–3 3.3.1.3 RCS11 Parallel Interface ....................3–5 3.3.1.4 G.703 – HSSI Interface with G.703 or ASI E3/T3/DS3/STS1 ......... 3–6 3.3.1.5 ...
- Page 11 RCS11 1:1 Redundancy SwitchTable of Contents Revision 9 Table of Contents MN-RCS11 5.4.1 FAULTS (J1) ........................5–2 5.4.2 REMOTE (J2) ........................5–2 5.4.3 TX B (J3) ..........................5–3 5.4.4 TX OUT (J4) ......................... 5–3 5.4.5 TX A (J5) ..........................5–3 5.4.6 ...
- Page 12 RCS11 1:1 Redundancy SwitchTable of Contents Revision 9 Table of Contents MN-RCS11 5.9 High-Speed Serial Interface (HSSI) & ASI or G703 Interface (Optional) ......5–20 5.9.1 HSSI TERR DATA (J8) ..................... 5–20 5.9.2 ASI or G703 Data Interface ....................5–20 5.9.2.1 ...
- Page 13 RCS11 1:1 Redundancy SwitchTable of Contents Revision 9 Table of Contents MN-RCS11 7.8 Storage Temperature: -20 to 70°C, 99% Humidity, Noncondensing Physical ...... 7–2 APPENDIX A. RCS11 DIP SWITCH CONFIGURATION ..........A–1 APPENDIX B. RCS11 REMOTE COMMUNICATIONS ..........B–1 B.1 Host Computer Remote Communications ................
- Page 14 RCS11 1:1 Redundancy SwitchTable of Contents Revision 9 Table of Contents MN-RCS11 Notes: viii...
-
Page 15: About This Manual
PREFACE About this Manual This manual describes the installation and operation for the Radyne RCS11. This is a technical document intended for earth station engineers, technicians, and operators responsible for the operation and maintenance of the RCS11. Reporting Comments or Suggestions Concerning this Manual Comments and suggestions regarding the content and design of this manual are appreciated. -
Page 16: Cautions And Warnings
RCS11 1:1 Redundancy Switch Revision 9 Preface MN-RCS11 Cautions and Warnings IMPORTANT or NOTE indicates a statement associated with the task being performed or information critical for proper equipment function. IMPORTANT CAUTION indicates a hazardous situation that, if not avoided, may result in minor or moderate injury. -
Page 17: Safety Compliance
RCS11 1:1 Redundancy Switch Revision 9 Preface MN-RCS11 Safety Compliance EN 60950 Applicable testing is routinely performed as a condition of manufacturing on all units to ensure compliance with safety requirements of EN60950.This equipment meets the Safety of Information Technology Equipment specification as defined in EN60950. Low Voltage Directive (LVD) The following information is applicable for the European Low Voltage Directive (EN60950): <HAR>... - Page 18 The warranty does not apply to any part of a product that has been installed, altered, repaired, or misused in any way that, in the opinion of Comtech EF Data Corporation, would affect the reliability or detracts from the performance of any part of the product, or is damaged as the result of use in a way or with equipment that had not been previously approved by Comtech EF Data Corporation.
- Page 19 The remedies provided herein are the buyer’s sole and exclusive remedies. Comtech EF Data shall not be liable for any direct, indirect, special, incidental, or consequential damages, whether based on contract, tort, or any other legal...
-
Page 20: Customer Support
480.333.2200 (Main Comtech EF Data number) 480.333.4357 (Customer Support Desk) 480.333.2161 FAX To return a Comtech EF Data product (in-warranty and out-of-warranty) for repair or replacement: Contact the Comtech EF Data Customer Support Department. Be prepared to supply the Customer Support representative with the model number, serial number, and a description of the problem. -
Page 21: Chapter 1. Introduction
Chapter 1. INTRODUCTION Description The Radyne RCS11 1:1 Redundancy Switch provides simple backup redundancy protection for most configurations of the DMD15, DMD20, DMD50 and DMD2050 Satellite Modems as well as the DM240XR Video Modulator and DD240XR Video Demodulator. The backup functions of the RCS11 may be performed manually via the front panel or from the Terminal Mode. -
Page 22: Power-Up Defaults
RCS11 1:1 Redundancy Switch Introduction Power-Up Defaults During power-up, the RCS11 initializes itself to the last mode set by the Front Panel Pushbuttons. For example, if the operator desires the RCS11 to operate in the Auto Mode, with both the Modulator and Demodulator set to Modem B, the operator places the RCS11 into this condition using the Front Panel Pushbuttons and the RCS11 stores this configuration into nonvolatile memory. - Page 23 RCS11 1:1 Redundancy Switch Introduction Optional HSSI and G703 or ASI Interface used with DM240XR, DD240XR, DMD20, DMD50 Optional Ethernet Interface (used with DM240XR, DD240XR, DMD20/50) Optional T3/E3 Interface (used with DMD50 only) Optional RS449/RS422 Serial interface MN-RCS11 – Revision 9 1–3...
- Page 24 RCS11 1:1 Redundancy Switch Introduction Figure 1-3. RCS11 Functional Block Diagram MN-RCS11 – Revision 9 1–4...
-
Page 25: Chapter 2. Theory Of Operation
Chapter 2. Theory of Operation Theory of Operation RCS11 Operation A block diagram of the signal flow is shown in Figure 2-1 below. Figure 2-1. Functional Block Diagram 2.2.1 Operating Procedures The RCS11 is designed to require minimal operator intervention and control during normal operation. -
Page 26: Configuring The Rcs11 (Refer To Figure 2-1)
RCS11 1:1 Redundancy Switch Theory of Operation 2.2.2 Configuring the RCS11 (Refer to Figure 2-1) The purpose of the ‘ENABLE’ pushbutton on the front panel is to reduce the risk of accidentally changing the operating modes of the RCS11 by accidentally bumping any one of the front panel pushbuttons. -
Page 27: Main Switch Board
RCS11 1:1 Redundancy Switch Theory of Operation 2.3.1 Main Switch Board The Main Switch Board contains the RCS11 1:1 Switch Intelligence and Memory Circuitry and all switching circuitry. The on-board microprocessor is an MC68HC11, which has a 16-bit address bus and an 8-bit data bus. The microprocessor controls and coordinates all of the major functions of the Switch and performs all necessary calculations. -
Page 28: Fail-Safe
RCS11 1:1 Redundancy Switch Theory of Operation 2.4.3 Fail-Safe If the RCS11 has a non-recoverable internal fault, the MOD and DEMOD both revert back to Modem A, the Switch Fault LED is illuminated, and the Switch Fault Relay switches to a faulted state. -
Page 29: Chapter 3. User Interfaces
Chapter 3. User Interfaces User Interfaces There are four user Interfaces available for the RCS11. These are: Front Panel Remote Port Terminal Front Panel Interface Table 3-1. RCS11 Front Panel Controls and Indicators Nomenclature Description Function Power 1 Indicates PS1 has LED illuminates Green power applied... -
Page 30: Rear Panel Interface
RCS11 1:1 Redundancy Switch User Interfaces from Modem A or B SELECT Demod A or -------------------- Allows the operator to B (Pushbutton) select a Demodulator: A or B Modulator Controls and Indicators Online LED Indicates which LED illuminates green Modulator is online: for Online A or B Fault LED... -
Page 31: Asi Interface With Optional Offline If Monitor
RCS11 1:1 Redundancy Switch User Interfaces Table 3-1. Connection Hardware LOCATION CONNECTOR DESCRIPTION AC1 / AC2 IEC/EN60320/C/3 Power Entry Module for Primary and Back Up AC DC1 / DC2 MS3102A10SC- Power Entry Module for Primary and Back Up DC J1 FAULT 9-Pin F D Sub. - Page 32 RCS11 1:1 Redundancy Switch User Interfaces Figure 3-2. RCS11 ASI Interface for DM240XR or DD240XR Table 3-2. Connection Hardware LOCATION CONNECTOR DESCRIPTION Asynchronous Data J7 DATA A from Primary Device Asynchronous Data J10 ASI TERR Asynchronous Data J11 DATA B from Back Up Device Alarm Fault Primary J18 ALARM A...
-
Page 33: Rcs11 Parallel Interface
RCS11 1:1 Redundancy Switch User Interfaces 3.3.1.3 RCS11 Parallel Interface Figure 3-3 illustrates the RCS11 DVB Parallel Data Interface (RS422 and LVDS Parallel). Table 3-3 describes the connection hardware required. Figure 3-3: RCS11 DVB Parallel Interface (RS422 and LVDS) Table 3-3. Connection Hardware LOCATION CONNECTOR DESCRIPTION... -
Page 34: G.703 – Hssi Interface With G.703 Or Asi E3/T3/Ds3/Sts
RCS11 1:1 Redundancy Switch User Interfaces 3.3.1.4 G.703 – HSSI Interface with G.703 or ASI E3/T3/DS3/STS1 Figure 3-4 illustrates the RCS11 HSSI Interface and optional G.703 or ASI data interface. The RCS11 must be configured from the factory to support ASI or G703. The G703 rates supported are E3, T3 and STS. -
Page 35: Ethernet Interface
RCS11 1:1 Redundancy Switch User Interfaces 3.3.1.5 Ethernet Interface Figure 3-5 illustrates the RCS11 that supports 10/100/1000 Data Rates. The RCS11 Ethernet interface can be configured to support a modem or modulator/demodulator. The S1 switch must be properly set to the correct position to support the modem or Modulator/Demodulator. Table 3-5 describes the connection hardware required. -
Page 36: T3/E3/Sts1 Interface
RCS11 1:1 Redundancy Switch User Interfaces 3.3.1.6 T3/E3/STS1 Interface Figure 3-7 illustrates the RCS11 T3/E3/STS1. Table 3-6 describes the connection hardware required. Figure 3-7. RCS11 T3 E3 STS1 Interface Table 3-6. Connection Hardware LOCATION CONNECTOR DESCRIPTION 68-Pin High Density J7 Modem A Data and Fault Primary Device Female 68-Pin High Density... -
Page 37: Serial Interface
RCS11 1:1 Redundancy Switch User Interfaces 3.3.1.7 Serial Interface Figure 3-8 illustrates the RCS11 RS449/422 Serial Interface. Table 3-7 describes the connection hardware required. Figure 3-8. RCS11 RS449/422 Serial Interface Table 3-7. Connection Hardware LOCATION CONNECTOR DESCRIPTION J7 Data A 37-Pin D Sub Data Primary Device J10 Terrestrial... - Page 38 RCS11 1:1 Redundancy Switch User Interfaces Notes: MN-RCS11 – Revision 9 3–10...
-
Page 39: Chapter 4. Installation
Chapter 4. Installation Installation Requirements The RCS11 can be installed within any standard 19-inch equipment cabinet or rack, and requires 1 rack unit (RU) of mounting space (1.75 inches) vertically and 21 inches of depth. Including cabling, a minimum of 23-inches of rack depth is required. WARNING There are no user-serviceable parts or configuration settings located inside the RCS11 Chassis. -
Page 40: Unpacking
RCS11 1:1 Redundancy Switch Installation Unpacking The RCS11 was carefully packaged to avoid damage and should arrive complete with the following items for proper installation: RCS11 1:1 Redundancy Switch Unit Two AC or DC Power Cords 1:1 Switch System Test Data Sheet ... -
Page 41: Rack Mounting
RCS11 1:1 Redundancy Switch Installation Rack Mounting To allow for the easy installation of cables and adequate air circulation through the units, a minimum of six inches of clearance must be provided at the sides and rear of the units. In addition, the RCS11 requires a minimum of 1¾”... -
Page 42: Connections
RCS11 1:1 Redundancy Switch Installation WARNING PROPER GROUNDING PROTECTION: During installation and setup, the user must ensure that the unit is properly grounded. The equipment shall be connected to the protective earth connection through the end use protective earth protection. In addition, the IF input and output coax cable shielding must be properly terminated to the Chassis/unit ground Connections... - Page 43 RCS11 1:1 Redundancy Switch Installation Table 4-1. Connection Hardware Item No. Quantity Part Number Discription RF/ZSC-2-175 70/140 IF Splitter CA/3598-36 3’ BNC to BNC 75 Ohm Coaxial Cable CA/3407-3 3’ SCSI Data Cable 4.6.2 DMD20, DMD50 or DMD2050 Universal with G.703 IBS/IDR Interface Figure 4-2 illustrates a 1:1 system using the RCS11 with the Universal Interface connected to DMD20 Modems with 70/140 MHz IF configuration and G.703 IBS/IDR Interfaces.
- Page 44 RCS11 1:1 Redundancy Switch Installation 4.6.3 DMD20, DMD50 or DMD2050 with HSSI Interface Figure 4-3 illustrates a 1:1 system using a RCS11 with the universal Interface connected to DMD20 or DMD50 Modems with 70/140 MHz option and G.703/HSSI Interfaces. Table 4-3 describes the connection hardware required.
- Page 45 RCS11 1:1 Redundancy Switch Installation 4.6.4 DMD20, DMD50 or DMD2050 ASI / DVB with RCS11 ASI HSSI Figure 4-4 illustrates a 1:1 system using a RCS11 with the HSSI / ASI Interface connected to DMD20 or DMD50 Modems with 70/140 MHz option utilizing the ASI DVB data Interfaces. Table 4-4 describes the connection hardware required.
-
Page 46: Dmd20 Hssi
RCS11 1:1 Redundancy Switch Installation 4.6.5 DMD20 HSSI Figure 4-5 illustrates a 1:1 system using a RCS11 with the HSSI / ASI Interface connected to DMD20 Modems with HSSI Interfaces. Table 4-5 describes the connection hardware required. Figure 4-5. RCS11 with HSSI/ASI Interface Connected to DMD20 Modems with HSSI Interfaces Table 4-5. - Page 47 RCS11 1:1 Redundancy Switch Installation 4.6.6 DMD20/DMD50/DMD2050 ETHERNET Figure 4-6 illustrates a 1:1 system using a RCS11 with the Ethernet Interface connected to a DMD20, DMD50 or DMD2050 Modem with 70/140 MHz and Ethernet Data Interfaces. Table 4-6 describes the connection hardware required. RX IN DATA IN / OUT TX OUT...
- Page 48 RCS11 1:1 Redundancy Switch Installation 4.6.7 DMD50 or DMD2050 T3 E3 STS1 With IDR/ESC Figure 4-7 illustrates a 1:1 system using a RCS11 with the T3 E3 STS1 Interface connected to DMD50 or DMD2050 Modems with 70/140 MHz and T3/E3 Interface. Table 4-7 describes the connection hardware required.
-
Page 49: Dm240 Piic Asi Interface
RCS11 1:1 Redundancy Switch Installation 4.6.8 DM240 PIIC ASI Interface Figure 4-8 illustrates a 1:1 system using a RCS11 with the ASI Interface connected to DM240 PIIC Modulators with 70/140 MHz and ASI PIIC Card. Table 4-8 describes the connection hardware required. -
Page 50: Dm240Xr Asi Data Interface
RCS11 1:1 Redundancy Switch Installation 4.6.9 DM240XR ASI Data Interface Figure 4-9 illustrates a 1:1 system using a RCS11 with 70/140 MHz, ASI Data Interface and optional Offline IF Monitor connected to DM240XR Modulators. Table 4-9 describes the connection hardware required. TX OUT ASI IN Figure 4-9. -
Page 51: Dd240Xr Ethernet
RCS11 1:1 Redundancy Switch Installation 4.6.10 DD240XR Ethernet Figure 4-10 illustrates a 1:1 system using a RCS11 with the Ethernet Interface connected to DD240XR Demodulators. Table 4-10 describes the connection hardware required. RX IN DATA OUT Figure 4-10. RCS11 with Ethernet Interface Connected to DD240XR Demodulators Table 4-10. -
Page 52: Dm240Xr Ethernet
RCS11 1:1 Redundancy Switch Installation 4.6.11 DM240XR Ethernet Figure 4-11 illustrates a 1:1 system using a RCS11 with the Ethernet Interface connected to DM240XR Demodulators. Table 4-11 describes the connection hardware required. Figure 4-11. RCS11 with Ethernet Interface Connected to DM240XR Modulators Table 4-11. -
Page 53: Dm240Xr Hssi
RCS11 1:1 Redundancy Switch Installation 4.6.12 DM240XR HSSI Figure 4-12 illustrates a 1:1 system using a RCS11 with the HSSI / ASI Interface connected to DM240XR Demodulators with HSSI PIIC Cards. Table 4-12 describes the connection hardware required. DATA IN TX OUT Figure 4-12. -
Page 54: Dm240Xr Dvb Parallel
RCS11 1:1 Redundancy Switch Installation 4.6.13 DM240XR DVB Parallel Figure 4-13 illustrates a 1:1 system using a RCS11 with a DVB Parallel Interface connected to DM240XR Modulators with DVB / M2P Parallel PIIC Cards. Table 4-13 describes the connection hardware required. TX OUT DATA IN Figure 4-13. -
Page 55: Dd240Xr Hssi
RCS11 1:1 Redundancy Switch Installation 4.6.14 DD240XR HSSI Figure 4-14 illustrates a 1:1 system using a RCS11 with the HSSI / ASI Interface connected to DD240XR Demodulators with 70/140 MHz IF and HSSI Data Interfaces. Table 4-14 describes the connection hardware required. Figure 4-14. -
Page 56: Dm240Xr & Dd240Xr
RCS11 1:1 Redundancy Switch Installation 4.6.15 DM240XR & DD240XR Figure 4-15 illustrates an RCS11 1:1 system with the HSSI / ASI Interface connected to DM240XR Modulators and DD240XR Demodulators utilizing the HSSI Interfaces. Table 4-15 describes the connection hardware required. Figure 4-15. -
Page 57: Dmd20 (Rs530) To Rcs11 Rs449/422 Serial Data Interface
RCS11 1:1 Redundancy Switch Installation 4.6.16 DMD20 (RS530) to RCS11 RS449/422 Serial Data Interface Figure 4-16 illustrates an RCS11 1:1 system with the RS449 Serial Interface connected to DMD20’s using the EIA-530 connection. Table 4-16 describes the connection hardware required. Figure 4-16. -
Page 58: Dmd20Lbst (Rs530) To Rcs11 Rs449/422 Serial Data Interface
RCS11 1:1 Redundancy Switch Installation 4.6.17 DMD20LBST (RS530) to RCS11 RS449/422 Serial Data Interface Figure 4-17 illustrates an RCS11 1:1 system with the RS449 Serial Data Interface connected to DMD20LBST’s using the EIA-530 connection. RCS11 will not pass BUC Voltage. Table 4-17 describes the connection hardware required. -
Page 59: Chapter 5. Connector Pinouts
Chapter 5. Connector Pinouts RCS11 Connections The RCS11 supports various rear panel hardware configurations. The following information describes the rear panel connections. Any connection interfacing to the RCS11 must be the appropriate mating connector. AC Power Input/Switch The AC Power Entry Modules (Figure 5-1) are located on the left and right sides of the unit. Primary power applied to the two ports with the supplied power cables is 10 –... -
Page 60: Rcs11 Common Connections
RCS11 1:1 Redundancy Switch Connector Pinouts Table 5-1 DC Power Ground RCS11 COMMON CONNECTIONS 5.4.1 FAULTS (J1) The Fault Port is a 9-Pin Female ‘D’ Connector. This does not include the HSSI interface. Refer to Table 5-2 for pinouts. Table 5-2 Fault Port – 9-Pin Female ‘D’ Connector Pin No. -
Page 61: Tx B (J3)
RCS11 1:1 Redundancy Switch Connector Pinouts RX (B) + RS485 Input TX (A) – RS485 Output TX (B) + RS485 Output Note: Connect to Ground on power up to enable RS485 Mode 5.4.3 TX B (J3) The TX B is the TX IF input from the modulator. If the RCS11 is configured for a 70 or 140 MHz application, then this connector is either a 75 Ohm or 50 Ohm BNC connector. -
Page 62: Modem A & B (J7 & J11) G703/Rs422 Serial Universal Interface W/Scsi Connectors
RCS11 1:1 Redundancy Switch Connector Pinouts Receive Data (A) - Output Request To Send (A) - Input Receive Timing (A) - Output Cllear To Send (A) - Output Data Mode (A) - Output Receive Ready (A) - Output External Clock (A) - Input Receive Octet (A) - Output... - Page 63 RCS11 1:1 Redundancy Switch Connector Pinouts IDR ESC Backward Alarm 3 Common G.703 Insert Data Out (A) - Synch Data Receive Data (A) Input IDR ESC Backward Alarm 3 Normally Open External Clock (A) - Output 14, 48, 57 Ground IDR ESC Audio Input Channel 1 (A) - Output IDR ESC Audio Input Channel 2 (A) -...
-
Page 64: Esc 8K Data (J15)
RCS11 1:1 Redundancy Switch Connector Pinouts IDR ESC Audio Input Channel 2 (B) + Output IDR ESC Audio Output Channel 1 (B) + Input IDR ESC Audio Output Channel 2 (B) + Input IDR ESC Backward Alarm 4 Output IBS ES Transmit Data (B) + / Synch Data Receive Data (B) + Output Demod Fault Open Collector Input... -
Page 65: Esc Voice (J16)
RCS11 1:1 Redundancy Switch Connector Pinouts 5.5.4 ESC VOICE (J16) The ESC Voice Port is a 9-Pin Female ‘D’ Connector. Refer to Table 5-6 for pinouts. Table 5-6. ESC Voice - 9-Pin Female ‘D’ Connector (J16) Pin No. Description Signal Tx Audio 1A Input Rx Audio 1A... -
Page 66: Es/Es (J18) Universal Interface
RCS11 1:1 Redundancy Switch Connector Pinouts 5.5.6 ES/ES (J18) Universal Interface The Earth Station to Earth Station (ES/ES) is a 9 Pin Female ‘D’ port. Refer to Table 5-8 for pinouts. Table 5-8. ES/ES Port - 9-Pin Female ‘D’ Connector (J18) Pin No. -
Page 67: Sd (Ddi) (J23)
RCS11 1:1 Redundancy Switch Connector Pinouts 5.5.8 SD (DDI) (J23) The Send Data (Drop Data In) Port (Unbalanced) is a 75-Ohm Female BNC Connector. 5.5.9 DDO (J24) The Drop Data Out Port (Unbalanced) is a 75-Ohm Female BNC Connector. 5.5.10 IDI (J25) The Insert Data In Port (Unbalanced) is a 75-Ohm Female BNC Connector. -
Page 68: Alarm B (J19)
RCS11 1:1 Redundancy Switch Connector Pinouts 5.6.5 Alarm B (J19) The Alarm B interface is a 9 Pin Female ‘D’ port. Refer to Table 5-11 for pinouts. Table 5-11. J18 Alarm A (9-Pin Female 'D') Pin # Signal Name Direction 1, 2, 3, 5, 7, 8, 9 Ground Mod Fault Open Collector... -
Page 69: Data A & Data B M2P Parallel Interface (J7 & J11)
RCS11 1:1 Redundancy Switch Connector Pinouts D3 - Output D2 - Output D1 - Output D0 - Output DVALID - Output PSYNC - Output 5.7.1.1 Data A & Data B M2P Parallel Interface (J7 & J11) The Data A and Data B M2P Parallel Interface (J7 & J11) is a 25-Pin Female ‘D’ port. This interface connects to (A) or (B) Modulator or Demodulator. -
Page 70: Terrestrial Data (J10) Dvb Parallel Interface
RCS11 1:1 Redundancy Switch Connector Pinouts 5.7.2 Terrestrial Data (J10) DVB Parallel Interface The Terrestrial Data (J10) DVB Parallel Interface is a 25-Pin Female ‘D’ port. Refer to Table 5-14 for pinouts. Table 5-14. J10 Terrestrial Data (DVB Parallel) (25-Pin Female 'D') Pin # Description Signal... -
Page 71: Terrestrial Data (J10) M2P Data Interface
RCS11 1:1 Redundancy Switch Connector Pinouts 5.7.2.1 Terrestrial Data (J10) M2P Data Interface The Terrestrial Data (J10) M2P Interface is a 25-Pin Female ‘D’ port. Refer to Table 5-15 for pinouts. Table 5-15. J10 Terrestrial Data (M2P Parallel) (25-Pin Female 'D') Pin No. -
Page 72: Alarm A (J18)
RCS11 1:1 Redundancy Switch Connector Pinouts 5.7.3 Alarm A (J18) The Alarm A Interface is a 9 Pin Female ‘D’ port. Refer to Table 5-16 for pinouts. Table 5-16. J18 Alarm A (9-Pin Female 'D') Pin # Signal Name Direction 1, 2, 3, 5, 7, 8, 9 Ground Mod Fault Open Collector... -
Page 73: Modem A & B (J7 & J11) Universal Interface, G703/Synchrounous Data W/Scsi Connectors
RCS11 1:1 Redundancy Switch Connector Pinouts Terminal Timing B (+) Input Send Timing B (+) Output Clear T Send B (+) Output Send Data B (+) Input Send Timing A (-) Output Receive Data B (+) Output Receive Timing A (-) Output 18, 21, 25 Request To Send B (+) - Page 74 RCS11 1:1 Redundancy Switch Connector Pinouts IDR ESC Audio Output Channel 2 (A) - Input IDR ESC Backward Alarm Input 3 Output IBS ES Transmit Data (A) - / IDR ESC Backward Alarm 1 Output Mod Fault Open Collector Input IBS ES Receive Data (A) - Input IBS ES Data Set Ready (RS-232 Only)
-
Page 75: Esc 8K Data (J15)
RCS11 1:1 Redundancy Switch Connector Pinouts IDR ESC Transmit 8 Kbps Data (B) + Output IDR ESC Receive 8 Kbps Clock (B) + Input IDR ESC Receive 8 Kbps Data (B) + Input IDR ESC Backward Alarm 4 Normally Open IBS Transmit Octet (B) + Output Synch Data - Data Mode (B) +... -
Page 76: Esc Alarms (J17)
RCS11 1:1 Redundancy Switch Connector Pinouts Ground Tx Audio 2B Input Rx Audio 2A Output Tx Audio 1B Input Rx Audio 1B Output Tx Audio 2A Input Rx Audio 2A Output 5.8.5 ESC Alarms (J17) The ESC Alarm Port is a 25-Pin Female ‘D’ Connector. Refer to Table 5-22 for pinouts. Table 5-22. -
Page 77: Es/Es (J18) Universal Interface
RCS11 1:1 Redundancy Switch Connector Pinouts 5.8.6 ES/ES (J18) Universal Interface The Earth Station to Earth Station (ES/ES) is a 9 Pin Female ‘D’ port. Refer to Table 5-23 for pinouts. Table 5-23. ES/ES Port - 9-Pin Female ‘D’ Connector (J18) Pin No. -
Page 78: High-Speed Serial Interface (Hssi) & Asi Or G703 Interface (Optional)
RCS11 1:1 Redundancy Switch Connector Pinouts High-Speed Serial Interface (HSSI) & ASI or G703 Interface (Optional) This interface supports HSSI and the G703 or ASI interface. The RCS11 must be configured with either ASI or G703 when ordering. This interface is supported by the DMD20, DMD50, DD240XR and DM240XR Modem. -
Page 79: Txb - Asi Or G703 (J17)
RCS11 1:1 Redundancy Switch Connector Pinouts 5.9.2.3 TXB - ASI or G703 (J17) Modem B TX Data Port (RD) is an ASI or G703 Unbalanced 75-Ohm Female BNC Connector. RCS11 Switch must be ordered supporting either ASI or G703 interface.. 5.9.2.4 RXA - ASI or G703 (J18) Modem A RX Data Port (SD) is an ASI or G703 Unbalanced 75-Ohm Female BNC Connector. -
Page 80: Ethernet & Rs530 Data Interface
RCS11 1:1 Redundancy Switch Connector Pinouts 5.10 ETHERNET & RS530 DATA INTERFACE The RCS11 Ethernet Interface supports 10/100/1000 Base-T and RS530/422 Synchrounous data. This interface is supported by the the DMD20, DMD50, DM240XR and DD240XR. 5.10.1 EIA 530 (J10) The EIA-530 is a 25 Pin Female ‘D’ port. This port is the user interface for Synchronous RS-422 Data. -
Page 81: Ethernet Interface
RCS11 1:1 Redundancy Switch Connector Pinouts 5.10.2 Ethernet Interface The Ethernet interface can support 10/100/1000 Base-T. 5.10.2.1 DATA B (J27) Modem B Data Port is an RJ45 Connector. 5.10.2.2 TERR DATA (J28) The TERR TX User Data Port is an RJ45 Connector. 5.10.2.3 DATA A (J29) Modem A Data Port is an RJ45 Connector. -
Page 82: Terrestrial Rs449/Rs422 Serial Data (J10)
RCS11 1:1 Redundancy Switch Connector Pinouts 5.11.1 TERRESTRIAL RS449/RS422 SERIAL DATA (J10) The Terrestrial Data (J10) is a 37-Pin Female ‘D’ port. Refer to Table 5-27 for pinouts. Table 5-27. J10 TERRESTRIAL DATA Pin Number Description Signal 1,19,20,37 Ground 2,10,12,14,18,28,30,32,34,36 Not Used Transmit Octet (A) - Input... -
Page 83: Data A & B (J7 & J11)
RCS11 1:1 Redundancy Switch Connector Pinouts 5.11.2 DATA A & B (J7 & J11) The RS449/422 Data ports are 37-Pin Female ‘D’ ports. These ports are the interface connection between the modem and the RCS11 Switch. Refer to Table 5-28 for pinouts. Table 5-28. - Page 84 RCS11 1:1 Redundancy Switch Connector Pinouts Notes: MN-RCS11 – Revision 9 5–26...
-
Page 85: Chapter 6. Maintenance And Troubleshooting
RCS11 1:1 Switch that may be performed on-site by qualified personnel. Only minor repairs will be discussed. For serious failures, the user should not attempt to repair the unit without first contacting the Comtech EF Data Customer Service Department at 480-333-4357 for further information and instructions. -
Page 86: Checking The Cabling And Connectors
RCS11 1:1 Redundancy Switch Maintenance and Troubleshooting CAUTION The appropriate AC power cord must be disconnected before the fuse may be removed. To keep the RCS11 operational, be sure to disconnect only one power cord at a time. Also be sure to replace the fuse and the power cord before checking the other fuse. -
Page 87: Chapter 7. Technical Specifications
Chapter 7. Technical Specifications Introduction This section defines the technical performance parameters and specifications for the RCS11 1:1 Redundancy Switch. General Modes of Operation: Auto, Manual, Remote Configurations: Modem, Mod Only, Demod Only Modulator Switch Time: 50 msec Maximum Demodulator Switch Time: 50 msec Maximum + Demod Lock Time Modulator Switch Delay Time: 40 msec... -
Page 88: Front Panel Led Indicators
DMD20/DMD20LBST Universal Satellite Modem Technical Specifications DMD20: Synch: RS530/ V.35/RS232 Universal: RS530/V.35/RS232/G.703/IDR & IBS Alarms/Drop & Insert, ASI/Parallel, HSSI, Ethernet: 10/100 Base-T/RS530 DMD50: Synch: RS530/ V.35/RS232 Universal: RS530/V.35/RS232/G.703/ IDR & IBS Alarms/Drop & Insert, Universal: G703 (T3, E3, STS1) / HSSI Universal: ASI Ethernet 10/100 Base-T/RS530 DMD2050:... -
Page 89: Appendix A. Rcs11 Dip Switch Configuration
Appendix A. RCS11 DIP Switch Configuration The RCS11 has four internal DIP switches that are accessible only by removing the top cover. These DIP switches S2, S3, S4 & S5 are used to configure Interface options, data rates and remote baud rates. An upgrade or change from an existing interface or configuration to another may require a change to one or more of the DIP switch settings. - Page 90 RCS11 1:1 Redundancy Switch RCS11 DIP Switch Configurations Figure A-2. DIP Switch showing Address and Baud Rate Table A-1 identifies the various S3 dip switch positions. Pins 1 - 6 are utilized for M&C unit addressing when using multiple switches. Pins 7 & 8 are utilized for baud rate for the terminal or remote M&C.
- Page 91 RCS11 1:1 Redundancy Switch RCS11 DIP Switch Configurations Tabel A-1 Continued SOFT IMPORTANT When Jumpers are set for SOFT, this allows user to set the Baud and Unit Addresses remotely via the terminal port. IMPORTANT For RS485 Remote communication, install CA/3733 gender changer into the remote port.
- Page 92 RCS11 1:1 Redundancy Switch RCS11 DIP Switch Configurations Figure A-3 Illustrates how to configure the Dip Switches for RS232 Data on an RCS11 with Universal Data Interface. Figure A-3. DIP Switch on the RS232 Driver Figure A-4 Illustrates how to configure the Dip Switches for G.703 Unbalanced data on an RCS11 with Universal Data Interface.
- Page 93 RCS11 1:1 Redundancy Switch RCS11 DIP Switch Configurations Figure A-5 Illustrates standard jumper blocks for fault execution on all Radyne products. J4 and JP1 Shunt Blocks should be installed as a factory default configuration. J4 and JP1 Shunt Blocks Figure A-5. J4 and JP1 Shunt Blocks MN-RCS11 –...
- Page 94 RCS11 1:1 Redundancy Switch RCS11 DIP Switch Configurations Notes: MN-RCS11 – Revision 9 A–6...
-
Page 95: Appendix B. Rcs11 Remote Communications
Appendix B. RCS11 Remote Communications Host Computer Remote Communications Control and status messages are conveyed between the RCS11 and the host computer using packetized message blocks in accordance with a proprietary communications specification. This communication is handled by the Radyne Link Level Protocol (RLLP), which serves as a protocol ‘wrapper’... -
Page 96: Protocol Wrapper
RCS11 1:1 Redundancy Switch RCS11 Remote Communications B.1.2 Protocol Wrapper The Radyne COMMSPEC is byte-oriented, with the Least Significant Bit (LSB) issued first. Each data byte is conveyed as mark/space information with two marks comprising the stop data. When the last byte of data is transmitted, a hold comprises one steady mark (the last stop bit). To begin or resume data transfer, a space (00h) substitutes this mark. -
Page 97: Frame Description And Bus Handshaking
RCS11 1:1 Redundancy Switch RCS11 Remote Communications <SOURCEID> = 11110000b 11110010b <DESTINATION ID> = 00101010b 00011100b <FSN> = 00001001b 00100101b <OPCODE> = 00000011b 00101000b <DATA> (Byte 1) = 11011111b 00000111b <DATA> (Byte 2) = 11111110b 00000101b Table 1. Checksum Calculation Example Thus, the checksum is 00000101b;... -
Page 98: Global Response Operational Codes
RCS11 1:1 Redundancy Switch RCS11 Remote Communications To reiterate, valid equipment responses to a message require the FSN tag in the command packet. This serves as part of the handshake/acknowledge routine. If a valid response message is absent, then the command is re-transmitted with the same FSN. For a repeat of the same command involving iterative processes (such as increasing or decreasing the transmit power level of a DMD15 modulator), the FSN is incremented after each message packet. -
Page 99: Software Compatibility
RCS11 1:1 Redundancy Switch RCS11 Remote Communications B.1.5 Software Compatibility CAUTION The DMD15 RLLP is not software-compatible with the following previous Radyne products: RCU5000 and DMD4500. These products may not occupy the same while using this protocol as equipment malfunction and loss of data may occur. The COMMSPEC, operating in conjunction within the RLLP shell, provides for full forward and backward software compatibility independent of the software version in use. -
Page 100: Remote Port Packet Structure
RCS11 1:1 Redundancy Switch RCS11 Remote Communications response packet is lost due to a system or internal error, the computer times out and re-transmits the same command packet with the same <FSN> to the same receiver and waits once again for an acknowledgment or a NAK packet. - Page 101 RCS11 1:1 Redundancy Switch RCS11 Remote Communications IMPORTANT When transmitting a packet at 9600 baud, the Remote M&C should ensure that the timeout value between characters does not exceed the time it takes to transmit 200 characters ( 200 msec). If this timeout value is exceeded, the equipment will timeout.
- Page 102 RCS11 1:1 Redundancy Switch RCS11 Remote Communications 1 = B Online 2 = <none or unknown> Opcode <2285h> Command RCS11 Force Manual Backup Command Data Field (2 bytes): <1> Mod Backup State 0 = A online 1 = B online <1>...
- Page 103 RCS11 1:1 Redundancy Switch RCS11 Remote Communications Opcode: <2089h> Query RCS11 Switch Alarms Mask Query Response Data Field (4 Bytes): <1> External Alarm Masks 1 = Enabled, 0 = Masked Off Bit 0: 1 = Mod A Alarm Enabled Bit 1: 1 = Force Mod A Alarm Enabled Bit 2: 1 = Demod A Alarm Enabled Bit 3: 1 = Force Demod A Alarm Enabled Bit 4: 1 = Mod B Alarm Enabled...
- Page 104 RCS11 1:1 Redundancy Switch RCS11 Remote Communications Notes: MN-RCS11 – Revision 9 B–10...
-
Page 105: Appendix C. Terminal Communications
Appendix C. Terminal Communications The RCS11 support Terminal communications. If the RCS11 is connected to a terminal (using a null modem cable) upon power up you should receive the following text: If the RCS11 is connected to a terminal (using a null modem cable) upon power up you should receive the following text: RCS11 1:1 Redundancy Switch Copyright (c) 1996, 1997... - Page 106 RCS11 1:1 Redundancy Switch Terminal Communications BAUD=9600 > >delaydf? DELAYDF=50 > >delaydn? DELAYDN=50 > >delaymf? DELAYMF=2 > >delaymn? DELAYMN=2 > >dmd? DMD=A > >mod? MOD=A > >mode? MODE=MANUAL > Typing a command without additional parameters or miss spelling of the command will return an error message >baud Error: BAD ARGUMENT...
- Page 107 RCS11 1:1 Redundancy Switch Terminal Communications >ver RCS11 1:1 Redundancy Switch Copyright (c) 1996, 1997 Radyne Firmware: fw03458-E Release Date: 102797 Version: 01.05 > The commands ADDR=nn and BAUD=nn are dependent on internal dip switches being set to Soft. If the dip switches are not set to soft the following error will occur: >baud=4800 Error: BAUD RATE IS HARD CONFIGURED >...
- Page 108 RCS11 1:1 Redundancy Switch Terminal Communications Notes: MN-RCS11 – Revision 9 C–4...
-
Page 109: Metric Conversions
METRIC CONVERSIONS Units of Length Unit Centimeter Inch Foot Yard Mile Meter Kilometer Millimeter 1 centimeter — 0.3937 0.03281 0.01094 6.214 x 10 0.01 — — 1 inch 2.540 — 0.08333 0.2778 0.254 — 25.4 1.578 x 10 1 foot 30.480 12.0 —... - Page 110 2114 85281 WEST TH STREET TEMPE ARIZONA 480 • 333 • 2200 PHONE 480 • 333 • 2161...