Table of Contents
Advertisement
Quick Links
Advertisement
Table of Contents

Related Manuals for Dynaudio BM9S II


Summary of Contents for Dynaudio BM9S II
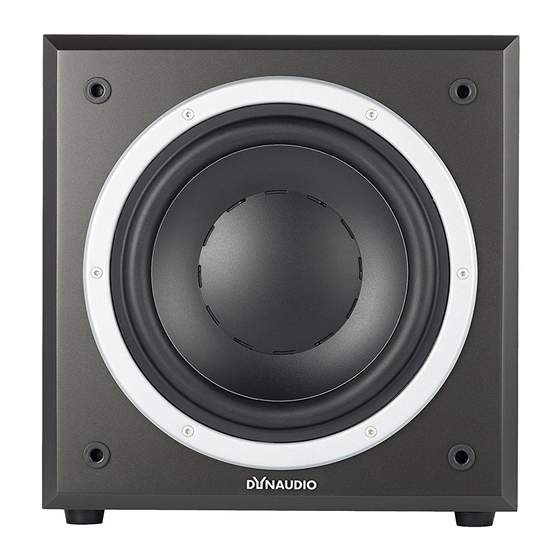
- Page 1 BM9S II – Owner’s manual...
- Page 3 Introduction Introduction the cart/apparatus combination to avoid injury from tip- over. Important safety instructions 13. Unplug this apparatus during lightning storms or when un- The lightning flash with an arrowhead symbol within an used for long periods of time. equilateral triangle, is intended to alert the user to the 1 4. Refer all servicing to qualified service personnel. Servicing presence of uninsulated “dangerous voltage”...
- Page 4 Introduction BM9S II...
- Page 5 Introduction About this manual This manual is divided in three main chapters, in which you can find all the information needed to operate the BM9S II successfully: – Before operation: Learn all about unpacking and con- necting the subwoofer. The controls and connections on the back panel are also described here. – Operation: In this chapter you will learn how to operate the subwoofer in general and how to position it properly for optimum performance.
-
Page 6: Before Operation
Ensure that no part of the top-cover is obstructing the opening at the top. 4. The outer packaging can now be lifted away from the sub- woofer itself. Remove the protective material that now is Dynaudio Acoustics BM9S on top. 5. Open the bag and remove such from around the base of the subwoofer. 6. Again, carefully tilt the subwoofer on its side and again to turn it onto its feet. Note that the top part of the protective... -
Page 7: Controls And Connections
➑ • 80: cut-off frequency at 80 Hz according to the SAT Highpass setting and provided at the SAT/SUB OUT. Terminal pinout ➐ ➑ ➒ ➓ 1 = 0 ➒ 2 = + 3 = – Dynaudio Acoustics BM9S Owner’s manual... - Page 8 Before operation (9) SAT/SUB OUT Output for satellite system to be connected. This signal is pro- cessed according to the SAT Highpass setting. (10) SAT Highpass Allows cutting off low frequencies of the signal provided at the SAT/SUB OUT. – Flat: signal is not processed – 60: cut-off frequency at 60 Hz – 80: cut-off frequency at 80 Hz Terminal pinout (7), (8), (9) 3=– BM9S II...
-
Page 9: Connecting The Subwoofer
• routed to the SAT/SUB OUT terminals. Low frequencies are cut-off according to Phase the SAT Highpass setting, • routed to the Slave OUT for a second subwoofer to be connected. High frequencies are cut-off according to the SUB Lowpass setting. Slave OUT SAT/SUB OUT Subwoofer The BM9S II provides two different signal inputs: Dynaudio Acoustics BM9S Owner’s manual... -
Page 10: Connecting A Single Subwoofer
Notes: Connecting multiple subwoofers 1. Connect the first subwoofer as described before. – You can also use both connection types. The signals will 1. Connect the first subwoofer as described before. Dynaudio Acoustics BM9S 2. Set Mode switch of first subwoofer to LFE. be combined in the BM9S II and routed accordingly. This 2. Set Mode switch of first subwoofer to LFE. Stereo 3. From the Slave OUT of the first subwoofer connect a XLR cable to the LFE/Slave allows the BM9S II to reproduce both the LFE channel in- 3. From the Slave OUT of the first subwoofer connect a XLR... -
Page 11: Operation
Operation Before operation Notes: Connecting loudspeakers Connecting – When using multiple subwoofers in a Master-Slave setup, it is recommended that the subwoofers are all the same If your source model. LFE or SLAVE – If you wish to use multiple subwoofers with full individual double proces control, set the Input switch for all to the “Master” position. Connecting s From the source subwoofer output, use a Y-connector. - Page 12 The correct volume setting is an important aspect in achieving setting of this cut-off frequency subwoofer and speakers. a well balanced speaker combination. Dynaudio Acoustics BM9S Selecting the cut-off frequen Automatic mode – Adjust the Gain control until the correct setting is reached. Set the SUB Lowpass con After switching on the BM9S II is in automatic mode: – When a music signal is detected, the internal amplifier is...
-
Page 13: Selecting The Subwoofer Cut-Off Frequency
The phase relationship between subwoofer and satellite Selecting the cut-off frequency speakers is very dependent on relative distance, construction Operation Dynaudio Acoustics BM9S Set the SUB Lowpass control to the desired frequency be- and working principles of the main speakers. The figure on tween 50 and 150 Hz. the left shows a case whereby phase of the subwoofer and... -
Page 14: Setting The Satellite Cut-Off Frequency (Sat Highpass)
Setting the cut-off frequency Switch SAT Highpass control to needed position. Depending on the bass capabilities of the speakers, the fre- quency range of subwoofer and speakers can overlap be- tween 50 Hz and 150 Hz. A bump or a gap in the frequency Dynaudio Acoustics BM9S response and thus a lower sound quality will be experienced if the system is not matched properly. In addition, small speak- ers and low powered amplifiers will particularly be affected by the low frequency signals, which again has a negative effect on the sound quality. Therefore it makes sense to limit the bass range of the connected speakers (called “satellites” in... -
Page 15: Troubleshooting
Troubleshooting Troubleshooting There may be various reasons why the subwoofer doesn’t function properly in a system without it being faulty. The checklist below will help solve problems you may encounter. Before consulting your Dynaudio Professional dealer, check this list first. Check this first: – Check if all signal cables are connected properly. – Check settings in bass management menu of the connect- ed source. – Carefully and gradually increase the subwoofer volume level on the source. -
Page 16: Maintenance
2. Pull out the fuse holder 3. Replace fuse with same type and rating 4. Push fuse holder back firmly until it is locked into position. Changing the fuse 1. Switch off the mains power switch and unplug the power cable. 2. Pull out the fuse holder 3. Replace fuse with same type and rating 4. Push fuse holder back firmly until it is locked into position. For continued protection against risk of fire, replace only with same type fuse and rating. Dynaudio Acoustics BM9S BM9S II... -
Page 17: Warranty
Dynaudio’s responsibility is limited to the product itself. Dynaudio assumes no responsibility for any loss due to cancellation of any events, or rent of replacement equipment or costs due to third party’s or customer’s loss of profit, or any other indirect cost or losses however incurred. Dynaudio reserves the right to make changes or improve- ments in design or manufacturing without assuming any ob- ligation to change or improve products previously manufac- tured and / or sold. The product warranty is only valid in the country where the product was purchased. -
Page 18: Technical Specifications
Technical Specifications Technical Specifications System Active subwoofer Bass principle Closed Frequency response 29 to 250 Hz (±3 dB) Input – LFE/Slave Input – vSAT/SUB right/left full bandwidth, XLR Input impedance + branch 20 kOhm 10 kOhm Input impedance - branch 75 mVRMS to 5 VRMS, adjustable 10 VRMS Sensitivity Max. input voltage right/left, Highpass filtered, XLR Output – Slave 100 Ohm (each branch) 1: 0 / 2: + / 3: - Output – SAT/SUB LFE, Slave (Phase and volume controls are bypassed in slave mode) Output impedance XLR Pinout 0°, 180° Mode selector Flat, 60 Hz, 80 Hz Phase adjustment SAT Highpass SUB Lowpass 50 to 150 Hz Auto ON/OFF – Automatic ON (LED green) When signal is detected at input Auto ON/OFF – Automatic mute (LED red) When no signal is detected for 15 to 20 minutes Amplifier power... - Page 19 Notes Notes Owner’s manual...
- Page 20 © Dynaudio A/S, 8660 Skanderborg, Denmark Owner’s Manual BM9S II 0214 – item no. 455402 All text and image copyrights reserved. Subject to change without notice. www.dynaudioprofessional.com...