Table of Contents
Advertisement
Quick Links
Advertisement
Table of Contents

Related Manuals for Dynaudio 9S


Summary of Contents for Dynaudio 9S
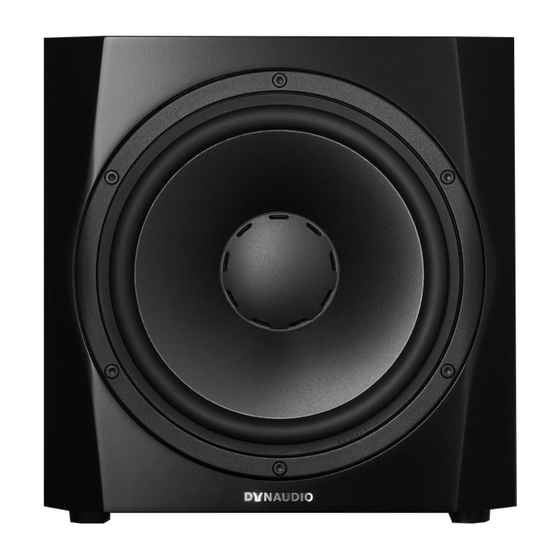
- Page 1 Professional Audio Subwoofers User manual...
- Page 2 ▪ Important safety instructions ▪ About this operating manual: Signal words ▪ About this manual ▪ Before you start ▪ Unpacking the subwoofer ▪ Controls and connections ▪ Damage due to improper connections! ▪ Subwoofer inputs ▪ SAT/SUB ▪ Connecting a single subwoofer ▪...
-
Page 4: Important Safety Instructions
Important safety instructions About this operating manual: Signal words The lightning flash with an arrowhead symbol within an equilateral triangle, is intended to alert the user to the presence of uninsulated “dangerous voltage” within the product’s enclosure that may be of sufficient magnitude to constitute a risk of electric shock to persons. - Page 5 4. Follow all instructions. 5. Do not use this apparatus near water. 6. Clean only with dry cloth. 7. Do not block any ventilation openings. Install in accordance with the manufacturer’s instructions. 8. Do not install near any heat sources such as radiators, heat registers, stoves, or other apparatus (including amplifiers) that produce heat.
-
Page 6: About This Manual
About this manual This manual is divided into three main chapters. ▪ Before you start: Learn how to unpack and connect the subwoofer. The controls and connections on the back panel are also described here. ▪ Operation: In this chapter you will learn how to operate the subwoofer and how to position it properly for optimum performance. -
Page 7: Before You Start
Before you start Unpacking the subwoofer ▪ Unpack the subwoofer on a clean, flat and soft surface; floor carpeting is suitable. ▪ The packaging should be opened from the top (1). Remove all accessories packed with the subwoofer (such as the AC power cord). -
Page 8: Controls And Connections
Controls and connections POWER GAIN P HAS E AUTO 0° 180° M ax SAT Highpass SUB Lowpass Flat 60Hz 80Hz 50Hz 150H z SAT/SUB Input SAT Output LEFT RIGHT LFE / Slave IN 10 . SUB I/O To Slave 11 . Slave ~ 50/60Hz 3.15A OF F... - Page 9 Damage due to improper connections! CAUTION Improper connections may damage the device. Set the mains power switch to OFF before connecting the 9S. Only switch on the subwoofer (mains power switch to ON) after all connections and configuration steps have Before you start...
-
Page 10: Subwoofer Inputs
Gain Phase Slave SAT/SUB The 9S provides two different signal inputs: LFE/Slave This input allows the LFE (Low Frequency Effect) channel to be connected. The signal is: ▪ reproduced by the subwoofer ▪ routed to the Slave output for a second subwoofer to be connected. -
Page 11: Connecting A Single Subwoofer
▪ Connect the full bandwidth signal to the SAT/SUB input. The subwoofer reproduces the sum of right and left signals. ▪ Set the Mode switch to LFE. Notes ▪ Both connection types can be used simultaneously. The signals will be combined in the 9S and routed accordingly. This Before you start... - Page 12 9S to reproduce both the LFE channel information as well as the bass range of the connected satellite system. ▪ Use Slave mode if external bass management is to be employed. Multiple subwoofer connections POWER GAIN PHASE POWER...
-
Page 13: Connecting Loudspeakers
Connecting loudspeakers POWER GAIN PHASE 0° 180° AUTO SAT Highpass SUB Lowpass Flat 60Hz 80Hz 50Hz 150Hz SAT/SUB Input SAT Output LEFT Ste reo RIGHT LFE / Slave IN SUB I/O To Slave Slave If the signal source includes a bass management function, the subwoofer LFE input alone can be used in LFE or SLAVE mode, depending on the management system capabilities. -
Page 14: Operation
Operation Switching on the subwoofer POWER GAIN PHASE AUTO 0° 180° SAT Highpass SUB Lowpass ~ 50/60Hz 3.15A FUSE T3.15A L 250V Once you have ensured that all necessary connections have been made, the subwoofer and the connected components can be switched on. 1. -
Page 15: Adjusting The Volume (Gain)
Adjusting the volume (Gain) POWER GAIN PHASE AUTO 0° 180° SAT Highpass SUB Lowpass Flat 60Hz 80Hz GAIN 50Hz 150Hz SAT/SUB Input SAT Output LEFT RIGHT LFE / Slave IN SUB I/O To Slave Slave CAUTION High Sound Levels! High sound levels can cause hearing damage. Do not listen to high sound levels for extended periods of time. The correct volume setting is an important aspect of achieving a well balanced speaker combination. - Page 16 Selecting the subwoofer filter frequency (low-pass) POWER GAIN PHASE AUTO 0° 180° SAT Highpass SUB Lowpass Flat 60Hz 80Hz SUB Lowpass 50Hz 150Hz SAT/SUB Input SAT Output LEFT 50Hz 150Hz RIGHT LFE / Slave IN SUB I/O To Slave Slave The Low-pass control allows the frequency range of the subwoofer to be defined.
-
Page 17: Setting The Phase (Phase)
Setting the phase (Phase) POWER GAIN PHASE AUTO 0° 180° SAT Highpass SUB Lowpass Flat 60Hz 80Hz 50Hz 150Hz PHASE 0° 180° SAT/SUB Input SAT Output LEFT RIGHT LFE / Slave IN SUB I/O To Slave Slave With the phase settings you can adjust the phase relationship between the subwoofer and main speakers. If either subwoofer or main speaker are slightly out of phase in relation to the other, it can result in decreased bass output in the frequency response area where they overlap each other. - Page 18 Freq. ▪ Red: Combined frequency response ▪ Grey: Subwoofer ▪ Black: Main speakers The phase relationship between subwoofer and satellite speakers is dependent on their relative distance to the listening position and on the working principles of the satellite speakers. The figure above shows a case in which the phase of the subwoofer and satellite speakers is incorrect in the critical overlap area, thus reducing acoustic output in the listening room in that region.
- Page 19 It is useful therefore to limit the bass range of the connected speakers (called “satellites” in this case) through a high-pass filter. The 9S provides two high-pass filter settings to achieve this: ▪...
-
Page 20: Troubleshooting
Troubleshooting There may be various reasons why a subwoofer doesn’t function properly in a system without it being faulty. The checklist below will help solve any problems you may encounter. Before consulting your Dynaudio Professional dealer, check this list first. - Page 21 Cause ▪ No signal is present on either of the subwoofer inputs. ▪ The subwoofer output in the source bass-management has been disabled. ▪ Source subwoofer volume level is at zero. ▪ Subwoofer volume level is at zero. Solution Make sure to switch off the system before making any changes! ▪...
-
Page 22: Maintenance
DANGER Dangerous voltage inside! Cleaning the 9S or other system components when switched on can lead to damages or electric shock. Switch off the subwoofer and all other components of your system when cleaning. To clean the subwoofer: The cabinet and other plain parts should be cleaned with a soft dry or slightly damp cloth. -
Page 23: Warranty
Dynaudio shall not be responsible for any incidental or consequential damages. Dynaudio’s responsibility is limited to the product itself. Dynaudio assumes no responsibility for any loss due to cancellation of any events, or rent of replacement equipment or costs due to third party’s or customer’s loss of profit, or any other indirect cost or losses however incurred. -
Page 24: Technical Specifications
Technical Specifications Parameter Value System Single driver, active 9,5 in subwoofer Analog inputs 1 x XLR LFE, 2 x XLR Stereo Input impedance – + branch 20 kOhm Input impedance – - branch 10 kOhm Max. input voltage 10 VRMS Analog outputs 1 x XLR Slave Out, 2 x XLR SAT Out Output impedance... - Page 25 Professional Audio Subwoofers Designed and engineered by Dynaudio Labs in Denmark Dynaudio A/S 8660 Skanderborg Denmark dynaudio.com © 2022 Dynaudio A/S All text and image copyrights reserved. Subject to change without notice. Technical Specifications...