Table of Contents
Advertisement
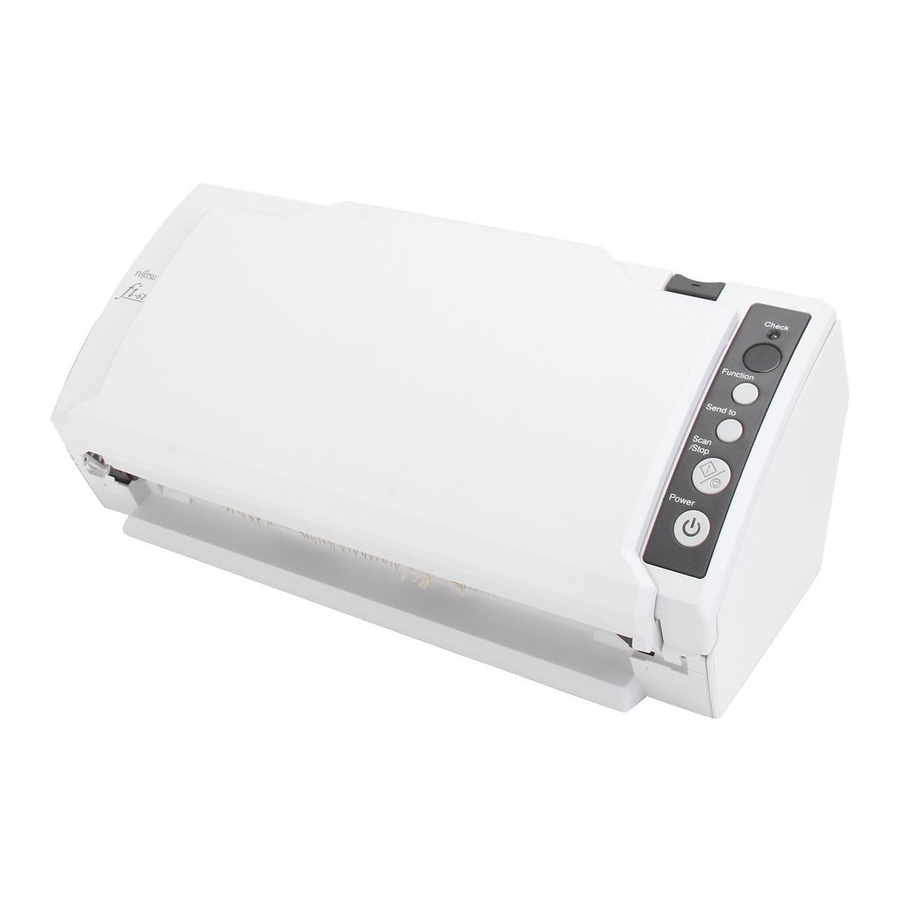
fi-6110
Image Scanner
Operator's Guide
Thank you for purchasing the fi-6110 color image scanner.
This manual explains about the basic operations and handling of the scanner.
For information on scanner installation, connection and software installation,
refer to "Getting Started".
P3PC-3012-01ENZ0
Explains the names and functions of parts
and basic scanner operation.
Explains how to load documents on the
scanner.
Explains about the setting items in the
scanner drivers.
Explains how to use the Operator Panel.
Explains about various ways of scanning.
Explains how to clean the scanner.
Explains how to replace the consumables.
Explains about troubleshooting.
Explains how to use the Software Operation
Panel to configure the scanner settings.
How to Use This Manual
TOP
Contents
Index
Introduction
Scanner
Overview
How to Load
Documents
Configuring the
Scan Settings
How to Use the
Operator Panel
Various Ways to
Scan
Daily Care
Replacing the
Consumables
Troubleshooting
Operational
Settings
Appendix
Glossary
Advertisement
Chapters
Table of Contents
Troubleshooting

Related Manuals for Fujitsu fi-6110


Summary of Contents for Fujitsu fi-6110
- Page 1 Documents Explains about the setting items in the Configuring the Thank you for purchasing the fi-6110 color image scanner. scanner drivers. Scan Settings This manual explains about the basic operations and handling of the scanner. For information on scanner installation, connection and software installation, refer to "Getting Started".
-
Page 2: How To Use This Manual
How to Use This Manual Contents How to Use This Manual Index Introduction Scanner The following shows the tips for using this manual. Index page Overview Cover page How to Load Documents Jumps to the first page of Configuring the each chapter. -
Page 3: Introduction
Introduction Contents Introduction Index Introduction Scanner Thank you for purchasing the fi-6110 color image scanner. Manual Description Overview About This Product TWAIN User's Guide Explains how to install and operate the (PDF) TWAIN driver. Included in the Setup DVD- How to Load The fi-6110 is equipped with an Automatic Document Feeder ROM. - Page 4 Introduction Contents Trademarks Index Microsoft, Windows, Windows Server, Windows Vista, and Introduction SharePoint are either registered trademarks or trademarks of Microsoft Corporation in the United States and/or other Scanner countries. Overview ISIS and QuickScan are either registered trademarks or trademarks of EMC Corporation in the United States. How to Load Adobe, the Adobe logo, Acrobat, and Adobe Reader are either Documents...
-
Page 5: Conventions
Conventions Contents Conventions Index Introduction Scanner Safety Information Naming Conventions in This Manual Overview The attached "Safety Precautions" manual describes The operating systems and products in this manual are important details for users to use this product safely and indicated as follows. How to Load Documents correctly. - Page 6 Conventions Contents Screen Examples in This Manual Product Indication Index The screen examples in this manual are subject to change ® ® Microsoft Microsoft Office SharePoint Portal Server Introduction SharePoint Server without notice in the interest of product improvement. 2003 If the actual displayed screen differs from the screen examples Scanner ®...
-
Page 7: Table Of Contents
Contents Contents Contents Index Introduction Scanner How to Use This Manual ........................... 2 Overview Introduction ................................ 3 Conventions ............................... 5 How to Load Documents Chapter 1 Scanner Overview ........................13 Main Features ................................14 Configuring the Parts and Functions ..............................15 Scan Settings Front .................................... - Page 8 Contents Contents Documents for Scanning ............................30 Index Paper Size..................................30 Introduction Paper Quality.................................. 30 Loading Capacity................................32 Scanner Area Not to Be Perforated .............................. 32 Overview Conditions for Multifeed Detection ..........................33 Conditions for Mixed Batch Scanning ..........................34 How to Load Documents Conditions for Using the Carrier Sheet...........................
- Page 9 Contents Contents [Paper Handling] Tab ..............................45 Index [Gamma] Tab ................................. 45 Introduction [Color Dropout] Tab................................ 46 [Compression] Tab ................................. 46 Scanner [Blank Page Deletion] Tab.............................. 47 Overview [About] Tab..................................47 How to Load Chapter 4 How to Use the Operator Panel ....................48 Documents Operator Panel ................................
- Page 10 Contents Contents Customizing the Scanner Settings ..........................78 Index Using a Button on the Scanner to Start Scanning......................78 Introduction Detecting Multifeed Errors.............................. 80 Ignoring Multifeed for a Set Pattern..........................82 Scanner Overview Chapter 6 Daily Care ............................ 85 Cleaning Materials and Locations that Require Cleaning ..................86 How to Load Cleaning Materials................................
- Page 11 Contents Contents Images are distorted or not clear..........................110 Index Vertical streaks appear on the scanned image......................111 Introduction "E" (or other numbers/letters) is already displayed on the Function Number Display after power-on......112 Multifeed error occurs frequently..........................113 Scanner Situation in which the document is not fed into the ADF occurs frequently..............
- Page 12 Contents Contents Settings Related to Page Counters ......................... 137 Index Checking and Resetting the Counters [Page Counter] ....................137 Introduction Replacement Cycle of Consumables [Life Counter Alarm Setting] ................139 Settings Related to Scanning ........................... 140 Scanner Adjusting the Start Position for Scanning [Offset/Vertical magnification Adjustment] ..........140 Overview Removing Shadows/Streaks that Appear around the Scanned Image [Page Edge Filler (ADF)] ........
-
Page 13: Chapter 1 Scanner Overview
Contents Index Chapter 1 Scanner Overview Introduction Scanner Overview This chapter explains about the names and functions of the scanner parts, as well as the methods for basic operations. How to Load Documents 1.1 Main Features.............................14 Configuring the 1.2 Parts and Functions............................15 Scan Settings 1.3 Turning the Power ON/OFF ........................18 1.4 Opening/Closing the ADF...........................19... -
Page 14: How To Load
Chapter 1 Scanner Overview Contents Index 1.1 Main Features Introduction This section explains about the main features of this product. Advanced image processing functions Scanner The scanner’s automatic detection function outputs images in color or The scanner is equipped with the following features. Overview monochrome by the document content. -
Page 15: Parts And Functions
Chapter 1 Scanner Overview Contents Index 1.2 Parts and Functions Introduction This section shows the names of the scanner parts. Scanner Front Overview Side Guide ADF Paper Chute Guides the documents in width Holds the documents to be scanned. How to Load direction as they are fed into the Documents Chute Extension 2... -
Page 16: Back
Chapter 1 Scanner Overview Contents Back Index Introduction Ventilation Port Holes for ventilating hot air from inside the scanner. Scanner Overview Power Connector How to Load Used to connect the power cable. Documents Power cable refers to the AC cable and AC adapter connected together. Configuring the Scan Settings Security Cable Slot... -
Page 17: Operator Panel
Chapter 1 Scanner Overview Contents Removable Parts Index ADF Paper Chute Introduction For details about removing the ADF paper chute, refer to "7.3 Replacing the Pick Roller" (page 94). Scanner Overview How to Load Documents Configuring the Scan Settings Sheet Guide For details about removing the sheet guide, refer to "7.3 Replacing the Pick Roller"... -
Page 18: Turning The Power On/Off
Chapter 1 Scanner Overview Contents Index 1.3 Turning the Power ON/OFF Introduction This section explains how to power on/off the scanner. How to Turn the Power OFF Scanner The method by which the scanner is powered ON/OFF can be Overview Press the [Power] button on the operator panel for more specified from one of the following: than two seconds. -
Page 19: Opening/Closing The Adf
Chapter 1 Scanner Overview Contents Index 1.4 Opening/Closing the ADF Introduction This section describes how to open and close the ADF. How to Close the ADF Scanner How to Open the ADF Overview Close the ADF. Push the center of the ADF until it locks in place. Remove all documents from the ADF paper chute. -
Page 20: Setting Up The Adf Paper Chute
Chapter 1 Scanner Overview Contents Index 1.5 Setting Up the ADF Paper Chute Introduction Documents loaded in the ADF paper chute are fed into the Pull out chute extension 2. Scanner scanner one by one. Overview Using the chute extension 1 and chute extension 2 as shown below will keep the documents straight and feed them How to Load smoothly. -
Page 21: Setting Up The Stacker
Chapter 1 Scanner Overview Contents Index 1.6 Setting Up the Stacker Introduction Documents loaded in the ADF paper chute are ejected onto Lift up the stacker extension. Scanner the stacker one by one. Overview Using the stacker and stacker extension as follows will keep the documents straight and stack them neatly. -
Page 22: Resuming From Power Saving Mode
Chapter 1 Scanner Overview Contents Index 1.7 Resuming from Power Saving Mode Introduction Power saving mode keeps the power consumption low when Scanner the scanner has not been used for a certain period of time. Overview If the scanner is left powered on for 15 minutes without being used, it automatically enters power saving mode. -
Page 23: Basic Flow Of Scanning Operation
Chapter 1 Scanner Overview Contents Index 1.8 Basic Flow of Scanning Operation Introduction This section explains about the basic flow of performing a The following describes the flow of performing a scan. Scanner scan. Overview Turn on the scanner. In order to perform a scan, you need a scanner driver and an For details, refer to "1.3 Turning the Power ON/OFF"... - Page 24 Chapter 1 Scanner Overview Contents Start up the application to use for scanning. Select a scanner. Index ScandAll PRO will be used here as an example to explain the procedure. Introduction Scanner Overview When ScandAll PRO is launched How to Load Documents For details about how to start up ScandAll PRO, refer to "How to Use ScandAll PRO".
- Page 25 Chapter 1 Scanner Overview Contents Launch the scanner driver from the application. In the scanner driver's setup dialog box, configure the Index scan settings and then click the [OK] button. Introduction Scan the document by clicking the [Scan] menu [Scan]. Scanner Overview How to Load...
-
Page 26: Chapter 2 How To Load Documents
Contents Index Chapter 2 How to Load Documents Introduction Scanner Overview This chapter explains how to load documents on the scanner. How to Load Documents 2.1 Loading Documents............................27 Configuring the 2.2 Documents for Scanning ..........................30 Scan Settings How to Use the Operator Panel Various Ways to Scan... -
Page 27: Loading Documents
Chapter 2 How to Load Documents Contents Index 2.1 Loading Documents Introduction This section explains how to load documents on the scanner. Fan the documents. Scanner 1 Grab a stack of documents, which should be 5 mm or less. Preparation Overview 2 Hold both ends of the documents and fan them a few times. -
Page 28: How To Load Documents
Chapter 2 How to Load Documents Contents How to Load Documents Make sure to keep the documents within the limit which is Index indicated by the line on the inside of each side guide. Introduction Line Pull out the chute extension 1 and chute extension 2 Side Guide according to the length of the document. - Page 29 Chapter 2 How to Load Documents Contents Lift up the stacker and stacker extension according to the Index length of the document. For details, refer to "1.6 Setting Up the Stacker" (page 21). Introduction Start up an application for scanning and perform a scan. Scanner For details about the scanning procedure in ScandAll PRO, refer to Overview...
-
Page 30: Documents For Scanning
Chapter 2 How to Load Documents Contents Index 2.2 Documents for Scanning Introduction Paper Size Paper Quality Scanner Overview The paper sizes that can be scanned are as follows. Paper type Recommended paper types for scanning are as follows: How to Load Wood-free paper Documents Wood-containing paper... - Page 31 Chapter 2 How to Load Documents Contents The following types of documents must not be scanned: To scan documents that are semi-transparent, slide the Index Paper-clipped or stapled documents [Brightness] bar to light to avoid bleed through. Documents on which the ink is still wet When you scan documents written with lead pencil, make Introduction sure to clean the rollers frequently.
-
Page 32: Loading Capacity
Chapter 2 How to Load Documents Contents Loading Capacity Area Not to Be Perforated Index The number of sheets that can be loaded in the ADF paper An error may occur when there are punched holes in the area Introduction chute is determined by the paper size and paper weight of the shaded in light blue in the following picture. -
Page 33: Conditions For Multifeed Detection
Chapter 2 How to Load Documents Contents Conditions for Multifeed Detection Fig. 1 Index Multifeed is an error where two or more sheets are fed through Introduction Reference point the ADF at once. It is also called a multifeed when a different Scanner document length is detected. -
Page 34: Conditions For Mixed Batch Scanning
Chapter 2 How to Load Documents Contents Conditions for Mixed Batch Scanning Paper size Index When you scan a mixed batch with different sizes, not feeding the The following conditions apply when scanning a mixed batch documents straight may cause paper jams or part of the image to Introduction appear missing. - Page 35 Chapter 2 How to Load Documents Contents Combinations of standard paper sizes in a mixed batch Index Refer to the table below for a guideline of the range available for mixed batch scanning. Introduction However, note that not feeding the documents straight may cause paper jams or part of the image to appear missing.
-
Page 36: Conditions For Using The Carrier Sheet
Chapter 2 How to Load Documents Contents Conditions for Using the Carrier Sheet Do not use a damaged Carrier Sheet because it may damage or Index cause the scanner to malfunction. To avoid deformation, keep the Carrier Sheet on a flat surface without ■Paper size Introduction any weight on it. -
Page 37: Chapter 3 Configuring The Scan Settings
Contents Index Chapter 3 Configuring the Scan Introduction Settings Scanner Overview How to Load Documents This chapter explains about the scan parameters of the scanner drivers. 3.1 TWAIN Driver..............................38 Configuring the Scan Settings 3.2 ISIS Driver ..............................42 How to Use the Operator Panel Various Ways to Scan... -
Page 38: Twain Driver
Chapter 3 Configuring the Scan Settings Contents Index 3.1 TWAIN Driver Introduction The TWAIN driver is a driver that conforms to the TWAIN Scanner standard. It can be used with an application that supports Overview TWAIN to perform scanning. Normally, the scanner driver is launched via an application, How to Load and then the scan settings are configured in the setup dialog Documents... -
Page 39: [Resolution]
Chapter 3 Configuring the Scan Settings Contents [Resolution] [Paper Size] Index Specify the resolution for scanning. Select a paper size from the drop-down list. Introduction You can either select a predefined value from the list, or Up to three custom sizes can be added to the list by using the Scanner specify a custom resolution which can range between 50 dpi [...] button. -
Page 40: [Preview] Button
Chapter 3 Configuring the Scan Settings Contents [Preview] Button [Option] Button Index Allows you to preview the scanned image. Configure the optional settings in the following window. Introduction Perform a test scan by the current settings and display the Scanner result in the Preview window. -
Page 41: [Advance] Button
Chapter 3 Configuring the Scan Settings Contents [Filter] tab Index Select the filter for image processing. Introduction Item Description Digital Endorser Adds alphanumeric character strings on the Scanner scanned image data. Overview Page Edge Filler Fills in the margins of the scanned image in a specified color. -
Page 42: Isis Driver
Chapter 3 Configuring the Scan Settings Contents Index 3.2 ISIS Driver Introduction The ISIS driver is a driver that conforms to the ISIS standard. Scanner It can be used with an application that supports ISIS to Overview perform scanning. Normally, the scanner driver is launched via an application, How to Load and then the scan settings are configured in the setup dialog Documents... -
Page 43: [Main] Tab
Chapter 3 Configuring the Scan Settings Contents [Main] Tab [Layout] Tab Index Introduction Scanner Overview How to Load Documents Configuring the Scan Settings How to Use the Operator Panel Various Ways to Scan Settings such as the scanning side(s), color (color/grayscale/ Settings such as the page orientation, feed direction, paper Daily Care black &... -
Page 44: [Image Processing] Tab
Chapter 3 Configuring the Scan Settings Contents [Scan Area] Dialog Box [Image Processing] Tab Index Introduction Scanner Overview How to Load Documents Configuring the Scan Settings How to Use the Operator Panel Various Ways to The scanning area for the specified paper size can be Scan selected. -
Page 45: [Paper Handling] Tab
Chapter 3 Configuring the Scan Settings Contents [Paper Handling] Tab [Gamma] Tab Index Introduction Scanner Overview How to Load Documents Configuring the Scan Settings How to Use the Operator Panel Various Ways to Scan You can configure the settings for during scanning such as You can specify the gamma correction pattern. -
Page 46: [Color Dropout] Tab
Chapter 3 Configuring the Scan Settings Contents [Color Dropout] Tab [Compression] Tab Index Introduction Scanner Overview How to Load Documents Configuring the Scan Settings How to Use the Operator Panel Various Ways to Scan Select a color to drop out when scanning documents. Select a compression rate and the image quality for scanning Daily Care in color/grayscale. -
Page 47: [Blank Page Deletion] Tab
Chapter 3 Configuring the Scan Settings Contents [Blank Page Deletion] Tab [About] Tab Index Introduction Scanner Overview How to Load Documents Configuring the Scan Settings How to Use the Operator Panel Various Ways to Scan You can configure the setting for deleting blank pages. Select this tab to view information related to the version of the Daily Care When scanning in black &... -
Page 48: Chapter 4 How To Use The Operator Panel
Contents Index Chapter 4 How to Use the Operator Introduction Scanner Panel Overview How to Load Documents This chapter explains how to use the operator panel. Configuring the 4.1 Operator Panel ............................49 Scan Settings How to Use the Operator Panel Various Ways to Scan Daily Care... -
Page 49: How To Load Documents
Chapter 4 How to Use the Operator Panel Contents Index 4.1 Operator Panel Introduction The operator panel consists of the Function Number Display, buttons, and Check LED. Scanner Overview Names and Functions Check LED How to Load Lights in orange when an error occurs. Documents Flashes when the ADF is open. -
Page 50: Scan Settings
When this alarm occurs, turn the power off then back on. (page 82). If the problem still persists, contact your FUJITSU scanner Indicates that the ADF was opened when the status was dealer or an authorized FUJITSU scanner service provider. -
Page 51: Chapter 5 Various Ways To Scan
Contents Index Chapter 5 Various Ways to Scan Introduction Scanner Overview This chapter explains how to scan documents in various ways, by using examples of the TWAIN driver started via How to Load ScandAll PRO. Documents 5.1 Summary ..............................52 Configuring the Scan Settings 5.2 Scanning Documents of Different Types and Sizes..................53 5.3 Advanced Scanning............................59... -
Page 52: Summary
Chapter 5 Various Ways to Scan Contents Index 5.1 Summary Introduction The following lists various ways of scanning documents. For information on how to scan documents in the following Scanner methods, refer to "How to Use ScandAll PRO". Scanning documents of different types and sizes Overview Dividing a Multipage Document Using Patch Codes "Scanning Both Sides at Once"... -
Page 53: Scanning Documents Of Different Types And Sizes
Chapter 5 Various Ways to Scan Contents Index 5.2 Scanning Documents of Different Types and Sizes Introduction Scanning Both Sides at Once Configure other settings such as [Paper Size]. Scanner Overview Click the [OK] button. Load documents in the ADF paper chute. The changes are applied. -
Page 54: Documents With Different Widths
Chapter 5 Various Ways to Scan Contents Documents with Different Widths Make sure that all documents are placed underneath the Index pick roller, otherwise the documents will not be picked. Introduction When you scan documents of different widths at the same Pick roller's width time, some of the smaller documents may be skewed or may not be fed into the scanner. -
Page 55: Documents Larger Than A4/Letter Size
Chapter 5 Various Ways to Scan Contents Documents Larger than A4/Letter Size 2 Place the document inside the Carrier Sheet. Index Align the fold line with the right edge of the Carrier Sheet so that the document fits in the upper right-hand corner. The Carrier Sheet can be used to scan documents larger than Introduction A4/Letter size, such as A3 and B4. - Page 56 Chapter 5 Various Ways to Scan Contents Click the [OK] button. Place the end with the black and white pattern as the Index The settings are saved. leading edge in the direction of the arrow. Set the back side of the document (right-hand side of a Introduction Scan the document by clicking the [Scan] menu [Scan]...
-
Page 57: Long Page Scanning
Chapter 5 Various Ways to Scan Contents Long Page Scanning To scan documents longer than A4/Letter size, perform Index the following: Documents with a length up to 3,048 mm (120 in.) in feed Pull out the chute extensions 1 and 2 all the way. Introduction For details, refer to "1.5 Setting Up the ADF Paper... - Page 58 Chapter 5 Various Ways to Scan Contents In [Scan Type], select [Long page (Front Side)] or [Long Scan the document by clicking the [Scan] menu [Scan] Index page (Duplex)]. in ScandAll PRO. Select [Long page (Front Side)] for simplex scanning and [Long page Introduction (Duplex)] for duplex scanning.
-
Page 59: Advanced Scanning
Chapter 5 Various Ways to Scan Contents Index 5.3 Advanced Scanning Introduction Removing a Color from the Scanned Image Load documents in the ADF paper chute. Scanner For details, refer to "Chapter 2 How to Load Documents" (page 26). (Dropout Color) Overview Start up ScandAll PRO and click the [Scan] menu You can select either green, red, blue (primary colors), or a... - Page 60 Chapter 5 Various Ways to Scan Contents Select a color to drop out in the [Dropout Color] drop- When you select [Custom], [Custom 2] or [Custom 3], the [Select Index Dropout color] dialog box is displayed where you can select up to down list under [More].
- Page 61 Chapter 5 Various Ways to Scan Contents [Color 1], [Color 2] and [Color 3] tabs Scan the document by clicking the [Scan] menu [Scan] Index Specify the color(s) to be dropped out. in ScandAll PRO. Up to three colors can be selected at once. Introduction - [Dropout] check box Select this check box in both [Color 2] and [Color 3] tabs to...
-
Page 62: Consumables
Chapter 5 Various Ways to Scan Contents Skipping Blank Pages Click the [Job/Cache] tab and check the [Blank Page Skip] Index check box. Blank pages (black or white) in the documents can be Introduction detected and automatically deleted during scanning. Scanner For example, when you scan a mixed batch of double-sided Overview... - Page 63 Chapter 5 Various Ways to Scan Contents Click the [OK] button in the [TWAIN Driver (32)] dialog Index box. The settings are saved. Introduction Scan the documents by clicking the [Scan] menu Scanner [Scan] in ScandAll PRO. Overview How to Load Documents Configuring the Scan Settings...
-
Page 64: Configuring Post-Scan Operations And Handling
Chapter 5 Various Ways to Scan Contents Index 5.4 Configuring Post-Scan Operations and Handling Introduction Automatically Correcting Skewed Images Start up ScandAll PRO and click the [Scan] menu Scanner [Scanner Setting]. Overview The [TWAIN Driver (32)] dialog box appears. When the documents are fed into the ADF skewed, the skewed images can be detected and straightened If the [TWAIN Driver (32)] dialog box does not appear, How to Load... - Page 65 Chapter 5 Various Ways to Scan Contents Click the [Rotation] tab and select [Automatic Page Size Click the [OK] button. Index Detection] in the [Automatic Size and Skew detection] It returns to the [TWAIN Driver (32)] dialog box. drop-down list. Introduction Click the [OK] button in the [TWAIN Driver (32)] dialog box.
-
Page 66: Automatically Correcting The
Chapter 5 Various Ways to Scan Contents Automatically Correcting the Page Orientation Click the [Rotation] tab and select [Automatic] in the Index [Rotation Degree] drop-down list. When you scan a batch of documents with mixed page Introduction orientations, the images can be adjusted to their correct page Scanner orientations automatically. - Page 67 Chapter 5 Various Ways to Scan Contents Click the [OK] button in the [TWAIN Driver (32)] dialog The following types of documents may not be adjusted Index box. correctly because the page orientation is detected The settings are saved. based on the characters printed on the document: Introduction - Documents scanned at a resolution of less than Scan the document by clicking the [Scan] menu...
-
Page 68: Saving Scanned Images In Pdf Format
Chapter 5 Various Ways to Scan Contents Saving Scanned Images in PDF Format When you use Adobe Acrobat to scan and convert a Index document into PDF, the output image may not turn out as There are two ways to create a PDF file. intended. - Page 69 Select [Show Scanner's Native Interface] for [User Interface], and then click [OK] button. Replacing the Consumables The [Custom Scan] dialog box appears. Select [FUJITSU fi-6110dj] for [Scanner]. Troubleshooting Operational Settings Appendix The [Scanner Options] dialog box closes and it returns to the [Custom Scan] dialog box.
- Page 70 Chapter 5 Various Ways to Scan Contents Click the [Scan] button. Configure settings such as [Resolution] and [Paper Size], Index and then click the [Scan] button. Introduction Scanner Overview How to Load Documents Configuring the Scan Settings How to Use the Operator Panel Various Ways to Scan...
- Page 71 Chapter 5 Various Ways to Scan Contents Select the [File] menu [Save As], and save the scanned Click the [Adobe PDF Settings] tab. Index image to file. For more details about using Adobe Acrobat, refer to the Adobe Select a job option in the [Adobe PDF Settings] tab. Introduction Acrobat Help.
-
Page 72: Splitting The Scanned Image In Two
Chapter 5 Various Ways to Scan Contents Splitting the Scanned Image in Two Click the [Option] button. Index Each page of the scanned image data can be split horizontally Introduction into two separate pages. Scanner Overview This function may not work properly in some applications. The [Option] dialog box appears. - Page 73 Chapter 5 Various Ways to Scan Contents When scanning in duplex mode, the back of the image is Index output in the following order according to the [Flip Side Rotation] setting: Introduction Book: top bottom Fanfold: bottom Scanner Overview Click the [OK] button. It returns to the [TWAIN Driver (32)] dialog box.
-
Page 74: Using The Multi Image Output
Chapter 5 Various Ways to Scan Contents Using the Multi Image Output Select the [Enable Multi Image] check box. Index "Multi image output" allows you to obtain both a color/ Introduction grayscale image and a black & white image from a single Scanner scan. - Page 75 Chapter 5 Various Ways to Scan Contents In [Order (for Multi Image Output)], select the order in Index which the images are output. Order Description Introduction Primary: Color/Grayscale A color/grayscale image is output Scanner Secondary: Binary first, then a black & white image. Overview Primary: Binary A black &...
-
Page 76: Automatically Detecting Color/Monochrome Documents
Chapter 5 Various Ways to Scan Contents Automatically Detecting Color/Monochrome Select the [Enable Multi Image] check box. Index Documents Introduction The color of the document can be automatically detected then Scanner output in color or grayscale for color documents, and in black Overview &... - Page 77 Chapter 5 Various Ways to Scan Contents Select a side in [Select Current Image Setting]. Index You need to pre-configure the settings for each case when the document is recognized as [Color/Grayscale] or [Binary]. Introduction Configure the scan settings in the [TWAIN Driver (32)] dialog box. Scanner If it is recognized as a color/grayscale document, the Overview...
-
Page 78: Customizing The Scanner Settings
Chapter 5 Various Ways to Scan Contents Index 5.5 Customizing the Scanner Settings Introduction Using a Button on the Scanner to Start Scanning Click the [Events] tab and select an event. Scanner From the [Select an event] drop-down list, select an event from which you want to launch an application. - Page 79 Chapter 5 Various Ways to Scan Contents Select an action and an application to be launched by the Scanner setup Index scanner button event. Click [Start this program] under [Actions], and select an application Check Introduction from the drop-down list on the right. Scanner Function Overview...
-
Page 80: Detecting Multifeed Errors
Chapter 5 Various Ways to Scan Contents Detecting Multifeed Errors Click the [Job/Cache] tab and specify the detection Index method in the [Multifeed Detection] drop-down list under [ADF Option]. Multifeed is an error where two or more sheets are fed through Introduction the ADF at once. - Page 81 Chapter 5 Various Ways to Scan Contents Click the [OK] button. Index It returns to the [TWAIN Driver (32)] dialog box. Introduction Click the [OK] button in the [TWAIN Driver (32)] dialog box. Scanner The settings are saved. Overview Scan the document by clicking the [Scan] menu [Scan] in ScandAll PRO.
-
Page 82: Ignoring Multifeed For A Set Pattern
Chapter 5 Various Ways to Scan Contents Ignoring Multifeed for a Set Pattern Intelligent Multifeed function Index The following three modes are available. If you attempt to scan a document with a sticky note, receipt, Introduction Mode Description or photo attached while multifeed detection is enabled, the Manual mode Checks for any paper attached every time a Scanner... - Page 83 Chapter 5 Various Ways to Scan Contents Preparation before using this function Select the [Startup] tab, and then select the [Enable Index Scanner Panel] and [Enable [Scan] Button] check boxes. Configure the following settings before using this function: Introduction Start up ScandAll PRO and select the [Scan] menu [Scanner Setting].
- Page 84 Chapter 5 Various Ways to Scan Contents Operational procedure Press the [Function] button and confirm that the function Index number is flashing faster, then either press the [Scan/Stop] After a multifeed error occurs, open the ADF and remove Introduction button or perform a scan from the computer. the documents.
-
Page 85: Chapter 6 Daily Care
Contents Index Chapter 6 Daily Care Introduction Scanner Overview This chapter describes how to clean the scanner. How to Load Documents Do not use aerosol spray or spray that contains alcohol to clean the scanner. Dust blown up by strong air from the spray may Configuring the enter inside the scanner which may cause the scanner to fail or Scan Settings... -
Page 86: Overview
Documents written with lead pencil Consumables Documents on which the toner is not sufficiently fused For more information about the cleaning materials, contact the Troubleshooting FUJITSU scanner dealer where you purchased the scanner or an authorized FUJITSU scanner service provider. Operational Settings Appendix... -
Page 87: Cleaning The Outside
Chapter 6 Daily Care Contents Index 6.2 Cleaning the Outside Introduction The outside of the scanner, including the ADF paper chute Scanner and the stacker, should be cleaned with either a piece of dry Overview cloth, a cloth/Cleaning Paper moistened with Cleaner F1/mild detergent, or a sheet of Cleaning Wipe. -
Page 88: Cleaning The Inside
Chapter 6 Daily Care Contents Index 6.3 Cleaning the Inside Introduction The inside of the scanner should be cleaned with a piece of Turn off the scanner and wait for at least 15 minutes. Scanner For details, refer to "1.3 Turning the Power ON/OFF" (page 18). - Page 89 Chapter 6 Daily Care Contents Pad assy (×1) 3 When you press the [Send to] and [Scan/Stop] buttons at the Index same time, the feed/eject rollers rotate a certain amount. Wipe the dirt and dust off the surface of the rubber pads, downwards from top to bottom.
-
Page 90: Cleaning The Carrier Sheet
Chapter 6 Daily Care Contents Index 6.4 Cleaning the Carrier Sheet Introduction The Carrier Sheet should be cleaned with either a piece of dry Scanner cloth, a cloth/Cleaning Paper moistened with Cleaner F1/mild Overview detergent, or a sheet of Cleaning Wipe. Gently wipe the dirt and dust off the surface and the inside of How to Load the Carrier Sheet. -
Page 91: Chapter 7 Replacing The Consumables
Contents Index Chapter 7 Replacing the Consumables Introduction Scanner Overview This chapter describes how to replace the consumables for the scanner. How to Load Documents The glasses inside the ADF become very hot when the scanner is being used. Configuring the Before you replace the consumables, make sure Scan Settings to turn off the power, unplug the power cable... -
Page 92: Operator Panel
Various Ways to Only use the specified consumables. Scan Daily Care To purchase the consumables, contact your FUJITSU scanner dealer or an authorized FUJITSU scanner service provider. Replacing the Consumables Please note that some parts (other than the consumables) -
Page 93: Replacing The Pad Assy
Chapter 7 Replacing the Consumables Contents Index 7.2 Replacing the Pad Assy Introduction Replace the pad assy in following procedure. Attach a new pad assy. Scanner Push the pad assy in until the hooks on both sides lock in place. Overview Remove all documents from the ADF paper chute. -
Page 94: Replacing The Pick Roller
Chapter 7 Replacing the Consumables Contents Index 7.3 Replacing the Pick Roller Introduction Replace the pick roller in following procedure. Remove the sheet guide. Scanner Hold the pickup tabs on both ends of the sheet guide and pull it out as you push the tabs inwards. - Page 95 Chapter 7 Replacing the Consumables Contents Remove the shaft. Remove the pick roller from its shaft. Index Slightly pull up the left part of the shaft (about 5 mm), move it towards Pull out the shaft as you lift the retaining clip. the left side, and then lift it up.
- Page 96 Chapter 7 Replacing the Consumables Contents Attach the shaft. Attach the sheet guide. Index Insert the right end of the shaft into the bushing (right), and set the Hold the pickup tabs on both ends of the sheet guide and place it shaft into the slot gradually by lowering it.
- Page 97 Chapter 7 Replacing the Consumables Contents Attach the ADF paper chute. Index Insert the tabs on the ADF paper chute into the slots on the back of the scanner, and push in to lock it firmly. Introduction ADF Paper Chute Scanner Overview How to Load...
-
Page 98: Purchasing The Carrier Sheet
How to Use the Carrier Sheet PA03360-0013 5 sheets Operator Panel Various Ways to Scan Daily Care Replacing the Consumables To purchase the Carrier Sheet, contact your FUJITSU scanner Troubleshooting dealer or an authorized FUJITSU scanner service provider. Operational Settings Appendix Glossary... -
Page 99: Chapter 8 Troubleshooting
Contents Index Chapter 8 Troubleshooting Introduction Scanner Overview This chapter explains about the countermeasures against paper jams and other troubles, items to check before contacting How to Load your scanner service provider, and how to read the product labels on the scanner. Documents For details about other errors/troubles not mentioned in this Configuring the... -
Page 100: Daily Care
Chapter 8 Troubleshooting Contents Index 8.1 Paper Jam Introduction When your document is jammed inside the scanner, remove Remove the jammed document. Scanner the document in the following procedure. Overview Be careful of injuries upon removing jammed documents. How to Load Be careful not to get your accessories (e.g. -
Page 101: Error Indications On Operator Panel
If the Error Recovery Guide is installed in your computer, the Scanner Function Number Display alternates between either "J" or "U" [Fujitsu fi-Scanner Error Recovery Guide] dialog box appears Overview and an "error number" for temporary errors, and either "E", "H"... -
Page 102: Temporary Errors
If the problem persists, write down the ■Cover open error Memory error displayed error code and contact your Daily Care FUJITSU scanner dealer or an authorized "U" and "error number" are displayed back and forth. FUJITSU scanner service provider. Display Item... - Page 103 Turn the power off then back on. Overview error If the problem persists, write down the displayed error code and contact your FUJITSU scanner dealer or an authorized How to Load FUJITSU scanner service provider. Documents ■Sensor error Configuring the Scan Settings "L"...
-
Page 104: Troubleshooting
(page 118) the Scanner Service Provider" (page 121), and then contact Documents your FUJITSU scanner dealer or an authorized FUJITSU "There are black traces on the document." (page 119) scanner service provider. Configuring the "Paper jams occur frequently when scanning with the Carrier Sheet."... -
Page 105: Scanner Cannot Be Powered On
Documents If the problem persists, check the items in "8.4 Before You Contact the Scanner Service Provider" (page 121) first, then contact your FUJITSU scanner dealer or Configuring the an authorized FUJITSU scanner service provider. Scan Settings How to Use the... -
Page 106: The Function Number Display Switches Off
If the problem persists, check the items in "8.4 Before You Contact the Scanner Operator Panel Service Provider" (page 121) first, then contact your FUJITSU scanner dealer or an authorized FUJITSU scanner service provider. Various Ways to Scan Daily Care... -
Page 107: Scanning Does Not Start
Various Ways to Scan If the problem persists, check the items in "8.4 Before You Contact the Scanner Service Provider" (page 121) first, then contact your FUJITSU scanner dealer or an authorized FUJITSU scanner service provider. Daily Care Replacing the Consumables... -
Page 108: Quality Of The Scanned Photo/Picture Is Poor When Scanning In Black & White Mode
If the problem persists, check the items in "8.4 Before You Contact the Scanner Configuring the Service Provider" (page 121) first, then contact your FUJITSU scanner dealer or Scan Settings an authorized FUJITSU scanner service provider. How to Use the... -
Page 109: Quality Of Scanned Text Or Lines Is Unsatisfactory
Operator Panel If the problem persists, check the items in "8.4 Before You Contact the Scanner Service Provider" (page 121) first, then contact your FUJITSU scanner dealer or Various Ways to an authorized FUJITSU scanner service provider. Scan *1: When scanning in halftone, grayscale or color, the scanned image may not become sharp and clear. -
Page 110: Images Are Distorted Or Not Clear
Various Ways to If the problem persists, check the items in "8.4 Before You Contact the Scanner Scan Service Provider" (page 121) first, then contact your FUJITSU scanner dealer or an authorized FUJITSU scanner service provider. Daily Care Replacing the Consumables... -
Page 111: Vertical Streaks Appear On The Scanned Image
If the problem persists, check the items in "8.4 Before You Contact the Scanner Operator Panel Service Provider" (page 121) first, then contact your FUJITSU scanner dealer or an authorized FUJITSU scanner service provider. Various Ways to Scan Daily Care... -
Page 112: E" (Or Other Numbers/Letters) Is Already Displayed On The Function Number Display After Power-On
If the display does not return to ready ("1") after closing the ADF, check the items Scan Settings "8.4 Before You Contact the Scanner Service Provider" (page 121) first, then contact your FUJITSU scanner dealer or an authorized FUJITSU scanner service provider. How to Use the Operator Panel Is "h"... -
Page 113: Multifeed Error Occurs Frequently
Chapter 8 Troubleshooting Contents Multifeed error occurs frequently. Index Introduction Does the paper condition fulfill the requirements Use paper that fulfills the requirements. described in "Precautions" in "Paper Quality" For details, refer to "2.2 Documents for Scanning" (page 30). (page 30)? Scanner Overview... - Page 114 If the problem persists, check the items in "8.4 Before You Contact the Scanner Service Introduction Provider" (page 121) first, then contact your FUJITSU scanner dealer or an authorized FUJITSU scanner service provider. Scanner *1: "Consumables" refers to the pad assy and the pick roller.
-
Page 115: Situation In Which The Document Is Not Fed Into The Adf Occurs Frequently
Daily Care If the problem persists, check the items in "8.4 Before You Contact the Scanner Service Provider" (page 121) first, then contact your FUJITSU scanner dealer or Replacing the an authorized FUJITSU scanner service provider. Consumables *1: "Consumables" refers to the pad assy and the pick roller. -
Page 116: Paper Jams/Pick Errors Occur Frequently
If the problem persists, check the items in "8.4 Before You Contact the Scanner Service Provider" (page 121) first, then contact your FUJITSU scanner dealer or an authorized FUJITSU scanner service provider. Replacing the *1: "Consumables" refers to the pad assy and the pick roller. -
Page 117: Scanned Images Turn Out Elongated
If the problem persists, check the items in "8.4 Before You Contact the Scanner Service Provider" (page 121) first, then contact your FUJITSU scanner dealer or an authorized FUJITSU scanner service provider. Daily Care *1: "Consumables" refers to the pad assy and the pick roller. -
Page 118: A Shadow Appears At The Top Or The Bottom Of The Scanned Image
If the problem persists, check the items in "8.4 Before You Contact the Scanner Operator Panel Service Provider" (page 121) first, then contact your FUJITSU scanner dealer or an authorized FUJITSU scanner service provider. Various Ways to Scan Daily Care... -
Page 119: There Are Black Traces On The Document
Scan Settings If the problem persists, check the items in "8.4 Before You Contact the Scanner Service Provider" (page 121) first, then contact your FUJITSU scanner dealer or an authorized FUJITSU scanner service provider. How to Use the Operator Panel... -
Page 120: Paper Jams Occur Frequently When Scanning With The Carrier Sheet
If the problem persists, check the items in "8.4 Before You Contact the Scanner Documents Service Provider" (page 121) first, then contact your FUJITSU scanner dealer or an authorized FUJITSU scanner service provider. Configuring the Scan Settings How to Use the... -
Page 121: Before You Contact The Scanner Service Provider
Chapter 8 Troubleshooting Contents Index 8.4 Before You Contact the Scanner Service Provider Introduction Please check the following items before contacting your Scanner FUJITSU scanner dealer or an authorized FUJITSU scanner Overview service provider. General How to Load Documents Item... -
Page 122: Operator Panel
Chapter 8 Troubleshooting Contents ■Image quality issues Error Status Index Item Findings ■Computer connection issues Introduction Scanner driver and Item Findings version Scanner Operating system Overview Interface controller version (Windows) Operating system Error message How to Load version (Windows) Documents Interface Example: USB interface Application... -
Page 123: Checking The Product Labels
Chapter 8 Troubleshooting Contents Index 8.5 Checking the Product Labels Introduction This section describes how to check the labels on the scanner. Label A (example): Shows the scanner information. Scanner Location Overview The location of the two labels are as follows. How to Load Documents Configuring the... -
Page 124: Chapter 9 Operational Settings
Contents Index Chapter 9 Operational Settings Introduction Scanner Overview This chapter explains how to use the Software Operation Panel to configure the scanner settings. How to Load Documents 9.1 Starting Up the Software Operation Panel ....................125 Configuring the 9.2 Password Setting............................126 Scan Settings 9.3 Configuration Items ..........................132 9.4 Settings Related to Page Counters ......................137... -
Page 125: Starting Up The Software Operation Panel
Index 9.1 Starting Up the Software Operation Panel Introduction The Software Operation Panel (SOP) is installed together with The [FUJITSU Software Operation Panel] dialog box appears. Scanner the scanner drivers (TWAIN/ISIS). Overview This application allows you to configure various settings such... -
Page 126: Password Setting
Chapter 9 Operational Settings Contents Index 9.2 Password Setting Introduction By setting a password, the Software Operation Panel can run Enter a password then again to confirm, and click the [OK] Scanner button. in [View Only mode] which allows users to only view the Overview scanner settings. -
Page 127: Setting The [View Only Mode]
Chapter 9 Operational Settings Contents Setting the [View Only mode] The Software Operation Panel enters the [View Only mode]. Index Set the Software Operation Panel to [View Only mode] in the Introduction following procedure. Scanner Overview Set a password. For details, refer to "Setting a Password"... -
Page 128: Clearing The [View Only Mode]
Chapter 9 Operational Settings Contents Clearing the [View Only mode] [View Only mode] is cleared, and the scanner settings can now be Index changed. Clear the [View Only mode] in the following procedure. Introduction Right-click the Software Operation Panel icon in the Scanner taskbar, and select [View Only mode] from the menu. -
Page 129: Changing The Password
Chapter 9 Operational Settings Contents Changing the Password Enter a new password then again to confirm, and click the Index [OK] button. Change the password in the following procedure. Up to 32 characters can be used for the password. Introduction Note that only alphanumeric characters (a to z, A to Z, 0 to 9) are Right-click the Software Operation Panel icon in the allowed. -
Page 130: Clearing The Password
Chapter 9 Operational Settings Contents Clearing the Password Leave both fields blank and click the [OK] button. Index Clear the password in the following procedure. Introduction Right-click the Software Operation Panel icon in the Scanner taskbar, and select [Password Setting] from the menu. Overview How to Load Documents... -
Page 131: Resetting The Password
Chapter 9 Operational Settings Contents Resetting the Password Enter a new password then again to confirm, and click the Index [OK] button. In case you forgot your password, it can be reset in the Up to 32 characters can be used for the password. Introduction following procedure. -
Page 132: Configuration Items
Chapter 9 Operational Settings Contents Index 9.3 Configuration Items Introduction The Software Operation Panel allows the configuration of the Scanner following settings for the scanner that is connected to the Overview computer. Device Setting How to Load Documents Start up the Software Operation Panel. Configuring the Refer to "9.1 Starting Up the Software Operation Panel"... - Page 133 Chapter 9 Operational Settings Contents Item Description Parameter/Value Factory Default Index Page Counter Check the counters to determine when to replace Total Page Count (ADF) / Pad / Pick Roller Introduction the consumables. Also use it to reset the counters after replacing the Scanner consumables.
-
Page 134: Device Setting 2
Chapter 9 Operational Settings Contents Device Setting 2 Index Introduction Start up the Software Operation Panel. Refer to "9.1 Starting Up the Software Operation Panel" (page 125). Scanner Overview From the listing on the left, select [Device Setting 2]. How to Load Documents Configuring the Scan Settings... - Page 135 Chapter 9 Operational Settings Contents Item Description Parameter/Value Factory Default Index Multifeed Specify a method for multifeed detection. Detect None / Check Overlapping (Ultrasonic) / None Introduction multifeeds by monitoring the overlap, document Check Length / Check Overlapping and Length length, or the combination of both.
- Page 136 Chapter 9 Operational Settings Contents Item Description Parameter/Value Factory Default Index Intelligent Multifeed When there is a paper of the same size attached to Manual mode / Auto mode 1 / Auto mode 2 Manual mode Introduction Function a designated location on the page, configure the scanner to memorize the location of the attachment Scanner and not detect multifeeds for that location.
-
Page 137: Settings Related To
Chapter 9 Operational Settings Contents Index 9.4 Settings Related to Page Counters Introduction Checking and Resetting the Counters From the listing on the left, select [Device Setting]. Scanner [Page Counter] Overview ■Checking the counters How to Load The status on each consumable part can be viewed to Documents determine when to replace the consumables. -
Page 138: Resetting The Counters
Chapter 9 Operational Settings Contents ■Resetting the counters ■Message for replacing the consumable Index When you have replaced the consumables, reset the The following message may appear while using the scanner. Introduction corresponding counters in the following procedure. Message Click the [Clear] button for the consumable(s) that you Scanner replaced. -
Page 139: Replacement Cycle Of Consumables [Life Counter Alarm Setting]
Chapter 9 Operational Settings Contents Replacement Cycle of Consumables Specify a value to be set as the life of each consumable Index (pad assy and pick roller). [Life Counter Alarm Setting] The value can range from 10,000 to 2,550,000 sheets (in increments Introduction of 10,000). -
Page 140: Settings Related To Scanning
Chapter 9 Operational Settings Contents Index 9.5 Settings Related to Scanning Introduction Adjusting the Start Position for Scanning From the listing on the left, select [Device Setting] and Scanner click the [Offset] button. [Offset/Vertical magnification Adjustment] Overview When the output position of the scanned image is not correct How to Load or the image appears shortened/elongated (vertically), use the Documents... - Page 141 Chapter 9 Operational Settings Contents Adjust the level of offset/vertical magnification as needed. Offset Setting Description Index Unit Select [ADF (front)] or [ADF (back)] as the Introduction target for offset adjustment. Scanner Main Adjusts the horizontal (width) offset. The value can range from -2 to +2 mm (in Overview increments of 0.5).
-
Page 142: Removing Shadows/Streaks That Appear Around The Scanned Image [Page Edge Filler (Adf)]
Chapter 9 Operational Settings Contents Removing Shadows/Streaks that Appear around Specify the width of each margin to fill in: top/bottom/left/ Index right. the Scanned Image [Page Edge Filler (ADF)] T: top = 0 to 15 mm Introduction Depending on the condition of the documents that you scan, B: bottom = -7 to 7 mm Scanner the shadow of the document may appear as black streaks. -
Page 143: Removing A Color From The Scanned Image [Dropout Color]
Chapter 9 Operational Settings Contents Removing a Color from the Scanned Image From the listing on the left, select [Device Setting 2] Index [Dropout color]. [Dropout color] Introduction With "Dropout color", you can select either green, red, or blue Scanner (primary colors) to remove the details of the selected color Overview from a scanned image. -
Page 144: Number Of Paper Feeding Retries
Chapter 9 Operational Settings Contents Number of Paper Feeding Retries Index Configure this setting to change the number of feeding retries Introduction when a pick error occurs. Scanner Overview Start up the Software Operation Panel. Refer to "9.1 Starting Up the Software Operation Panel" (page 125). -
Page 145: Settings Related To Multifeed Detection
Chapter 9 Operational Settings Contents Index 9.6 Settings Related to Multifeed Detection Introduction Method of Multifeed Detection [Multifeed] From the listing on the left, select [Device Setting 2] Scanner [Multifeed]. Overview Multifeed is an error where two or more sheets are fed through the ADF at once. - Page 146 Chapter 9 Operational Settings Contents Select a detection method. To scan documents with different lengths, specify Index [Check Overlapping (Ultrasonic)]. Method Description When a photo or a piece of paper is attached on the Introduction document, the overlapping part of the document may None Does not detect multifeeds.
-
Page 147: Specifying An Area To Detect Multifeed [Document Check Area Specification For Multifeed Detection]
Chapter 9 Operational Settings Contents Specifying an Area to Detect Multifeed Specify the detection range. Index [Document check area specification for Multifeed Range Description Introduction Detection] Selected range Select the check box to specify the detection range (colored in light blue) in the Scanner The following setting is only available when you specified picture below. - Page 148 Chapter 9 Operational Settings Contents Example 1: Range Description Index Displays the end position of the detection Introduction Position: Middle (Middle) by the length from the leading edge of the document. Selected range = Enable, Start = 50 mm, End = 200 mm Scanner Range: 0 to 510 mm, in 2 mm increments, Overview...
- Page 149 Chapter 9 Operational Settings Contents Example 2: Example 3: (Bad example) Index Introduction Position: Middle Position: Middle Selected range = Enable, Start = 0 mm, End = 0 mm Selected range = Enable, Start = 100 mm, End = 102 mm Scanner Overview How to Load...
-
Page 150: Configuring The
Chapter 9 Operational Settings Contents Specifying an Area Not to Detect Multifeed Select an operation mode and click the [OK] button. Index [Intelligent Multifeed Function] Mode Description Introduction Manual mode Stops feeding the documents when a When there is paper of the same size attached to a multifeed is detected. -
Page 151: Settings Related To Waiting Time
Chapter 9 Operational Settings Contents Index 9.7 Settings Related to Waiting Time Introduction Waiting Time to Enter Power Saving Mode Scanner [Power saving] Overview The waiting time for the scanner to enter power saving mode How to Load can be specified. Documents Start up the Software Operation Panel. -
Page 152: Settings Related To Power On/Off
Chapter 9 Operational Settings Contents Index 9.8 Settings Related to Power ON/OFF Introduction Method of Turning the Scanner ON/OFF Select one of the following. Scanner [Power SW Control] [Enable power switch : Press the [Power] button on the Overview (Factory default)] operator panel. -
Page 153: Appendix
Contents Index Appendix Introduction Scanner Overview This section provides the following information. How to Load Documents A.1 Basic Specification ...........................154 Configuring the A.2 Installation Specification...........................156 Scan Settings A.3 Outer Dimensions ............................157 A.4 Uninstalling the Software .........................158 How to Use the Operator Panel Various Ways to Scan... -
Page 154: Basic Specification
Appendix Contents Index A.1 Basic Specification Introduction Scanner Item Specification Notes Overview Scanner type ADF (Automatic Document Feeder) How to Load Image sensor Color CCD ×2 (front, back) Documents Light source White cold cathode fluorescent lamp ×2 (front, back) Configuring the Scanning area Minimum 52 ×... - Page 155 Appendix Contents *1: Long page scanning supports scanning of documents with a length up to 3,048 mm (120 in.) in feed direction. Index For documents longer than 864 mm (34.02 in.), the resolution must be set to 200 dpi or less. *2: Note that this is the hardware limitation, and the software's processing time such as data transfer time is added to the actual time of scanning.
-
Page 156: Installation Specification
Appendix Contents Index A.2 Installation Specification Introduction Scanner Item Specification Overview Outer dimensions (W × D × H)(*1) 292.0 × 143.0 × 130.0 (mm) / 18.1 × 16.9 × 5.1 (in.) How to Load Installation space (W × D × H) 493.5 ×... -
Page 157: Outer Dimensions
Appendix Contents Index A.3 Outer Dimensions Introduction The outer dimensions are as follows. Scanner Overview How to Load Documents Configuring the Scan Settings How to Use the Operator Panel 292 (11.5) 143 (5.6) Various Ways to Scan Unit: mm (in.) Daily Care Replacing the Consumables... -
Page 158: Uninstalling The Software
* Microsoft SharePoint will also be removed after ScandAll PRO. Troubleshooting Microsoft SharePoint: [Scan to Microsoft SharePoint] ISIS driver: [ISIS Driver - Fujitsu fi-6110] Operational Error Recovery Guide: [Error Recovery Guide for fi-6110] Settings Software Operation Panel: [Software Operation Panel] (Software Operation Panel is installed together with TWAIN/ISIS drivers) -
Page 159: Glossary
Glossary Contents Glossary Index Introduction Scanner dpi (dots per inch) Portrait Number Overview Driver Job Separator 11” × 17” Dropout color Resolution How to Load Documents Duplex scanning mode Landscape A4 size Letter size Simplex scanning mode A5 size Configuring the Edge Extract Smoothing A6 size... - Page 160 Glossary Contents Index Number Introduction 11” × 17” Scanner A standard paper size used in the United States and other countries, also referred to as Overview double-letter size. How to Load Documents A4 size Configuring the A standard paper size which is 210 × 297 mm (8.27 x 11.7 inches). Scan Settings A5 size A standard paper size which is 148 ×...
- Page 161 Glossary Contents Index Introduction Blank Page Skip A function that detects and automatically deletes blank (white or black) pages in a batch Scanner of documents. Overview Brightness Refers to the brightness of a scanned image. How to Load Documents Configuring the Canadian DOC Scan Settings A standard issued by Industry Canada, a department of the Canadian government,...
- Page 162 Glossary Contents Density Index Refers to the deepness of a color in an image. Introduction Device error Errors that require troubleshooting by a service engineer. Scanner Overview Dither The process by which a group of dots is arranged to reproduce the density of grayscale. Grayscale density is reproduced by configuring preset dot patterns.
- Page 163 Glossary Contents Energy Star Index ENERGY STAR is an international standard for energy-efficient electronic equipment which was established by the US Environmental Protection Agency (EPA) in 1992. The Introduction standard program has now been adopted by countries around the world. Scanner Error diffusion Overview...
- Page 164 Glossary Contents Index Introduction Gamma A unit which indicates the changes in the brightness of an image. It is expressed as a Scanner function of the electric input power to devices (e.g. scanner, display) and the brightness Overview of the image. If the gamma rate is larger than 1, the brightness of an image increases and vice versa.
- Page 165 Glossary Contents ISIS Index ISIS (Image Scanner Interface Specification) is an API (Application Program Interface) standard for imaging devices (e.g. scanners, digital cameras) which was developed by Introduction Captiva, a division of EMC Corporation (the former Pixel Translations) in 1990. In order to use devices that comply with this standard, it is necessary to install a driver software Scanner Overview...
- Page 166 Glossary Contents Multifeed Index Multifeed is an error when two or more sheets are fed through the ADF at once. It is also called a multifeed when a different document length is detected. Introduction Scanner Overview Noise removal A function which improves the quality of an image by removing isolated noise that How to Load appear as black dots in a white area (or vice versa).
- Page 167 Glossary Contents Paper jam Index Refers to a state in which a document is jammed inside the paper path, or feeding is interrupted by documents slipping. Introduction Patch code Scanner A special code for the scanner to recognize the start and the end of each job or image Overview mode.
- Page 168 Glossary Contents Smoothing Index Refers to the removal of irregularities on diagonal lines and curves, which is a processing method commonly used in OCR applications. Introduction Scanner Overview Temporary error An error that can be fixed by the operator. How to Load Documents Threshold The value which is used to determine whether a certain color is black or white.
- Page 169 Glossary Contents Index USB (Universal Serial Bus) is a standard for interfaces used to connect devices such as keyboards and scanners. Up to 127 devices can be connected by this interface. It can Introduction be connected and disconnected without powering off the devices. For USB 2.0, the data transfer rate is 1.5 Mbps in Low-Speed, 12 Mbps in Full-Speed, Scanner Overview...
-
Page 170: Index
Index Contents Index Index Introduction Scanner Overview ADF paper chute setup........... 20 how to load documents ..........27 how to use the operator panel........48 How to Load how to use this manual............. 2 Documents basic flow of scanning operation ........23 basic specification ............ - Page 171 Index Contents parts and functions ............15 Power SW Control............ 152 Index password (Software Operation Panel)......126 stacker setup ..............21 post-scan operations and handling......... 64 Introduction power on/off..............152 power saving mode ............22 Scanner troubleshooting............99, 104 product label ..............123 Overview turning the power off............
- Page 172 How to Load Documents Configuring the Scan Settings How to Use the Operator Panel Various Ways to Scan fi-6110 Image Scanner Operator's Guide Daily Care P3PC-3012-01ENZ0 Issue date: July 2010 Replacing the Consumables Issued by: PFU LIMITED The contents of this manual are subject to change without notice.