JVC KD-HDR20 Instructions Manual
Cd receiver
Hide thumbs
Also See for KD-HDR20:
- Instructions manual (110 pages) ,
- Installation & connection manual (4 pages) ,
- Brochure (2 pages)
Table of Contents
Advertisement
IVIP3
W'JlHA
[Q]DO~J@
DIGITAL AUDIO
I
TEXT
I
~
'RADIO~
READY
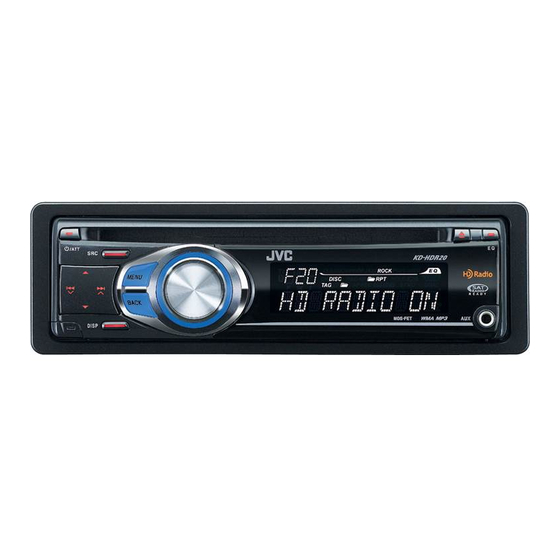
KD-HDR20
CD RECEIVER
RECEPTOR CON CD
RECEPTEUR CD
..Ive
For canceling the display demonstration, see page 7.
Para cancelar la demostraci6n en pantalla, consulte la pagina 7.
Pour annuler la demonstration des affichages, referez-vous
a
la page 7.
For installation and connections, refer to the separate manual.
Para la instalaci6n ylas conexiones, refierase al manual separado.
Pour I'installation et les raccordements, se referer au manuel separe.
INSTRUCTIONS
MANUAL DE INSTRUCCIONES
MANUEL D'INSTRUCTIONS
For customer Use:
Enter below the Model
No. and Serial No. which
are located on the top or
bottom of the cabinet. Retain
this information for future
reference.
Model No.
Serial No.
LVT1960-001 A
[J]
Advertisement
Table of Contents
Troubleshooting

Related Manuals for JVC KD-HDR20


Summary of Contents for JVC KD-HDR20
- Page 1 ..Ive CD RECEIVER RECEPTOR CON CD RECEPTEUR CD KD-HDR20 [Q]DO~J@ IVIP3 'RADIO~ DIGITAL AUDIO W'JlHA READY TEXT For canceling the display demonstration, see page 7. Para cancelar la demostraci6n en pantalla, consulte la pagina 7. Pour annuler la demonstration des affichages, referez-vous la page 7.
- Page 2 - Connect the equipment into an outlet on acircuit different from that to which the receiver is connected. - Consult the dealer or an experienced radiolTV technician for help. Caution: Changes or modifications not approved by JVC could void the user's authority to operate the equipment. IMPORTANT FOR LASER PRODUaS 1. ClASS 1LASER PRODUCT CAUTION: Do not open the top cover.
- Page 3 'CONTENTS • Detaching the control panel • Attaching the control panel How to reset your unit • Your preset adjustments will also be erased (except the registered Bluetooth devices, see page 12). • How to forcibly eject adisc [Hold] ~/ATT •...
- Page 4 Basic operations Using the control panel -11---I---t------ 71 -------- 1 .Ive :::::::::::::::::::::::::::1; 11?J OJ • FM/AM: []] Loading slot - Select HD Radio™ multicast channel. Display window [[] Eject disc. - Search for HD Radio stations only [Hold]. []] Select the sound mode. •...
- Page 5 HD (HD Radio™ broadcast) indicator (Bluetooth) indicator [[] Disc information indicators- Tr (track) indicator Status of Bluetooth device TAG (Tag information), '" (track/file),. (folder) [ill Main display (Device number, [P: 1- 5]; signal strength, [IQ] [''''',/: 0 - 3]*; battery reminder, Playback mode / item indicators-RND (random), 0 - 3]*) (disc), •...
- Page 6 II] . Searches for stations if pressed briefly. • Fast-forwards or reverses the track if pressed and held. • Changes the tracks if pressed briefly. • While listening to the Satellite Radio: - Changes the channels if pressed briefly. - Changes the channels rapidly if pressed and held.
- Page 7 Changing the display information IlItti . . € DISP • When the power is turned off: The current clock time is displayed if"CLOCK DISP" is set to "CLOCK OFF" (see page 23). • When the power is turned on: The display information of the current source changes as follows: FM/AM Call Sign*l Frequency...
- Page 8 Listening to the radio You can tune in to both conventional and HO Radio broadcasts. • If you want to search for HO Radio stations only, see "Searching for HO Radio stations only" on page 9. _------_._._ _._--_._._ ---_. _._---_ .••..
- Page 9 • Searching for HD Radio stations Changing HD Radio reception only mode While receiving an Radio broadcast, the unit [Hold] receives digital or analog audio automatically due to the receiving condition. While listening to an HD Radio station... • See also page 24. When astation is tuned in, searching stops.
- Page 10 Manual presetting • Storing stations in memory Ex.: Storing FM station of 92.50 MHz into preset number You can preset up to stations for FM and stations /IP04./1 for AM. • The Radio multicast channels can also be preset. Tune in to the station or channel you want to preset.
- Page 11 Stop playing and ejecting the disc • Selecting the playback modes You can use only one of the following playback modes at atime. • "NO DISC" appears. Press SRC to listen to another playback source. [Hold] The playback mode menu is called Prohibiting disc ejection [Turn] ..
- Page 12 Using the Bluetooth® devices For Bluetooth operations, it is required to connect the Registering using 1I0PEN Bluetooth adapter (KS-BTA200) (not supplied) to the Preparation: Operate the device to turn on its CD changer jack on the rear of this unit. Bluetooth function.
- Page 13 Use the Sluetooth device to search and For available devices••• connect. Enter the specific PIN code of the device to the On the device to be connected, enter the same unit. PIN code you have just entered for this unit. Refer to the instructions supplied with the "CONNECTED"...
- Page 14 MISSED*). If the cellular phone is compatible with text message Then select aname (if it is acqUired) or phone (notified through JVC Bluetooth adapter) and "MSG number. INFO" (message info) is setto "AUTO" (see page 22L the unit rings to inform you of the message arrival.
- Page 15 [1] Speak the name you wantto call. If you wish to receive more information about • If your cellular phone does not support the Bluetooth, visit the following JVC web site: voice recognition system, "ERROR" appears <http://www.jVc.co.jp/english/car/> (English on the display.
- Page 16 Listening to the CD changer It is recommended to use aJVC MP3-compatible CD changer (not supplied) with your unit. You can connect aCD changer to the CD changer jack on the rear of the unit. • You can only play conventional CDs (including CD Text) and MP3 discs. Make sure POD"...
- Page 17 • JVC SIRIUS Satellite Radio System, SC-Cl and KS-SRA100, PnP, SC-VDOC1 and KS-SRA100, for listening to the SIRIUS Satellite Radio. • XM Satellite Radio System, JVC Smart Digital Adapter-XMDJVC100, CNP2000UC and CNPJVC1 for listening to the XM Satellite Radio. ~(Global Control Information) update •...
- Page 18 Select IISIRIUS" or I~M." Select a category. SIRIUS: If you select All,1I you can tune in to all the channels of all categories. Select a channel to listen• • Holding the button changes the channels rapidly. • While searching, invalid and unsubscribed channels are skipped. XM: If you do not select achannel within 15 seconds, category selected in step 2 is canceled.
- Page 19 Listening to the iPod Before operating, connect the Interface adapter for iPod, KS-PD100 (not supplied) to the CD changer jack on the rear of the unit. Preparation: Make sure "CH/IPOD" is selected in the "SELECT SRC" .."EXT IN" setting, see page 26. Select POD."...
- Page 20 Listening to the other external components You can connect an external component to: INPUT: • EXT CD changer jack on the rear of this unit using the following adapters (not supplied): - KS-US7: For connecting the component with pin jacks - KS-US8: For connecting the component with stereo mini jack Preparation: Make sure "EXT INPUT"...
- Page 21 Selecting a preset sound mode You can select apreset sound mode suitable to the music genre. Selecting from Menu. (See also page USER _ ROCK _ CLASSIC 23.) [Hold] JAZZ - HIP HOP - POPS The menu is called up. [Turn] ..
- Page 22 Bluetooth settings Setting menu (_ : You can change the settings listed on the right column Initial) according to your preference. • AUTO CNNCT (connect) Select "BT PHONE" or "BT AUDIO." When the unit is turned on, the connection is <tHtil established automatically with...
- Page 23 Menu operations Call up the menu. Select the desired item. Repeat step 2 necessary. • To return to the previous menu, press BACK. [Turn] [Press] [Hold] • To exit from the menu, press DISP or MENU. Initial: Underlined aref.reQ ~,~.':-W:_<" ~, DEMO Display demonstration will be activated automatically if no Display...
- Page 24 ;~lecta~,I~~in9~1 [r"~~~9'Jr;;'" t~;i~1:i; Y,:!k~i~. ,ii~1~jl~,~;' ~.>,;<;~~¥;.;\ ite~~;, ca~*,,\; Menu . . . < .i ' ..i . . DIMMER • DIMMER OFF: Cancels. Dimmer Dims the display and button illumination. • DIMMER ON: SCROLL • SCROLL ONCE: Scrolls the displayed information once.
- Page 25 ·;sel~~rt~n., ,lrifeii.nce·Pa9, / FADER R12 Adjust the front and rear speaker output balance. - FADER F12: [Initial: 00] BALANCE L12 Adjust the left and right speaker output balance. - BALANCE R12: [Initial: 00] VOL ADJ -10 Preset the volume adjustment level of each source (except VOL ADJUST Volume adjust - VOL ADJ +10:...
- Page 26 SUB.W LEVEL SUB.WOO Adjust the subwoofer output level. -SUB.WOS: Subwoofer level [Initial: SUB.W 04] BEEP • BEEP OFF: Deactivates the keypress tone. Keypress tone Activates the keypress tone. • BEEP ON: AMPGAIN*8 • LOW POWER: VOLUME 00 - VOLUME 30 (Select if the maximum power Amplifier gain of each speaker is less than 50 Wto prevent damaging the control...
- Page 27 More about this unit Basic operations Disc operations Turning on the power Caution for DualDisc playback • By pressing SRC button on the unit, you can also turn • The Non-DVD side of a"DualDisc" does not comply on the power. If the source is ready, playback also with the "Compact Disc Digital Audio"...
- Page 28 CD-RWs may require alonger readout time since the • This unit can recognize atotal of 512 files and of 255 reflectance of CD-RWs is lower than that of regular folders. CDs. • This unit cannot play back the following files: Do not use the following CD-Rs or CD-RWs: - MP3 files encoded with MP3i and MP3 PRO format.
- Page 29 When operating an iPod, some operations may not unit). be performed correctly or as intended. In this case, • RESET 8 visit the following JVC web site: <http://www.jvc. Check the connection between the adapter and this co.jp/english/car/> (English website only) unit.
- Page 30 Troubleshooting What appears to be trouble is not always serious. Check the following points before calling aservice center. Remedies/Causes ;,:;;:,~ Reset the unit (see page 3). Check the "SELECT SRC" .."AUX IN" setting (see page 26). Store stations manually. Connect the antenna firmly.
- Page 31 Remedies/Causes "! . Stop playback while driving on rough roads. • Change the disc. • Check the cords and connections. Insert aplayable disc into the loading slot. • Use adisc with MP3IWMA tracks recorded in aformat compliant with ISO 9660 Levell, Level 2, Romeo, or Joliet.
- Page 32 Symptoms. Remedies/Causes "l The~ • unit does. not detectthe Bluj!tooth • Check the Bluetooth setting of the device. , • Search from the Bluetooth device. Afterthe device device. detects the unit, select "OPEN" on the unit to connect the device. (See page 12.) •...
- Page 33 Symptoms " Remedies/Causes • U(All1-888-539-SIRIUS TO SUBSCRlBE1 ' Starts subscribing to SIRIUS Satellite radio (see page 17). scroillon the displaywhile listeniog to the'i SIRIUSSateUiter~dio~i ' ' . : -""',- -','" ..Nos~ti~dcallbe<h~afdL';UPDATI·N "or,:,·(,:il The unit is updating the channel information and it takes ';UP~~TE XXX~;~pp~at£onthed aY.<.J afew minutes to complete.
- Page 34 • The Bluetooth word mark and logos are owned by the Bluetooth SIG, Inc. and any use of such marks by Victor Company of Japan, limited (JVC) is under license. Other trademarks and trade names are those of their respective owners.
- Page 35 Maintenance • How to clean the connedors • To keep discs clean Frequent detachment will deteriorate the connectors. Adirty disc may not play correctly. To minimize this possibility, periodically wipe the If adisc does become dirty, wipe it with connectors with acotton swab or cloth moistened with asoft cloth in astraight line from center alcohol, being careful not to damage the connectors.
- Page 36 Specifications Power Output: 20 WRMS x 4Channels at 4 1% THD+N Signal-to-Noise Ratio: 80 dBA (reference: 1Winto 4 Load Impedance: 40 (4 0 to 80 allowance) Equalizer Control Range: Frequencies: 60 Hz, 150 Hz, 400 Hz, 1 kHz, 2.4 kHz, 6kHz, 15 kHz level: ±10dB...
- Page 37 Type: Compact disc player Non-contact optical pickup Signal Detection System: (semiconductor laser) 2channels (stereo) Number of Channels: 5Hz to 20 000 Hz Frequency Response: 96 dB Dynamic Range: Signal-to-Noise Ratio: 98dB less than measurable limit Wow and Flutter: MP3 Decoding Format: (MPEG1/2 Audio layer 3) Max.
- Page 38 Having TROUBLE with operation? Please reset your unit Refer to page of How to reset your unit Still having trouble?? USA ONLY Call 1-800-252-5722 http://www.jvc.com We can help you! .lye EN, SP, FR © 2008 Victor Company of Japan, Limited 1208MNMMDWJEIN...
-
Page 39: Troubleshooting
KD-HDR20 Installation/Connection Manual Manual de instalación/conexión Manuel d’installation/raccordement 1208MNMMDWJEIN LVT1960-002B EN, SP, FR © 2008 Victor Company of Japan, Limited WARNINGS ADVERTENCIAS AVERTISSEMENTS TROUBLESHOOTING LOCALIZACION DE AVERIAS EN CAS DE DIFFICULTES... - Page 40 INSTALLATION INSTALACION (MONTAJE EN EL INSTALLATION (MONTAGE DANS LE (IN-DASH MOUNTING) TABLERO DE INSTRUMENTOS) TABLEAU DE BORD)
-
Page 41: Electrical Connections
ELECTRICAL CONNECTIONS CONEXIONES ELECTRICAS RACCORDEMENTS ELECTRIQUES JVC Amplifier JVC Amplifier JVC Amplificateur JVC Amplificateur... - Page 42 CAUTION: PRECAUTION: Nombre del Component Adapter/System Model name Componente Adaptador/Sistema Appareil Adaptateur/Système Nom du modèle modelo...
- Page 43 WHEN IT IS NOT REQUIRED TO DETACH THE FRONT CONTROL PANEL FROM THE MAIN UNIT, USETHE PROVIDED SCREW TO ATTACH THE CONTROL PANEL TO THE MAIN UNIT. GE40401-001 A...
- Page 44 -0:= CAUTI 0 N « CONNECT BLACK WIRE (CDG D) TO GROU D FIRST. OTHERWISE, DAMAGE TO YOUR UNIT MAY OCCUR. ::::> INCORRECT CON ECTIO CAUSES SERIOUS DAMAGE TO THIS U IT 0::: PLEASE READ INS ALLATION/CON ECTION MANUAL CAREFULLY. «...
- Page 45 This form is for Product Registration purposes only. Failure to return this form does not diminish your rights during the warranty period. THANK YOU FOR PURCHASING THIS JVC PRODUCT REGISTER ONLINE AT: REGISTER.JVC.COM...
- Page 46 Zip Code: Phone Number: E-Mail Address: 1) Would you like to receive the JVC Community e-mail newsletter? 2) Would you like to receive special offers from JVC? 3) Have you purchased an extended warranty for this product? Date of Purchase...
- Page 47 ..Ive LVT1672-002A • The countries where you may use the Bluetooth® function • Die Lander, in denen Sie die Bluetooth'" Funktion verwenden • Lond lJar sem hCEgt er a3 nota Bluetooth'" konnen • Riigid, kus on voimalik kasutada Bluetooth'" funktsiooni •...
- Page 48 JVC distribue au Canada par JVC Owner's Address by an authorized JVC dealer. et vendu par un detaillant JVC autorise. Adresse du Proprietaire' JVC warrants that this JVC product is free, under JVC vous garantit que ce produit est degage, sous Street Apt. App.
- Page 49 I'acheteur doit assumer la responsabilite et les couts pour un emballage adequat, I'expedition, ainsi que tous les couts associes la livraison de I'equipement chez et depuis Ie detaillant JVC autorise Ie plus pres pour un service d'entretien. Receivers and Home Speakers purchased separately, Front Place stamp here Projection and Car Audio "ARSENAL"...
- Page 50 OUR VALUED CUSTOMER - - THANK YOU FOR PURCHASING THIS JVC PRODUCT. WE WANT TO HELP YOU ACHIEVE A PERFECT EXPERIENCE. NEED HELP ON HOW TO HOOK UP? NEED ASSISTANCE ON HOW TO OPERATE? NEED TO LOCATE A JVC SERVICE CENTER? LIKE TO PURCHASE ACCESSORIES? JVC®IS...
- Page 51 : WHAT WE WILL DO: : If this product is found to be defective within the warranty period, JVC will repair or replace defective parts with new or : rebuilt equivalents at no charge to the original owner. Such repair and replacement services shall be rendered by JVC during normal business hours at JVC authorized service centers.