Advertisement
Available languages
Available languages
Table of Contents
- 1 Application
- 2 Overview
- 3 Install the Assurelink Control Panel
- 4 Troubleshooting
- 5 Install the Assurelink Internet Gateway
- 6 Troubleshooting
- 7 Download the Smartphone App
- 8 Functions
- 9 Lights
- 10 Motion Sensor
- 11 Timer-To-Close (TTC)
- 12 Programming
- 13 Remote Control
- 14 Assurelink Enabled Accessories
- 15 Keyless Entry
- Download this manual
APPLICATION
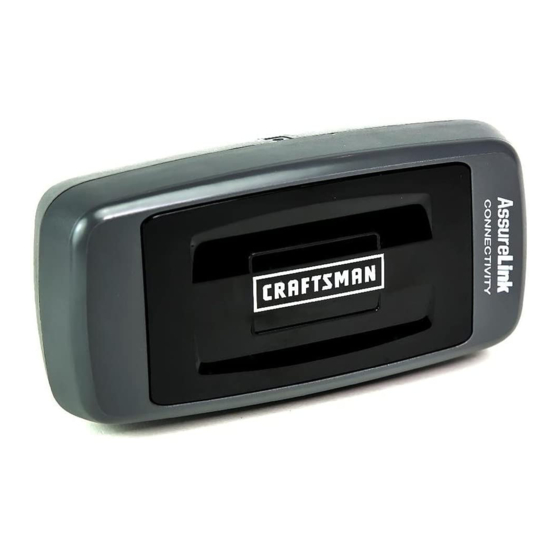
This kit includes the Assurelink™ Control Panel model 41a7928-1 and the
Assurelink™ Internet Gateway model 41A7665. The control panel is
intended to be installed with Craftsman
Openers manufactured between 1998 and present. The Assurelink™
Control Panel is NOT compatible with Security✚ 2.0™ Garage Door
Openers. DO NOT install this door control on garage door opener
systems controlling one-piece or swing doors.
OVERVIEW
The Assurelink™ Control Panel offers a quick and convenient way to add
Assurelink™ technology to your existing garage door opener. Assurelink™
technology uses a 900MHz signal to provide two-way communication
between the garage door opener and Assurelink™ enabled accessories.
When programmed to the Assurelink™ Internet Gateway you can monitor
and control your garage door from any internet enabled computer or
smartphone. You may program up to 12 Assurelink™ remote controls, 2
Assurelink™ keyless entries and a combination of 16 Assurelink™
accessories to the Assurelink™ control panel. For full compatibility, see
page 4.
INSTALL THE ASSURELINK™ CONTROL PANEL
Install the control panel in place of the existing door control. Due to
power consumption the control panel cannot be used in conjunction with
another wired door control connected to your garage door opener. If an
additional door control is needed, the wireless door control model
41A7773-1 can be programmed to the control panel. To program the
41A7773-1 to the control panel, follow the remote control programming
steps. When in battery back-up mode, any feature using unattended
operation such as Timer-to-Close, closure from a garage door and gate
monitor or remote operation utilizing the Assurelink™ Internet Gateway
will be disabled.
1. Disconnect all electrical and battery power (if applicable) to the
garage door opener.
2. Remove the existing door control from the wall.
3. Note the polarity of the wires connected to the existing door
control.
• Label the wire connected to the RED terminal.
• Label the wire connected to the WHITE terminal.
Disconnect the wires from the existing door control.
4. Connect the wires to the new control panel. Make sure the polarity
is correct.
• Red wire to the R terminal.
• White wire to the W terminal.
5. Mount the control panel to the wall.
6. Reconnect power. The yellow command LED and the red learn LED
will blink quickly for up to 5 minutes as the control panel
recharges. When the control panel is operational, the yellow
command LED will glow steadily.
7. To test the control panel, press the push bar to activate the garage
door opener.
•
If the yellow command LED does not turn on, reverse the wires
connected to the R and W terminals of the control panel. Replace
wire if necessary.
•
If yellow and red LEDs are blinking slowly, the control panel is not
compatible with your garage door opener.
•
If the yellow and red LEDs are blinking quickly, the control panel is
charging, and may take up to 5 minutes to become operational.
®
Security✚™ Garage Door
ASSURELINK
TM
SMARTPHONE CONTROL KIT
To prevent possible SERIOUS INJURY or DEATH from electrocution:
• Be sure power is NOT connected BEFORE installing door control.
• Connect ONLY to 7-28 VOLT low voltage wires.
To prevent possible SERIOUS INJURY or DEATH from a closing
garage door:
• Install door control within sight of garage door, out of reach of
children at a minimum height of 5 feet (1.5 m), and away from ALL
moving parts of door.
• NEVER permit children to operate or play with door control push
buttons or remote control transmitters.
• Activate door ONLY when it can be seen clearly, is properly
adjusted, and there are no obstructions to door travel.
• ALWAYS keep garage door in sight until completely closed. NEVER
permit anyone to cross path of closing garage door.
• DO NOT install this door control on garage door opener systems
controlling one-piece or swing doors.
To provide an adequate visual alert, the garage door opener light
bulb(s) MUST be a minimum of 40 Watt (or equivalent).
Existing Door Control
Wire from
RED terminal
Discard, donate
or recycle
1
GARAGE DOOR OPENER
MODEL 139.53999
Assurelink™ Control Panel
Wire from
WHITE
terminal
Connect
WHITE
wire to W
terminal
Connect
RED wire to
R terminal
Advertisement
Table of Contents
Troubleshooting

Related Manuals for Craftsman ASSURELINK 139.53999


Summary of Contents for Craftsman ASSURELINK 139.53999
- Page 1 Assurelink™ Internet Gateway model 41A7665. The control panel is To prevent possible SERIOUS INJURY or DEATH from electrocution: ® intended to be installed with Craftsman Security✚™ Garage Door • Be sure power is NOT connected BEFORE installing door control. Openers manufactured between 1998 and present. The Assurelink™...
-
Page 2: Install Assurelink Internet Gateway
LEDs will blink momentarily and then the blue and green LEDs will light solid. Green LED 2 CREATE AN ACCOUNT From your computer, go to www.craftsman.com/assurelink and follow Blue LED Ethernet the instructions to create an account. Use a computer for this step; you Cable cannot create an account from a mobile device. - Page 3 FUNCTIONS TIMER-TO-CLOSE (TTC) Push Bar (Open) DO NOT install this door control on garage door opener systems NOTE: controlling one-piece or swing doors. The TTC feature automatically closes the door after a specified time period (1, 5, or 10 minutes). Once the TTC has been set and the door is Command Learn LED open, the LED for the selected close interval will blink and begin to count...
-
Page 4: Programming
PROGRAMMING A variety of accessories (available separately) can be programmed to the Assurelink™ Control Panel. REMOTE CONTROL 1. Press the control panel LEARN KEYLESS ENTRY button twice, the red learn LED will 1. Press the control panel LEARN button twice, the red turn on. - Page 5 Assurelink™ Internet Gateway modelo 41A7665. El panel de control está hecho Para evitar posibles ACCIDENTES LESIVOS e incluso MORTALES de ® para ser instalado con los abre-puertas de garaje Craftsman Security✚™, electrocución: fabricados entre 1998 y la actualidad. El panel de control Assurelink™ NO es •...
- Page 6 LED azul y verde se iluminará por completo. 2 CREE UNA CUENTA LED verde Desde su computadora, ingrese a www.craftsman.com/assurelink y siga las instrucciones para crear una cuenta. Utilice una computadora para realizar este LED azul Cable de paso;...
- Page 7 FUNCIONES TEMPORIZADOR DE CIERRE (TTC) Barra de empuje NOTA: NO instale este control de puerta en sistemas de abre-puertas de garaje que (abierta) controlan puertas de una pieza o de vaivén. La función del TTC cerrará automáticamente la puerta después de un periodo de tiempo especificado (1, 5 o 10 minutos).
- Page 8 PROGRAMACIÓN Se puede programar una variedad de accesorios (que se venden por separado) al panel de control Assurelink™. CONTROL REMOTO 1. Presione dos veces el botón LLAVE DIGITAL PROGRAMAR (LEARN) del panel de 1. Presione dos veces el botón PROGRAMAR (LEARN) del panel control;...