Universal Remote Control URC-A6 Owner's Manual
Remote control
Hide thumbs
Also See for URC-A6:
- Features & specifications manual (1 page) ,
- Owner's manual (47 pages)
Table of Contents
Advertisement
Advertisement
Table of Contents

Related Manuals for Universal Remote Control URC-A6


Summary of Contents for Universal Remote Control URC-A6
-
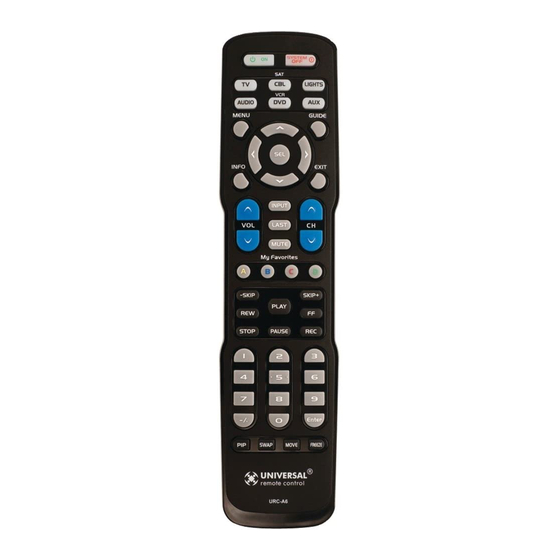
Page 1: Remote Control
URC-A6 Remote Control Owner’s Manual... - Page 2 Control’s URC-A6 Pre--Programmed and Learning remote control. You now have the power to control your entire home entertainment system with one easy--to--use remote. The URC-A6 can be used with thousands of audio/video components because of the extensive library of codes that have already been programmed into the remote.
-
Page 3: Table Of Contents
Programming URC-A6 Using Pre-Programmed Codes .....7 • Quick Set-Up Method ......7 • Three-Digit Code Entry Method ....8 • Auto-Search Method......10 Programming URC-A6 Using the Learning Method........12 Special Advanced Features ....14 • Programming Automated Activities ..14 • MacroPower Total System On/Off..14 •... -
Page 4: Getting Started - Overview
A6 will work with that component. For example, when you press the TV component button, all the buttons on your URC-A6 will operate your TV. If you press the DVD component button, all the buttons on the URC-A6 will operate your DVD. -
Page 5: Low Battery Warning
LED will quickly blink three times when you press the Power [ON] button. Couch Mode The URC-A6 is designed to automatically turn itself off if a button is pressed for more than 30 seconds. This prevents battery power from being depleted should the remote accidentally slip between the couch cushions. -
Page 6: Keypad Layout & Button Functions
Keypad Layout & Button Functions POWER SYSTEM OFF Allows you to turn the Designed to send Power selected component On/Off commands for up on and off. to six components with one button press. TV, CBL, LIGHTS, AUDIO, DVD, AUX GUIDE Used to select the Displays the component you... -
Page 7: Programming Urc-A6 Using Pre-Programmed Codes
TV, turn on your TV set. STEP 2: Point the URC-A6 toward the component that you want to program (in this case the TV set) and press and hold the component button (in this case the TV button). -
Page 8: Three-Digit Code Entry Method
STEP 2: Once you have located the 3-digit codes for each of the components that you wish to operate with your URC-A6, write them ALL down on a piece of paper. It’s important that you write down all the codes listed for your brand because only one code is going to work with your component. - Page 9 STEP 6: Once you’ve entered the code number and the component has turned off, press the POWER button on the URC-A6 remote to turn the component back on. Next test the VOLUME and CHANNEL buttons (or PLAY and STOP buttons for DVD and DVR) to make sure they all work.
-
Page 10: Auto-Search Method
TV, turn on your TV set. STEP 2: On the URC-A6, press the Component button that you want to program (in this case the button that says TV) and the SELECT [SEL] button at the same time. - Page 11 STEP 4: Once you have found the right code number and the component has turned off, press the POWER button on the URC-A6 remote to turn the component back on. Next test the VOLUME and CHANNEL buttons (or PLAY and STOP buttons for DVD and DVR) to make sure they all work.
-
Page 12: Programming Urc-A6 Using The Learning Method
If Auto Search did not work, try this: Programming URC-A6 using the Learning Method STEP 1: Line up the URC-A6 to the remote control you want to ‘learn’ from, head--to--head as shown below. Make sure the heads are one to two inches apart. - Page 13 STEP 5: Once the URC-A6 has learned all the buttons in the selected component mode, press and hold the Component button and ENTER [ENT] buttons at the same time to save the learned functions. The component LED light will blink three times to confirm the programming.
-
Page 14: Special Advanced Features
TV, your DVD player and your Surround Sound receiver by pressing a single button on your URC-A6. What could normally take three remotes and three button pushes, the URC-A6 can accomplish with the press of one button. We call that MacroPower. - Page 15 IMPORTANT: You have 30 seconds to perform the next step while you are in programming mode. If you do not press a button within 30 seconds, the component LED light will turn off. The remote will exit the programming mode and you will have to start over.
-
Page 16: Macro Buttons
Notes regarding programming multi- commands to Macro buttons: • You can program up to 20 commands on each Macro button. • You can program delays in between commands by pressing the PAUSE button. Each press adds a one-half second delay. •... -
Page 17: My Favorites" - Favorite Channels
Programming “My Favorites” - Favorite Channel Buttons In Cable mode, the A, B, C, D buttons are also designed to serve as dedicated Favorite Channel buttons. Each button will access one of your favorite channels with just one button press. Here’s how to program Favorite Channels: STEP 1: Press the CBL button to select the Cable mode. -
Page 18: More Favorite Channels
More Favorite Channels You can also use the "A, B, C and D" buttons to program favorite channels. Each button can pro- gram up to 5 favorite channels (or a total of 20 button presses), but you're not limited to using these buttons for only that. -
Page 19: Simplesound™ Total System Volume Control
SimpleSound™ Total System Volume Control SimpleSound is one of the most exciting features of the URC-A6. It gives you total volume control over ALL the components in your system, even those that do not have built--in volume control, such as TIVO, DVD and VCR. - Page 20 STEP 2: Press the VOLUME UP button and then press either the TV or AUDIO component button that you want to use for volume. The Component LED light will blink three times to confirm that it is saved. This sets up three buttons (Volume Up, Volume Down and MUTE) as a group for that component.
-
Page 21: Channel Control "Punch Through
Channel Control “Punch Through” This “Punch Through” enables you to program the URC-A6 so that either the Cable or TV Channel Controls (CHANNEL UP, DOWN, LAST, CHANNEL NUMBERS 0-9, +10 and ENTER) will also operate in other component modes on the remote control. -
Page 22: Transport Control "Punch Through
Transport Control “Punch Through” This “Punch Through” enables you to program the URC-A6 so that DVD or DVR Transport Controls (PLAY, STOP, FF, REW, PAUSE, SKIP and RECORD) will also operate in other component modes on the remote control. STEP 1: Press and hold the component button... -
Page 23: Osd (On-Screen Display) Control "Punch Through
OSD (On-Screen Display) Control “Punch Through” This “Punch Through” enables you to program the URC-A6 so that CBL or DVD OSD Controls (MENU, GUIDE, INFO, EXIT, SEL and 4 Cursor Controls) will also operate in other component modes on the remote control. -
Page 24: Input Switching Macros
Input Switching Macros These macros can be difficult and will vary depending on your specific setup. Because most TVs have a "Toggle" input feature, there's no way to jump to a specific video source discretely. "Toggle" means that you have one button on your remote that cycles through all available video sources (inputs) on your TV. -
Page 25: Erasing Commands-Overview
Erasing Commands -- Overview You can erase a single learned command, all learned commands in each component mode, SimpleSound programming, MacroPower commands, or re--set the remote to original factory default settings. Erasing a Single Learned Command from One Component STEP 1: Press the component button where the learned command is stored and the ENTER buttons at the same time for two seconds until the component LED light turns on. -
Page 26: Erasing All Learned Commands From One Component
Erasing All Learned Commands from One Component This function allows you to erase all the learned commands from one component. For example, if you want to erase all learned commands on the TV component button because you bought a new TV, the process is very simple. -
Page 27: Erasing Macropower & Other Macro Commands
Erasing MacroPower & Other Macro Commands STEP 1: To erase MacroPower commands on the POWER ON or SYSTEM OFF button, press and hold either the POWER ON or SYSTEM OFF button and the MUTE button simultaneously for two seconds until the current status component LED turns IMPORTANT: If you don’t proceed to the next step within 30 seconds, the LED will turn off and exit set-up mode and you will need to start over. -
Page 28: Erasing Simplesound & Other "Punch Through" Commands
Erasing SimpleSound & Other “Punch Through” Commands STEP 1: Press and hold the Component button you want to erase volume control from, such as DVD or VCR and the SELECT [SEL] button at the same time for two seconds until the Component LED light turns STEP 2: Press the VOLUME UP button and the same component button from Step 1. -
Page 29: Factory Reset
Factory Reset You can reset your URC-A6 remote to the original factory default settings. Press and hold both the TV and RECORD buttons for about five seconds until the LIGHTS component LED light blinks five times. All programming and set-... -
Page 30: Finding A Component's Set-Up Code Number
Finding a Component’s Set-up Code Number If you used the Auto--Search or Learning Methods to program a component, you may not know the code number you programmed. Here is a way for you to identify what that code number is, so you can make a note in the back of this Manual for future reference. -
Page 31: Pre-Programmed Code Tables
Pre-Programmed Code Tables The URC-A6 Pre-Programmed code library is classified by category (CABLE/SAT, TV, DVD, etc). Within each category, the code numbers are listed in rows by brand (Sony, Panasonic, B & K, etc.). Some brands have more than one three-digit code. -
Page 32: Cable/Sat
CABLE/SAT Brand Code Numbers Brand Code Numbers CABLE Boxes SATELLITE Receivers 004 042 CABLEVISION ADELPHIA 001 110 DIRECTV ADVANCED NEWHOUSE DISH ALTRIO ECHOSTAR AMERICAST EXPRESSVU ARMSTONG AT&T BROADBAND GENERAL INSTRUMENT AT&T IPTV ATLANTIC BROADBAND 001 110 HITACHI BELL SOUTH BLUE RIDGE 001 110 HUGHES BRESNAN... - Page 33 Brand Code Numbers Brand Code Numbers ABEX ADMIRAL 072 251 333 FISHER 007 057 ADVENT FUJITSU 246 198 ADVENTURA FUNAI 028 043 052 AIKO FUTURETECH ALERON GATEWAY 242 268 AKAI 116 146 248 281 073 116 008 009 034 404 405 056 074 155 333 363 A MARK AMERICA ACTION...
- Page 34 Brand Code Numbers Brand Code Numbers MEMOREX 007 072 363 SEARS 138 030 363 007 028 116 363 024 028 057 094 333 082 166 MIDLAND 333 073 SELECO 205 011 MINTEK 282 362 SHARP 251 019 014 028 MINUTZ 029 363 022 175 MITSUBISHI 124 109 024 363...
-
Page 35: Dvd/Dvr/Vcr
DVD/DVR/VCR Brand Code Numbers Brand Code Numbers AKAI SYLVANIA ALLEGRO SYMPHONIC APEX DIGITAL 111 115 TATUNG BLAUPUNKT TEAC 023 270 BROKSONIC TECHNICS CINEVISION TECHWOOD COBY THETA DIGITAL CYBERHOME TOSHIBA 035 130 141 164 DENON 138 173 188 273 DURABRAND URBAN CONCEPTS DVD 2000 VENTURER EMERSON... -
Page 36: Audio
AUDIO Brand Code Numbers Brand Code Numbers ADCOM 082 092 225 161 PHILIPS 249 250 063 805 269 356 PIONEER 014 039 044 069 AIWA 170 018 104 202 168 116 035 078 198 480 203 213 211 188 PROCEED 144 268 AKAI 010 048 117 156... -
Page 37: Aux
KENSINGTON TEN TECHNOLOGY MEDIA PC Controls DELL GATEWAY KEYSPAN SONY TOSHIBA WINBOOK GAMING SYSTEM Controls MICROSOFT / XBOX 908 607 SONY / PS2 URC-URC-A6 AUX (D2A) ARTEC CASTI CRAIG GRIDLINK INET ACCESS INSIGNIA LASONIC MAGNAVOX SANSONIC TIVAX 589 590 ZENITH... -
Page 38: Lights
LIGHTS Brand Code Numbers COLORADO VNET 311 312 313 314 315 316 317 318 CYRON LEVITON LIGHTOLIER CONTROLS LITE-TOUCH 708 757 LUTRON 001 158 159 306 308 309 340 341 RAKO 301 302 303 304 305 WATT STOPPER 319 320 XANTECH 688 689 X-10... -
Page 39: Faqs
Frequently Asked Questions If the batteries run out, will I lose my settings? No. The URC-A6 stores all of your settings in non- volatile FLASH memory. You could remove the batteries for months, replace them at your convenience, and the URC-A6 would still remember your settings. -
Page 40: Warranty
(1) year and as set forth below. Universal Remote Control will, at its sole option, repair the product using new or comparable rebuilt parts, or exchange the product for a comparable new or rebuilt product. -
Page 41: Information To The User
Information To The User This equipment has been tested and found to comply with the limits for a Class B digital device, pursuant to part 15 of the FCC Rules. These limits are designed to provide reasonable protection against harmful interference in a residential installation. - Page 42 Notes Page 42...
- Page 43 Notes Page 43...
- Page 44 PLEASE DO NOT RETURN THIS PRODUCT TO THE STORE PLEASE CONTACT OUR TECHNICAL SUPPORT CENTER IF YOU NEED ASSISTANCE, E-MAIL techsupport@UniversalRemote.com 1-800-901-0800 or dial (9:00AM-6:00PM EST) 500 Mamaroneck Avenue, Harrison, NY 10528 Phone: (914) 835-4484 Fax: (914) 835-4532 OCE-0084A_Rev 01...