Universal Remote Control URC-A6 Owner's Manual
Hide thumbs
Also See for URC-A6:
- Features & specifications manual (1 page) ,
- Owner's manual (44 pages)

Related Manuals for Universal Remote Control URC-A6


Summary of Contents for Universal Remote Control URC-A6
-
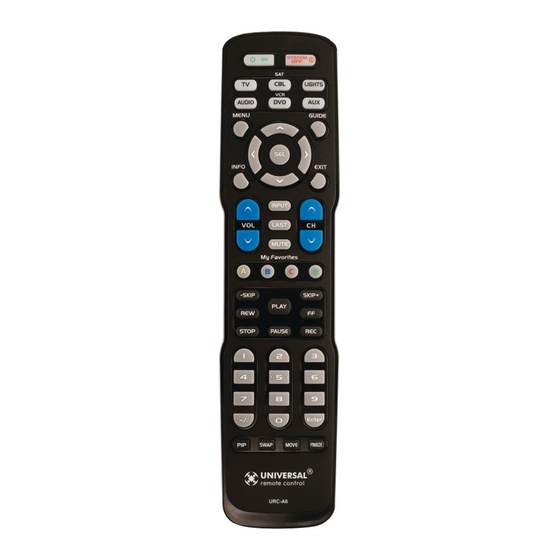
Page 1: Remote Control
URC-A6 Remote Control Owner’s Manual Replace with high quality image Place URC logo here. -
Page 2: Quick Set-Up
STEP 1: Turn on the component you want to activate. (Other components can be on or off, it doesn’t matter.) STEP 2: Point your new URC-A6 universal remote toward the component and press the appropriately labeled Component button (TV for TV, DVD for DVD, etc.) While holding this button down, press the numeric keys one at a time sequentially (1, 2, 3, etc.) until the... -
Page 3: Button Functions
Keypad Layout and Button Functions POWER SYSTEM OFF Allows you to turn the selected Designed to send Power On/Off component on and off. commands for up to six components with one button press. COMPONENTS GUIDE Used to select the Displays the component you Program Guide want to operate... -
Page 4: Table Of Contents
Table of Contents Quick Set-up ......1 Keypad Layout & Button Functions..........2 Getting Started – Overview • Battery Installation....5 • Activation Overview ....5 • Using Component Buttons ..6 • Learning Capability....6 • Low Battery Warning....6 • Couch Mode ......6 Get Started with the Basics ..7 •... - Page 5 Erasing Commands - Overview ........27 • Erasing a Single Learned Command ......28 • Erasing All Learned Commands from One Component ..29 • Erasing MacroPower & Other Macro Commands ....30 • Erasing SimpleSound & Other “Punch Through” Commands..31 • Factory Reset ......32 Finding a Component’s Set-Up Code Number ......33 Pre-Programmed...
-
Page 6: Getting Started - Overview
Activation overview control up to six components Your URC-A6 Universal remote control is designed to operate virtually all brands of AUDIO, TV, DVD, CD, SAT/CABLE, Lights, and AUX (Music Server, games, etc.) components. Component Buttons Be sure to match your component to the proper Component button on the top of the remote. -
Page 7: Using Component Buttons
Once you have activated the URC-A6 remote for all of your components, you can simply press a Component button at the top of the remote, and the buttons on the URC-A6 will work with that component. Each time you press a button on the remote,... -
Page 8: Get Started With The Basics
SAT/CABLE for your cable box so the Menu, Guide, Info and Exit buttons work correctly. In addition to activating the pre-programmed codes, the URC-A6 universal remote has the capacity to learn from your component remote. See instructions on page 13. -
Page 9: Quick Set-Up
Step 1: Turn on the component you want to activate. (Other components can be on or off, it doesn’t matter.) Step 2: Point your new URC-A6 universal remote toward the component and press the appropriately labeled Component button (TV for TV, DVD for DVD, etc.) While holding this button down, press the numeric keys one at a time sequentially (1, 2, 3, …) until the... -
Page 10: Three-Digit Set-Up
STEP 2: Turn on the component you want to activate. (Other components can be on or off, it doesn’t matter.) STEP 3: On your URC-A6 universal remote, press the Component button that you want to set up and the SELECT [SEL] button at the same time. - Page 11 STEP 5: Check your work. Once you’ve entered the code number and the component has turned off, press the POWER [ON] button to turn the component back on. Next, test the VOLUME and CHANNEL buttons (or PLAY and STOP buttons for VCR and DVD) to make sure they all work.
-
Page 12: Auto-Search Set-Up
STEP 1: Turn on the component you want to activate. (Other components can be on or off, it doesn’t matter.) STEP 2: On the URC-A6, press the Component button that you want to set up and the SELECT [SEL] button at the same time. - Page 13 STEP 4: Once the component has turned off, check your work. Press the POWER ON button on the URC-A6 remote to turn the component back on. Next, test the VOLUME and CHANNEL buttons (or PLAY and STOP buttons for VCR and DVD) to make sure they all work.
-
Page 14: Set-Up Using The Learning Method
Set-up using the Learning Method STEP 1: Line up the URC-A6 to the remote control you want to “learn” from, head—to— head as shown below. Start with the two remotes’ infrared (IR) windows touching, or nearly touching. Replace with high... - Page 15 In this case, please repeat Steps 3 and 4. STEP 6: Save your work. Once the URC-A6 has learned all the buttons for the selected component, press and hold the Component button and ENTER buttons at the same time to save the learned functions.
-
Page 16: Learning Method
● Gradually vary the distance between the two remote controls. ● Adjust the angles of the remotes (i.e., keep the URC-A6 on a flat surface while holding the other remote in hand and angling it down toward the URC-A6) ● Tap and release the button on your old... -
Page 17: Activating Optional Advanced Features
Automated Activity Macros and Punch Throughs. The URC-A6 has six Automated Activity Macro buttons: Power, System off and the four “My Favorites” lettered buttons. Macros can be set up to automatically fire off a sequence of commands. - Page 18 What to know before you start: ● You can program up to 20 sequential commands on a Macro button. ● You can program delays in between commands by pressing the [PAUSE] button on the transport control. - Each press adds a one-half second delay.
-
Page 19: Macropower™ Total System On/Off
MacroPower™ for Total System On or Off MacroPower makes several devices work together while pressing just one button. If you want to turn on your TV, DVD player and audio receiver by pressing a single button, you can. Both the Power On and the System Off buttons can be set up this way. -
Page 20: My Favorites
My Favorites Buttons The four MY FAVORITES buttons (A, B, C and D) can be set up as dedicated Favorite Channel buttons or lists, or you can give them the power of Macro commands. Set up a dedicated Favorite Channel: STEP 1: Press the CABLE/SAT button STEP 2: Press one of the MY FAVORITES buttons and the MUTE button at the same... - Page 21 The [DVD] Component light will blink three times to confirm the set-up. TV input button not working right? You may want to teach your new URC-A6 remote from your TV remote. See page 13 for the Learning Method. Page | 20...
-
Page 22: Input Switching Macros
Set up “ M y Favorite Buttons as Input Switching Macros Another use of the My Favorite buttons is to select an input for your TV with one click instead of toggling through an input button. These advanced macros are tricky, and will vary depending on your specific setup. -
Page 23: Activating Push Throughs
Pressing “Pause” in between input commands adds a delay to assure that all commands get sent properly. Pressing the “Stop” button allows you to start a new macro. Now you can toggle from Cable TV input to DVD and back again using your “My Favorite”... -
Page 24: Simplesound™ Total System Volume Control
SimpleSound™ Total System Volume Control Punch Through SimpleSound gives you total volume control over ALL the components in your system, even those that do not have built—in volume control, such as TIVO, DVD and VCR. It saves you the hassle of switching between component modes just to control volume. -
Page 25: Channel Control Punch Through
Channel Control Punch Through This punch through lets you set up the URC- A6 remote so that either the Cable or TV Channel Controls (CHANNEL UP, DOWN, LAST, CHANNEL NUMBERS 0-9, +10 and ENTER) will operate in other component modes on the remote control. STEP 1: Press and hold the component button you want to add channel control to, such as [DVD] or [VCR], and the SELECT... -
Page 26: Transport Control Punch Through
Transport Control Punch Through This punch through enables you to program the URC-A6 remote so that DVD Transport Controls (PLAY, STOP, FF, REW, PAUSE, SKIP and RECORD) will also operate in other component modes on the remote control. STEP 1: Press and hold the component... -
Page 27: Osd (On-Screen Display) Control Punch Through
OSD (On-Screen Display) Control Punch Through This “punch through” enables you to program the URC-A6 so that CBL or DVD OSD Controls (MENU, GUIDE, INFO, EXIT, SEL and 4 Cursor Controls) will also operate in other component modes on the remote control. -
Page 28: Erasing Commands - Overview
Erasing Commands - Overview If you have set up your macros and punch throughs, you should be able to put all your other controls away for safe keeping. However, you may find one pesky control you want to change or get rid of. The URC- A6 allows you to erase commands easily. -
Page 29: Erasing A Single Learned Command
Erasing a Single Learned Command from One Component STEP 1: Press the component button where the learned command is stored and the [ENTER] button at the same time for two seconds until the component light turns on. Replace with high quality image STEP 2: Press and hold the button you want... -
Page 30: Erasing All Learned Commands From One Component
Erasing All Learned Commands from One Component This function allows you to erase all the learned commands from one component. For example, if you want to erase all learned commands on the TV component button because you bought a new TV, the process is very simple. -
Page 31: Erasing Macropower & Other Macro Commands
Erasing MacroPower & Other Macro Commands STEP 1: To erase MacroPower commands on the POWER ON or SYSTEM OFF buttons, press and hold either the POWER ON or SYSTEM OFF button and the MUTE button simultaneously for two seconds until the current status Component light turns on. -
Page 32: Erasing Simplesound & Other Punch Through Commands
Erasing SimpleSound & Other Punch Through Commands STEP 1: Press and hold the Component button you want to erase volume control from, such as DVD and the SELECT [SEL] button at the same time for two seconds until the Component light turns on. STEP 2: Press the VOLUME UP [VOL ▲] button and the same Component button from Step 1. -
Page 33: Factory Reset
Factory Reset You can reset your URC-A6 remote to the original factory default settings. Press and hold both the [TV] and RECORD [REC] buttons for about five seconds until the [CABLE/SAT] Component light blinks five times. All programming and set-up codes... -
Page 34: Finding A Component's Set-Up Code Number
Finding a Component’s Set-up Code Number If you used the Auto—Search or Learning Methods to program a component, you may not know the code number you programmed. Here is a way for you to identify what that code number is, so you can make a note in the back of this Manual for future reference. -
Page 35: Pre-Programmed Code Tables
Pre-Programmed Code Tables The URC-A6 Pre-Programmed code library is classified by category (Audio, CD, VCR/DVR, etc.). Within each category, the code numbers are listed in rows by brand (Sony, Panasonic, B & K, etc.). Some brands have more than one three digit code. -
Page 36: Cable/Sat
Cable/Sat (insert codes from original doc) Ohsung Insert codes Page 35... - Page 37 (insert codes from original doc) Ohsung Insert codes Page 36...
- Page 38 (insert codes from original doc) Ohsung Insert codes Page 37...
-
Page 39: Dvd/Dvr
DVD/DVR/VCR (insert codes from original doc) Ohsung Insert codes Page 38... -
Page 40: Audio
Audio (insert codes from original doc) Ohsung Insert codes Page 39... -
Page 41: Aux
(insert codes from original doc) Ohsung Insert codes Page 40... -
Page 42: Lights
Lights (insert codes from original doc) Ohsung Insert codes Page 41... -
Page 43: Faqs
Frequently Asked Questions If the batteries run out, will I lose my settings? No. The URC-A6 stores all of your settings in nonvolatile FLASH memory. You could remove the batteries for months, replace them at your convenience, and the URC-A6 would still remember your settings. -
Page 44: Warranty
USA Limited Warranty UNIVERSAL REMOTE CONTROL, INC. warrants this product against defects in material or workmanship for a period of one (1) year and as set forth below. Universal Remote Control will, at its sole option, repair the product using new or comparable rebuilt parts, or exchange the product for a comparable new or rebuilt product. -
Page 45: Information To The User
This Owner’s Manual is designed to assist you in programming your URC-A6 remote to work with your components by guiding you through an easy step-by-step process. Everything you need to know about programming the URC-A6 is contained in this Manual. - Page 46 Universal Remote Control, Inc. Although reasonable care has been taken to assure the accuracy of the information herein contained, Universal Remote Control, Inc. is not responsible for operational, technical or editorial errors or omissions. The specifications and information in this manual may be subject to change without notice.
- Page 47 The Pioneer in Control Technology 500 Mamaroneck Avenue, Harrison, NY 10528 Phone: (914) 835-4484 Fax: (914) 835-4532 www.universalremote.com OCE-0085A Rev 06...