Moffat Turbofan E27 Service Manual
Hide thumbs
Also See for Turbofan E27:
- Service manual (41 pages) ,
- Installation & operation manual (14 pages) ,
- Specifications (20 pages)

Related Manuals for Moffat Turbofan E27


Summary of Contents for Moffat Turbofan E27
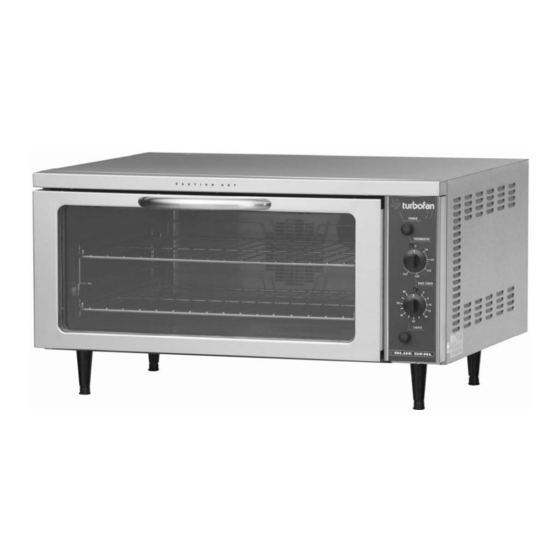
- Page 1 E27 CONVECTION OVEN E27MS CONVECTION OVEN SERVICE MANUAL E27 Convection Oven © Moffat Ltd, August 2006 Revision 3/F3563...
-
Page 2: Installation............................................................................................................. 7
WARNING: ALL INSTALLATION AND SERVICE REPAIR WORK MUST BE CARRIED OUT BY QUALIFIED PERSONS ONLY. E27 Convection Oven © Moffat Ltd, August 2006 Revision 3/F3563... -
Page 3: Table Of Contents
Access Replacement Adjustment / Calibration ELECTRICAL SCHEMATICS ..................27 ELECTRICAL WIRING DIAGRAMS ................28 SPARE PARTS......................29 ACCESSORIES / OPTIONS ..................30 IMPORTANT: MAKING ALTERATIONS MAY VOID WARRANTIES AND APPROVALS. E27 Convection Oven © Moffat Ltd, August 2006 Revision 3/F3563... - Page 4 PARTS DIAGRAM ......................31 11.1 Main Assembly 11.2.1 Control Panel Assembly - E27 11.3.2 Control Panel Assembly - E27MS 11.3 E27MS Door Assembly SERVICE CONTACTS....................37 APPENDIX A. DOUBLE STACKING KIT ................39 E27 Convection Oven © Moffat Ltd, August 2006 Revision 3/F3563...
-
Page 5: Specifications
1. SPECIFICATIONS MODEL: E27 (37.2) (28.5) (3.0) (31.1) (1.75) (9.3) (15.6) (4.7) FRONT SIDE PLAN LEGEND - Electrical connection entry point Dimensions shown in millimetres. Dimensions in inches shown in brackets. E27 Convection Oven © Moffat Ltd, August 2006 Revision 3/F3563... - Page 6 3-pin 250V 15A, AS/NZ 3112 United Kingdom 3-pin 250V 13A fused, BS 1363A United States 3-pin 250V 15A, NEMA 6-15 Other Countries 3-pin 250V 13A minimum, type meet country standards E27 Convection Oven © Moffat Ltd, August 2006 Revision 3/F3563...
- Page 7 BEFORE USE Operate the oven for about 1 hour at 200°C (400°F) to remove any fumes or odours which may be present. E27 Convection Oven © Moffat Ltd, August 2006 Revision 3/F3563...
-
Page 8: Operation
3. BAKE TIMER 1 Hour bake timer. (Indicator illuminates when “time up” (0) reached, and buzzer sounds). 4. LIGHT SWITCH Push switch to activate light. (Oven light illuminates while button depressed). E27 Convection Oven © Moffat Ltd, August 2006 Revision 3/F3563... -
Page 9: Explanation Of Control System
When the thermostat calls for heat, it energises this relay, which switches power to the fan E27 Convection Oven © Moffat Ltd, August 2006 Revision 3/F3563... -
Page 10: Maintenance
(anti- clockwise rotation) at top of baffle. Lift baffle to disengage from locating studs and thumb- screws then pull forward to remove. Replace in reverse order. E27 Convection Oven © Moffat Ltd, August 2006 -10- Revision 3/F3563... -
Page 11: Trouble Shooting Guide
(Refer fault diagnosis 6.1.3) OVEN LIGHT NOT Blown bulb. Replace. ILLUMINATING - DOOR (Refer service section 6.3.1) CLOSED Light switch faulty. Replace. (Refer fault diagnosis 6.1.4) (Refer service section 6.3.4) E27 Convection Oven © Moffat Ltd, August 2006 -11- Revision 3/F3563... - Page 12 Check fan operation. Thermostat calibration. Correct calibration. (Refer fault diagnosis 6.1.9) (Refer service section 6.4.1) NO THERMOSTAT HEATING Indicator faulty. Replace. INDICATOR LIGHT (Refer fault diagnosis 6.1.10) (Refer service section 6.3.3) E27 Convection Oven © Moffat Ltd, August 2006 -12- Revision 3/F3563...
- Page 13 Replace. worn. (Refer service section 6.3.19) DOOR SEAL LEAKS Door seal damaged. Replace. (Refer service section 6.3.16) Door seal incorrectly fitted. Correctly install door seal. (Refer service section 6.3.16) E27 Convection Oven © Moffat Ltd, August 2006 -13- Revision 3/F3563...
-
Page 14: Service Procedures
Fan Motor Timer ....................22 6.3.13 Fan Motor Capacitor ....................22 6.3.14 Outer Glass ......................23 6.3.15 Inner Glass......................23 6.3.16 Door Seals ......................23 6.3.17 Door Handle ......................23 6.3.18 Door Hinges ......................24 6.3.19 Hinge Counter Brackets..................24 E27 Convection Oven © Moffat Ltd, August 2006 -14- Revision 3/F3563... - Page 15 ADJUSTMENT / CALIBRATION ..................25 6.4.1 Thermostat Calibration..................25 6.4.2 Door Microswitch Adjustment ................25 6.4.3 60 Minute Timer Zero Position Adjustment............26 6.4.4 Buzzer Volume Adjustment..................26 E27 Convection Oven © Moffat Ltd, August 2006 -15- Revision 3/F3563...
-
Page 16: Fault Diagnosis
Using a multimeter, measure the resistance If not, microswitch is faulty—replace. across capacitor terminals. Microswitch n.c. Capacitor Terminals n.o. Figure 6.1.1 Figure 6.1.3 E27 Convection Oven © Moffat Ltd, August 2006 -16- Revision 3/F3563... -
Page 17: Oven Light Not Illuminating-Door Open
If there is no voltage, then check 6.1.2, microswitch out of adjustment / faulty. wiring. If there is voltage then check wiring to the With switch depressed, check voltage at thermostat. E27 Convection Oven © Moffat Ltd, August 2006 -17- Revision 3/F3563... -
Page 18: No Temperature Control
Heating relay faulty With power switch off on control panel, check for voltage at terminal 4 of heating relay. If there is voltage then the heating relay is faulty—replace. E27 Convection Oven © Moffat Ltd, August 2006 -18- Revision 3/F3563... -
Page 19: Access
1) Remove all trays and racks. 2) Loosen two thumb screws (top). Thumb screws Figure 6.2.3 3) Lift baffle to disengage from locating studs and thumbscrews, and remove baffle. E27 Convection Oven © Moffat Ltd, August 2006 -19- Revision 3/F3563... -
Page 20: Replacement
1) With control panel open (refer 6.2.1) remove the wires from the back of the Two Screws neon. Figure 6.3.5 4) Transfer wires to new buzzer. 5) Reassemble in reverse order. E27 Convection Oven © Moffat Ltd, August 2006 -20- Revision 3/F3563... -
Page 21: Bake Timer
Element Ratings (±5%) 5) Withdraw old thermostat phial through rear of oven. 208-220V Fan Element 15.5 ohms 6) Insert new thermostat. 230-240V Fan Element 20.5 ohms 7) Re-assemble in reverse order. E27 Convection Oven © Moffat Ltd, August 2006 -21- Revision 3/F3563... -
Page 22: Fan
Screws (x4) Figure 6.3.16 3) Remove the capacitor wires from the motor terminal block. 4) Replace with new capacitor, and re- assemble in reverse order. Figure 6.3.14 E27 Convection Oven © Moffat Ltd, August 2006 -22- Revision 3/F3563... -
Page 23: Outer Glass
1) Remove the outer glass (refer 6.3.14). 2) Undo four screws and remove the top trim and handle assembly. Two Bolts Figure 6.3.21 Four Screws Figure 6.3.19 E27 Convection Oven © Moffat Ltd, August 2006 -23- Revision 3/F3563... -
Page 24: Door Hinges
8 screws Insulation panel Figure 6.3.24 4) Undo three screws and remove lintel cover. 5) Remove control panel (refer 6.2.1) and Figure 6.3.27 microswitch bracket (refer 6.3.2). Place inside oven. E27 Convection Oven © Moffat Ltd, August 2006 -24- Revision 3/F3563... -
Page 25: Adjustment / Calibration
1) Open oven door. 2) Open control panel (refer 6.2.1). 3) With fingers, bend actuator arm of microswitch so that switch operates when door is in closed position. Actuator Arm Figure 6.4.2 E27 Convection Oven © Moffat Ltd, August 2006 -25- Revision 3/F3563... -
Page 26: Minute Timer Zero Position Adjustment
Two Screws Figure 6.4.4 3) Adjust volume screw on buzzer, clockwise to increase volume, and anti-clockwise to decrease volume. Volume Adjustment Figure 6.4.5 4) Reassemble in reverse order. E27 Convection Oven © Moffat Ltd, August 2006 -26- Revision 3/F3563... -
Page 27: Electrical Schematics
7. ELECTRICAL CIRCUIT SCHEMATIC E27 Convection Oven © Moffat Ltd, August 2006 -27- Revision 3/F3563... -
Page 28: Electrical Wiring Diagrams
8. ELECTRICAL WIRING DIAGRAM BLACK WHITE BLACK BLUE BROWN E27 Convection Oven © Moffat Ltd, August 2006 -28- Revision 3/F3563... -
Page 29: Spare Parts
RACKS 024406 OVEN SIDE RACK LH 024407 OVEN SIDE RACK RH 023068 SIDE RACK SCREW 024408 WIRE OVEN RACK (NORTH AMERICAN MODELS) 025349 WIRE OVEN RACK (ALL OTHER MODELS) E27 Convection Oven © Moffat Ltd, August 2006 -29- Revision 3/F3563... -
Page 30: Accessories / Options
100 MM (FOUR INCH) FOOT OPTION OVEN RACKS (PART NO 24408) (PART NO 13048) 25 MM (ONE INCH) FOOT OPTION (PART NO 13908) A28 STAINLESS STEEL STAND DOUBLE STACKING KIT (PART NO 24419) E27 Convection Oven © Moffat Ltd, August 2006 -30- Revision 3/F3563... -
Page 31: Main Assembly
11. PARTS DIAGRAMS 11.1 MAIN ASSEMBLY E27 Convection Oven © Moffat Ltd, August 2006 -31- Revision 3/F3563... - Page 32 (Refer Section 11.3 for E27MS Door Assembly) 023218 HINGE SA1550 CONTROL PANEL ASSEMBLY BAKBAR (REFER SECTION 11.2) SA1549 CONTROL PANEL ASSEMBLY BLUE SEAL (REFER SECTION 11.2) SA1551 CONTROL PANEL ASSEMBLY MOFFAT (REFER SECTION 11.2) 024394 OVEN BODY 013908 FOOT ASSEMBLY 024396 INSULATION PANEL 024503...
- Page 33 003434 SILK GASKET 013521 LAMP 40W 003002 LIGHT GLASS 024431 MOTOR 024478 MOTOR SHAFT SEAL 024432 CAPACITOR 3µF 003004 MICROSWITCH 013977 INSULATOR 023093 MICROSWITCH MOUNTING BRACKET 024399 VENT TUBE E27 Convection Oven © Moffat Ltd, August 2006 -33- Revision 3/F3563...
-
Page 34: Control Panel Assembly - E
11.2.1 CONTROL PANEL ASSEMBLY - E27 Part No. Description 004916 CONTROL PANEL °C – BAKBAR 004915 CONTROL PANEL °C – BLUE SEAL 004917 CONTROL PANEL °F – MOFFAT 021474 LIGHT SWITCH 020823 TIMER KNOB 020849 INDICATOR NEON 021472 THERMOSTAT KNOB... -
Page 35: Control Panel Assembly - E27Ms
INDICATOR NEON 023211 THERMOSTAT 021472 KNOB - THERMOSTAT 011760 1 HOUR TIMER 020823 KNOB - TIMER 021474 LIGHT SWITCH 011794 BUZZER 026613 OVERLAY - BLUE SEAL 026496 OVERLAY - MOFFAT E27 Convection Oven © Moffat Ltd, August 2006 -35- Revision 3/F3563... -
Page 36: E27Ms Door Assembly
005038 DOOR INNER WA 023218 HINGE 026485 DOOR OUTER PANEL 026579 HANDLE STIFFENER 026498 DOOR HANDLE PLATED 024378 DOOR INNER GLASS 024392 INNER GLASS SEAL 026492 GLASS CLAMP ANGLE E27 Convection Oven © Moffat Ltd, August 2006 -36- Revision 3/F3563... - Page 37 Mulgrave VIC 3170 Fax (03) 9518 3838 Spare Parts Department Free Call 1800 337 963 Fax (03) 9518 3895 NEW SOUTH WALES - MOFFAT PTY Unit 3/142 James Ruse Drive Tel (02) 8833 4111 Rosehill NSW 2142 Spare Parts Free Call 1800 337 963...
- Page 38 UNITED STATES OF AMERICA MOFFAT INC. 3765 Champion Blvd Winston-Salem Tel 1-800-551 8795 NC27115 Fax 336 661 9546 NATIONAL COVERAGE FOR SERVICE OR MAINTENANCE DIAL FREE CALL 1800 551 8795 (USA ONLY) E27 Convection Oven © Moffat Ltd, August 2006 -38- Revision 3/F3563...
- Page 39 (with fibre washers). Secure to bottom of oven with three screws. Secure the double stack rear to the double stack sides with two screws. E27 Convection Oven © Moffat Ltd, August 2006 -39- Revision 3/F3563...
- Page 40 Using pliers or similar, knock out the notches at the top and bottom of the rear cover panel that allow for the vent pipe. Refit the rear cover panel to the top unit. Figure A.2 E27 Convection Oven © Moffat Ltd, August 2006 -40- Revision 3/F3563...
- Page 41 E27 Convection Oven © Moffat Ltd, August 2006 -41- Revision 3/F3563...