Table of Contents
Advertisement
Available languages
Available languages
Quick Links
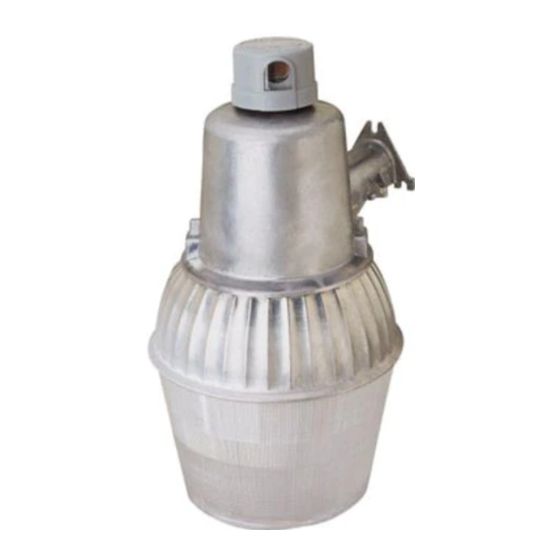
Model SL-5660
READ ALL INSTRUCTIONS CAREFULLY BEFORE BEGINNING INSTALLATION.
NOTE: All wiring must be run in accordance with the National Electrical Code (Canadian Electrical Code in Canada) through
conduit or another acceptable means. Contact a qualifi ed electrician if there is any question as to the suitability of
the system.
Photocontrol
Lens/Refl ector
Assembly
To test operation during daylight, cover the photocontrol with a small box. Turn on the power. Not all photocontrols are alike. Some may
have a time delay of a few minutes, others will turn on as soon as power is applied. The light will take up to ten minutes to reach full
brightness. Uncover the photocontrol and your unit will operate automatically—on at dusk, off at dawn.
© 2007 HeathCo LLC
Installation Instructions
Ground
Screw
Cover Plate
Fixture wires thru
this hole
High Pressure Sodium Dusk-
to-Dawn Security Light
Lamp in Fixture Contains Mercury. Dispose According
to Local, State, or Federal Laws.
WARNING: Turn power off at the fuse or circuit
breaker.
1. Select a location on a fl at wall with structurally sound wood and
from 10 to 25 feet (3 to 7.6 m) from the ground. The wood should
be at least one inch (25 mm)thick to safely secure the fi xture.
2. Using the mounting template as a guide, mark the 3 mounting holes.
We suggest drilling 3/16" (4.8 mm) pilot holes for the lag screws.
3. Install the two bottom lag screws fi rst. Screw in the lag screws
so that there is about 3/8" (9.5 mm) of space under the head.
4. Place the fi xture on these two screws and install the top lag screw.
Tighten the top lag screw fi rst, then tighten the remaining lag
screws.
5. Secure your outdoor cable or fl exible conduit to the cover plate
with a fi tting in accordance with the National Electrical Code.
6. Thread the black and white fi xture wires through the hole in the
cover plate as shown.
7. Connect the fi xture wires to the service wires (black to black
and white to white).
8. This fi xture must be connected to ground. Secure the service
ground wire under the head of the green ground screw.
9. Install the cover plate. Secure with the two screws and nuts
provided.
10. Install the refl ector/lens assembly. Secure with the two screws
and washers provided.
11. Screw in the 70 watt H.P. Sodium type S62 lamp provided.
12. Loosen the screw in the center of the photocontrol socket two
turns. Twist the socket so that the arrow points north. Note: There
is a stop to prevent the socket from turning all the way around. If
you have trouble turning the socket, try turning it the other direc-
tion. Retighten the screw in the center of the socket.
13. Align the photocontrol (it will only plug-in one way). Plug it in
and twist clockwise until it stops.
598-1089-03
Advertisement
Table of Contents

Related Manuals for Heath Zenith High Pressure Sodium Dusk-to-Dawn Security Light SL-5660


Summary of Contents for Heath Zenith High Pressure Sodium Dusk-to-Dawn Security Light SL-5660
- Page 1 Model SL-5660 READ ALL INSTRUCTIONS CAREFULLY BEFORE BEGINNING INSTALLATION. NOTE: All wiring must be run in accordance with the National Electrical Code (Canadian Electrical Code in Canada) through conduit or another acceptable means. Contact a qualifi ed electrician if there is any question as to the suitability of the system.
- Page 2 Ballast Assembly Replacement Instructions Ballast assembly can be replaced without the cutting of any wires. Use of a qualifi ed electrician is recom- mended. WARNING: Turn power off at the fuse or circuit breaker. 1. Remove bulb. 2. Loosen two screws holding plastic/aluminum refl ector and remove refl...
- Page 3 Modelo SL-5660 Indicaciones para su instalación LEA TODAS LAS INDICACIONES CON CUIDADO ANTES DE COMENZAR LA INSTALACION. NOTA: Todo el cableado debe realizarse de acuerdo con el Código Nacional Eléctrico (Código Eléctrico Canadiense en Canadá) usando tubería u otro medio aceptable. Contáctese con un electricista califi cado si tiene alguna pregunta respecto a la adaptabilidad del sistema.
- Page 4 Instrucciones para el cambio del conjunto estabilizador El conjunto estabilizador puede cambiarse sin necesidad de cortar ningún alambre. Se recomienda que lo haga un electricista califi cado. ADVERTENCIA: Apague la energía en el fusible o cortacircuitos. 1. Retire la bombilla. 2.
-
Page 5: Mode D'installation
Modèle SL-5660 LIRE SOIGNEUSEMENT LES DIRECTIVES AVANT D’ENTREPRENDRE L’INSTALLATION. NOTE: Le câblage doit être conforme aux exigences du Code national del'électricité (Code Canadian de l'électricité au Ca- nada) et être installé dans des canalisations ou autres dispositifs acceptables. Si vous avez des doutes concernant la convenance du système, consultez un électricien reconnu. - Page 6 Directives de remplacement du ballast Il est possible de remplacer le ballast sans couper de fi ls. Nous recommandons de recourir aux services d’un électricien qualifi é. AVERTISSEMENT : Coupez l'alimentation au dis- joncteur ou au fusible. 1. Retirez l’ampoule. 2.
-
Page 7: Technical Service
Technical Service Please call 1-800-858-8501 (English speaking only) for assistance before returning product to store. If you experience a problem, follow this guide. You may also want to visit our Web site at: www.hzsupport.com. If the problem persists, call* for assistance at 1-800-858-8501 (English speaking only), 7:30 AM to 4:30 PM CST (M-F). You may also write* to: HeathCo LLC P.O. -
Page 8: Five Year Limited Warranty
FIVE YEAR LIMITED WARRANTY This is a “Limited Warranty” which gives you specifi c legal rights. You may also have other rights which vary from state to state or province to province. For a period of fi ve years from the date of purchase, any malfunction caused by factory defective parts or workmanship will be corrected at no charge to you.