Table of Contents
Advertisement
Advertisement
Table of Contents

Related Manuals for Sekonic MULTIMASTER L-408


Summary of Contents for Sekonic MULTIMASTER L-408
- Page 1 EXPOSURE METER Operating Instructions...
- Page 2 SAFETY PRECAUTIONS This manual uses the following safety labels fork WARNING andA CAUTION that you must follow. &, Indicates hazards or unsafe practices that can result in severe WARNING personal injury or death. Indicates hazards or unsafe practices that can result in the personal CAUTION injury or a damage to your L-408 exposure meter.
- Page 3 FEATURES Thank you for your purchase of the Sekonic Multimaster L-408. It features: Built-in non-parallax viewfinder with 5 degree acceptance angle. 0 Built-in viewfinder eliminates parallax error caused by separate viewfinders. Built-in design eliminates troublesome viewfinder mounting and removal in the field.
-
Page 4: Table Of Contents
CONTENTS SAFETY PRECAUTIONS ............FEATURES ................Parts Designations .............. Display ................2-1 LCD panel ................2-2 Light-receiving indicator ................2-3 Viewfinder information ........Mode Selection ..............Switching between lumisphere UP and DOWN positions ..3-2 Switching between incident and reflected light metering ..Light-receiving Method ............ -
Page 5: Parts Designations
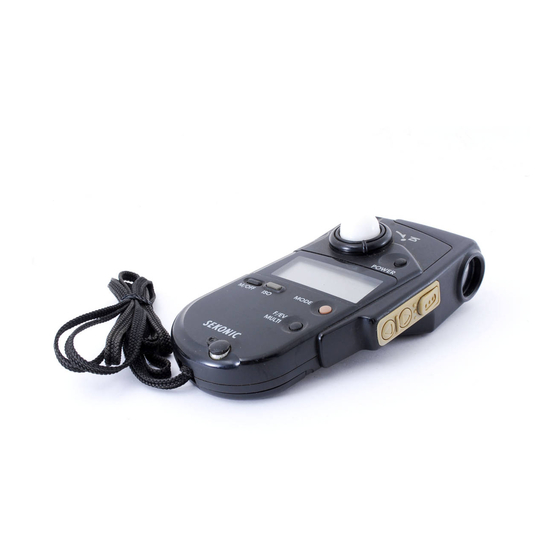
1. Parts Designations Light-receiving indicator- _ ____ Objective lens cover POWER switch receiving element) Measuring switch UP/DOWN button display (LCD) panel Mode selector F/EV/MULTI selector ’ Synchro terminal Viewfinder Eye-piece cover Memory button Battery case cover lock... -
Page 6: Display
2. Display . ~ ~ 2.1 LCD panel @ Mode selection Ambient light measurement Flash measurement without cord Flash measurement with cord The mode symbols are switched in the following sequence: @ Aperture/EV/Battery/Others “b.c” Battery capacity 2‘:“; See Page 7. Aperture value (Indicated by a number and dots 2’:‘i ) See Page 11. - Page 7 @ m Number of cumulative flashes When the flash is fired, this mark appears and the measurement times are acccumulated. More than 10 measurement causes the “E” (error) mark to appear. See Pages 15 and 18. IS0 film speed The film speed of IS0 3 to 8000 is shown. See Page 8.
-
Page 8: Light-Receiving Indicator
2.2 Light-receiving indicator Slide the eyepiece cover up or down to set metering to either incident light or reflected light (with 5-degree viewfinder metering). receiving Light ‘... indicator Incident light metering Reflected light metering 2.3 Viewfinder information Circle e) indicates 5 degree spot measurement. Center spot @ is for positioning of spot measurement. -
Page 9: Mode Selection
3. Mode Selection light and L-408 can measure both incident and reflected light in both ambient Your flash (strobe or bulb) modes. You can switch the modes as follows: [LighM~fng [Llghk$\mg light) [Measured speed priority measurement See Page 11 (Can be stored in memory)i ‘... -
Page 10: Light-Receiving Method
4. Light-receiving Method Incident light metering (with eyepiece cover closed) Hold the L-408 close to the subject, point the lumisphere towards the camera, and measure the incident light intensity. .\; q Lumisphere in up position: For incident measurement Lumisphere in down position: For light balance and simple illuminance eflected light metering (with eyepiece cover open) Your L-408 has a built-in viewfinder. -
Page 11: Preparation For Measurement
5. Preparation for Measurement Mounting a battery and strapping Use a 1.5volt, type-AA (UM3 dry, LR-6 or R-6) battery. Do not use a NiCd battery. @ Unlock the cover lock and remove the battery case cover. @ Insert the battery in the battery case aligning the polarities as indicated on the inside of the case. -
Page 12: Auto Power Off
NOTES 0 You can sustain battery level display by holding down the Power switch. * When the battery capacity drops below the limit, the “b.c” display blinks and then goes out. * When the battery level is indicated by only two or three dots, replace the battery. -
Page 13: Measurement Mode Setup
5.6 Measurement mode setup Press the mode selection button (&iJ) to select the desired measurement mode. Mode switching sequence: Flash measurement Flash measurement Ambient light --) w with cord without cord measurement The following shows the meter display of each selected mode. (Ambient liqht measurement) mode: Press the F/EV/MULTI button (~0) to switch the display. -
Page 14: Shutter Speed Priority Setup
5.7 Shutter speed priority setup Press the UP/DOWN button (~=a) to select a shutter speed. The UP button is used to increase shutter speed, and the DOWN button to decrease it. Holding down the UP or DOWN button continuously increases or decreases the shutter speed. -
Page 15: Ambient Light Measurement
6. Ambient Light Measurement 6.1 Mode selection Press the mode selection button (c==@) to select the a Ambient light measurement mode. Shutter priority measurement 6.2 Measuring switch Press the F/EV/MULTI button (e=@) to select the desired measuring value display. EV exposure value measurement Exposure priority measurement After this measurement, you can change the measuring mode by pressing the F/EV/ MULTI button. -
Page 16: Data Memory
@i J “3:’ Aperture priority measurement is set at “F:5.6+3/10” is r- Ii D -1 rr -1 r-1 3 1 _ 3 !J and “T: 1/30". - .a z NOTES * Bars and analog values are displayed. @ Ambient light metering continues as long as you keep pressing the measuring switch. -
Page 17: Contrast Measurement
(3 Measurement mode/light-receiving method and memory Light-receiving method Measuring mode lncldent light metering Reflected light metering Lvorphu. UP Ambient light Flash with cord Flash without cord Memory data count (in the ambient light mode, memo; can be syored only in shu;ter priority measurement.) Caution You can only recall memory data in the same measuring mode. -
Page 18: Flash Measurement With Cord
7. Flash Measurement with cord 7.1 Single flash measurement (II Flash measurement with cord (Flash measurement with cord) e mode selection button (e(Q)* 0 Never use the L-408 in flash mode when your hands are wet in conditions such as rain, splashing water or wet place. High voltage at the synchro terminal may result in an electric shock. -
Page 19: Data Memory
If the camera’s flash does not fire, use flash measurement without cord. NOTES When the IS0 setup is changed, the measurement data is recalculated and redisplayed. If the shutter speed is changed after measurement, the measurement is lost and the aperture is cleared to zero (0). When the measuring range is exceeded, “Eu”... -
Page 20: Contrast Measurement
--_l In this mode, you can set the shutter speed from 1 sec to 1/500 sec. NOTE After 1/500 sec., 1/75, 1/80, 1/90, 1/100, 1/200 and 1/400 sec. appear in the display and you can select a particular shutter speed. _ --_ - . -
Page 21: Flash Measurement Without Cord
8. Flash Measurement without cord 8.1 Single flash metering <jr! Flash measurement without cord (Flash measurement without cord) mode using the mode selection button. @I Single flash measurement Select the single flash measurement mode using the F/EV/MULTI button. (3 Shutter speed setup Set the desired shutter speed using the UP/DOWN button. -
Page 22: Data Memory
NOTES e When the measuring range is exceeded, “Eu” (underexposure) or “Eo” (overexposure) appears. Correct the shutter speed or the light source. @ If a rapid start luminescent lamp or special illumination lamp is to be measured (although no flash fires), connect the synchro cord and use the flash measurement with cord. -
Page 23: Contrast Measurement
When the flash fires, the aperture value will appear on the LCD panel. The cumulative exposure of each measurement and the number of flashes also appear. ii ,-,- ’ When a single flash firing is measured b‘ 0 rj d c 3 iJ/J$‘- ,.e..r,.l*.*l. -
Page 24: Other Metering Operations
9.1 Exposure index correction Although your L-408 has been calibrated to exacting standards, you can manually correct the exposure within B.9 EV. @ Hold down the IS0 button (@a) and press the F/EV/MULTI button (~=a) to change display. 1g-,-y;; Use the UP/DOWN button (e@) for exposure index correction. -
Page 25: Using Your L-408 As An Illumination Meter
9.2 Using your L-408 as an illuminance meter @ Set your L-408 to the incident light and ambient light metering mode, and select the IS0 100 and EV display (turn off exposure index correction ). Set the lumisphere to the DOWN position, hold the L-408 parallel to the subject, and start metering. -
Page 26: Specifications
10. Specifications * Digital exposure meter for ambient and flash metering Type * Incident and reflected light metering system Light-receiving method * Incident light: Lumisphere /Flat diffuser function (Lumisphere down Light-receiving section p o s i t i o n ) Built-in viewfinder (with 5-degree spot meter);... -
Page 27: Instructions And Maintenance Notes
11. Instructions and aintenance CAUTION I B Your L-408 exposure meter is water-resistant, but it is NOT water-proof. Do not wash your L-408 with water, and do not use it in water. ~ i DO not wash with a water. i Water splash R a i n Do not use in a water.