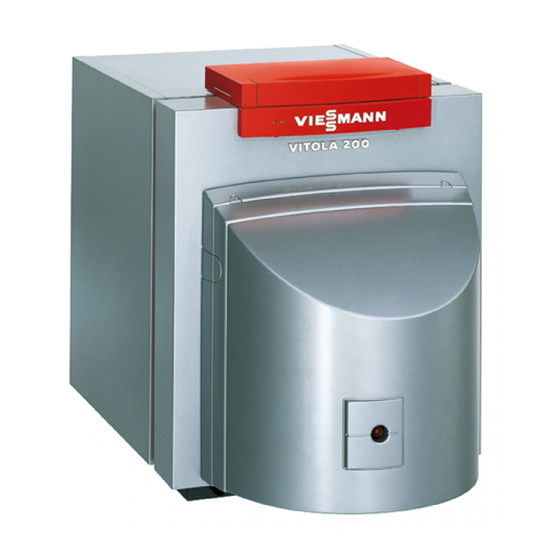
Viessmann VITOLA 200 Installation Instructions Manual
Oil-/gas-fired boiler heating input 83 to 300 mbh 24 to 88 kw
Hide thumbs
Also See for VITOLA 200:
- Technical manual (16 pages) ,
- Specification (2 pages) ,
- Start-up/service instructions (16 pages)
Table of Contents

Related Manuals for Viessmann VITOLA 200


Summary of Contents for Viessmann VITOLA 200
-
Page 1: Installation Instructions
Installation Instructions for use by heating contractor Vitola 200 VB2 Series Oil-/Gas-Fired Boiler Heating input 83 to 300 MBH 24 to 88 kW VITOLA 200 IMPORTANT Read and save these instructions for future reference. 5167 404 v1.9 01/2004... - Page 2 Viessmann equipment. Please see section For a listing of For information " "...
-
Page 3: Table Of Contents
Contents Page Safety Important Regulatory and Installation Requirements ..General Information About these Installation Instructions ....... . . Product Information . -
Page 4: Important Regulatory And Installation Requirements
Literature applicable to the Vitola: site and advise the system - Technical Data Manual operator/ultimate owner where the - Installation Instructions literature can be found. Contact - Start-up/Service Instructions Viessmann for additional copies. - Installation codes mentioned in this manual... -
Page 5: About These Installation Instructions
General Information About these Installation Instructions Take note of all symbols and notations intended to draw attention to potential hazards or important product information. These include ”WARNING”, ”CAUTION”, and ”IMPORTANT”. See below. Warnings draw your attention to the WARNING presence of potential hazards or important product information. -
Page 6: Mechanical Room
General Information Mechanical Room During the early stages of new home design, we recommend that proper consideration be given to constructing a separate mechanical room dedicated to gas or oil fired equipment including domestic hot water storage tanks. The boiler must be located in a heated indoor space, near a floor drain, and as close as possible to the vertical chimney or vent. -
Page 7: Combustion Air Supply
Fresh Air Combustion Air Supply (Continued) Combustion air opening (gas-fired installations) Install a combustion air opening. Ensure that all code requirements are met. Minimum round duct diameters are as follows: Boiler Model Model No. VB2-18 VB2-22 VB2-33 VB2-40 VB2-50 VB2-63 Round duct for combustion air supply Ø”... -
Page 8: Fresh Air Combustion Air Supply
Fresh Air Combustion Air Supply (Continued) Combustion air opening (oil-fired installations) Install a combustion air opening. Ensure that all code requirements are met. Minimum round duct diameters are as follows: Boiler Model Model No. VB2-18 VB2-22 VB2-33 VB2-40 VB2-50 VB2-63 Round duct for combustion air supply Ø”... - Page 9 Fresh Air Combustion Air Supply (Continued) Combustion air opening (oil-fired installations) If the boiler is located in a confined Unconfined spaces Louvres and grilles Where the boiler is located in an space and that obtains all of its air for In calculating free area as specified unconfined space in a building having combustion and ventilation from...
-
Page 10: Product Delivery
This clearance is required for service work. Viessmann strongly recommends maintaining 48” / 1200 mm front clearance on all models. The Vitola 200 can be mounted on a Vitocell-H as shown to reduce the footprint of heating equipment in the mechanical room. -
Page 11: Minimum Clearances To Combustibles
6” / 150 mm oil: min. 9” / 230 mm Boiler Model Rear inches Sides inches Flue (oil) inches (gas) inches inches Front inches (AL) Viessmann strongly recommends maintaining 48” / 1200 mm front clearance on all models. -
Page 12: Combustion Chamber
Set-up Combustion Chamber Provide ample clearance in front of boiler to allow easy removal of combustion chamber. Ensure the bolts of the combustion chamber door are tightened before installing the burner Combustion chamber sizes Boiler Model inches 1096 inches Product Installation Alternatives Installation with Boiler Stand Installation on Vitocell Packaging of Boiler Stand... -
Page 13: Boiler Set-Up And Location
Set-up Boiler Set-up and Location 1. Remove the combustion chamber door and ensure all transportation wrapping is taken off. IMPORTANT Remove package containing the nameplate of the boiler, the levelling bolts, and the sight glass for later installation. Installation without domestic hot water tank 2. -
Page 14: Enclosure Panel Installation
Set-up Enclosure Panel Installation IMPORTANT All the parts required for mounting the enclosure panels are supplied in the carton containing the insulation. 1. Push the insulation blanket (with black side facing outwards) under the boiler and wrap the mat around the boiler shell. - Page 15 Set-up Enclosure Panel Installation (Continued) 5. Place the rear insulation blanket in position (with black side facing outwards). 6. Place the rear panel over the safety supply connection and position in hooks on the base plate. 7. Place the rear panel up against the retaining brackets and bend over the tabs approx.
- Page 16 Set-up Enclosure Panel Installation (Continued) 1. Place the control unit base on the boiler. WARNING Do not kink capillaries. Proper operation of sensors is not possible if capillaries are kinked. IMPORTANT Boiler temperature sensor is shipped with the boiler control. 2.
- Page 17 Set-up Mounting the Combustion Chamber Door Installation Instructions Burner 1. Position combustion chamber door. 2.Insert the hinge pin on the right or left-hand side depending on whether the door is required to swing out to the right or left. IMPORTANT Push combustion chamber insert to the rear as far as possible;...
-
Page 18: Venting Connection
Connections Venting Connection (Gas Installations) Gas installations Installation of boiler venting Venting codes Use approved vent material only. For For gas-fired boilers install venting H After it has been determined that gas or propane, use B-vent (C-vent system in accordance with all applicable each appliance remaining connected recommended). - Page 19 Connections Venting Connection (Oil Installations) Oil installations Installation of boiler venting The vent system must comply with all The heating contractor shall ensure all H A chimney flue shall extend at least 3 applicable local and/or national codes. of the following requirements are met: ft / 1 m above the highest point at H The vent system shall ensure that no which the chimney comes in contact...
- Page 20 Connections Venting Connection (Gas and Oil Installations) Installation IMPORTANT 1. Install the venting so as to achieve When installing piping or venting, or the shortest possible way with while insulating overhead pipes, do not minimum elbows. If necessary, stand on top panel of boiler. Advise rearrange existing water piping to other trades accordingly! achieve closest chimney connection.
-
Page 21: Water Side Connections
Such systems must have the non-oxygen diffusion barrier tubing separated from the boiler with a heat exchanger. Viessmann recommends the use of underfloor plastic tubing with an oxygen diffusion barrier. - Page 22 Connections Safety Connections and Pressure Testing Installation Instructions Viessmann Safety Header (Accessory) Install safety devices on the boiler Install safety devices. IMPORTANT 1. Install pressure relief valve, discharge Install the (approved) factory supplied pipe, air vent and pressure gage as pressure relief valve.
-
Page 23: Safety Connections And
Connections Safety Connections and Pressure Testing (Continued) Perform pressure test on the boiler The boiler must be leak tested before being placed in operation. Before boiler is connected to piping or electrical power supply, it must be hydrostatically pressure tested with a maximum of 1½ times the maximum operating pressure of the boiler. -
Page 24: Installation Examples
Specific system layouts may 20 50 be further discussed with the local Viessmann sales representative office. 16 40 12 30 Clearances A minimum of 2” circumferential clearance from non-insulated hot water... - Page 25 Connections Installation Examples (Continued) Without mixing valve e.g. with Vitotronic 100, Model KK10 Heating circuit Spring-loaded flow check valve Circulation pump Safety header with automatic air vent, pressure relief valve, and pressure gage Expansion tank Heating circuit Spring-loaded flow check valve Circulation pump Safety header with automatic air vent,...
- Page 26 Connections Installation Examples (Continued) With one low-temperature circuit with 3-way mixing valve, one high-temperature circuit, and with domestic hot water production e.g. with Vitotronic 200, KW2 combined with one Mixing Valve Actuator Accessory Kit Heating circuit Spring-loaded flow check valve Circulation pump Safety header with automatic air vent,...
- Page 27 Connections Installation Examples (Continued) Underfloor heating system with one low-temperature, with 3-way mixing valve, and system separation e.g. with Vitotronic 200, KW2 combined with one Mixing Valve Actuator Accessory Kit Heating circuit Spring-loaded flow check valve Circulation pump for heating circuit Safety header with automatic air vent, pressure relief valve, and...
- Page 28 ................90° Elbow Viessmann Safety Header...
-
Page 29: Electrical Connections
Connections Electrical Connections Installation Instructions Boiler Control (for all connections to control base) IMPORTANT The power supply cable is shipped with the boiler control. 1. Open strain-reliefs located on rear panel. 2. Channel power supply cable or Power/Pump Module cable (for Vitotronic 200/300) and all other 120 VAC cabling through strain reliefs toward boiler control. -
Page 30: Top Panel Installation
Connections Top Panel Installation 1. Hook top panel into side panels and orient flush with front panel. 2. Fasten top panel to rear panel with sheet metal screw supplied. 3. Fasten boiler logo to front panel. -
Page 31: Burner Installation
Burner / Fresh Air Burner Installation Installation Instructions Burner To mount supplied burner: Use metric M8 bolts. Follow instructions supplied with burner. Burner Information Fuels WARNING For oil burners: For gas burners, the gas supply piping Use Fuel Oil #2 only. must be leak tested before placing the boiler in operation. -
Page 32: Start-Up Information
167°F / 75°C, return 140°F / 60°C. Measured flue gas temperature with combustion air temperature of 68°F / 20°C. Viessmann Manufacturing Company (U.S.) Inc. Viessmann Manufacturing Company Inc. 45 Access Road 750 McMurray Road Warwick, Rhode Island •...