Bissell PowerSteamer 1697 Series User Manual
Hide thumbs
Also See for PowerSteamer 1697 Series:
- User manual (17 pages) ,
- Service manual (10 pages) ,
- User manual (17 pages)
Table of Contents
Advertisement
USER'S GUIDE
1697, 8804 SERIES
Thank You
2
Safety Instructions
3
Product View
4-5
Assembly
6
Special Features
7-8
Operations
8-13
Maintenance & Care
14-15
Troubleshooting
16-17
Replacement Parts
18
Warranty
19
Product Registration
20
Consumer Care
20
Earn BISSELL Rewards!
R
egister your
product today!
See details on
back page
Advertisement
Table of Contents

Related Manuals for Bissell PowerSteamer 1697 Series


Summary of Contents for Bissell PowerSteamer 1697 Series
- Page 1 Earn BISSELL Rewards! egister your product today! See details on back page USER'S GUIDE 1697, 8804 SERIES Thank You Safety Instructions Product View Assembly Special Features Operations 8-13 Maintenance & Care 14-15 Troubleshooting 16-17 Replacement Parts Warranty Product Registration Consumer Care...
- Page 2 Your BISSELL deep cleaner is well made, and we back it with a limited one year warranty. We also stand behind it with a knowledgeable, dedicated Consumer Care department, so, should you ever have a problem, you’ll...
-
Page 3: Grounding Instructions
Use only manufacturer’s recommended attachments. ■ attachment plug that looks like the plug in Use only cleaning products formulated by BISSELL for use in this ■ the drawing above. make certain that the appliance to prevent internal component damage. See the cleaning appliance is connected to an outlet hav- fluid section of this guide. -
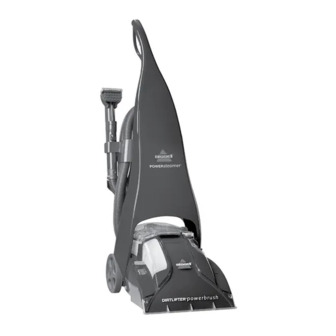
Page 4: Product View
roduct view turbobrush ® storage (select models) flow indicator (filter inside) smartmix ® switch lower handle smartmix ® tank Readytools ™ dial dirtlifter ® belt access door powerbrush floor nozzle Window Optional Accessories these items are available for purchase with your model. to order replacement parts or additional tools or formulas, please refer to page 19. -
Page 5: Cleaning Fluid
Cleaning fluid to reduce the risk of fire and Keep plenty of genuine bissell 2X formula on hand so electric shock due to internal you can clean and protect whenever it fits your schedule. component damage, use only always use genuine bissell deep cleaning formulas. - Page 6 ssembly your powersteamer comes in three, easy to WARNING: assemble components: Upper Handle do not plug in your cleaner until Lower Handle you have completely assembled Tool Caddy it per the following instructions the only thing you will need to assemble your and are familiar with all instruc- cleaner is a phillips head screwdriver.
-
Page 7: Special Features
Features your bissell powersteamer is a home cleaning system that uses a combination of hot tap water, bissell advanced cleaning formula and suction to safely clean carpets and upholstery. ® DirtLifter PowerBrush the dirtlifter powerbrush is designed to enhance cleaning performance. the bristle pattern safely lifts out the deep down dirt while gently grooming carpet fibers. -
Page 8: Flow Indicator
Removal instructions on page 12. and hallways. a. spray the bissell tough stain pre-treat formula onto heavy traffic areas, soiled areas, or stains. b. allow to penetrate for at least 3 minutes. -
Page 9: Fill 2-In-1 Water Tank
2. fill the formula tank by first unscrewing the cap and insert. always use genuine bissell formulas to maximize cleaning and for the safety of your machine. fill with water to the water fill line, then fill with formula to the formula fill line and replace the cap and insert. -
Page 10: Choose Smartmix Setting
• Normal component damage, use only • Water Rinse bissell cleaning fluids intended and the powersteamer will adjust the right for use with the deep cleaner. amount of cleaning solution to mix with the heated water to fit your cleaning need. - Page 11 Remove the top of the for use with the deep cleaner. tank by rotating the handle forward to unlatch lid and lifting lid off tank.
-
Page 12: Stain Removal
6. using the bissell tough stain precleaner, spray evenly over soiled area. do not overwet. Wait 3-5 minutes. gently work the solution by blotting area with a clean, damp, color safe cloth. -
Page 13: Hard Floor Cleaning
2. move any furniture, if needed. 3. empty any carpet cleaning formula back into the bissell bottle if stored in the formu- la tank. fill formula tank with water to the water fill line, then with bissell 2X hard... -
Page 14: Maintenance And Care
aintenance and Care Machine storage WARNING: once your cleaning is complete, make sure to reduce the risk of fire, the 2-in-1 water tank is emptied and rinsed out. electric shock or injury, unplug put the unit away in a closet or basement for from the outlet before servicing. - Page 15 2. follow the instructions on page 9 for filling deep cleaning carpeting the 2-in-1 water tank and the formula tank. and upholstery with bissell multi-allergen 3. set ready tools dial to the tools or pretreat Removal formula™ with setting. this will allow spray and divert the scotchgard™...
-
Page 16: Troubleshooting
roubleshooting WARNING: to reduce the risk of fire, electric shock or injury unplug from outlet before servicing. Reduced spray or no spray. Possible Cause Remedies Bladder may be empty. 1. Refill bladder with hot tap water. SmartMix tank may be empty. 2. -
Page 17: Please Do Not Return This Product To The Store
Thank you for selecting a BISSELL product. Please do not return this product to the store. For any questions or concerns, BISSELL is happy to be of service. Contact us directly at 1-800-237-7691. w w w . b i s s e l l . c o m... -
Page 18: Parts List
203-5640 hard floor tool 203-6651 3" tough stain tool 62e5-2 bissell 2X deep clean & protect formula 60 oz 99K5-2 bissell 2X professional deep cleaning formula 60 oz 84u4-2 bissell 2X professional deep cleaning formula 60 oz 56l9 bissell 2X hard floor solutions™... -
Page 19: Limited One Year Warranty
*eXceptions and eXclusions identified below, upon receipt of the prod- uct bissell will repair or replace (with new or remanufactured components or products), at bissell’s option, free of charge from the date of purchase by the original purchaser, for one year any defective or malfunctioning part. - Page 20 Grand Rapids MI 49501 ATTN: Consumer Care Or visit the BISSELL website - www.bissell.com When contacting BISSELL, have model number of cleaner available. Please record your Model Number: ___________________ Please record your Purchase Date: ___________________ NOTE: Please keep your original sales receipt. It provides proof of purchase date in the event of a warranty claim.