Table of Contents
Advertisement
Quick Links
Installation & Operating Manual
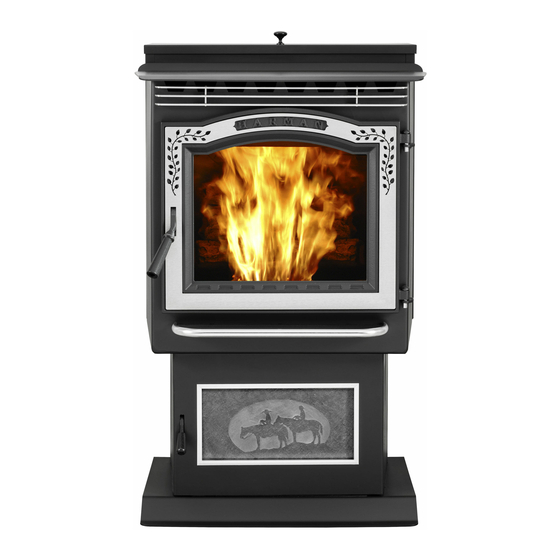
P68 Pellet Stove Owners Manual
R3
"Ce manuel est disponible en Français sur demande"
SAFETY NOTICE
PLEASE READ THIS ENTIRE MANUAL BEFORE YOU INSTALL AND USE YOUR NEW ROOM HEATER. FAILURE
TO FOLLOW INSTRUCTIONS MAY RESULT IN PROPERTY DAMAGE, BODILY INJURY, OR EVEN DEATH.
FOR USE IN THE U.S. AND CANADA. SUITABLE FOR INSTALLATION IN MOBILE HOMES.
IF THIS HARMAN STOVE IS NOT PROPERLY INSTALLED, A HOUSE FIRE MA Y RESULT. FOR YOUR SAFETY ,
FOLLOW INSTALLATION DIRECTIONS.
CONTACT LOCAL BUILDING OR FIRE OFFICIALS ABOUT RESTRICTIONS AND INSTALLATION INSPECTION
REQUIREMENTS IN YOUR AREA.
CONTACT YOUR LOCAL AUTHORITY (SUCH AS MUNICIPAL BUILDING DEPARTMENT, FIRE DEPARTMENT,
FIRE PREVENTION BUREAU, ETC.) TO DETERMINE THE NEED FOR A PERMIT.
CETTE GUIDE D'UTILISATION EST DISPONIBLE EN FRANCAIS. CHEZ VOTRE CONCESSIONNAIRE DE HARMAN
STOVE COMPANY.
R1
SAVE THESE INSTRUCTIONS.
Advertisement
Table of Contents

Related Manuals for Harman Stove Company P68


Summary of Contents for Harman Stove Company P68
-
Page 1: Safety Notice
TO FOLLOW INSTRUCTIONS MAY RESULT IN PROPERTY DAMAGE, BODILY INJURY, OR EVEN DEATH. FOR USE IN THE U.S. AND CANADA. SUITABLE FOR INSTALLATION IN MOBILE HOMES. IF THIS HARMAN STOVE IS NOT PROPERLY INSTALLED, A HOUSE FIRE MA Y RESULT. FOR YOUR SAFETY , FOLLOW INSTALLATION DIRECTIONS. - Page 2 P68 Pellet Stove...
-
Page 3: Table Of Contents
The only thing you need to do is set your desired room temperature and fill the hopper. With the P68 you will notice even heat throughout your home and a level of convenience you never thought possible. - Page 4 Mobile home installation should be done in accordance with the Manufactured Home and Safety Standard (HUD), CFR 3280, Part 24. P68 Pellet Stove IMPORTANT NOTES DO NOT INSTALL IN SLEEPING ROOM THE STRUCTURAL INTEGRITY OF THE MOBILE HOME FLOOR, WALL, AND CEILING/ROOF MUST BE MAINTAINED.
-
Page 5: Assembly & Installation
¼-20 x 2-1/4" ( P.N. 3-30-3025202252 ) from hardware pack. Unpacking The P68 is bolted (1/4 x 1" hex head bolts) to the skid to prevent movement during shipping. To free the stove from the skid you must remove the hold-down bolts in the rear of the pedestal base. -
Page 6: Installation
(The draft meter must have a minimum range of 0-.5.)Record the first reading. Connect flue pipe to stove and be sure all doors and windows in the home are closed. Record the second draft read- ing_______. If the second reading is more than .05"... -
Page 7: Venting
NOT E: Where passage t hrough a w all, or partition of combustible construction is desired, the installation shall conform to CAN/CSA-B365. (if in Canada) Inside Corner Detail Fixed Openable Closed = Air supply inlet = Area where terminal is not permitted P68 Pellet Stove... - Page 8 However, in some cases a perfect seal is not achieved. For this reason and the fact that the P68 operates with a positive vent pressure we specify that the joints also be sealed with silicone. Aluminum tape can also be used for any joint that is 1 ft.
- Page 9 To install outside air use 2 3/8" I.D. non-com- bustible flex pipe. There is a break-away hole on the rear panel of the P68 stove which must be removed before connecting the flex pipe. The pipe should be run outside and terminate to the side or below the vent pipe outlet so the flue outlet is more than 12"...
- Page 10 This vertical sec- tion will provide natural draft in the event of a power failure. If the stove is installed below grade be sure the rmination is at least 18" above grade. The 3 ft.
- Page 11 #7. *The chimney should be inspected and cleaned before installing your stove. If you discover that the chimney does not have a clay tile liner or has cracks or flaking of the tile liner you will need to install a stainless steel liner within the chimney.
- Page 12 Fig. 12 Fig. 13 P68 Pellet Stove Venting #6 Installing into an existing fireplace chimney ( US and Canada) This method provides excellent venting for nor- mal operation. This method also provides natural draft in the event of a power failure.
- Page 13 3" min. (See Page 5 for corner installation clearances) Fig. 14 12" min. wall to outlet Fig. 16 Fig. 15 36" m in clearance to any com bustible m aterial P68 Pellet Stove...
-
Page 14: Automatic Operation
P68 AUTOMATIC IGNITION/OPERATION The P68 is a fully automatic stove that features two operating modes; Stove Temperature Mode and Room Temperature Mode. In Stove Temperature Mode, you select a burn rate and the stove will remain at the same burn rate regardless of the room temperature. - Page 15 The fire will not go out immediately and may take more than an hour to fully shut down. If the stove is left to run out of fuel, you may get a 6 blink status light. If this happens simply reset the control...
- Page 16 7. Setting the feed adjuster # for maximum burn: With the unit burning in "AUTO", turn to "Stove Mode" and put the fan on "H". Set the Temperature Dial to #7. Allow the unit to burn for about 30 minutes and check ash on front of burn pot.
-
Page 17: Manual Operation
P68 MANUAL IGNITION/OPERATION The P68 Pellet Stove is capable of manual operation. This also allows the operator to manually control operation during an emergency (i.e. igniter failure, when using a 502H battery backup, or when using certain generators.) The unit can be switched between "AUTO" and "MANUAL" at any time during operation. - Page 18 7. Setting the feed adjuster # for maximum burn: With the unit burning in "AUTO", turn to "Stove Mode" and put the fan on "H". Set the Temperature Dial to #7. Allow the unit to burn for about 30 minutes and check ash on front of burn pot.
-
Page 19: Esp Control
50 minutes. A six blink status may be set if the stove is allowed to run out of pellets. To reset, turn mode selector to "OFF" then back on to the desired mode. If the unit was not out of pellets, see Troubleshooting section, Page 26, for more details. -
Page 20: Low Draft Voltage Adjustment
The control board on the P68 is equipped with a low draft adjustment port. Located on the control face just to the right of the igniter light. This voltage adjustment... -
Page 21: Room Sensor
NOTE: Distances of more than 25 feet from the unit or in another room are not recommended. The room sensor is essential for the P68's excel- lent efficiency. NOTE: It is recommended that the room sensor be installed, even if only installed on the rear of the unit as a return air sensor. -
Page 22: Maintenance
Blower Cover ash pan handle to carry and dispose of ashes. Latch 2. Slide the ash pan back into the stove and latch the door by pushing in on latch handle. Cleaning: The stove should be cleaned after burning ap- proximately 1 ton of pellets (50 bags). - Page 23 8. Clean the combustion blower wheel with a brush and a vacuum cleaner. Note: Do not use a household vacuum to clean the stove. We recommend that you use a shop vacuum that is equipped with a fine dust filter called a HEPA filter or a vacuum specially made for fly ash and soot.
- Page 24 P68 Maintenance - Burn Pot Fig. 34 Fig. 35 Viewed from below through the ash pan opening. Fig. 36 P68 Pellet Stove Burn Pot Cleaning and Maintenance 1. Scrape the top holed surface and sides of the burn pot.(Fig 34) It is not necessary to completely remove all material from the burn pot.
- Page 25 P68 Maintenance - Gasket Adjustment Your new Harman Stove viewing door gasket has been factory set, however over a period of time some minor adjus tment may be necessar y. The easiest way to check the adjustment of the door gasket...
- Page 26 P68 Maintenance - Cleaning the Feeder Body Pellet fines will accumulate in the feeder body over a period of time; therefore, a yearly inspection and cleaning of this must be performed. To clean out fines: 1. Remove right rear cover panel ( see rear cover installation on page 4 ).
-
Page 27: Trouble Shooting
Premium at 1% or less, Standard at 3% or less and all others at 3% or more. The P68 is capable of burning all 3 categories of pellets due to a patented feeder and burn pot sys- tem. -
Page 28: Feeder Parts
P68 Feeder and Specifications ( 4) 3- 30- 2252005013 Weight Blower Feed Rate Hopper Capacity Fuel Flue Size Outside Air Size Fuse Rating P68 Pellet Stove P61A Feeder 3- 30- 1371612513 Specifications 290 lbs. 135 cfm approx. 1lb. to 8 lbs per hr... -
Page 29: Options
136 pounds of pellets at one time. Part #1-00-08636 OPTIONS Floor Protector The P68 Steel Floor Protector measures 25 inches wide by 33 inches deep. It is made of 20 gauge steel. This is the minimum size for floor protection with this unit. Part# 1-00-06727... -
Page 30: Wiring Diagram
P68 Wiring Diagram P68 Pellet Stove... -
Page 31: Parts List
3' Flex Pipe Log Set Side Heat Shields Floor Protector (25" x 33") Air Grill Door Frame w/ash lip & tile/slate trim Tile Pack(1 piece) Decorative Slate (1 piece) P68 Parts List Part Number 0-88-00248 1-10-05800 1-10-06723 2-00-06468-1 2-00-06468-2 2-00-773850... -
Page 32: Warranty
Harman Stove Company. This warranty does not apply if the product has been altered in any way after leaving the factory. Harman Stove Company and its agents assume no liability for “resultant damages of any kind”...