Table of Contents
Advertisement
Installation & Operating Manual
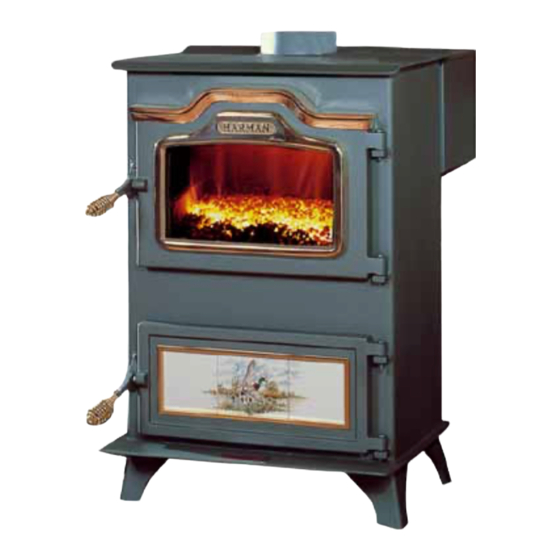
The Harman Magnum Stoker
Tested by:
DO NOT BURN WET COAL.
R15
OMNI-TEST Laboratory
SAFETY NOTICE
PLEASE READ THIS ENTIRE MANUAL BEFORE YOU INSTALL AND USE YOUR NEW ROOM HEATER. FAILURE TO
FOLLOW INSTRUCTIONS MAY RESULT IN PROPERTY DAMAGE, BODILY INJURY, OR EVEN DEATH.
FOR USE IN THE U.S. AND CANADA.
IF THIS HARMAN STOVE IS NOT PROPERLY INSTALLED, A HOUSEFIRE MAY RESULT. FOR YOUR SAFETY , FOLLOW
INSTALLATION DIRECTIONS.
CONTACT LOCAL BUILDING OR FIRE OFFICIALS ABOUT RESTRICTIONSAND INSTALLATION INSPECTION
REQUIREMENTS IN YOUR AREA.
CONTACT YOUR LOCAL AUTHORITY (SUCH AS MUNICIPAL BUILDING DEPARTMENT, FIRE DEPARTMENT, FIRE
PREVENTION BUREAU, ETC.) TO DETERMINE THE NEED FOR A PERMIT.
CETTE GUIDE D'UTILISATION EST DISPONIBLE EN FRANCAIS. CHEZ VOTRE CONCESSIONNAIRE DE HARMAN ST OVE
COMPANY.
M GMR13
SAVE THESE INSTRUCTIONS.
Advertisement
Table of Contents

Related Manuals for Harman Stove Company Harman Stove The Harman Magnum Stoker


Summary of Contents for Harman Stove Company Harman Stove The Harman Magnum Stoker
-
Page 1: Safety Notice
FOLLOW INSTRUCTIONS MAY RESULT IN PROPERTY DAMAGE, BODILY INJURY, OR EVEN DEATH. FOR USE IN THE U.S. AND CANADA. IF THIS HARMAN STOVE IS NOT PROPERLY INSTALLED, A HOUSEFIRE MAY RESULT. FOR YOUR SAFETY , FOLLOW INSTALLATION DIRECTIONS. CONTACT LOCAL BUILDING OR FIRE OFFICIALS ABOUT RESTRICTIONSAND INSTALLATION INSPECTION REQUIREMENTS IN YOUR AREA. -
Page 2: Table Of Contents
INDEX Introduction Warnings Packing List Assembly Installation Verti-Flow Stoker Control Operation Maintenance Trouble-Shooting Wiring Diagram Feeder Parts Domestic Hot Water Coil Hot Air Option Warrant y DO NOT BURN WET COAL... -
Page 3: Introduction
17 hours or stretch out to over 100 hours when less heat is required. A thermostat is used to regulate the heat output of the stove. When no heat is needed, the stoker stops and only runs to maintain the fire. If heat is needed, the thermostat can turn on the stoker at any time. - Page 4 If you don’t, the feeder will over-fire the stove and waste coal. Doing this once or twice a year will not damage your stove as long as it is hot and burning. The damage is caused when the hopper has wet coal in it when This will cause rust and corro- th e s to v e is c o ld .
-
Page 5: Packing List
Inside bag (2) terminals for thermostat wire (4) 8-32 x 1/2 screws and nuts Parts inside stove (2) grate inserts grate holder combustion blower ash pan DO NOT BURN WET COAL... -
Page 6: Assembly
It is not intended by Harman Stove Company that you assemble this unit. This job is to be performed by your Harman Dealer who has been taught how to assemble and explain the operation of your new stoker to you. - Page 7 gasket fig 3 thermostat Restricter Plate Control Box Small blower Large blower fig 4 Feeder Begin assembly by sliding the pusher block with the adjuster rod from the front through the slot shown in fig.1. Be sure the pusher block is turned with the bolt hole to Blowers feed indicator side.
- Page 8 hopper support slotted holes Grate insert fig 5 Grate angle Grate holder fig 6 fig 7 Hopper Install hopper support on top rear of stoker. Note that bolt holes in hopper support are slotted for adjust- ment. Insert small end of hopper into the hopper slot on the feeder as shown.
-
Page 9: Installation
Place the stoker a minimum of 4" to a com- bustible wall from the rear of the hopper and a minimum of 34" from the sides. The stove should be placed on a noncombustible floor. Install a 6" stove pipe from flue opening to chimney with a barometric damper. -
Page 10: Verti-Flow Stoker Control
Fine Tuning Draft With fire burning and stablized take draft reading in flue pipe and note the reading. Next take a reading in the fire box by removing the bolt in the front center of the unit. While watching the draft meter, close the restricter plate on the combus- tion blower slowly, until the needle reads about the same as it did on the... - Page 11 Place thermostat in a central location. Do not place it in an isolated room with poor air circulation of the stove. NOTE: The bolt holes on the blowers are not used. Install the control box on mounting pad provided on the side of the stoker with (4) #8-32 bolts.
- Page 12 0 minutes to 15 minutes. The purpose of having the off delay timer on to distri- bution blower is to exhaust the excess heat in the stove that is inherent after the combustion blower and coal feeder turn off.
-
Page 13: Stoker Control
The distribution blower time should be programmed for a time which is long enough to move the excess heat from the stove to the room heated. If this time is programmed for a longer time than the "off" time the distribution blower will operate con- stantly. -
Page 14: Feed Adjustment
To start a fire you first pour rice coal into the hopper. With the thermostat turned up and the stoker running, the coal will begin to feed onto the grate inside the stove. This process can be speeded up by adjusting the feed rate to the maximum position. When the coal starts to come up out of the grate and is almost up to the area where the holes start, turn the feed rate back to about 3/8"... -
Page 15: Maintenance
This operation can be performed while the unit is burning. However, you should first lower the thermostat to lower the stove temperature and be sure you are wearing protective gloves. DO NOT BURN WET COAL... - Page 16 by lifting out the grate inserts and removing fly ash with the vacuum cleaner. maintenance. The reason is rust and corrosion can form much faster in the high humidity of summer. è IMPORTANT found, remove it with a file or sandpaper and paint the area with spray paint available from your dealer.
-
Page 17: Trouble-Shooting
Lack of draft or a down draft in the chimney will cause gases to escape from the unit. No stove will function properly without draft. Any draft problem should be corrected before use. A draft inducer may be installed to increase draft in marginal situations. - Page 18 The installation should be performed by your dealer who is factory trained to correct any problem on initial start-up. After proper installation, many years of trouble-free operation can be expected. Stoker Control Trouble-Shooting This trouble-shooting guide is designed to help the customer find basic problems external to the stoker timer.
-
Page 19: Wiring Diagram
Check the connections from the stoker control to the thermostat. Check the thermostat for proper operation. PROBLEM: The motors do not turn off even when the room tempera- ture is above the thermostat set point. Check that the programmed off time is not for 0 minutes. DO NOT BURN WET COAL... -
Page 20: Feeder Parts
1. (2)grate inserts 2. grate holder 3. grate angle 4. feeder body 5. clean-out slide 6. pusher arm 7. (2) pillow block bearings 8. feed motor 9. capacitor 10. motor mount 11. pusher block 12. adjuster rod 13. adjuster tube 14. -
Page 21: Domestic Hot Water Coil
Domestic hot water coil hookup automatic air valve temperature pressure relief valve aquastst valve electric hot water heater circulator pump valve Cut holes with 1 1/8" hole saw where shown . Install coil with hardware provided. Hook up as shown above. If distance between unit and tank is less than 10 feet the circula- tor pump and aquastat are not needed. -
Page 22: Hot Air Option
6" starting collar Your stoker has a built-in feature that lets you take the air that normally blows out from the front and puts it out the top into a 6" duct. To do this, remove the 6" round plate from the top of the unit by removing the bolt located in the top of the firebox. -
Page 23: Warrant Y
In the event of change in ownership, the remaining portion of this warranty may be transferred to the new owner by sending the new owner information and a transfer fee of $25.00 US to the Harman Stove Company. PLEASE READ THE LITERATURE BY THE MANUFACTURER FOR THE VARIOUS ACCESSORY DEVICES.