
Related Manuals for Ariston FK 898E P X AUS S


Summary of Contents for Ariston FK 898E P X AUS S
-
Page 1: Table Of Contents
FK 898E P X AUS S FK 898E P AUS S English Operating Instructions OVEN Contents Operating Instructions,1 Warnings,2 Assistance,3 Description of the appliance,4 Installation,5 Electrical Connection,6 Start-up and use,7 Modes,8 Precautions and tips,12 Maintenance and care,12 Troubleshooting,15... -
Page 2: Warnings
WARNING: Ensure that the appliance is switched off before replacing the lamp to avoid the possibility of electric shock. Warnings Before initiating the automatic cleaning WARNING: The appliance and its cycle: accessible parts become hot during use. • clean the oven door; Care should be taken to avoid touching •... -
Page 3: Assistance
• The serial number (S/N). The latter two pieces of information can be found on the data plate located on the appliance. ARISTON GENUINE ACCESSORIES PRIORITY SERVICE & SPARE PARTS If you are not completely satis ed with your appliance or... -
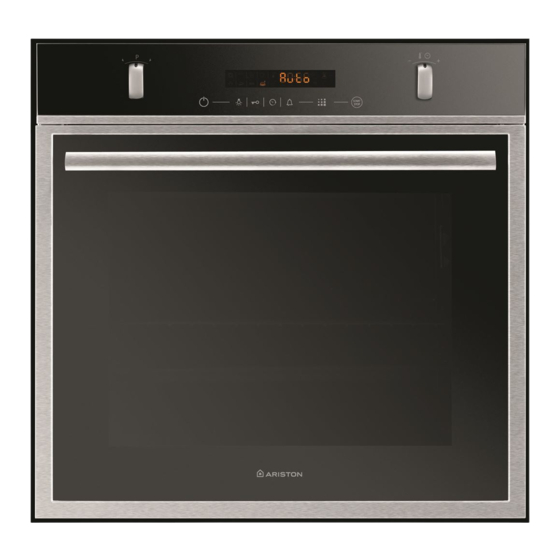
Page 4: Description Of The Appliance
Description of the appliance Overall view 1. POSITION 1 2. POSITION 2 3. POSITION 3 4. POSITION 4 5. POSITION 5 6. GUIDES for the sliding racks 7. DRIPPING PAN 8. GRILL 9. Control panel Display Control panel 20. TEMPERATURE and TIME numerical digits 10. -
Page 5: Installation
Installation Ventilation To ensure adequate ventilation, the back panel of the cabinet must be removed. It is advisable to install the oven ! Please keep this instruction booklet in a safe place for so that it rests on two strips of wood, or on a completely future reference. -
Page 6: Electrical Connection
Electrical Connection ! Once the appliance has been installed, the power supply cable and the electrical socket must be easily accessible. ! The cable must not be bent or compressed. The electrical connection to the mains must be made on ! The cable must be checked regularly and replaced by the appliance. -
Page 7: Start-Up And Use
Start-up and use a blackout, the button and the digits on the TIME display will flash for 10 seconds. To set the clock: ! When inserting the shelf 1. Press the button. make sure the backstop is 2. Turn the TIMER knob towards to adjust the at the rear of the cavity (see hour value. -
Page 8: Modes
minutes and the control panel/door lock has not been - press the button to stop cooking. In this case the activated, the appliance automatically reverts to standby appliance stores the temperature modified previously in its mode. The standby mode is visualised by the high luminosity memory (manual modes only);... - Page 9 LOW TEMPERATURE modes ! When the cooking stage has been reached, the oven This type of cooking can be used for proving, defrosting, buzzer sounds. preparing yoghurt, heating dishes at the required speed and slow cooking at low temperatures. The temperature options ! Do not open the oven door as this will disrupt the cooking are: 40, 65 and 90°C.
-
Page 10: Programming Cooking
Programming cooking Practical cooking advice ! A cooking mode must be selected before programming ! Do not place racks in position 1 and 5 during fan-assisted can take place. cooking. This is because excessive direct heat can burn Programming the cooking duration temperature sensitive foods. -
Page 11: Cooking Advice Table
Cooking advice table Rack position Recommended Cooking Modes Foods Weight Preheating (Kg) Temperature duration (°C) (minutes) standard sliding Manual guide rails guide rails Multilevel* Pizza on 2 racks 2 and 4 1 and 3 220-230 20-25 2 and 4 1 and 3 30-35 Pies on two racks/cakes on 2 racks Sponge cake on 2 racks (on the dripping pan) -
Page 12: Precautions And Tips
Precautions and tips Disposal • When disposing of packaging material: observe local legislation so that the packaging may be reused. ! This appliance has been designed and manufactured • The European Directive 2002/96/EC on Waste in compliance with international safety standards. The Electrical and Electronic Equipment (WEEE), requires following warnings are provided for safety reasons and that old household electrical appliances must not... -
Page 13: Sliding Rack Kit Assembly
! Do not touch the light bulb directly with your hands. • The inside of the oven should ideally be cleaned after each use, while it is still lukewarm. Use hot water and ! Do not use the oven lamp as/for ambient lighting. detergent, then rinse well and dry with a soft cloth. - Page 14 ! If the oven is too hot, the pyrolytic cycle may not start. Programming the automatic cleaning end time Wait for the oven to cool down. 1. Press the button twice: the icon and the ! The programme may only be started once the oven door numerical digits on the display will begin to flash.
-
Page 15: Troubleshooting
Troubleshooting Problem Possible cause Solution The appliance has just been Set the clock. The “Clock button” and the connected to the electricity digits on the display flash. mains or there has been a blackou A programmed cooking mode There has been a blackout. Reprogram the cooking mode. - Page 16 195102562.00 04/2012 - XEROX FABRIANO...