Table of Contents
Advertisement
DAILY REFERENCE
GUIDE
THANK YOU FOR PURCHASING AN
ARISTON PRODUCT
To receive more comprehensive help and
support, please register your product at
www. aristonchannel. com
Before using the appliance carefully read the Health and Safety guide.
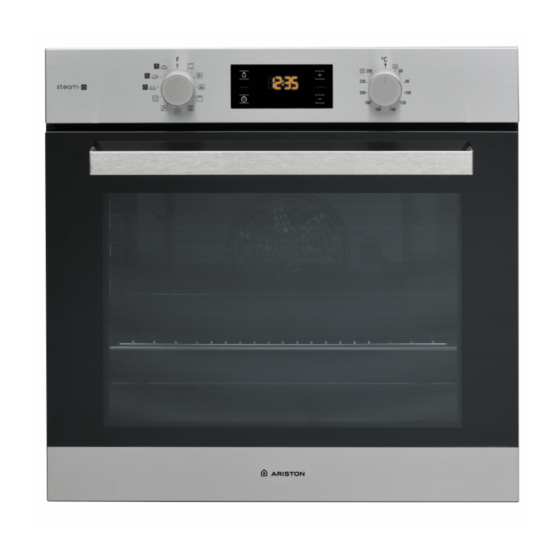
PRODUCT DESCRIPTION
1
2
3
4
5
CONTROL PANEL DESCRIPTION
1
1. SELECTION KNOB
For switching the oven on by
selecting a function. Turn to the
position to switch the oven off.
2. LIGHT
With the oven switched on, press
to turn the oven compartment
lamp on or off.
WWW
2
3
4
3. SETTING THE TIME
For accessing the cooking time
settings, delayed start and timer.
For displaying the time when the
oven is off.
4. DISPLAY
You can download the Safety Instructions
and the Use and Care Guide by visiting our
website www. aristonchannel. com and
following the instructions on the back of
this booklet.
1. Control panel
2. Fan
3. Lamp
6
4. Shelf guides (the level is
indicated on the wall of the
7
cooking compartment)
8
5. Door
6. Door lock (locks the door while
automatic cleaning is in progress
and afterwards)
9
7. Upper heating element/grill
8. Circular heating element (not
visible)
9. Identification plate (do not
remove)
10
10.
drinking water
5
5. ADJUSTMENT BUTTONS
For changing the cooking time
settings.
6. THERMOSTAT KNOB
Turn to select the temperature you
require when activating manual
functions.
EN
embossing for
6
1
Advertisement
Table of Contents

Related Manuals for Ariston FA3S 841 P IX A AUS


Summary of Contents for Ariston FA3S 841 P IX A AUS
- Page 1 DAILY REFERENCE GUIDE THANK YOU FOR PURCHASING AN You can download the Safety Instructions ARISTON PRODUCT and the Use and Care Guide by visiting our website www. aristonchannel. com and To receive more comprehensive help and following the instructions on the back of support, please register your product at this booklet.
-
Page 2: Baking Tray
ACCESSORIES WIRE SHELF DRIP TRAY * BAKING TRAY * SLIDING RUNNERS * Use to cook food or as a Use as an oven tray for Use for cooking all bread and To facilitate inserting or support for pans, cake tins cooking meat, fish, pastry products, but also for removing accessories. -
Page 3: First Time Use
FUNCTIONS CONVENTIONAL RISING For cooking any kind of dish on one shelf only. For helping sweet or savoury dough to rise effectively. Turn the thermostat knob to the icon to FORCED AIR activate this function. For cooking different foods that require the ECO FORCED AIR same cooking temperature on several shelves (maximum three) at the same time. -
Page 4: Daily Use
DAILY USE SELECT A FUNCTION that there is residual heat in the compartment. To select a function, turn the selection knob to the Please note: The time after which the icon switches off varies symbol for the function you require: the display will because it depends on a series of factors such as ambient light up and an audible signal will sound. -
Page 5: Setting The Timer
alternately with the remaining time. AUTOMATIC CLEANING FUNCTION – PYRO SETTING THE TIMER Do not touch the oven during the Pyro cycle. This option does not interrupt or program cooking Keep children and animals away from the oven but allows you to use the display as a timer, either during while a function is active or when the oven is during and after (until the room has finished off. -
Page 6: Cooking Table
COOKING TABLE RECIPE FUNCTION PREHEAT TEMPERATURE (°C) DURATION (Min) LEVEL AND ACCESSORIES 30 - 50 Leavened cakes 30 - 50 40 - 60 160 - 200 35 - 90 Filled cake (cheese cake, strudel, fruit pie) 160 - 200 40 - 90 25 - 35 Biscuits / tartlets 25 - 35... - Page 7 RECIPE FUNCTION PREHEAT TEMPERATURE (°C) DURATION (Min) LEVEL AND ACCESSORIES Toasted bread 2 - 6 Fish fillets / slices 230 - 250 15 - 30 * Sausages / kebabs / 15 - 30 * spare ribs / hamburgers Roast chicken 1-1.3 kg 200 - 220 55 - 70 ** Roast beef rare 1 kg...
-
Page 8: Cleaning And Maintenance
CLEANING AND MAINTENANCE Make sure that the oven has Do not use wire wool, abrasive Wear protective gloves. cooled down before carrying out scourers or abrasive/corrosive The oven must be disconnected any maintenance or cleaning. cleaning agents, as these could from the mains before carrying damage the surfaces of the Do not use steam cleaners. -
Page 9: Troubleshooting
CLICK & CLEAN - CLEANING THE GLASSES 3. Refit the intermediate pane (marked with “1R”) before refitting the inside pane: To position the panes 1. After removing the door and resting it on a soft of glass correctly, make sure that the “R” mark can be surface with the handle downwards, simultaneously seen in the left-hand corner. - Page 12 400011345609 Printed in Italy...