Table of Contents
Advertisement
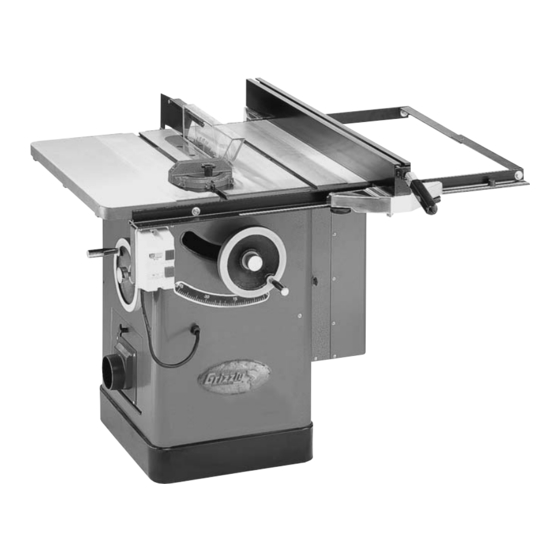
10" HEAVY-DUTY TABLE SAW
MODEL G1023Z, ZX & ZX3
INSTRUCTION MANUAL
COPYRIGHT © NOVEMBER 2001 BY GRIZZLY INDUSTRIAL, INC
WARNING: NO PORTION OF THIS MANUAL MAY BE REPRODUCED IN ANY SHAPE
OR FORM WITHOUT THE WRITTEN APPROVAL OF GRIZZLY INDUSTRIAL, INC.
REVISED NOVEMBER 2002, PRINTED IN TAIWAN
ONLINE MANUAL DISCLAIMER
THE INFORMATION IN THIS MANUAL REPRESENTS THE CONFIGURATION OF THE MACHINE AS IT IS CURRENTLY BEING SHIPPED. THE
MACHINE CONFIGURATION CAN CHANGE AS PRODUCT IMPROVEMENTS ARE INCORPORATED. IF YOU OWN AN EARLIER VERSION OF
THE MACHINE, THIS MANUAL MAY NOT EXACTLY DEPICT YOUR MACHINE . CONTACT CUSTOMER SERVICE IF YOU HAVE ANY QUESTIONS
ABOUT DIFFERENCES. PREVIOUS VERSIONS ARE NOT AVAILABLE ONLINE.
Advertisement
Table of Contents

Related Manuals for Grizzly G1023Z


Summary of Contents for Grizzly G1023Z
-
Page 1: Instruction Manual
INSTRUCTION MANUAL COPYRIGHT © NOVEMBER 2001 BY GRIZZLY INDUSTRIAL, INC WARNING: NO PORTION OF THIS MANUAL MAY BE REPRODUCED IN ANY SHAPE OR FORM WITHOUT THE WRITTEN APPROVAL OF GRIZZLY INDUSTRIAL, INC. REVISED NOVEMBER 2002, PRINTED IN TAIWAN ONLINE MANUAL DISCLAIMER THE INFORMATION IN THIS MANUAL REPRESENTS THE CONFIGURATION OF THE MACHINE AS IT IS CURRENTLY BEING SHIPPED. - Page 2 Some dust created by power sanding, sawing, grinding, drilling, and other construction activities contains chemi- cals known to the State of California to cause cancer, birth defects or other reproductive harm. Some examples of these chemicals are: • Lead from lead-based paints. •...
-
Page 3: Table Of Contents
SAFETY RULES FOR ALL TOOLS...2-3 ADDITIONAL SAFETY INSTRUCTIONS FOR TABLE SAWS...4 AVOIDING KICKBACK ...5 SAFETY ACCESSORIES ...5-6 INTRODUCTION COMMENTARY ...7 CIRCUIT REQUIREMENTS G1023Z ...8 G1023ZX ...9 G1023ZX3 ...10 GROUNDING ...11 EXTENSION CORDS ...11 MACHINE FEATURES TERMS & DEFINITIONS ...12-13 MAIN FEATURES ...13 SET UP UNPACKING ...14... -
Page 4: Safety Page Safety Rules For All Tools
G1023Z Series Heavy-Duty 10'' Table Saw VISITORS... - Page 5 13. NEVER OVERREACH. Keep proper foot- ing and balance at all times. G1023Z Series Heavy-Duty 10'' Table Saw 14. MAINTAIN TOOLS WITH CARE. Keep 15. DISCONNECT TOOLS before servicing 16. REDUCE THE RISK OF UNINTENTION-...
-
Page 6: Additional Safety Instructions For Table Saws
No list of safety guidelines can be com- plete. Operating this machinery may require additional safety precautions spe- cific to your shop environment. Failure to use reasonable caution while operating this machine could result in serious per- sonal injury. G1023Z Series Heavy-Duty 10'' Table Saw... -
Page 7: Avoiding Kickback
If you do not have a clear understanding of kick- back and how it occurs, do not operate this table saw. G1023Z Series Heavy-Duty 10'' Table Saw Safety Accessories Not using safety accessories could cause serious personal injury. Learn how to cor- rectly use each safety accessory. - Page 8 We also carry a wide selection of table inserts (Figure 2) in the Grizzly catalog or website. Be sure to hold the insert firmly in place with a piece of wood when creating slots. Never hold the table insert with your hand while cutting new slots.
-
Page 9: Introduction Commentary
SECTION 2: INTRODUCTION Commentary We are proud to offer the Grizzly Model G1023Z Series Table Saw. The Model G1023Z Series is part of a growing Grizzly family of fine wood- working machinery. When used according to the guidelines set forth in this manual, you can expect years of trouble-free, enjoyable operation and proof of Grizzly’s commitment to customer... -
Page 10: Circuit Requirements
The circuit you use should be dedicated, (i.e., the machine should provide the only draw from that circuit). If frequent circuit failures occur when using this machine, contact Department or your local electrical contractor. G1023Z Series Heavy-Duty 10'' Table Saw Service... -
Page 11: G1023Zx
Use a 30 amp circuit breaker or a 30 amp slow- blow fuse for 220V operation. G1023Z Series Heavy-Duty 10'' Table Saw The Model ZX does not come with a plug. When operating at 220V, use a NEMA-style L6-30 plug and receptacle as shown in Figure 6. -
Page 12: G1023Zx3
The circuit you use should be dedicated, (i.e., the machine should provide the only draw from that circuit). If frequent circuit failures occur when using this machine, contact Department or your local electrical contractor. G1023Z Series Heavy-Duty 10'' Table Saw Service... -
Page 13: Grounding
Operating this machine when it is not properly grounded can result in electric shock or electro- cution. G1023Z Series Heavy-Duty 10'' Table Saw Extension Cord Should it be necessary to use an extension make sure the cord is rated Hard Service (grade S) or better. -
Page 14: Machine Features Terms & Definitions
It is important that you read and become familiar with them before assembling, adjusting or operating this machine. Your safety is VERY important to us at Grizzly! Arbor: Metal shaft extending from the drive mechanism, to which the cutting blade is attached. -
Page 15: Main Features
Used primarily when making rabbet cuts with a dado blade. G1023Z Series Heavy-Duty 10'' Table Saw Main Features Set up and operation instructions will be easier to understand if you become familiar with the loca- tion and names of the basic features. -
Page 16: Set Up
SECTION 5: SET UP Unpacking The Model G1023Z Series Table Saws are shipped from the manufacturer in three carefully packed boxes. If you discover the machine is damaged after you have signed for delivery, immediately call our Customer Service for advice. - Page 17 10. Standard Blade Table Insert 11. Dust Port 12. Cleanout Door 13. Hardware Bag 14. Table Saw Unit (Not Shown) G1023Z Series Heavy-Duty 10'' Table Saw Figure 9C. G1023Z Series component layout. The hardware bag should contain the follow- ing: (1) 3mm Allen Wrench...
-
Page 18: Hardware Recognition Chart
Hardware Recognition Chart Use this chart to match up hardware pieces during the assembly process! -16- G1023Z Series Heavy-Duty 10'' Table Saw... -
Page 19: Clean Up
G1023Z Series Heavy-Duty 10'' Table Saw Site Considerations Floor Load The Model G1023Z Series Table Saws are a heavy load with a medium footprint. Most com- mercial or home shop floors should be sufficient to carry the weight of the machine. Reinforce the floor if you question its ability to support the weight. -
Page 20: Beginning Assembly
Re-check the flushness of the wings against the table above each bolt. Re-adjust if nec- essary. ® G1023Z Series Heavy-Duty 10'' Table Saw The table and the wings represent a very heavy load. DO NOT over-exert yourself while lifting or moving the table and the wings –... -
Page 21: Extension Wings
Figure 10. Using tape to shim for wing alignment. G1023Z Series Heavy-Duty 10'' Table Saw Fence & Rails Your Model G1023Z Series comes with a Shop ® Brand Fence & Rails. Refer to the manual included in the fence box for assembly instruc- tions. -
Page 22: Dust Hood
Dust Hood The Model G1023Z Series comes with a 4" dust hood and a cleanout door. To mount the dust hood and cleanout door: Mount the cleanout door into the square hole on the lower left side of the saw base. -
Page 23: Motor Brace
Slide the loosely assembled bracket onto the blade guard mounting shaft and tem- porarily hand tighten the nuts as shown in Figure 14 . G1023Z Series Heavy-Duty 10'' Table Saw Figure 13. Attaching the Blade Guard Mounting Bracket Figure 14. Blade guard mounting bracket ®... -
Page 24: Handwheel
Make sure it never contacts any part of the table insert. Repeat Step 6 with the blade in the 45° posi- tion. Figure 16. Setscrews on each corner of insert. G1023Z Series Heavy-Duty 10'' Table Saw... -
Page 25: Saw Blade
Figure 17. Figure 17. Changing saw blade. G1023Z Series Heavy-Duty 10'' Table Saw Blade Guard/Splitter To install a blade guard/splitter: Disconnect the machine from the power... - Page 26 Splitter Blade Figure 21. Improper splitter/blade alignment. Adjusted Rear Splitter Proper Alignment Figure 22. Proper splitter/blade alignment. G1023Z Series Heavy-Duty 10'' Table Saw Add washers here to move back of split- ter to the left. Add washers here to move front of split- ter to the left.
- Page 27 You can always adjust the splitter back to the left with wash- ers. 10. Tighten the adjustment bolt securely. G1023Z Series Heavy-Duty 10'' Table Saw Blade Adjustment Bolt Figure 23. Arbor bracket adjustment locations. 11. Moving the arbor bracket moves the V-belts DO NOT over- 12.
-
Page 28: Miter Gauge
Miter Gauge The miter gauge for the Model G1023Z Series has two setscrews in the miter bar which can be set to remove any loose movement between the miter bar and the T-slot. To adjust the miter gauge: Loosen or tighten the two miter bar... -
Page 29: Start Up
STOP button in case you need to shut the machine off immediately. The machine should run smoothly with little or no vibration. G1023Z Series Heavy-Duty 10'' Table Saw For your convenience, the adjustments listed below have been performed at the factory and no further setup is required to operate your machine. -
Page 30: Operations
The teeth are arranged in groups of five. The gullets are small and shallow within the groups of five teeth, similar to a cross-cut blade; then large and deep between the groups, like a ripping blade. Figure 27. Combination blade. G1023Z Series Heavy-Duty 10'' Table Saw... -
Page 31: Blade Selection
A typical stacked dado blade is shown in Figure 29. G1023Z Series Heavy-Duty 10'' Table Saw Figure 29. Optional dado blade. • Wobble Dado Blade—Also a dedicated dado blade, a wobble blade usually consists of a sin- gle blade that is tilted on the arbor shaft while it is spinning. -
Page 32: Crosscutting
Turn off the saw and allow the blade to come to a complete stop before removing the cut-off piece. Failure to follow this warn- ing could result in serious personal injury ⁄ " above the G1023Z Series Heavy-Duty 10'' Table Saw Figure 31. Cross-cut operation. -
Page 33: Ripping
The jointed edge of the workpiece must be slide against the fence during the cutting operation. G1023Z Series Heavy-Duty 10'' Table Saw Stand to the left of the blade line-of-cut when ripping a board. Serious personal injury could occur if kickback results. -
Page 34: Dado Operations
With one finger ready to push the OFF but- ton, turn the saw on. The blade should run smooth with no vibrations or wobbling. When the blade has reached full speed, per- form a test cut with a scrap piece of wood. G1023Z Series Heavy-Duty 10'' Table Saw... - Page 35 Figure 34. Figure 34. Single-blade dado cut. G1023Z Series Heavy-Duty 10'' Table Saw Never allow hands or arms to be above or behind the saw blade. Should kickback occur, the hands and arms could be pulled into the saw blade causing serious person- al injury.
-
Page 36: Rabbet Operations
To attach a sacrificial fence: Rabbet cutting with a dado blade requires the use of a sacrificial fence attachment as shown in Figure 35. Sacrificial Fence Wood Screws Dado Insert Rip Fence Figure 35. Sacrificial fence. G1023Z Series Heavy-Duty 10'' Table Saw... - Page 37 12. Re-attach the sacrificial fence to the metal fence with screws or clamps. G1023Z Series Heavy-Duty 10'' Table Saw 13. Slide the fence assembly over the saw blade. The blade should NOT touch the sacrificial fence.
- Page 38 (depth of rabbet channel desired). If the rabbet runs the length of the material, adjust the fence so the blade is aligned with the inside of your rabbet channel as shown in Figure 37. Figure 37. Rabbet cutting. G1023Z Series Heavy-Duty 10'' Table Saw...
- Page 39 Rotate the workpiece as shown in Figure 38 . Figure 38. Rabbet cutting. G1023Z Series Heavy-Duty 10'' Table Saw Perform the second cut to complete the rab- bet cut. Always replace the blade guard after dado- ing is complete.
-
Page 40: Maintenance
-38- Regular periodic maintenance on your Model G1023Z Series Table Saw will ensure its optimum mainte- performance. Make a habit of inspecting your machine each time you use it. Check for the following conditions and repair or replace when necessary: 1. -
Page 41: Lubrication
Lubrication The sealed ball bearings in the motor and throughout the Model G1023Z Series require no maintenance during their lifetime. When they do wear out, replacements can be obtained through the Grizzly Parts Department. Lubricate the areas indicated below every 12 months: BLADE ANGLING TRUNNION—The front and... -
Page 42: V-Belt
Pull off the old V-belts and replace them with new ones. Have the number from the belt ready when calling the service department for replacements. Raise the arbor and remove the board to adjust the V-belt tension. Tighten the motor mount bolt. G1023Z Series Heavy-Duty 10'' Table Saw... -
Page 43: Maintenance Log
Maintenance Log Maintenance Performed Date Approximate Hours Of Use G1023Z Series Heavy-Duty 10'' Table Saw -41-... -
Page 44: 45˚ & 90˚ Stops
45° stop bolt on the right side of the front trunnion. Use the 45° side of a combo square or a bevel gauge set at 45°. 90˚ Stop Bolt Figure 40. Geared trunnion. G1023Z Series Heavy-Duty 10'' Table Saw... -
Page 45: Blade Parallelism
Figure 41. Adjusting blade to miter slot. G1023Z Series Heavy-Duty 10'' Table Saw If the blade tip does not touch the end of the adjustable square similar to the first mea- surement, then the table will need to be adjusted. -
Page 46: Blade Parallelism
-44- 45˚ Bevel #1 Shim #2 Shim Figure 43. 45° blade parallelism measurement. 45˚ Bevel #1 Shim #2 Shim Figure 44. 45° blade parallelism measurement. G1023Z Series Heavy-Duty 10'' Table Saw #4 Shim #3 Shim #4 Shim #3 Shim... -
Page 47: Blade Alignment
– get assis- tance. G1023Z Series Heavy-Duty 10'' Table Saw 4. Reattach the table, making sure there is ade- 5. If the blade is still contacting the insert, 6. Recheck the blade to miter slot adjustments,... - Page 48 7. If the blade is still contacting the insert, repeat Steps 1-6. Check all other adjust- ments. 8. Recheck the blade to miter slot adjustments, and adjust as necessary. -46- G1023Z Series Heavy-Duty 10'' Table Saw...
-
Page 49: Wiring Diagram
G1023Z Series Heavy-Duty 10'' Table Saw -47-... - Page 50 -48- G1023Z Series Heavy-Duty 10'' Table Saw...
-
Page 52: Closure
Grizzly Service Department. Trained ser- vice technicians will be glad to help you. If you have any comments regarding this manual, please write to Grizzly at the address below: Grizzly Industrial, Inc. Technical Documentation P.O. Box 2069... -
Page 53: Data Sheet
Motor: Type (G1023Z & ZX / G1023ZX3) ...TEFC Capacitor Start Induction / Three-Phase Horsepower (G1023Z / G1023ZX / G1023ZX3) ...3 HP ⁄ 5 HP / 5 HP Phase (G1023Z / G1023ZX / G1023ZX3) ...Single / Single / Three Voltage ...220V Amps (G1023Z / G1023ZX / G1023ZX3) ...18A / 25A / 15A... -
Page 54: Parts Breakdowns & List
-52- G1023Z Series Heavy-Duty 10'' Table Saw... - Page 55 055 P1023055 MOTOR PULLEY 056 P1023056 MOTOR 3 HP 220V 56A P1023056A MOTOR 5 HP 220V 56B P1023056B MOTOR 5 HP 3-PHASE G1023Z Series Heavy-Duty 10'' Table Saw REF# PART# 057 PB76 058 PB03 060 PB07 061 PW07 "-16 062 P1026062 063 P1023063 ⁄...
- Page 56 536 P1023536 537 P1023537 ⁄ " 538 PB26 539 PW06 540 PN05 541 PB07 542 PW07 543 PN02 G1023Z Series Heavy-Duty 10'' Table Saw DESCRIPTION SUPPORTING ARM PIVOT PIN RETAINER RETAINER SPRING SPACER SPLITTER PAWL ROLL PIN 4 X 22...
-
Page 57: Troubleshooting
Hand wheels won’t turn. Bullets are wedged. Roll pin or setscrew in worm gear is contacting geared trunnion. G1023Z Series Heavy-Duty 10'' Table Saw CORRECTIVE ACTION Check power line for proper voltage. Inspect all lead connections on motor for loose or open con- nections. - Page 58 Notes -56- G1023Z Series Heavy-Duty 10'' Table Saw...
-
Page 59: Push Stick Pattern
G1023Z Series Heavy-Duty 10'' Table Saw -57-... -
Page 60: Warranty And Returns
WARRANTY AND RETURNS Grizzly Industrial, Inc. warrants every product it sells for a period of 1 year to the original purchaser from the date of purchase. This warranty does not apply to defects due directly or indirectly to misuse, abuse, negligence, accidents, repairs or alterations or lack of maintenance. -
Page 61: Warranty Card
Do you think your purchase represents good value? ___Yes Would you recommend Grizzly Industrial to a friend? ___Yes Would you allow us to use your name as a reference for Grizzly customers in your area? Note: We never use names more than three times. ___Yes Comments:_________________________________________________... - Page 62 FOLD ALONG DOTTED LINE FOLD ALONG DOTTED LINE Send a Grizzly Catalog to a friend: Name_______________________________ Street_______________________________ City______________State______Zip______ GRIZZLY INDUSTRIAL, INC. P.O. BOX 2069 BELLINGHAM, WA 98227-2069 TAPE ALONG EDGES--PLEASE DO NOT STAPLE Place Stamp Here...
- Page 63 Buy Direct and Save with Grizzly Visit Our Website Today And Discover Why • • • – Trusted, Proven and a Great Value! ® Grizzly Is The Industry Leader! ® SECURE ORDERING ORDERS SHIPPED WITHIN 24 HOURS E-MAIL RESPONSE WITHIN ONE HOUR...