Table of Contents
Advertisement
Advertisement
Table of Contents

Related Manuals for Konica Minolta pagepro 1480MF


Summary of Contents for Konica Minolta pagepro 1480MF
- Page 1 1480MF User’s Guide...
-
Page 2: Dear Customer
For your security and comfort, we urge you to carefully read the chapter Security before attempting use. In buying this multifunction machine, you have opted for a quality Konica Minolta product. Your device satisfies all of the different needs of a modern office automation tool. -
Page 3: Table Of Contents
MFP Laser Contents Copy Simple copy ECO mode copy Advanced copying Dear customer ID Card Copy mode Consumables Special setup for the copying Security Resolution setup Security directives Zoom setup Analysis origin setup Note to users in the United States Contrast setup of America Brightness setup... - Page 4 MFP Laser Installing the drivers using the Companion Suite Pro software Installing the drivers manually Connections Multifunction Terminal's Supervision Checking the connection between the PC and the multifunction machine Companion Director Graphical presentation Utilities and applications activation Companion Monitor Graphical presentation Device management Selecting the current device Status of the connection...
-
Page 5: Security
MFP Laser Security Security directives Before turning on your device, check that the outlet that you are going to plug it into conforms to the indications shown on the information plate (voltage, current, power network frequency) located on your device. This device shall be connected to a single phase power network. -
Page 6: Eme Compliance For Canada
MFP Laser EME Compliance for Canada This Class "B" digital apparatus complies with Canadian ICES-003. Cet appareil numérique de la classe "B" est conforme à la norme NMB-003 du Canada. Laser Safety Information CAUTION: Use of controls, adjustments, or performance of procedures other than those specified in this guide may result in hazardous light exposure. -
Page 7: Positions Of Safety Labels On The Machine
MFP Laser Positions of Safety labels on the machine The device has warning labels at the positions shown below. For your safety, you must never touch these surfaces when you remove a paper jam or when you replace the Toner cartridge. Symbols for the main power switch In accordance with IEC 60417, this machine uses the following symbols for the main power switch: means POWER ON. -
Page 8: Regulatory Information
MFP Laser Regulatory Information Certifications in Europe The CE mark applied to this product, symbolizes declaration of conformity with the following applicable European Union Directives, as of the dates indicated: December 12,2006: Council Directive 2006/95/EC as amended. Approximation of the laws of the member states related to low voltage equipment. -
Page 9: Environment
MFP Laser Environment The preservation of the environment is of importance to the manufacturer. The manufacturer wishes to service the installations with respect to the environment and has chosen to integrate the environmental performance in the whole lifecycle of its products, throughout manufacturing, release, use and disposal. The packaging The (green point) logo indicates that a contribution is given to an approved national organization to improve the packaging salvage and recycling infrastructures. -
Page 10: Software Use License
MFP Laser Software use license CAREFULLY READ ALL THE TERMS AND CONDITIONS OF THE PRESENT LICENSE BEFORE OPENING THE SEALED ENVELOPE CONTAINING THE SOFTWARE. OPENING THIS ENVELOPE INDICATES THAT YOU ACCEPT THESE TERMS AND CONDITIONS. In case you should not accept the terms of this license, the DVD-ROM packaging should be returned to the retailer unopened, along with the other components of the product. -
Page 11: Applicable Law
MFP Laser Applicable law This license is under the French law. Any dispute following the interpretation or execution of this license will be submitted to the Paris Court. Given the continuous technology development, the manufacturer reserves the right to modify the technical specifications indicated for this product, at any time, without prior notice, and/or to stop manufacturing of the product. -
Page 12: Installation
MFP Laser Installation Location conditions By choosing an appropriate location, you preserve the longevity of the machine. Check that the selected location has the following characteristics: - Choose a well ventilated location. - Make sure not to obstruct the ventilation grids located on the left and right sides of the device. During the installation, make sure to place the machine thirty centimeters away from the surrounding objects so all the lids can be easily opened. -
Page 13: Safety Information
MFP Laser - If liquid or metallic item gets accidentally inside the machine, turn it off immediately, unplug the power cord and contact your retailer. Otherwise, you will face a fire hazard or an electric shock hazard. - In case of heat, smoke, unusual smell or abnormal noise emissions, turn the machine off, unplug the power cord immediately and contact your retailer. -
Page 14: Power Supply
MFP Laser - Be careful not to cut yourself on any sharp edges when you reach inside the product to remove misfed sheets of paper or masters. - For environmental reasons, do not dispose of the product or expended supply wastes at household waste collection point. -
Page 15: Rules For Use Symbols
MFP Laser Rules for use symbols WARNING Indicates important safety notes. Ignoring these notes could result in serious injury or death. Be sure to read these notes. They can be found in the Safety information section of this manual. CAUTION Indicates important safety notes. -
Page 16: Terminal Description
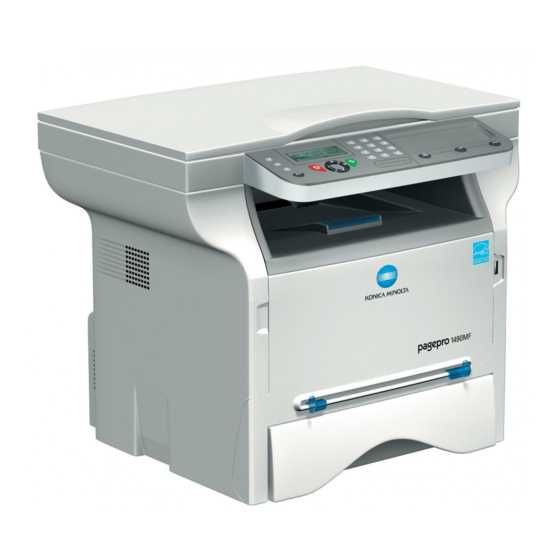
MFP Laser Terminal description Front and Back sides 1. Control panel 8. Manual input tray 2. Paper jam cover 9. Paper tray 3. Power supply cord connection 10. Cartridge access cover 4. On/Off switch 11. Fold-down stopper for paper delivery 5. -
Page 17: Command Panel
MFP Laser Command panel 1. Screen. 11. Key : stops the current operation. 2. Digital keypad. 12. Key : sets up the activation delay and toner save in 3. Key : document analysis to the PC or a media copy mode. (USB key). -
Page 18: Packaging Contents
MFP Laser Packaging contents Device installation The packaging contains the items listed below: 1 Unpack the device. 2 Install the device respecting the security notices Multifunction device stated at the beginning of this booklet. 3 Remove all stickers from the machine. 4 Remove the plastic protection film from the screen. -
Page 19: Cartridge Installation
MFP Laser 3 Setup the back side feed cassette stop by pushing assure the maximum copies per cartridge. the "PUSH" lever (A). Hold it by its handle. Then adjust the lateral paper guides to the paper format by pushing lever (B) located on the left guide. -
Page 20: Starting Your Device
MFP Laser Starting your device 1 Select the desired language using the buttons and confirm with OK. The setup is now complete and the functions list is Device connection automatically printed out. Before plugging the power cord, it The LCD screen displays the message P if no APER EMPTY is imperative to refer to the... - Page 21 MFP Laser appear on the reverse side. • Set envelope by pressing the folding line of four edges properly after releasing air inside. • Set envelope in a proper position after aligning in case it is bent or warped. • Paper conditioning is not allowed.
-
Page 22: Copy
MFP Laser Copy 5 Choose with the buttons the printing option (see examples below) depending on the copy mode that you want: 1 Page to 1, 1 Page to 4 or 1 page to 9. Your machine has the function to make one or more copies. -
Page 23: Special Setup For The Copying
MFP Laser Special setup for the copying 2 Enter the desired number of copies and confirm with the OK button. Setups done through this menu become the device 3 Choose the paper tray AUTOMATIC or MANUAL default setups after you confirm. with the buttons , then confirm with the OK button. -
Page 24: Analysis Origin Setup
MFP Laser Analysis origin setup Paper tray selection If you want, you can change the origin of the scanner. The Automatic selection can have two meanings depending on the paper format defined on the paper By entering new values for X and Y in mm (X < 209 and trays. -
Page 25: Top And Bottom Printing Margins Setup
MFP Laser Top and bottom printing margins setup If you want to, you can offset the lateral margins of the document towards the top or the bottom during printing. 856 - ADVANCED FCT/SCAN. & PRINT/TOP PRINT. 1 Press , enter 856 using the keypad. 2 Setup the top / bottom margins offsets (by 0.5 mm steps) with the buttons 3 Confirm by pressing the OK button. -
Page 26: Parameters/Setup
MFP Laser Parameters/ Technical Parameters As delivered your machine is preset by default. However, Setup you may adjust it to meet your requirements by resetting the technical parameters. To set the technical parameters: You can setup your machine as you like depending on the use. -
Page 27: Printing The Functions Guide
MFP Laser Printing the functions guide 3 Press OK to confirm. 4 With the buttons , choose ON and confirm with OK. The printing is not possible on A5 Important 5 Quit this menu by pressing the button. (or Statement) paper format. 51 - PRINT / FUNCTIONS LIST Lock the Media service This function prevents access to the Media service. -
Page 28: Display The Consumables Status
MFP Laser Display the consumables status You can read at any time the remaining toner in the cartridge. This level appears in percentage. 86 - ADVANCED FCT / CONSUMABLES 1 Press , enter 86 using the keypad. 2 The available toner percentage appears on the screen. -
Page 29: Games
MFP Laser Games Print the solution to a grid The printing is not possible on A5 Important (or Statement) paper format. Sudoku 522 - PRINT / SUDOKU / PRT SOLUTION Sudoku is a Japanese puzzle. The game is in a grid 1 Press , enter 5 using the keypad. -
Page 30: Network Features
MFP Laser Network features Radio ad-hoc network In an ad-hoc network, the devices communicate directly with each other without passing through an access point. You may connect your multifunction terminal to a wireless The speed of communication across the whole radio network. -
Page 31: Connect Your Wlan Adaptor
MFP Laser machine, you must enter the parameters that will allow a You can be sure of perfect WLAN network to recognise your machine. communication if you use an Note approved adaptor in conjunction with On your machine you will find simple instructions your PC. -
Page 32: Referring To Or Changing Your Network Parameters
MFP Laser Referring to or changing your 3 Select PARAMETERS using the keys confirm with OK. network parameters 4 Select GATEWAY using the keys confirm with OK. Each of the parameters of your network may be changed 5 The number of your gateway will appear in the as your network develops. -
Page 33: An Example Of How An Ad-Hoc Network May Be Set Up
MFP Laser 2827 - SETUP / WLAN / PARAMETERS / SECURITY Once your connection has been set up, you must install the network printer driver on your PC so that you can print This parameter allows you to make your network secure your documents. -
Page 34: Setting Up The Pc
MFP Laser Setting up the PC For this section, refer to the instructions supplied by the manufacturer of the WLAN USB key to help you to find and join the "house" network. 1 You may need to install the software for the WLAN USB key on the PC, if this has not already been done. -
Page 35: Usb Memory Key
MFP Laser USB memory key 4 The list is shown in a table with the following information: the analysed files are indexed in an incremental You can connect a USB memory Key on the front side of 1 by 1 order, your machine. -
Page 36: Delete Your Files Located In The Key
MFP Laser Analyse the USB memory key content confirm with OK. Select the printing format: THICK or NORMAL and confirm with OK to start printing. After a period of inactivity, your machine will return to the main menu. To view the USB memory key again please 5 Quit this menu by pressing the button. - Page 37 MFP Laser With the IMAGE format, if you have selected: • BLACK&WHITE, the picture will be saved in TIFF format. • COLOUR, the picture will be saved in JPEG format. You can choose the image resolution that will be digitized to the USB memory key;...
-
Page 38: Pc Features
MFP Laser PC Features Software installation This section describes the following installation procedures: Introduction • full installation of the Companion Suite Pro software, • installation of the drivers only. The Companion Suite Pro software allows the connection of a personal computer with a compatible multifunction Installing the full software package machine. - Page 39 MFP Laser 9 The final installation is ready to be executed. Click on the I button. NSTALL 6 The welcome screen appears. Click on the N button to launch the installation of the Companion Suite Pro in your PC. The following screen appears to indicate the progression of the installation.
-
Page 40: Installing Drivers Only
MFP Laser Installing drivers only 6 Place your cursor on C OMPANION UITE and confirm with left-click of the mouse. This section describes the following installation procedures: • installation of drivers using the Companion Suite Pro software, • manual installation of drivers. Installing the drivers using the Companion Suite Pro software Turn your PC on. -
Page 41: Installing The Drivers Manually
MFP Laser 11 Select the destination folder for installation and Installing the drivers manually click on the N button. You can install the printer and scan drivers manually without running any setup software. This installation mode is only possible Note on Windows 2000, XP and Vista. -
Page 42: Connections
MFP Laser 5 Select L LL2 in the list and click on N 2 Power on your multifunction machine. ASER The PC detects the device and the drivers are automatically installed. 3 Once the installation is finished, a message indicates that the drivers are installed correctly. You can now use the multifunction machine to print or 6 A screen informs you that the drivers have been scan your documents. -
Page 43: Multifunction Terminal's Supervision
MFP Laser Multifunction Terminal's Supervision Companion Monitor The software that you have installed contains two Graphical presentation multifunction machine management applications, and C , which OMPANION IRECTOR OMPANION ONITOR Run the application by clicking on the C OMPANION allow you to: icon located on your desktop or from the menu ONITOR •... -
Page 44: Status Of The Connection
MFP Laser Status of the connection 3 Select the desired scan R in the drop- ESOLUTION down menu. The status of the connection between the current device and the PC is indicated by a colour. The following table defines the possible states of the connection. Colour State Yellow... -
Page 45: Companion Suite Pro Functionalities
MFP Laser Companion Suite Pro functionalities To scan a document from PaperPort: 1 Click on F > S Document analysis 2 Select the desired scanner. The document analysis can be carried out in two ways: • either by the S function (application accessible from the Companion Director window or from the SCAN button on the machine),... -
Page 46: Printing In Duplex Mode With The Multifunction Machine
MFP Laser Printing in duplex mode with the multifunction The PC generates and prints a page machine explaining how to reload the sheets for a duplex job. Read this page The machine offers the possibility to print a document in carefully and place it back with the manual duplex mode from your PC. -
Page 47: Software Uninstallation
MFP Laser Software Uninstallation Uninstall the drivers using the Companion Suite Pro software This section describes the following procedures: Run the programs removal from the menu S TART >A >C >C ROGRAMS OMPANION UITE OMPANION UITE • full uninstallation of the Companion Suite Pro LL2 >... - Page 48 MFP Laser 6 Select the option R EMOVE DRIVER AND DRIVER and click on the OK button. PACKAGE 7 A confirmation screen appears. Click on the Y button to continue. 8 Click on the D button to confirm the removal. ELETE To remove scan and modem drivers: 1 Open the D...
-
Page 49: Maintenance
MFP Laser Maintenance To replace the toner cartridge, proceed as shown below. 1 Insert the smart card provided with the new toner cartridge as shown on the picture below. Service General information For your safety, it is imperative to refer to the security directives CAUTION presented in chapter Security, page 1. -
Page 50: Issues With Smart Cards
MFP Laser Printer issues A wait message appears. PLEASE WAIT Error messages The smart card is read. When the printer encounters any of the problems described below, the corresponding message is shown NEW TONER on the machine display. REMOVE CARD Message Action 9 Remove the smart card from the reader, your... -
Page 51: Paper Jam
MFP Laser Paper jam PC printing issues When printing, a sheet of paper may get stuck in the This section details how the machine handles a print printer or the paper tray and cause a paper jam. request after having encountered an issue (paper jam, connection loss, etc.). -
Page 52: Pc Printing Via Wlan Connection
MFP Laser PC printing via WLAN connection Firmware update Updating the machine firmware requires that the Companion Suite Pro software be installed on your PC, Issue encountered Print request handling and that the PC is connected to the machine (see PC Features, page 34). -
Page 53: Specifications
MFP Laser Specifications Physical specifications Dimensions: 344 x 447 x 386 mm Weight: 11.6 kg Electrical specifications Power supply (see rating plate): Single phase 220-240 V - 50/60 Hz - 4.5 A Electric consumption: 10 W typical in powersave 33 W typical in standby 450 W average during printing (900W peak) Environmental specifications Operating temperature:... -
Page 54: Consumable Specifications
MFP Laser Consumable specifications Reference paper Scanner : Inapa tecno SPEED A4 Printer : Ricoh T6200 A4 Specifications are subject to changes for improvement without notice. - 50 -...