Table of Contents
Advertisement
Quick Links
Advertisement
Table of Contents

Related Manuals for Grundig CDS 5000 DEC


Summary of Contents for Grundig CDS 5000 DEC
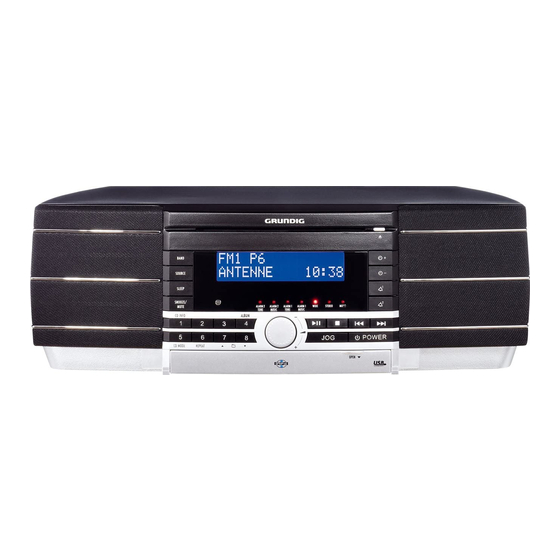
- Page 1 HIFI MICRO SYSTEM CDS 5000 DEC...
-
Page 2: Table Of Contents
CONTENTS ____________________________________________ Set-up and safety Overview The hi-fi system controls LEDs on the hi-fi system The back of the hi-fi system The remote control Connection and preparation Settings Setting the time Setting and storing radio stations General functions Tuner mode Selecting the TUNER input source Selecting a preset Stereo/mono reception... -
Page 3: Set-Up And Safety
SET-UP AND SAFETY ___________________________ Please note the following instructions when setting up the system: The hi-fi system is designed for the playback of audio signals. Any other use is expressly prohibited. BAND SOURCE SLEEP SNOOZE/ ALARM 2 ALARM 2 ALARM 1 ALARM 1 WIDE STEREO... -
Page 4: Overview
OVERVIEW ____________________________________________ The hi-fi system controls BAND SOURCE SLEEP SNOOZE/ ALARM2 ALARM2 ALARM1 ALARM1 WIDE STEREO MONO MUTE TONE MUSIC TONE MUSIC CD INFO SEARCH INTRO ALBUM POWER CD MODE REPEAT OPEN General information POWER Switches the hi-fi system to and from standby mode. The only way to completely disconnect the hi-fi system from the mains supply is to pull out the plug. - Page 5 OVERVIEW ____________________________________________ BAND SOURCE SLEEP SNOOZE/ ALARM2 ALARM2 ALARM1 ALARM1 WIDE STEREO MONO MUTE TONE MUSIC TONE MUSIC CD INFO SEARCH INTRO ALBUM POWER CD MODE REPEAT SD/MMC Infrared sensor for remote control signals. Auto dimmer sensor. Automatically adjusts the brightness of the backlight display to the brightness of the surroundings.
- Page 6 OVERVIEW ____________________________________________ BAND SOURCE SLEEP SNOOZE/ ALARM2 ALARM2 ALARM1 ALARM1 WIDE STEREO MONO MUTE TONE MUSIC TONE MUSIC CD INFO SEARCH INTRO ALBUM POWER CD MODE REPEAT OPEN CD mode CD compartment Slot for inserting CDs. Ejects the CD. Starts and pauses CD playback. In MP3 and CD-DA mode: press briefly to select the next track, press and hold down to search forwards for a particular passage.
- Page 7 OVERVIEW ____________________________________________ BAND SOURCE SLEEP SNOOZE/ ALARM2 ALARM2 ALARM1 ALARM1 WIDE STEREO MONO MUTE TONE MUSIC TONE MUSIC CD INFO SEARCH INTRO ALBUM POWER CD MODE REPEAT SD/MMC ALBUM In MP3 mode: press once to view the name of the album, press twice to view the name of the track.
- Page 8 OVERVIEW ____________________________________________ BAND SOURCE SLEEP SNOOZE/ ALARM2 ALARM2 ALARM1 ALARM1 WIDE STEREO MONO MUTE TONE MUSIC TONE MUSIC CD INFO SEARCH INTRO ALBUM POWER CD MODE REPEAT OPEN Timer mode Press and hold down to activate the setting for alarm time 1. Briefly press to switch the alarm standby for alarm time 1 on or off.
-
Page 9: Leds On The Hi-Fi System
OVERVIEW ____________________________________________ LEDs on the hi-fi system ALARM2 ALARM 2 ALARM 1 ALARM 1 WIDE STEREO MONO TONE MUSIC TONE MUSIC ALBUM Z ALARM 2 Lights up red if the alarm is switched to TONE signal tone for alarm time 2. Z ALARM 2 Lights up red if the alarm is switched to radio station, CD or USB for alarm time 2. -
Page 10: The Back Of The Hi-Fi System
OVERVIEW ____________________________________________ The back of the hi-fi system FM ANTENNA ANTENNA INPUT INPUT OUTPUT 75 OHMS Power cord. AC ~ The only way to completely disconnect the hi-fi system from the mains supply is to pull out the plug. Switches between external and internal (built-in) EXT. -
Page 11: The Remote Control
OVERVIEW ____________________________________________ The remote control Switches the hi-fi system to and from ON/OFF standby mode. Press and hold down to activate the setting for alarm time 1. Briefly press to switch the alarm standby for alarm time 1 on or off. Press and hold down to activate the set- ting for alarm time 2. - Page 12 OVERVIEW ____________________________________________ In MP3 and CD-DA mode: the elapsed CD INFO playing time of the track appears. SEARCH In MP3 and CD-DA mode: switches between the various search functions. In USB and SD/MMC mode: switches between the USB and CARD input sources.
-
Page 13: Connection And Preparation
CONNECTION AND PREPARATION Connecting the antennas Plug the roof antenna cable into the antenna socket »FM ANTENNA« on the hi-fi. Notes: Switch the »INT. EXT.« (on the back of the hi-fi) to »EXT.« for FM ANTENNA ANTENNA INPUT INPUT OUTPUT 75 OHMS connecting the roof antenna. -
Page 14: Connecting External Devices
CONNECTION AND PREPARATION Connecting external devices Connect the audio output of the external device to the audio input socket »AUX« under the front flap of the hi-fi system CD MODE REPEAT using a stereo jack plug (3,5 mm) connect the audio input socket »AUX INPUT«... -
Page 15: Inserting A Memory Card
CONNECTION AND PREPARATION Inserting a memory card The hi-fi player supports SD and MMC memory cards. ARCH INTRO ALBUM Switch off the hi-fi system. POWER PEAT Insert the card carefully into the card slot »SD/MMC« (under SD/MMC the front flap) with the contacts facing downwards until it latches into place. - Page 16 CONNECTION AND PREPARATION Putting the battery in the remote control Pull off the film from the battery. Pull out the battery holder. When inserting the battery (3 V, lithium), make sure the positive terminal (+) is facing upwards and the buttons on the remote control are facing downwards.
-
Page 17: Settings
SETTINGS ______________________________________________ Setting the time When connecting up the hi-fi system to the main power supply for the first time, switch to standby mode. The time appears in the display. Briefly press » « or » –« on the hi-fi system as often as necessary. - Page 18 SETTINGS ______________________________________________ Storing stations as presets Select the frequency band (FM1, FM2 or AM) with »BAND«. Make the » « setting using » « on the remote control – »– « on the hi-fi system. To save the station, press and hold down »1 ...
- Page 19 SETTINGS ______________________________________________ Settings in the jog menu You can find the settings in the jog menu for bass, treble, audio format, snooze in alarm mode, ticker and static text in MP3 and RDS modes and 12/24 hour clock format. Switch on the hi-fi system by pressing » ON/OFF«.
-
Page 20: General Functions
GENERAL FUNCTIONS ________________________ Switching on and off Switch the hi-fi system on from standby mode by pressing » ON/OFF«. – The last input source used is automatically selected. Switch the hi-fi system on from standby mode by pressing » ON/OFF«. –... -
Page 21: Rds Information
TUNER MODE _______________________________________ Selecting the tuner input source Press »SOURCE« to select TUNER as the input source. – The most recently selected channel is activated (Last Station Memory). – Display: e.g. » « or » «. Selecting a preset Select the frequency band (FM1, FM2 or AM) with »BAND«. Select the preset with »1 ... -
Page 22: Tuner Mode
TUNER MODE _______________________________________ Viewing RDS information If an RDS station is being received, the frequency briefly appears in the display followed by the station name and the radio text (TEXT) as ticker text. Note: This is provided that in the jog menu at » «... - Page 23 CD MODE ______________________________________________ The hi-fi system is suitable for music CDs bearing the logo shown here (CD-DA), and for CD-Rs and CD-RWs with audio data or MP3 formats. In MP3 mode, the terms “album” and “file” are very important. “Album” corresponds to a folder on a PC, “file” to a file on a PC or a CD-DA track.
-
Page 24: Cd Mode
CD MODE ______________________________________________ Inserting a CD Insert a CD in the compartment with its label facing upwards. – Display: » «. – In MP3 mode: the hi-fi system scans the contents of the CD. The display briefly shows the disc format » «... -
Page 25: Displaying Other Information
CD MODE ______________________________________________ Pausing and resuming playback In CD mode, press »SOURCE« to select another input source or »ON/OFF« on the hi-fi to switch to standby. Press »SOURCE« to select the CD input source or switch the hi-fi system on from standby mode by pressing »ON/OFF«. –... -
Page 26: Viewing The Name Of The Album Or Tracks (Mp3 Only)
CD MODE ______________________________________________ Viewing the name of the album or tracks (MP3 only) You can view the name of the current album or track with this function. Press »ALBUM«. – You will see the name of the album if it has been stored. Press »ALBUM«... -
Page 27: Repeating A Track (Repeat One)
CD MODE ______________________________________________ Searching for albums by name Press »SEARCH« to select search mode. – Display: » «. You can select the letter using » « on the remote control or – »– « on the hi-fi system. Use » «... -
Page 28: Repeating All The Tracks On An Album (Mp3 Only)
CD MODE ______________________________________________ Repeating all the tracks on an album (MP3 only) Press » II« to start playback. Select the repeat function by pressing »REPEAT« repeatedly until the display shows: » « and then » «. – All the tracks on the current album are played back repeatedly. To quit this function, press »REPEAT«. -
Page 29: Sd/Mmc And Usb Mode
SD/MMC AND USB MODE ________________ The card slot and the USB port can be occupied at the same time. Press »SEARCH« to switch between the input sources. Playing the contents of a memory card Insert a memory card in the card slot »SD/MMC« (under the front flap). -
Page 30: Timer Mode
TIMER MODE ________________________________________ Your hi-fi system has two timer modes: – The switch-on timer, which switches the hi-fi system on at the set time and wakes you with an alarm or music. – The sleep timer, which switches the hi-fi system off at a preset time. Switch-on timer Setting the switch-on timer The time must be set on the hi-fi system. - Page 31 TIMER MODE ________________________________________ Activating and deactivating the alarm Press »e 1« or »e 2« briefly to activate the alarm. – Display: » « or » «. – The red LED »Z ALARM1 MUSIC« or »Z ALARM2 MUSIC« lights up. To switch from music to signal tone, briefly press »e 1«...
-
Page 32: Sleep Timer
TIMER MODE ________________________________________ Sleep timer Setting the sleep timer Switch on the hi-fi system by pressing »ON/OFF« and select the input source you require. Call up the function with »SLEEP«. – Display: » «. Set the switch-off time (15, 30, 45, 60, 90 or 120 minutes) by pressing »SLEEP«. - Page 33 INFORMATION _____________________________________ Cleaning the CD unit If the device is unable to scan CDs perfectly, use a standard, commercially available cleaning CD to clean the laser optics. Other cleaning methods may damage the laser optics. Use a lint-free cloth for cleaning the CD and always wipe it from the inside out in a straight line.
-
Page 34: Information
INFORMATION _____________________________________ General information on laser devices This device is a CLASS 1 LASER PRODUCT. This means that the laser is designed in such a way as to ensure that the maximum permissible emission value cannot be exceeded under any circumstances. CLASS 1 Caution: LASER PRODUCT... -
Page 35: Environmental Note
INFORMATION _____________________________________ Environmental note This product has been made from high-quality parts and materials which can be re-used and recycled. Therefore, do not throw the product away with normal household waste at the end of its life. Take it to a collection point for recycling electrical and electronic devices. - Page 36 Grundig Multimedia B.V. Atrium, Strawinskylaan 3105 NL-1077 ZX Amsterdam http://www.grundig.com • • 06/30 72011 407 2000...