
Related Manuals for Grundig Ovation CDS 6380 S


Summary of Contents for Grundig Ovation CDS 6380 S
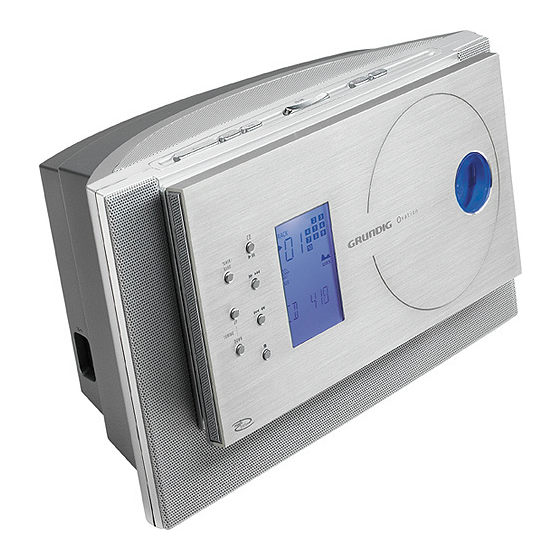
- Page 1 HIFI STEREO MICRO SYSTEM Ovation CDS 6380 S DEUTSCH ENGLISH FRANÇAIS ITALIANO PORTUGUÊS ESPANOL...
-
Page 2: Table Of Contents
The sound concept from Ovation. Magic Fidelity is a new, three-channel active loudspeaker system developed and patented by Grundig, which produces powerful and brilliant sound. A bass speaker as well as two medium and treble speakers, each in their own casing,... -
Page 3: Set-Up And Safety
SET-UP AND SAFETY ___________________________________________ Please note the following information when setting up the system: The device is designed for the playback of audio signals. Any other use is expressly prohibited. If you want to set up the device on wall shelves or in cupboards, please ensure vation that it is adequately ventilated. -
Page 4: Overview
OVERVIEW ________________________________________________________________________ Operating controls on the device vation Controls on the front Tuner mode TUNER/BAND Switches the device on with the input source, » « selects the input source » « Selects the frequency band – » « or » «... -
Page 5: General Information
OVERVIEW __________________________________________________________________________________ VOLUME 5 a a a Press briefly to select the previous track. Hold down to look for a particular passage. Ends CD playback Deletes the track memory for the CD Controls on the top General information ON/OFF Switches the device to and from standby mode SLEEP For setting the sleep timer SNOOZE... - Page 6 OVERVIEW __________________________________________________________________________________ Controls on the sides AC ~ Connection jack for the power cord on the left side of the device The device is only disconnected from the mains once you remove the power cord Audio signal input for an external device on the right hand side Headphone jack for connecting a headphone set with a jack plug (ø...
-
Page 7: Display Elements On The Device
OVERVIEW __________________________________________________________________________________ Display elements on the device In standby mode – displays the time and special TRACK PRESET functions The »JAZZ« sound setting is activated JAZZ -< The Ultra Bass System is activated In tuner mode – displays the wavelength, frequency, USER CLASSIC POP JAZZ ROCK... -
Page 8: The Remote Control
OVERVIEW __________________________________________________________________________________ The remote control ON/OFF Switches the device to and from standby mode Selects the input source » « In CD mode – starts and pauses playback In tuner mode – deletes individual preset stations ON/OFF In CD mode – ends playback of the CD s s s 6 In tuner mode –... -
Page 9: Connection And Preparation
CONNECTION AND PREPARATION ________ Connecting an external device Using the stereo jack plug (ø 3.5 mm), connect the sound output jacks of the external device (for example, PC or MP3-Player) to the » AUX« socket on the device. Note: Switch off the device when connecting it to an external system. Connecting headphones Insert the headphone plug (ø... -
Page 10: Additional Information For Units Sold In The Uk
In no circumstance must any of the wires be connected to the terminal marked with the letter “E”, earth symbol ”, coloured green, or green & yellow. “ Replacement mains lead sets can be obtained from your local dealer, or by contacting Grundig Consumer Relations (01788 570088) Moulded 3-pin lead set, suitable for UK use:... -
Page 11: Settings
SETTINGS ____________________________________________________________________________ Setting the clock When the device is plugged in for the first time, the time and day displays will flash indicating that they need to be set. The following settings may only be per- formed in standby mode. To set the 12-hour format, briefly press »... -
Page 12: Setting And Storing Radio Stations
SETTINGS ____________________________________________________________________________________ Setting and storing radio stations Automatic station search After the device has been connected to the mains for the first time, it searches in tuner mode on the FM frequency band for up to 40 stations which are most easi- PRESET ly received and stores them. -
Page 13: Deleting Settings
SETTINGS ____________________________________________________________________________________ Press » 5 a § « or » s s s 6 « to select the desired preset position. Note: If stations are already stored on the preset positions, they are overwritten when new stations are stored. PRESET Press »PROG./RAND./TIME«... -
Page 14: General Functions
GENERAL FUNCTIONS _________________________________________ Switching on and off Press »ON/OFF« to switch on the device from stand-by mode. – The last input source used is automatically selected. Note: The following buttons on the device can also be used to switch on the stereo system: »TUNER /BAND«... -
Page 15: Sound Settings
GENERAL FUNCTIONS ______________________________________________________________ Sound settings You can choose between five different sound settings: You can select the sound settings » USER«, » CLASSIC«, » POP«, » JAZZ« and » ROCK« depending on the type of music you are listening to. The basic setting PRESET is »... -
Page 16: Tuner Mode
TUNER MODE ________________________________________________________________ Selecting the tuner input source PRESET Select the input source by pressing » TUNER /BAND«. – The most recently selected station is activated (Last Station Memory). – Display: e.g. » « or » «. Selecting a preset position Select the frequency band (FM or MW) by pressing »... -
Page 17: Rds Station Service
TUNER MODE _____________________________________________________________________________ RDS station service RDS (Radio Data System) is an information system which is transmitted additio- nally by most FM stations. If the device is currently receiving an RDS station, it displays the station name, for example » «, and »... -
Page 18: Cd Mode
CD MODE ___________________________________________________________________________ Basic CD mode functions The device is suitable for music CDs displaying the logo shown here or for CD-Rs and CD-RWs with audio data. Always keep the CD compartment closed to prevent dust from collecting on the laser optics. -
Page 19: Special Cd Mode Features
CD MODE ____________________________________________________________________________________ Playing back a CD Press »CD II« to start playback. TRACK – Playback begins with the first track. -< – Display: » «, the current track number and the elapsed playing time of the track. The current track number flashes in the number field. Playback stops at the end of the CD. -
Page 20: Creating A Track Memory - Playing Back Tracks In Selected Order
CD MODE ____________________________________________________________________________________ Repeating a track (Repeat one) Press »CD II« to start playback. Select the track using» 5 a § « or » s s s 6 «. Select the Repeat function by pressing »INTRO/REP./TIMER« once on the TRACK remote control. - Page 21 CD MODE ____________________________________________________________________________________ Press » PROG./RAND./TIME« on the remote control to store the track. TRACK – Display: The stored track appears in the number field. »TRACK «, » PROG« flashes again. PROG Note: Repeat steps to program more tracks. To start playback of the track memory, press »CD II«.
- Page 22 CD MODE ____________________________________________________________________________________ Adding tracks Press »PROG./RAND./TIME« on the remote control when the CD is in the STOP position. Select the track by pressing » 5 a § « or » s s s 6 «. Press »PROG./RAND./TIME« on the remote control to store the track. Deleting the track memory Open the CD compartment on the device In »...
-
Page 23: Timer Mode
TIMER MODE __________________________________________________________________ Your device has three timer modes: – The switch-on timer, which switches the device on at the set time and wakes you with an alarm or music. – The reminder timer, reminding you by sounding an alarm at a time you set. –... -
Page 24: Switch-On Timer
TIMER MODE ______________________________________________________________________________ Interrupting the alarm Press »SNOOZE« on the device while the alarm is sounding. – The alarm signal (signal tone, radio station or CD) stops. – The alarm goes on again at 5-minute intervals (alarm duration – 90 minutes). Cancelling the alarm for the day Switch the device off by pressing »ON/OFF«... -
Page 25: Reminder Timer
TIMER MODE ______________________________________________________________________________ Ending the reminder timer Switch the reminder timer off by pressing »ON/OFF«. Ending the reminder timer prematurely To end the reminder timer prematurely, keep pressing »NAP« on the remote control until » « appears in the display. Sleep timer Setting the sleep timer PRESET... -
Page 26: Information
INFORMATION _____________________________________________________________ Troubleshooting Not every sound problem is necessarily caused by a defect in the your device. Defects can also be caused by leads having been accidentally pulled out, damaged CDs and worn out batteries in the remote control. If the fol- lowing measures do not do not rectify the problem, consult an authorised dealer.