Table of Contents
Advertisement
Quick Links
Advertisement
Table of Contents

Related Manuals for Grundig Oslo CDS 6690 USB


Summary of Contents for Grundig Oslo CDS 6690 USB
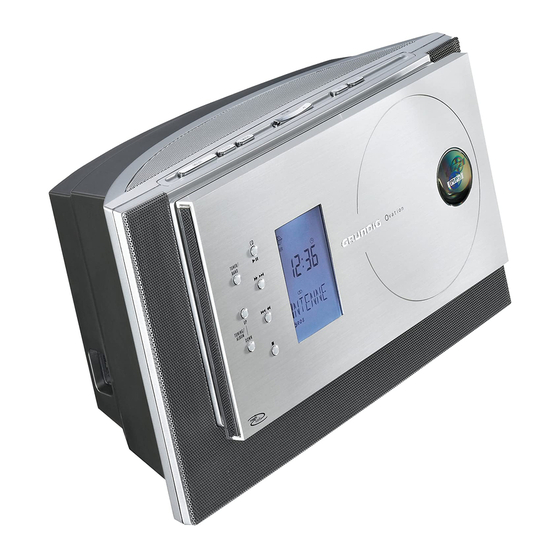
- Page 1 HIFI MICRO SYSTEM Oslo 6690 USB...
-
Page 2: Table Of Contents
CONTENTS _____________________________________________________________ SET-UP AND SAFETY CD MODE Magic Fidelity Selecting the CD input source The sound concept Inserting a CD Playing back a CD OVERVIEW Repeating the current file or track The hi-fi system controls Selecting another file or track The hi-fi system displays Searching for a passage within a file or track The remote control... -
Page 3: Set-Up And Safety
This may leave stains on the loudspeaker system developed and patented by surface of the furniture which can be difficult or Grundig, which produces powerful and brilliant impossible to remove. sound. Do not use any cleaning agents as they may da- A bass speaker as well as two medium and treble mage the housing. -
Page 4: Overview
OVERVIEW ____________________________________________________________ The hi-fi system controls Controls on the front FUNCTION Selects the different audio Front panel Fold to the front to open the TUNER«, sources »FM »MW CD compartment. TUNER«, »CD«, »SD CARD«, In CD/USB/SD mode: Starts »USB« and »AUX«. and pauses playback. - Page 5 OVERVIEW ____________________________________________________________ Controls on the top ON/OFF Switches the device to and from standby mode. The device is only fully discon- nected from the mains after the plug has been pulled out. SLEEP For setting the sleep timer. SNOOZE Interrupts the alarm function. –...
- Page 6 OVERVIEW ____________________________________________________________ Controls on the sides Controls on the bottom AC ~ Socket for mains cable (left side of the device). RESET Resets the hi-fi system in case The only way to isolate the hi-fi of malfunction. system from the mains supply is Press »RESET«...
-
Page 7: The Hi-Fi System Displays
OVERVIEW ____________________________________________________________ The hi-fi system displays In tuner mode: flashes when awaiting an RDS time signal; lights up when RDS time synchronisation is complete. In MP3/WMA and CD-DA mode: a file or a track is repeated. USER CLASSIC JAZZ ROCK In MP3/WMA and CD-DA mode: all files ALBUM FILE... -
Page 8: The Remote Control
OVERVIEW ____________________________________________________________ ON/OFF Switches the hi-fi system to standby The remote control mode and from standby mode to the last signal source selected. In CD, USB or SD mode: Plays and pauses the playback. In CD, USB or SD mode: Stops the playback. - Page 9 OVERVIEW ____________________________________________________________ DISPLAY In tuner mode: switches the display between frequency, station name, sta- tion type, radio text and time/day. In CD-DA mode: switches the display between elapsed playing time and time/day. In MP3/WMA mode: switches the display between file number/elapsed playing time, file name/ID3 tag infor- mation (ticker text) and time/day.
-
Page 10: Connection And Preparation
CONNECTION AND PREPARATION _____________________ Connecting the antenna Connecting an MP3 player or USB memory stick Plug the rooftop antenna cable into the »FM AN- TENNA« socket of the hi-fi system. The hi-fi system supports most MP3 players and USB Note: memory sticks. -
Page 11: Connecting The Headphones
CONNECTION AND PREPARATION _____________________ Connecting the headphones Inserting batteries in the remote control Insert the headphone plug (ø 3,5 mm) into the » « socket on the right side of the hi-fi. Open the battery compartment by pushing down its –... -
Page 12: Additional Information For Units Sold In The Uk
240V ac, 50Hz mains supply. Replacement mains lead sets can be obtained from The range of multi-system receivers is built to work in your local dealer, or by contacting Grundig Consu- most European countries. However, the mains plug and mer Relations (01788 570088) -
Page 13: Settings
SETTINGS _______________________________________________________________ Activate the station search by pressing »UP TUN- Setting and storing radio stations ING/ADJ/ALBUM DOWN« until the frequency display changes to rapid run-through. Initial station search – The search stops when a station is found. After the hi-fi system has been connected to the mains for the first time, the device searches for the 40 stations with the best reception and stores them. -
Page 14: Setting The Time
SETTINGS _______________________________________________________________ To store more stations, repeat steps to 4. Set the day of the week using »UP TUNING/ ADJ/ALBUM DOWN« and press »PROG./ Note: RAND./TIME« to confirm. If the hi-fi is disconnected from the mains for a long – Display: »CT ON« flashes. time, all the preset stations are deleted. -
Page 15: General Functions
GENERAL FUNCTIONS __________________________________________ Adjusting the volume Switching the hi-fi system on and off »– VOLUME + Adjust the volume with «. Switch the hi-fi system on from standby mode by – Display: briefly »VOL« (»MIN«, »I« to »39«, and pressing »ON/OFF«. above this »MAX«). -
Page 16: Switching The Ultra Bass System On And Off
GENERAL FUNCTIONS __________________________________________ Switching the display »– VOLUME + Set the values by pressing « (maxi- mum »+6«, minimum »-6«). In Tuner , CD- USB- and SD-mode you can switch the – The equaliser display disappears after 5 seconds. display to show the time and day. Press »DISPLAY«... -
Page 17: Rds Station Service
TUNER MODE ________________________________________________________ RDS station service Press »DISPLAY« on the remote control again. – The current time and day of the week appear in RDS (Radio Data System) is an information system the display. which is trans mitted additionally by most FM stations. When the hi-fi system is receiving an RDS station, the sta- Press »DISPLAY«... -
Page 18: Cd Mode
CD MODE _______________________________________________________________ Playback starts automatically with the first file of The hi-fi system is suitable for the first album. music CDs bearing the logo – In CD-DA mode if a CD is already inserted: the shown here (CD-DA), and device scans the content of the CD. -
Page 19: Repeating The Current File Or Track
CD MODE _______________________________________________________________ Selecting albums and files (MP3/ Use » « to switch to playback pause. – Display: »II«, the elapsed playing time of the file WMA only) or track flashes. During playback, select the desired album by press- »UP TUNING/ADJ/ALBUM DOWN«. -
Page 20: Repeating A File Or A Title (Repeat One)
CD MODE _______________________________________________________________ Repeating a file or a title (Repeat To quit the function, press »INTRO/REP./TIMER« repeatedly until the repeat symbol » « disap- One) pears from the display. Press » « to start playback. Note: Press » « or » «... -
Page 21: Creating A Track Memory
CD MODE _______________________________________________________________ Creating a track memory Playing back a track memory You can create a track memory of up to 60 files on Start the track memory by pressing » «. different albums (MP3/WMA) or up to 60 tracks (CD- –... -
Page 22: Usb And Sd/Sdhc/Mmc Mode
USB AND SD/SDHC/MMC MODE ________________________ Searching for a passage within a file For MP3/WMA mode with MP3 player, USB memo- ry stick or SD/SDHC/MMC memory card, the same or track playback and search functions are available as for During playback, press and hold » «... -
Page 23: Selecting Another Track
USB AND SD/SDHC/MMC MODE ________________________ Selecting another track Notes: Further functions like Repeat, Random and Intro During playback, press » « or » « 5a aa you will find in the CD Mode section. repeatedly until the desired track or file is reached. The USB socket on the device does not support –... -
Page 24: Timer Mode
TIMER MODE _________________________________________________________ Notes: Your hi-fi system has three timer modes: If you select CD, USB, SD make sure that a CD, – The switch-on timer, which switches the hi-fi system on USB, SD has been inserted. at the set time and wakes you with an alarm or music. If you select tuner, select the radio station with –... -
Page 25: Reminder Timer
TIMER MODE _________________________________________________________ Switching off alarm for the weekend – After the set time has expired, a signal tone sounds (for max. 90 minutes). You can switch off the alarm function over the week- – The display shows the currently remaining time, for end. -
Page 26: Information
INFORMATION _____________________________________________________ Technical data Cleaning the CD unit If the device is un- able to scan CDs perfectly, use a standard, commer- This device is noise-suppressed according to the ap- cially available plicable EU directives. cleaning CD to This product fulfils the European directives clean the laser op- 2004/108/EC , 2005/32/EC and 2006/95/EC. -
Page 27: Troubleshooting
INFORMATION _____________________________________________________ Troubleshooting Not every kind of sound interference is caused by a de- fect in your hi-fi system. Defects can also be caused by leads having been accidentally pulled out, damaged CDs and worn out batteries in the remote control. If the following measures do not do not rectify the problem, consult an authorised dealer. - Page 28 52/10 72011 411 1500...