Table of Contents
Advertisement
Quick Links
Advertisement
Table of Contents

Related Manuals for Grundig Ovation 3


Summary of Contents for Grundig Ovation 3
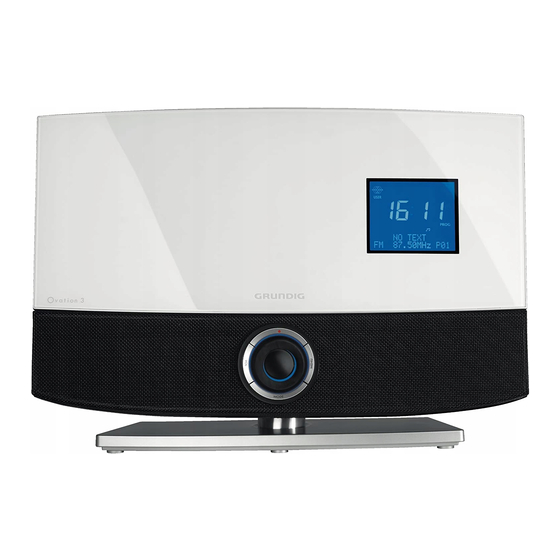
- Page 1 HiFi MUSIC CENTER Ovation 3 CDS 8120...
-
Page 2: Table Of Contents
CONTENTS ---------------------------------------------------------------------------------------------------------------------------------- SET-UP AND SAFETY CD MODE Selecting the CD input source OVERVIEW Inserting and playing CDs The hi-fi system controls Pausing and playback The remote control Repeating the current track The hi-fi system displays Selecting another track, album or file Searching for a passage within a track CONNECTION AND PREPARATION Repeating a track (Repeat One) -
Page 3: Set-Up And Safety
SET-UP AND SAFETY ----------------------------------------------------------------------------------------------- Please note the following instructions when set- Do not open the hi-fi system casing under any ting up the system: circumstances. Warranty claims are excluded for damage resulting from improper handling. The hi-fi system is designed for the playback of audio signals. -
Page 4: Overview
OVERVIEW ---------------------------------------------------------------------------------------------------------------------------------- The hi-fi system controls DISPLAY MENU Infrared sensor MODE Jog-Shuttle The front of the device Display of the hi-fi system, for more details, please see Recording button, starts or ends “The hi-fi system displays” recording to USB memory stick section. - Page 5 OVERVIEW ---------------------------------------------------------------------------------------------------------------------------------- The sides of the device Headphone socket for connect- ing a stereo headphone set with a jack plug (ø 3.5 mm). This au- tomatically switches off the loud- speakers. USB socket for connecting MP3 player, a USB memory stick or a card-reading device.
- Page 6 OVERVIEW ---------------------------------------------------------------------------------------------------------------------------------- The back of the device + SPEAKER RIGHT - + SPEAKER LEFT - FM ANT. AUX IN FM ANT. Antenna socket for the antenna cable or wire antenna for FM recep- tion. AUX IN Audio signal input for connecting an external source.
-
Page 7: The Remote Control
OVERVIEW ---------------------------------------------------------------------------------------------------------------------------------- The remote control Switches the hi-fi system to standby mode and from standby mode to the last input source selected. Recording button, starts or ends recording to USB memory stick or SD/SDHC/MMC memory card. Volume button, opens the control menu for the volume or sound settings. - Page 8 OVERVIEW ---------------------------------------------------------------------------------------------------------------------------------- In CD/USB/SD mode: interrupts the playback. Press twice to stop playback. DSC/UBS/ Selects the sound setting by pressing briefly. Press and hold down, switches the ultra bass system on and off. Cancels or reactivates the switch-on timer function for the weekend (in stand by mode).
-
Page 9: The Hi-Fi System Displays
OVERVIEW ---------------------------------------------------------------------------------------------------------------------------------- The hi-fi system displays Displays the current time. RANDOM In CD/USB/SD mode: all tracks or files are played in random order. In tuner mode: displays the frequency band and frequency, INTRO In CD/USB/SD mode: the first the station name, the station 10 seconds of all the tracks or type and the radio text informa- files are played. -
Page 10: Connection And Preparation
CONNECTION AND PREPARATION --------------------------------------- Connecting a USB memory stick Connecting the antenna The hi-fi system supports most USB memory Plug the auxiliary antenna supplied or the sticks. roof antenna cable into the »FM ANT.« socket. Note: The hi-fi system must be switched off while Note: the USB connection is being made. -
Page 11: Inserting A Memory Card
CONNECTION AND PREPARATION --------------------------------------- Inserting a memory card Connecting external devices The hi-fi system supports SD/SDHC and MMC memory cards. Note: Switch the hi-fi system off before you Note: connect external devices. The hi-fi system must be switched off while Use a standard audio cable to connect the the memory card is being inserted. -
Page 12: Connecting To The Mains Supply
CONNECTION AND PREPARATION --------------------------------------- Putting battery in the remote Connecting to the mains supply control Notes: Check that the mains voltage on the type plate (on the bottom of the hi-fi system) corresponds to your local mains supply. If Remove the cover of the remote control by this is not the case, contact your specialist sliding it backwards and pulling out. -
Page 13: Jog-Shuttle
JOG-SHUTTLE ------------------------------------------------------------------------------------------------------------------------ Functions and operation using »MENU« the Jog-Shuttle on the hi-fi sys- In CD-mode, SD-mode, USB-mode: tem and the remote control – START or STOP: Starts or stops playback. – ALBUM: Next/previous album You can perform many functions using the Jog- (if available on data medium). - Page 14 JOG-SHUTTLE ------------------------------------------------------------------------------------------------------------------------ Operation Example – setting the timer Press on »VOL«, »MODE«, »MENU« or » «. Press on »MODE« to select the »MODE« menu. Turn the Jog-Shuttle to select the function Turn the Jog-Shuttle until the »SETUP« menu and press on it to activate. item appears.
-
Page 15: Settings
SETTINGS --------------------------------------------------------------------------------------------------------------------------------------- Automatic tuning search for FM Set the year by rotating the Jog-Shuttle on radio stations (ATS) the remote control and confirm with »TIME« on the remote control or by pressing the Jog- After connecting the hi-fi system to the mains Shuttle. -
Page 16: Tuning And Storing Radio Stations
SETTINGS --------------------------------------------------------------------------------------------------------------------------------------- Tuning and storing radio stations Programming radio stations – automatic tune, for the next radio After the initial automatic station search, you can station also adjust radio stations whenever you want. Automatic tune starts from the current radio sta- Programming radio stations –... -
Page 17: Adjusting The Brightness Of The Display
SETTINGS --------------------------------------------------------------------------------------------------------------------------------------- Programming radio stations – Adjusting the brightness of the manually display Switch on the hi-fi system from standby mode Repeatedly press »BRIGHT« on the remote by pressing » «. control to change the brightness of the display in four levels. Press »MODE«... -
Page 18: General Functions
GENERAL FUNCTIONS --------------------------------------------------------------------------------------- Switching on and off Setting the equaliser The only way to disconnect the hi-fi system from The user sound setting allows you to make your own personal equaliser settings. the mains supply is to pull out the plug from the wall socket. -
Page 19: Switching The Ultra Bass System On And Off
GENERAL FUNCTIONS --------------------------------------------------------------------------------------- Switching the Ultra Bass System on and off Press and hold down »DSC/UBS« to switch the Ultra Bass System on and off. – Display: » « appears when the UBS is ac- tivated and disappears when deactivated. Note: If you select user sound setting, wait until »USER«... -
Page 20: Tuner Mode
When the hi-fi system receives an RDS station, the station name appears in the display, for example »FANTASY« and » «. Notes: It may take some time before all the RDS information is available. GRUNDIG has no influence on the correctness of this information. ENGLISH... -
Page 21: Cd Mode
CD MODE --------------------------------------------------------------------------------------------------------------------------------------- The hi-fi system is suitable for Inserting and playing CDs music CDs bearing the logo Warning shown here (CD-DA), and for The lens of the CD player should never be CD-Rs (CD-Recordables) and touched. CD-RWs (CD-Rewritables) with Press »... -
Page 22: Repeating The Current Track
CD MODE --------------------------------------------------------------------------------------------------------------------------------------- Repeating the current track Repeating a track (Repeat One) During playback, press » « on the remote During playback press »REP./INT.« once on control or press »MENU«, on the hi-fi sytem, the remote control. then press once to the Jog-Shuttle and select –... -
Page 23: Playing The Start Of Each Track Or File (Intro)
CD MODE --------------------------------------------------------------------------------------------------------------------------------------- Playing the start of each track or Playing the playlist file (Intro) To start playback of the playlist, press » « on the remote control. Press »REP./INT.« on the remote control in – Display: »PROG«, playing time, track or stop mode. -
Page 24: Usb And Sd/Sdhc/Mmc Mode
USB AND SD/SDHC/MMC MODE -------------------------------------------- For MP3/WMA mode with MP3 player, USB If USB operation is impaired or is not pos- memory stick or SD/SDHC/MMC card, the sible, this does not indicate a malfunction of same playback and search functions are avail- the hi-fi system. -
Page 25: Recording To Mmc/Sd/Sdhc Or Usb
USB AND SD/SDHC/MMC MODE -------------------------------------------- Recording to MMC/SD/SDHC or Encoding from the CD Press »MODE« and rotate Jog-Shuttle to find »CD« on display and confirm by pressing on The hi-fi system has a recording function which the Jog-Shuttle. can record from FM Tuner, CD or Aux input sources. -
Page 26: Aux Mode
AUX MODE -------------------------------------------------------------------------------------------------------------------------------- Listening to an external source You can listen to the sound of the connected external device through your system’s speakers. Use a standard audio cable (not supplied) to connect »AUX IN« on the back of the hi-fi system to an AUDIO OUT or »... -
Page 27: Timer Mode
TIMER MODE -------------------------------------------------------------------------------------------------------------------------- Your hi-fi system has 3 timer modes: Switch-on Timer – The switch-on timer, which switches the hi-fi Setting the timer system on at the set time and wakes you with the input source you selected. In standby mode, press and hold »TIMER« on the remote control. -
Page 28: Reminder Timer
TIMER MODE -------------------------------------------------------------------------------------------------------------------------- Activating and deactivating the Sleep Timer timer Setting the sleep timer In standby, press »TIMER« on the remote con- Switch on the hi-fi system with » « and select trol once. the sound source you desire. – Display shows » « or » « if the timer is activated. -
Page 29: Information
INFORMATION ------------------------------------------------------------------------------------------------------------------ Cleaning the device Technical data Pull out the power cord from the wall socket. This device is noise-suppressed Clean the device by using a soft cloth slightly according to the applicable EU moistened with a mild detergent solution. Do not directives. -
Page 30: General Information On Laser Devices
INFORMATION ------------------------------------------------------------------------------------------------------------------ General information on laser devices CLASS 1 LASER PRODUCT This device is a CLASS 1 LASER PRODUCT. This means that the laser is designed in such a way as to ensure that the maximum permissible emission value cannot be exceeded under any circumstances. -
Page 31: Troubleshooting
CDs and flat battery for the remote control will impair functioning. If the following measures do not resolve the problem satisfactorily, please visit www.grundig.com, product range: hi-fi, micro CD stations or contact your specialist dealer. Problem Possible cause The volume setting is too low. - Page 32 33/10 72011 410 7500...