Table of Contents
Advertisement
Advertisement
Table of Contents

Related Manuals for Denon RCD-M35DAB


Summary of Contents for Denon RCD-M35DAB
- Page 1 CD RECEIVER RCD-M35DAB RCD-M33 OPERATING INSTRUCTIONS...
- Page 2 NOTE ON USE CAUTION RISK OF ELECTRIC SHOCK DO NOT OPEN CAUTION: O REDUCE THE RISK OF ELECTRIC SHOCK, DO NOT REMOVE COVER (OR BACK). NO USER SERVICEABLE PARTS INSIDE. REFER SERVICING TO QUALIFIED SERVICE PERSONNEL. • Avoid high temperatures. Allow for sufficient heat •...
-
Page 3: Table Of Contents
CDs. off the SDB/TONE. Model No. RCD-M35DAB/RCD-M33 Serial No. Thank you for purchasing this DENON CD receiver. Please read the operation instructions thoroughly in order to acquaint yourself with the CD BEFORE USING receiver and achieve maximum satisfaction from it. -
Page 4: Cautions On Installation
CAUTIONS ON INSTALLATION Installing the AM loop antenna Installing the DAB indoor antenna (RCD-M35DAB only) Tune in an AM station (see page 12) and set Note: the antenna as far from the system as possible Find the position at which the reception For heat dispersal, do not install this equipment in a confined space such as a book case to keep distortion and noise is minimal. -
Page 5: Connections
RCD-M35DAB (option) DAB antenna (RCD-M35 only) DRR-M33 Stacking installation CD receiver (RCD-M35DAB/RCD-M33) Power plug AC 230 V, 50 Hz System operations NOTES: Such system operations as the timer and the auto power on functions, as well as remote control • Do not plug the power cord into the power outlet until all connections are completed. Be... - Page 6 (2) Connecting to Cassette deck (DRR-M33) and CD recorder etc. CD recorder etc. LINE IN-2 IN-1 Cassette deck (DRR-M33) CD receiver (RCD-M35DAB/RCD-M33) (option) Power plug Power plug AC 230 V, 50 Hz AC 230 V, 50 Hz...
-
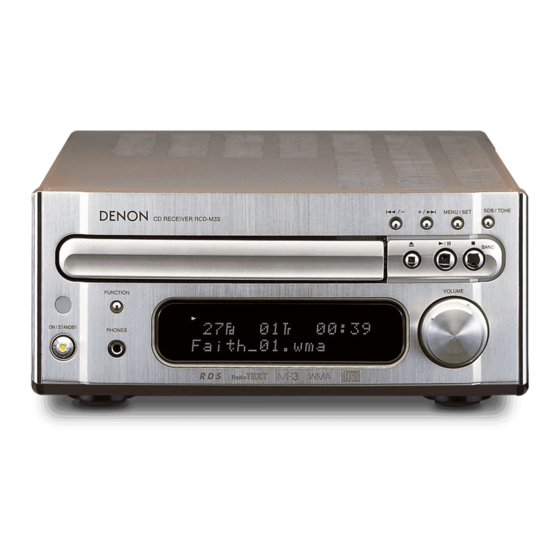
Page 7: Part Names And Functions
• In TUNER function, use this button to qw er selecting the band. to the beginning of a specific track while in CD function. For the RCD-M35DAB : • Use the +/– button to select radio Power operation switch (ON/STANDBY) Remote sensor FM AUTO stations while in TUNER function. - Page 8 DRR-M33, connect to the AC outlet on DAB antenna terminal TUNED 1st press : 1 (single-track repeat) the CD receiver (RCD-M35DAB/RCD- This lights when a station is tuned in (ANTENNA TERMINAL DAB) is displayed. M33) or one of the other components properly.
-
Page 9: Remote Control Unit
SLEEP button • Press this button to set the sleep timer. • The supplied remote control unit (RC-999) is for use with the RCD-M35DAB/RCD-M33 unit only. OFF button • If the cassette deck (DRR-M33) is connected to the main unit, you may operate each of the above •... - Page 10 (RCD-M35DAB only) menu on and off. • Used to display the reception sensitivity, For the RCD-M35DAB : •When the function is set to FM and the (During programmed playback, indicate to sort the service list, to select the...
-
Page 11: Cautions On Handling Discs
CAUTIONS ON HANDLING DISCS LISTENING TO RADIO PROGRAMS (Check the connections on pages 4, 5.) About Compact Discs Auto tuner presets Use this to automatically search for FM broadcasts and store up to 40 stations at preset channels Only discs with the mark can NOTES: 1 to 40. - Page 12 The function of the +/– button on the main unit may toggle between Tuning +/– and Preset +/– Manual tuning functions. • Pressing the – button while holding down the BAND button at the same time changes function of the +/– button to Tuning +/–. (“TUNING” flashes for 5 seconds.) •...
- Page 13 Presetting or naming radio stations Listening to Preset Stations (This operation is only possible from the remote control unit.) If the following operation is performed when the system power is off, the power automatically turns on and the radio is played. (Auto on function) You can preset up to 40 FM/AM stations.
- Page 14 PTY Search TP Search Press the RDS button twice. Press the RDS button 3 times. Press the PTY button to select the type of program. (One of the 29 types listed below can be Press TU+( TU–(6) button. (auto tuning) selected.) Reception frequency Press...
-
Page 15: Listening To Dab
LISTENING TO DAB Presetting the station that is currently tuned in (Check the connections on pages 4, 5.) Up to 60 DAB stations can be tuned in. Tuning in DAB (Digital Audio Broadcasting) Follow steps 1 to 6 under “Tuning in DAB (Digital Audio Press the power operation Broadcasting) broadcasts”... - Page 16 Switching the DAB information display DAB Settings Follow steps 1 to 6 under “Tuning in DAB (Digital Audio Use the DAB/RDS button to make the DAB Broadcasting)” on page 15 to tune in a DAB station. settings. Remote control unit Use the TIME/DISPLAY button to switch the DAB reception information on the qTuning Aid...
-
Page 17: Using The Timer
USING THE TIMER Setting the Current Time The time and timer functions are incorporated in the CD receiver. The time is displayed in the 24-hour mode. 3, 5 2, 4, 6 Timer Settings Types of timer operations EVERYDAY TIMER : Use this to turn the power on and standby at the same time every day. 2, 4, 6 ONCE TIMER : Use this to turn the power on and standby once. - Page 18 Setting the Timer Press the MENU/ SET button. The power can be set to turn on and off at a specific time or at the same time everyday, in any modes: tuner, CD, cassette deck (optional) and timer recording (recording to the cassette deck from the tuner or AUX input).
- Page 19 Various Timer Operations Use the button 4, 6, 8 3, 5, 7, 8 minutes for the timer Flashes off time. Main unit Remote control unit Press the MENU/ SET button. 3, 5, 7, Displays the currently set Main unit Remote control unit timer ON or OFF mode.
- Page 20 Cancelling the Sleep Timer Press the MENU/ SET button. Select OFF using the SLEEP button. The sleep timer is also canceled if the CD receiver‘s power operation switch or the power Main unit Remote control unit operation switch on the remote control unit is pressed, turning the system power off. NOTE: Now follow steps 8 to 18 under “Setting the Timer”...
-
Page 21: Playing Cds
PLAYING CDs 2 (stop) button 1/ 3 (play/pause) button Normal Playback 1, 3 1/ 3 (play/pause) button 2 (stop) button Interrupting playback temporarily Press the (play/pause) button. Example: Playing a disc containing 15 tracks and with a playing time of 62 minutes, 3 The “... -
Page 22: Various Playback Functions
(3) Playing all the tracks repeatedly …………………………………………………………………… All-track Repeat Various Playback Functions (Using the remote control unit) In addition to the regular playback, the RCD-M35DAB/RCD-M33 also offers the following playback functions: When the REPEAT button is pressed twice, “ ” appears (1) Playing a specific track ………………………………………………………………………………... - Page 23 Other operations possible during programmed playback: (4) Playing the tracks in a certain order ……………………………………………………………… Programmed Playback Such operations as quick search, pause and skip monitor are also possible during programmed (Using the remote control unit) playback. For the quick search function, press the automatic search reverse button ( ) to move back to the beginning of the track, then press it again while the time display reads “00:00”...
- Page 24 (7) Finding a certain spot on the disc while listening to the sound …………………………… (8) Playing the tracks in random order ……………………………………………………………… Skip Monitor Random Playback (Using the remote control unit) (Using the remote control unit) • Use this function to skip through the disc while listening to the sound. •...
-
Page 25: Edited Recording On Sides A And B Of A Tape
Remote control unit EDIT button 2 times. Edited recording is a system function of the RCD-M35DAB/RCD-M33 and DRR-M33. This • The display changes as shown below each time the function can only be used in combination with the DRR-M33. -
Page 26: Playing Mp3/Wma
There are many music distribution sites on the internet from which music files in MP3/WMA (Windows Media Audio) audio compression format can be downloaded. Music downloaded as instructed on the site and written onto a CD-R/RW disc can be played on the RCD-M35DAB/RCD- M33. -
Page 27: Various Playback Functions
q File name display Stopping playback Press the (play/pause) button. Press the (stop) button. • The current folder is displayed Main unit Remote control unit in both the disc and folder w Title/Artist display The title, artist and album names are scrolled. modes. -
Page 28: Auto On Function
NOTES: Use the FOLDER +/ – buttons to select the folder to be repeated. 5DAB/RCD-M33 • The RCD-M3 is compatible with the “MPEG-1 Audio Layer 3” standards (sampling frequency of 32, 44.1 or 48 kHz). It is not compatible with such other standards as “MPEG-2 Audio Layer 3”, “MPEG-2.5 Audio Layer 3”, MP1, MP2, etc. -
Page 29: Troubleshooting
TROUBLESHOOTING SPECIFICATIONS Check the following once more before assuming there is a problem with the system. Receiver section 1. Are connections proper? Reception frequency band: : 87.50 MHz ~ 108.00 MHz 2. Is the system being operated as explained in the operating instructions? : 522 kHz ~ 1611 kHz DAB : BAND3 170 MHz ~ 240 MHz... - Page 30 MEMO...
- Page 31 MEMO...
- Page 32 TOKYO, JAPAN www.denon.com Denon Brand Company, D&M Holdings Inc. Printed in China 00D 511 4307 102...