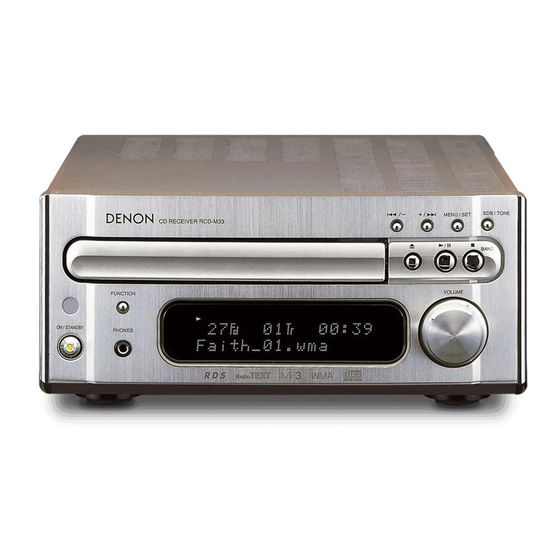
Denon RCD-M33 Operating Instructions Manual
Denon car stereo system user manual
Hide thumbs
Also See for RCD-M33:
- Operating instructions manual (182 pages) ,
- Service manual (54 pages) ,
- Specification (2 pages)
Table of Contents
Advertisement
Available languages
Available languages
Advertisement
Chapters
Table of Contents

Related Manuals for Denon RCD-M33


Summary of Contents for Denon RCD-M33
- Page 1 CD RECEIVER RCD-M33 OPERATING INSTRUCTIONS MODE D’EMPLOI INSTRUCCIONES DE OPERACION FOR ENGLISH READERS PAGE 004 ~ PAGE POUR LES LECTEURS FRANCAIS PAGE 027 ~ PAGE PARA LECTORES DE ESPAÑOL PAGINA 050 ~ PAGINA...
-
Page 2: Safety Instructions
FCC HAZARDOUS RADIATION EXPOSURE. requirements. Modification not expressly approved THE COMPACT DISC PLAYER SHOULD NOT BE by DENON may void your authority, granted by the ADJUSTED OR REPAIRED BY ANYONE EXCEPT FCC, to use the product. PROPERLY QUALIFIED SERVICE PERSONNEL. - Page 3 ENGLISH FRANCAIS ESPAÑOL FRONT PANEL PANNEAU AVANT PANEL FRONTAL q w e r REAR PANEL PANNEAU ARRIERE PANEL TRASERO !4 !5 !6...
-
Page 4: Table Of Contents
ENGLISH NOTE ON USE / OBSERVATIONS RELATIVES A L’UTILISATION / NOTAS SOBRE EL USO • Keep the set free from • Avoid high temperatures. moisture, water, and dust. Allow for sufficient heat • Protéger l’appareil contre dispersion when installed l’humidité, l’eau on a rack. -
Page 5: Before Using
BEFORE USING Read the following before using the system. • Before turning on the power • Should condensation occur: The signals on the disc cannot be read and Check again that all connections are correct the system will not function properly. and that there are no problems with the Remove the disc then let the system set with connection cords. -
Page 6: Connections
AM loop antenna Right FM antenna CD receiver (RCD-M33) System operations Such system operations as the timer and the auto power on functions, as well as remote control operations cannot be performed unless all the RCA pin-plug cords are connected between the units, so be sure to make all the connections properly as shown in the diagram. -
Page 7: Part Names And Functions
(,) and decreases before turning it back on.) when it is turned counterclockwise (.). Power is supplied to the RCD-M33 even • The volume increases and decreases in when the power is in the standby mode 35 steps from the minimum (VOLUME (The clock is displayed in the clock 00) to the maximum (VOLUME MAX). - Page 8 AC OUTLET • When using in combination with the cassette deck, connect to the AC outlet on the CD receiver (RCD-M33) or one of the other components (100W MAX). Power cord • Plug this cord into a wall power outlet.
-
Page 9: Remote Control Unit
The RCD-M33 comes with a system remote control unit (RC-999). • The supplied remote control unit (RC-999) is for use with the RCD-M33 unit only. • If the cassette deck is connected to the main unit, you may operate each of the above components using its respective remote control unit (refer to pages 9, 10). - Page 10 Title / Album • Press this button to play or pause of the With the function set to TUNER, and in the CD player. FM and RDS modes: • Press to switch the display below. CLEAR/ DEL button...
-
Page 11: Cautions On Handling Discs
About Compact Discs NOTES: Only discs with the mark can • The disc tray opens when the 5 (open/close) be played on the RCD-M33. button is pressed once and closes when it is pressed again. Use compact discs that include the mark. - Page 12 ENGLISH Manual tuning Example: Tuning in FM 92.50 MHz (AM stations are tuned in using the same procedure.) Press the power operation switch to turn on the power. Main unit Remote control unit Press FUNCTION TUNER button to select TUNER mode.
- Page 13 Presetting or naming radio stations (This operation is only possible from the remote control unit.) You can preset up to 40 FM/AM stations. You can name the preset stations (up to 8 characters each). Tune in the desired preset station. Press the EDIT button on the remote control unit.
- Page 14 ENGLISH PTY Search Press the RDS button twice. Press the PTY button to select the type of program. (One of the 24 types listed below can be selected.) Press TU+( TU–( ) button. (auto tuning) The station is tuned in. NOTE: If no program of the specified type is found, “...
-
Page 15: Using The Timer
USING THE TIMER The time and timer functions are incorporated in the CD receiver. Timer Settings Types of timer operations EVERYDAY TIMER : Use this to turn the power on and standby at the same time every day. ONCE TIMER : Use this to turn the power on and standby once. - Page 16 ENGLISH Setting the Timer The power can be set to turn on and off at a specific time or at the same time everyday. NOTE: • Please do not change the setup function of this unit after performing the timer setup. In the event the setup function is changed, the timer start mode may not start properly.
- Page 17 Use the button minutes for the timer off time. Main unit Remote control unit Press the MENU/ SET button. Main unit Remote control unit Use the button select “1_off/E_on”. • The mark lights. Main unit Remote control unit Press the MENU/ SET button. Main unit Remote control unit Press the power operation...
- Page 18 ENGLISH Press the MENU/ SET button. Main unit Remote control unit Now follow steps 8 to 18 under “Setting the Timer” on page 16. • “The “E” indicating “EVERYDAY” switches to “1” indicating “ONCE”. • Press the MENU/ SET and button to select “1_on/E_off”...
-
Page 19: Playing Cds
PLAYING CDs Normal Playback 1, 3 Example: Playing a disc containing 15 tracks and with a playing time of 62 minutes, 3 seconds, starting from the first track. Press the (open/close) button to open the disc tray. Main unit Load the CD in the disc tray. Press the (open/close) button. -
Page 20: Various Playback Functions
ENGLISH Various Playback Functions In addition to the regular playback, the RCD-M33 also offers the following playback functions: (1) Playing a specific track ……………………………………………………………………………… (Using the remote control unit) Example: Playing the 8th track Press the CD button on the remote control unit. - Page 21 (4) Playing the tracks in a certain order ……………………………………………………………… (Using the remote control unit) Press the PROG/ DIRECT button. Displays when the 3rd track is set at the first place. Displays the total number of programmed Press the number and +10 buttons to select tracks and total playing time.
- Page 22 ENGLISH (7) Finding a certain spot on the disc while listening to the sound …………………………… (Using the remote control unit) • Use this function to skip through the disc while listening to the sound. • When the desired spot is reached using the skip monitor function, release the manual search forward button ( ) or manual search reverse button ( from that point.
-
Page 23: Playing Mp3/Wma
There are many music distribution sites on the internet from which music files in MP3/WMA (Windows Media Audio) audio compression format can be downloaded. Music downloaded as instructed on the site and written onto a CD-R/RW disc can be played on the RCD-M33. Windows Media, and the Windows logo are trademarks, or registered trademarks of Microsoft Corporation in the United States and/or other countries. -
Page 24: Various Playback Functions
ENGLISH Press the (play/pause) button. Main unit Remote control unit The title, artist and album names are scrolled. • Use the TIME/ DISPLAY button to switch the information displayed. File Name Title / Artist Title / Album • The title, artist and album names are only displayed when they are recorded on the disc. -
Page 25: Auto On Function
”, • With the RCD-M33 it is possible to display folder names and file names on the display up to 32 characters. • If recorded in a format other than “ISO9660 level 1”, normal display and playback may not be possible. -
Page 26: Troubleshooting
Rated output power: Audio input / output jacks: Remedy page • Plug the power cord securely into an outlet. CD player section Wow & flutter: • Set the control to an appropriate Position. Sampling frequency: • Disconnect the headphones. Optical source: •... - Page 27 TABLE DES MATIERES ⁄1 Caractéristiques principales ……………27 Lecture de CD ………………………42 ~ 45 Avant d’utiliser votre appareil ……………27 Lecture normale…………………………42 • Précautions d’installation ………………28 Diverses fonctions de lecture……43 ~ 45 • ⁄2 Raccordement des antennes fournies …28 Lecture de MP3/WMA ……………46 ~ 48 Raccordements……………………………29 Lecture normale…………………………46 •...
-
Page 28: Précautions D'installation
FRANCAIS PRECAUTIONS D’INSTALLATION Remarque: Pour permettre la dissipation de chaleur, n’installez pas cet équipement dans un espace confiné tel qu’une bibliothèque ou un endroit similaire. Remarque RACCORDEMENT DES ANTENNES FOURNIES Installation de l’antenne FM intérieure Raccordement d’une antenne FM extérieure Syntonisez une station FM (voir page 35), Si l’antenne FM fournie ne procure pas une orientez l’antenne afin que la distorsion et les... -
Page 29: Raccordements
Gauche Antenne FM Ampli-tuner avec lecteur de CD (RCD-M33) Fonctionnement du système Les opérations de système telles que les fonctions de minuterie et de mise en marche automatique ainsi que les opérations de la télécommande ne fonctionneront pas à moins que tous les cordons de connecteur à... - Page 30 été faites. (Attendre au moins 10 secondes après la mise hors tension avant de la remettre.) L‘alimentation est fournie au RCD-M33, même lorsqu‘elle est en mode d‘attente (L‘horloge s‘affiche en mode d‘affichage d‘horloge.).
- Page 31 PRISE SECTEUR (AC OUTLET) • Lors d’une utilisation en association avec la platine cassette, branchez à la prise CA du récepteur CD (RCD-M33) ou de l‘un des autres composants (100W MAX). Cordon Secteur • Brancher le cordon dans une prise secteur murale.
-
Page 32: Télécommande
TÉLÉCOMMANDE L’RCD-M33 est livré avec une télécommande (RC-999). • La télécommande fournie (RC-999) ne doit être utilisée qu’avec l’unité RCD-M33 • Si la platine cassette est connectée à l‘unité principale, vous pouvez activer tous les composants ci-dessus à l‘aide de leur télécommande respective. (voir pages 33, 34). - Page 33 Touche MENU/ SET Touche DIMMER • Si vous appuyez sur cette touche en • Utiliser cette touche pour ajuster la mode de veille, le mode de veille luminance de l’affichage de l’unité commute (l‘affichage de l‘horloge est principale. Peut être commuté en 4 activé...
- Page 34 Seuls les disques portant le REMARQUES: symbole ci-contre peuvent être • Le plateau du disque s’ouvre lorsque vous appuyez lus sur l’RCD-M33. (ouverture/fermeture) et il se ferme lorsque vous appuyez de nouveau sur cette touche. Utilisez des disques compacts qui portent le symbole •...
- Page 35 Réglage manuel Exemple: Syntonisation sur 92,50 MHz FM (Cette procédure s’applique aussi à la syntonisation des stations AM.) Appuyez sur l’interrupteur d’alimentation pour mettre le système sous tension. Unité principale Unité de télécommande Appuyez sur la FUNCTION ou touche TUNER pour sélectionner le mode TUNER.
- Page 36 FRANCAIS Mémorisation ou attribution d’un nom à des stations radio (Cette opération ne peut être exécutée qu’à partir de la télécommande.) Vous pouvez mémoriser jusqu’à 40 stations FM/AM. Vous pouvez donner un nom (de 8 caractères au maximum) aux stations mémorisées. Syntonisez la station mémorisée désirée.
-
Page 37: Automatique
Recherche PTY Appuyez deux fois sur la touche RDS. Appuyez touche pour sélectionner le type de programme. (Vous avez le choix entre l’un des 24 types énumérés ci-dessous.) Appuyez sur la touche de syntonisation TU+( ) ou TU–( (syntonisation automatique). La station est syntonisée. - Page 38 FRANCAIS UTILISATION DE LA MINUTERIE L’horloge et la minuterie sont intégrées dans l’ampli-tuner avec lecteur de CD. Réglages de la minuterie Types d’opérations commandées par minuterie EVERYDAY TIMER :Pour mettre l’appareil sous tension et activer le mode de veille à la même heure chaque jour.
- Page 39 Réglage de la minuterie L’alimentation peut être réglée pour être activée et désactivée à une heure spécifique ou à la même heure chaque jour. REMARQUE: • Veuillez ne pas changer la fonction de configuration de cet appareil après avoir effectué la configuration de la minuterie.
- Page 40 FRANCAIS Utilisez les touches pour régler partie “minutes” de l’heure d’arrêt de la minuterie. Unité principale Unité de télécommande Appuyez sur la touche MENU/ SET. Unité principale Unité de télécommande Utilisez les touches pour sélectioner“1_off/E_on”. • La marque Unité principale Unité...
- Page 41 Appuyez sur la touche MENU/ SET. Unité principale Unité de télécommande Suivez les étapes 8 à 18 de la procédure “Réglage de la minuterie” à la page 39. • La “E” che indica “EVERYDAY” passa a “1” che indica “ONCE”. •...
-
Page 42: Lecture De Cd
FRANCAIS LECTURE DE CD Lecture normale 1, 3 Exemple: Lecture d’un disque de 15 plages d’une durée de lecture de 62 minutes, 3 secondes, en commençant par la première plage Appuyez touche (ouverture/fermeture) pour ouvrir le plateau du disque. Unité principale Posez le CD dans le plateau du disque. - Page 43 Diverses fonctions de lecture Outre la lecture normale, l’RCD-M33 offre les fonctions de lecture suivantes: (1) Lecture d’une plage spécifique …………………………………………………………………… (A l’aide de la télécommande) Exemple: Lecture de la 8e plage Appuyez sur la touche CD sur la télécommande.
- Page 44 FRANCAIS (4) Lecture des plages dans un ordre déterminé …………………………………………………… (A l’aide de la télécommande) Appuyez sur la touche de lecture programmée PROG/ DIRECT. Apparaît lorsque la 3e plage occupe la 1re position Affiche Sélectionnez la plage à programmer à l’aide de programmées et la durée totale de lecture.
- Page 45 (7) Recherche d’un passage du disque sans interruption de l’écoute ……………………………………………………………………………… (A l’aide de la télécommande) • Utilisez cette fonction pour parcourir le disque sans en interrompre l’écoute. • Lorsque le passage souhaité est trouvé, relâchez la touche de recherche manuelle vers l’avant ( ) ou la touche de recherche manuelle vers l’arrière ( normale à...
- Page 46 MP3/WMA (Windows Media Audio). Les musiques téléchargées selon les instructions du site et gravées sur des disques CD-R ou CD-RW peuvent être lues par le RCD-M33. Windows Media et le logo Windows sont des marques commerciales ou des marques déposées de Microsoft Corporation aux Etats-Unis et/ou dans les...
- Page 47 Appuyez sur la touche (lecture/pause). Unité principale Unité de télécommande Les noms du titre, de l‘artiste et de l‘album défilent. • Utilisez la touche TIME/ DISPLAY pour changer les informations affichées. File Name Title / Artist Title / Album • Les noms du titre, de l‘artiste et de l‘album ne sont affichés que s‘ils sont enregistrés sur le disque.
- Page 48 • En général, plus le débit binaire d’un fichier MP3 est élevé, meilleure sera la qualité du son. Avec le RCD-M33 nous vous conseillons d’utiliser des fichiers MP3 enregistrés avec un débit binaire de 128 kilobits par seconde ou plus.
-
Page 49: Disques
DÉPANNAGE Vérifiez de nouveau les points suivants avant de conclure que votre système est en panne. 1. Tous les raccordements sont-ils corrects ? 2. Le système est-il utilisé conformément aux instructions de ce mode d’emploi ? Si le système ne semble pas fonctionner correctement, procédez aux vérifications énumérées dans le tableau ci-dessous. -
Page 50: Principales Prestaciones
ESPAÑOL ÍNDICE ⁄1 Principales prestaciones …………………50 Reproducción de CDs………………65 ~ 68 Reproducción normal …………………65 Antes de su utilización……………………50 • Diferentes funciones Precauciones en la Instalación …………51 • de reproducción ……………………66 ~ 68 Conexión de las antenas incluidas………51 ⁄2 Reproducción de MP3/WMA ……69 ~ 71 Conexiones ………………………………52 Reproducción normal ………………69, 70 •... -
Page 51: Conexión De Las Antenas Incluidas
PRECAUCIONES EN LA INSTALACIÓN Nota: Para la dispersión del calor, no instale este equipo en un lugar confinado tal como una librería o unidad similar. Nota CONEXIÓN DE LAS ANTENAS INCLUIDAS Instalación de la antena de interior de FM Conexión de una antena de exterior de FM Sintonice una emisora de FM (consulte la Si no puede conseguir una buena recepción página 58), coloque la antena de forma que la... -
Page 52: Conexiones
AM Derecho Antena de FM Receptor de CD (RCD-M33) Funcionamiento del sistema No se pueden llevar a cabo operaciones del sistema tales como la función del temporizador y de desactivación automática, así como las operaciones del mando a distancia a menos que todos los cables de espina RCA se conecten entre las unidades, de modo que asegúrese de realizar todas... -
Page 53: Nombres De Las Partes Y Funciones
(.). • El volumen aumenta y disminuye en 35 Se suministra alimentación al RCD-M33 gradaciones, desde el mínimo (VOLUME incluso cuando la alimentación está en 00) hasta el máximo (VOLUME MAX). - Page 54 Salida de CA (AC OUTLET) • Al utilizar en combinación con el portadiscos, conecte a la salida de CA en el receptor (RCD-M33) del CD o a uno de los otros componentes (100 W MÁX.). Cable de alimentación • Conecte el cable a una toma de corriente mural.
-
Page 55: Mando A Distancia
El RCD-M33 viene con un mando a distancia de sistema (RC-999). • El mando a distancia suministrado (RC-999) es para utilizarse solamente con la unidad RCD-M33. • Si la unidad de casete está conectada a la unidad principal, puede utilizar cada uno de los componentes anteriormente mencionados a través de su mando a distancia correspondiente... - Page 56 ESPAÑOL Botón MENU/ SET Botón DIMMER • Cuando se pulsa en modo de espera, el • Utilice este botón para ajustar el brillo del modo de espera cambia (se activa y visualizador de la unidad principal. Tiene 4 desactiva la visualización del reloj). posiciones de configuración, desde OFF •...
-
Page 57: Precauciones Al Manejar Los Discos
PRECAUCIONES AL MANEJAR LOS DISCOS Acerca de los discos compactos En el RCD-M33 sólo pueden NOTAS: reproducirse discos con la marca • El platillo del disco se abre cuando se presiona que se muestra a la izquierda. una vez el botón 5 (apertura/cierre) y se cierra cuando se presiona de nuevo. - Page 58 ESPAÑOL Sintonización manual Ejemplo: Sintonización en FM 92,50 MHz. (El mismo procedimiento sirve para sintonizar emisoras de AM) Pulse el interruptor de alimentación para activar ésta. Unidad principal Unidad de control remoto Presione botón FUNCTION o TUNER para seleccionar modo TUNER.
- Page 59 Preajuste o asignación de nombre a emisoras de radio (Esta operación sólo puede realizarse desde el mando a distancia) Es posible preajustar un máximo de 40 emisoras de FM/AM. Puede asignar nombre a las emisoras preajustadas (máximo de 8 caracteres cada una). Sintonice la emisora preajustada que desee.
- Page 60 ESPAÑOL Búsqueda de tipo de programa (PTY) Presione dos veces el botón RDS. Presione el botón PTY para seleccionar el tipo de programa. (Puede seleccionarse uno de los 24 tipos del listado que aparece más adelante.) Presione el botón TU+( TU–( ) (sintonización automática).
- Page 61 UTILIZACIÓN DEL PROGRAMADOR Las funciones de tiempo y del programador están incorporadas en el receptor de CD. Ajustes del programador Tipos de operaciones con el programador EVERYDAY TIMER : Utilícelo para activar la alimentación y la reserva a la misma hora todos los días. ONCE TIMER : Utilícelo para activar la alimentación y la reserva una vez.
- Page 62 ESPAÑOL Ajustes del programador La alimentación puede ajustarse para que se active y se desactive a una hora específica o a la misma hora todos los días. NOTA: • Por favor, no cambie la función de configuración de esta unidad antes de efectuar la configuración del temporizador.
- Page 63 Utilice los botones para ajustar los minutos de apagado programador. Unidad principal Unidad de control remoto Presione botón MENU/SET. Unidad principal Unidad de control remoto Utilice el botón para seleccionar “1_off/E_on”. • El símbolo Unidad principal Unidad de control remoto enciende.
- Page 64 ESPAÑOL Presione botón MENU/SET. Unidad principal Unidad de control remoto Ahora siga los pasos 8 a 18 del apartado ”Ajustes del Programador“ en la página 62. • La “E” de “EVERYDAY” cambia al “1” que indica “ONCE”. • Presione el botón MENU/SET y seleccionar “1_on/E_off”...
-
Page 65: Reproducción Normal
REPRODUCCIÓN DE CDs Reproducción Normal 1, 3 Ejemplo: Reproducción de un disco de 15 pistas y con un tiempo de reproducción de 62 minutos, 3 segundos, empezando por la primera pista. Presione el botón (apertura/cierre) para abrir el platillo del disco. Unidad principal Cargue el CD en el platillo del disco. -
Page 66: Diferentes Funciones
ESPAÑOL Diferentes funciones de reproducción Además de la reproducción normal, el RCD-M33 ofrece también las siguientes funciones de reproducción : (1) Reproducción de una pista específica …………………………………………………………… (Utilizando el mando a distancia) Ejemplo: Reproducción de la pista nº 8 Presione el botón CD en el mando a distancia. - Page 67 (4) Reproducción de las pistas en un orden determinado ………………………………………… (Utilizando el mando a distancia) Presione el botón PROG/DIRECT. Aparece en el visor cuando la 3ª pista se programa en primer lugar. Muestra el número total de pistas programadas Presione los botones del número y +10 para y el tiempo total de reproducción.
- Page 68 ESPAÑOL (7) Encontrar un determinado punto en el disco mientras se escucha el sonido …………………………… (Utilizando el mando a distancia) • Utilice esta función para saltar partes del disco mientras lo escucha. • Cuando llegue al pasaje deseado utilizando la función SKIP MONITOR, suelte el botón de búsqueda manual hacia adelante ( ) o el botón de búsqueda manual hacia atrás ( tpara reanudar la reproducción normal a partir de ese punto.
-
Page 69: Reproducción De Mp3/Wma
En Internet existen muchos sitios de distribución de música del que se pueden bajar ficheros de música en formato de compresión de audio MP3/WMA (Windows Media Audio). En el RCD-M33 puede reproducirse la música descargada según las intrucciones del sitio y escrita en un disco CD-R/RW. - Page 70 ESPAÑOL Presione el botón (reproducción/pausa). Unidad principal Unidad de control remoto Se recorren el título del álbum, el nombre del artista y el título de la pista. • Utilice el botón TIME/ DISPLAY para cambiar la información que se muestra. File Name Title / Artist Title / Album...
- Page 71 ”. de software de escritura.Para obtener más detalles, remítase a las instrucciones de uso del software de escritura. • Con el RCD-M33 pueden visualizarse los nombres de carpeta y de archivo en la pantalla hasta 32 caracteres. Reproducción arbitraria • Si se ha grabado en un formato que no sea “el nivel 1 de “ISO9660 level 1”, la visualización y la reproducción normales puede que no sean posibles.
-
Page 72: Localización De Fallos
ESPAÑOL LOCALIZACIÓN DE FALLOS Antes de considerar que su sistema tiene un problema serio, compruebe lo siguiente. 1. ¿Están las conexiones en buen estado ? 2. ¿Esta siendo operado el sistema como se describe en las instrucciones de funcionamiento ? Si el sistema no parece funcionar bien, compruebe lo que se describe en la tabla que aparece más adelante. - Page 73 MEMO...
- Page 74 TOKYO, JAPAN www.denon.com Denon Brand Company, D&M Holdings Inc. Printed in China 00D 511 4309 003...