Plantronics CS510 User Manual
Cs500 series wireless headset system
Hide thumbs
Also See for CS510:
- Quick start manual ,
- User manual (21 pages) ,
- Connection diagram (4 pages)

Related Manuals for Plantronics CS510


Summary of Contents for Plantronics CS510
-
Page 1: User Guide
USER GUIDE Let’s talk S A M P L E I M A G E Plantronics CS500 Series CS510 CS520 Wireless Headset System CS540... -
Page 2: Table Of Contents
Contents What’s in the Box Base and Headset Basics Accessories Customise Your Headset Change Headset Configuration Left Ear loop Assembly Headband Assembly Position Your Headset Connect Your Desk Phone Connect the Power Charge the Headset Connect and Configure Your Desk Phone Desk Phone (standard) Check Configuration and Make a Test Call Desk Phone plus HL10 Lifter (sold separately 13 Desk Phone plus EHS Cable Position Your Base Your Headset... -
Page 3: What's In The Box
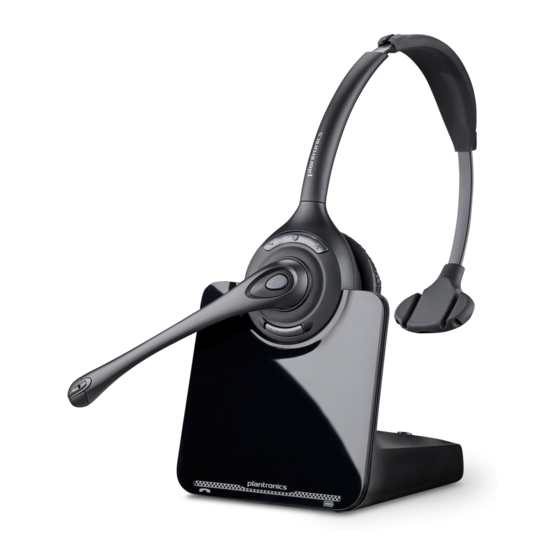
Headset with pre-installed battery, eartip and earloop Base Fit kit instruction card Headband Other size eartip and earloops Power supply Telephone interface cable CS510 - CS520 Base Basics Headset Basics Base Headset Model CS520 (binaural) shown Model CS510 (monaural) available... -
Page 4: Base And Headset Basics
Power jack Handset lifter/EHS cable jack Telephone interface cable jack Auto answer switch Listening volume dial* Speaking volume dial* Configuration switch* *For installation set up CS510 - CS520 Base overview Headset overview FRONT BACK Call/mute LED Headband Power on/subscription LED... -
Page 5: Accessories
Accessories HL10 ™ Lifter – automatically lifts handset and returns it to its cradle enabling remote call answer/end with your headset. Electronic Hookswitch Cable (EHS) – allows your phone handset to be electronically lifted off its hook enabling remote call answer/end with your headset. -
Page 6: Customise Your Headset
Customise Your CS540 Headset The CS540 headset comes configured for your right ear with a small ear tip and medium ear loop already secured. You are able to reconfigure your headset for your left ear, change to a different-sized ear tip and ear loop or install the headband. Changing Your Headset Configuration Remove the ear tip from the headset by gently pulling it. Rotate the ear loop downwards 90°. -
Page 7: Headband Assembly
Headband Configuration You are able to rotate the headset for wearing on the left or right ear depending on what suits you. PLEASE NOTE: You will need to remove the ear tip and ear loop from the headset prior to installing the headband. Refer to the below diagram to line the headband with the headset as shown. -
Page 8: Position Your Headset
Headset Position When wearing the headset, ensure the microphone is resting as close as possible to your cheek without touching it. The pivoting earpiece allows the microphone to be adjusted inwards which will help optimise the headset position. 1 To wear, slide the headset over and behind your ear while fitting the ear tip into your ear. Hold the base of the headset and push it in and back towards your ear to allow the pivoting earpiece to bring the microphone closer to your mouth. - Page 9 Headset Set Up for your CS510 and CS520 Your headset comes fully assembled. You can adjust the headband for a better fit and the mouthpiece for optimal performance. Adjust the Headband 1 To adjust the headband, lengthen or shorten the band until it fits comfortably. The clickstop feature keeps the headband securely adjusted. Position the headset so that the foam ear cushion(s) sit comfortably over the centre of your ear(s). For the C510 headset, position the stabilizer T-bar above...
-
Page 10: Connect Your Desk Phone
Connecting Your Desk Phone This section explains how to connect the headset base to your desk phone. Connect the Power Take the power supply and plug one end of the power jack to on the back of the base and the other end into a working power outlet. The Power On LED will be solid white. Charge the Headset To charge your headset, place it in the charge cradle. The charging LED on the base will flash green when charging and turn solid green when the headset is fully charged. Charge for at least 20 minutes prior to the first use. A full charge takes 3 hours. PLEASE NOTE: This product has a replaceable battery. Please only use the battery type supplied by Plantronics. -
Page 11: Connect And Configure Your Desk Phone
EHS Getting Started guide that came with your EHS cable or at plantronics.com/accessories. Desk Phone (standard) Connect one end of the telephone interface cable to the back of the base. Disconnect the handset coil cord from the desk phone and re-connect it to the telephone interface cable junction box. -
Page 12: Check Configuration And Make A Test Call
Checking Configuration and Making a Test Call If your desk phone has a volume control set it to mid-range. Look at the bottom panel of your base and make sure the default settings are correct, as below: listening volume dial ( ) = 3 and speaking volume dial ( ) = 3 configuration switch = A desk phone volume = mid-range... -
Page 13: Desk Phone Plus Hl10 Lifter
Desk Phone plus HL10 Lifter (sold separately to headset) PLEASE NOTE: Before progressing to the below instructions, first follow the steps above for Desk Phone (Standard). Firmly press the handset lifter power cord into the handset lifter jack Slide the handset lifter arm under the handset until the lifter base touches the side of the phone. - Page 14 If You Do Not Hear a Dial Tone If you do not hear a dial tone, raise the lifter height switch to the next highest position. 2 Repeat steps 2 through 5 in the section above until you hear a dial tone. When you hear a dial tone, secure the lifter as described in steps 6 through 8. Additional Parts (if required) Extender Arm Use an extender arm when the handset lifter needs additional stability with the lift and...
-
Page 15: Desk Phone Plus Ehs Cable
For Nortel Phones Only Desk Phone and EHS Cable Connect the end of the EHS cable to the base and the other end to the desk phone as described in the EHS Adapter Getting Started guide. For further installation information refer to the EHS Getting Started PLEASE NOTE: guide that came with your EHS cable. -
Page 16: Position Your Base
Positioning Your Base It is recommended that the minimum separation between your desk phone and the base is 15 cm. It is also recommended that the minimum separation between the base and your computer is 30 cm. Incorrect positioning can cause noise and interference problems. -
Page 17: Your Headset
Your Headset Now that your headset and desk phone are correctly configured, use this section to learn about the headset features, how to use the controls and more. Headset Controls This table describes volume controls if your headset is worn on the right. The volume controls are opposite if worn on the left. 1. Volume/Mute button Increase the Volume the volume button up. Decrease the volume the volume button down. Mute/unmute a call To mute/unmute the headset, press the volume/ mute button in. -
Page 18: Battery
Battery This product has a replaceable battery. To ensure optimal performance and quality, only use replacement batteries provided by Plantronics or their distributors. Low Battery Warning If you are on a call and the headset battery is critically low, you will hear a repeated single low tone every 15 seconds. You should recharge the headset immediately. -
Page 19: Out Of Range Warning Tones
Out of Range Warning Tones If you are on a call and move out of the operating range, you will hear three low tones. You will hear a single mid tone when you are back in range. If you stay out of range, an active call will be suspended. The call will be re- established when you return within range. If you remain out of range for more than 5 minutes, the system will drop the call. -
Page 20: Your Base
Your Base Base Phone Button and Switches 1. Pairing Button The headset and base that came in the box are paired (connected) to each other. However, if you wish to use a new headset or need to restore pairing to your current headset, the units can be paired to each other by the following two methods. Automatic Secure Pairing With your system idle, docking a headset will automatically pair it to the base, making it the primary headset. The Power On/Pairing LED will flash white during... -
Page 21: Wideband/Narrowband Switch
2 Wideband/Narrowband Switch The CS500 Series has wideband audio, which is optimal for clearer and more natural speech. If your desk phone is capable of wideband audio, set the Wideband- Narrowband switch to green for wideband. Set the switch to red (narrowband) for longer headset battery life or to increase the number of systems that can work in a small area. 3 Auto Answer Switch Auto answer establishes the radio link between headset and base. -
Page 22: Daily Use
Daily Use Place an Outgoing Call While wearing your headset, press the headset call button. Remove the handset from the cradle to hear a dial tone. This step will be automatic if you install a lifter or EHS cable accessory. PLEASE NOTE: Dial the number using your desk phone. -
Page 23: Troubleshooting
Troubleshooting Headset My headset is unstable. When wearing the headset, ensure that the microphone is resting as close as possible to your cheek without touching. The microphone can be adjusted inward to optimise the position of the headset by pivoting the earpiece. Please see Headset Position (Page 8). Talk time performance If this happens, it means the battery is wearing out. Contact your distributor is significantly degraded for battery supplies. - Page 24 How do I protect myself from acoustic shock injuries? Only the Soundshield can totally prevent dangerous sounds from getting through to your headset. Soundshield can intercept acoustic shrieks before they reach your ear. By digitally processing the sound, Soundshield constantly manages the volume of the incoming conversation, identifying and silencing the dangerous tones. Most importantly, the intelligibility of your conversation is never compromised.