
Related Manuals for Ricoh ImageReader PowerScan FB750


Summary of Contents for Ricoh ImageReader PowerScan FB750
- Page 1 Model FB750 ImageReader PowerScan User’s Guide Version 980605 Info Peripherals 1998...
- Page 2 Trademarks Microsoft is a U.S. registered trademark of Microsoft Corporation. Windows and MS-DOS are trademarks of Microsoft Corporation. IBM, PC, AT, XT are registered trademarks of International Business Machines Corp. Other brands and product names herein are trademarks or registered trademarks of their respective holders. Copyright All rights reserved.
-
Page 3: Table Of Contents
Table of Contents Introduction ............................5 Welcome ................................5 The User’s Guide ..............................5 Assistance ................................7 What is TWAIN? ..............................7 A note about application software ........................7 Scanner Setup ............................. 9 System Requirements ............................9 Package Contents ............................... 10 Unlocking the Scanner ............................ - Page 4 Descreen ..................................27 Color Wizard ................................28 Tool Bar ................................28 Invert ................................... 28 Mirror ..................................28 Brightness/Contrast ..............................28 Color Adjustment ................................. 28 Histogram/Tone Map ..............................29 Menu Bar ................................29 File ....................................29 Settings ..................................29 Image ................................... 29 Help .....................................
-
Page 5: Introduction
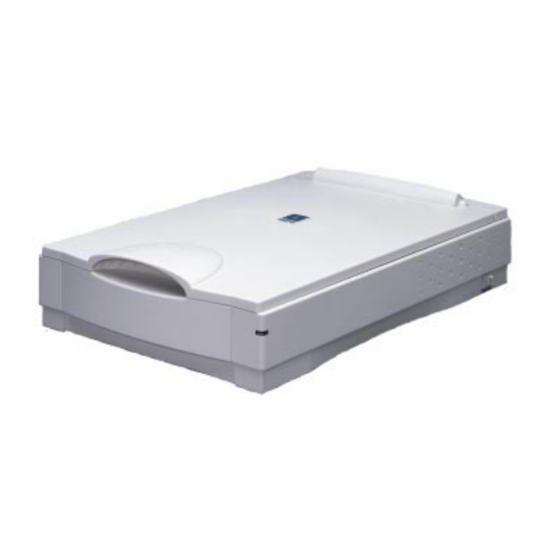
The ImageReader PwerScan (FB750) is designed as a CCD scanner with an exact A4 scanning bed. Care has been taken to save the most space possible on your desktop while maintaining the highest quality scanning results with an optical resolution of 600x600 dpi (9600dpi through interpolation). - Page 6 Bold/Italics Special notes. This icon is for tips or helpful information. This icon is for important information you should not miss. This icon is for warnings. Note: Other icons represent the icons you will see on your own computer. The Table of Contents is linked to the rest of the document. You can click on an item in the table of contents and be instantly taken to that section of the User’s Guide.
-
Page 7: Assistance
Assistance If you experience difficulties with the installation or operation of your scanner, there are many solutions in the Troubleshooting section of this User’s Guide, including how to get in touch with our Technical Support staff when all other attempts to solve your problem fail. What is TWAIN? TWAIN is the interface that links the scanner with scanning software applications. - Page 8 Graphics: If your desired use is to edit or digitize (convert into a computer file) a photo or other picture or 3-dimensional object, you will want to use a graphics application (i.e. PictureFun!, Microsoft Photo Editor, Adobe Photoshop, etc). These types of applications provide image-editing tools for performing modifications to art, photographs, or other continuous tone images.
-
Page 9: Scanner Setup
Scanner Setup System Requirements Minimum and recommended system requirements are: IBM compatible PC with a 486 or Pentium Processor Microsoft Windows 3.1 or 3.11, Windows 95/98 or NT (Windows 95/98 or NT recommended) 16 Megabytes of RAM (32 Megabytes or higher recommended) EPP, ECP, or SPP parallel port (EPP recommended) VGA, SVGA color monitor and video card supporting at least 256 colors (24-bit True Color recommended) -
Page 10: Package Contents
Package Contents Scanner 12-Volt Power Adapter D25P Parallel Cable Quick Start Guide CD-ROM disc with Scanner Driver, Application Software, User’s Guide and Software Manuals InfoCenter 32/ImageDock Quick Reference Guide InfoCenter Lite Quick Reference Guide Technical Support Card Unlocking the Scanner The scanner is locked at the factory. -
Page 11: Connecting The Power Adapter To A Power Supply
1. Scanner 2. Power Supply 3. D25P Cable 4. PC Parallel Port 5. Printer Cable Connecting the Power Adapter to a Power Supply The Power Adapter should be plugged into an AC power supply that is 110 Volts and 60 Hertz. It is highly recommended that you use a surge-protected power strip or power center for your com- puter and all computer peripherals such as the scanner. -
Page 12: Scanner Driver And Application Software Installation
Scanner Driver and Application Software Installation Starting the Installation Program Most Windows 95/98 and Windows NT computers have Autorun enabled. With a computer with Autorun enabled, as soon as you insert the ImageReader PowerScan Installation CD-ROM disc in the computer, the installation program will start. If you have Autorun enabled (if the Installation screen opened on its own), start at Installa- tion Program, below. -
Page 13: Scanner Driver
To go from one screen during the installation to another click Next, Back, or as applicable. Scanner Model The ImageReader PowerScan (FB750) is a parallel port scanner. Select Parallel Port Scanner as your scanner model before you click Next. Destination Directory The scanner driver needs to be installed to a directory of its own on your hard drive. -
Page 14: Infocenter 32 (Windows 95, 98, Or Nt Only)
Installing files The scanner driver will take a few moments to write the appropriate files to your hard drive. PC Compatibility Information When the driver is installed you will be shown a reminder about the parallel port settings required for optimal perfor- mance of your scanner. - Page 15 If you want to change the information that was pre-entered by your computer, you will have to clear the line (click your mouse on the line and either delete or backspace or highlight the exist- ing text and overwrite). If you have no company name or the Camera and software is for your personal use, type – none- in the company field.
-
Page 16: Picturemall Picturefun! (Windows 95, 98 Or Nt Only)
your installation called Headliner. Headliner is a news and information retrieval service that is designed to display the news and information in an easy to read and access format. If you do not have an Internet connection or you do not want to install Headliner, click No. This will end the installation without installing Headliner. -
Page 17: Infocenter Lite
Installing files Once you have completed filling in the required information, PictureFun will proceed to install on your computer. During the installation you will be asked if you want to install high-resolution templates for Paper. If you want to use the more advanced features of Paper (adding your images to cards, magazine covers, and invitations), you may want to install these high-resolution templates now. - Page 18 As you go through the installation, there are some points where you will be asked to fill in information. Each section here is a separate installation screen. Many of the screen-shots below only show a portion of the screen (the portion that changes or has important information).
- Page 19 The default directory for InfoCenter Lite is C:\InfoLite. There are two methods to change the destination directory if you want to install to a different location. For either method, first click Browse. Type in the complete new path instead of the default (either block and overwrite or clear the default directory with backspace or delete and then type in the new directory).
-
Page 20: Adobe Acrobat Reader
InfoCenter Lite Installation Complete When the InfoCenter Lite installation is finished copying files onto your hard drive and setting up the applications you chose, it will create two program groups, open them and put in the new icons which are links to launch the applications. -
Page 21: Uninstalling
InfoCenter 32 D:\Setup32\Set32.exe PictureFun! D:\Setup32\ColorDesk\Setup.exe Adobe Acrobat Reader D:\Adobe\Acroread.exe Scanner Driver (Windows 95/98/NT) D:\Driver\32\Setup.exe Scanner Driver (Windows 3.1 or 3.11) D:\Driver\16\Setup.exe Uninstalling If you just delete the directory where the application or driver resides, you will leave configuration information and shared files that can cause problems with your computer later. Use the Uninstall program(s) if you need to uninstall the scanning applications. -
Page 22: Scanner Operation
Scanner Operation The following directions specify using your scanner with InfoCenter 32 or InfoCenter Lite. How- ever, most TWAIN compliant applications have similar controls and menu choices with regard to TWAIN. For any application other than InfoCenter 32 or InfoCenter Lite, consult the software manual for specific information. -
Page 23: Document Placement
If there is nothing listed in the source selection window, the scanner driver is not installed. See the Troubleshooting section for information on what may have interfered with the driver installation. Document Placement Your original should be placed into the scanner face down against the glass. The top left edge of the docu- ment should be aligned with the arrow on the outside edge of the scanning bed (the glass). -
Page 24: Image Types And Scanning Modes
The PowerScan TWAIN interface is divided into two windows: the Control Window and the Preview Window. The Control Window is further divided into sections to help guide you through all the scanning settings. The main part of the Control Window has the controls you are most likely to modify for your image and has drop down menus in three sections to configure your scan. -
Page 25: B/W Line Art
B/W Line Art Line Art captures the image in black and white only (single-bit) with no intermediate shades of gray. Because there is very little image information that has to be stored, a LineArt scanned item takes up very storage space. Many OCR programs require an image be scanned in Line Art. -
Page 26: Recommended Scanning Resolution And Mode By Task
The ImageReader PowerScan is capable of a maximum resolution of 9600dpi (600x600 Optical). However, if you try to scan at 9600 dpi, be very aware the resulting file size will be astronomically Huge. You should match your scanning resolution to the purpose of your image or scanning task. Some software has specific requirements for resolution for specific scanning tasks (refer to your software manual for this information or below for some general guidelines). -
Page 27: Scale
Scale You can resize your image before you scan it by setting the scale. If you set the scale to 25%, your image will be reduced to one quarter of its original size. If you set the scale to 200%, your image will be doubled. -
Page 28: Color Wizard
Color Wizard Color Enhance will automatically make adjustments to the scanned output to achieve a closer match to the colors of your original in the scanned image. Tool Bar There are six buttons on the button bar at the top of the TWAIN interface window. Only five of the buttons are implemented in the current scanner driver. -
Page 29: Histogram/Tone Map
Histogram/Tone Map With the Histogram/Tone Map, you can make adjustments to color values: brightest, middle & darkest gray. Each item can be configured separately with its labeled slide bar. If you want to see how your changes will affect your image, click the Preview button. The previewed image will be temporarily altered. -
Page 30: Help
Halftone Patterns: Halftone mimics grayscale by varying the size of the dots. Use this screen to choose how the dots will be varied to achieve the effect you desire. Sharpness: Some images can be improved with adjustments to the Sharpness, which governs how the differences between color edges and shapes are handled. -
Page 31: Scan
Scan After you have made any necessary adjustments to the scanning control, this button will begin the actual scan. Note: The Scan button will remain grayed (unavailable) until you have marked a scanning area , see Preview above. Your scanning progress will be noted at the bottom of the Preview Window. Click Cancel if you need to halt the scanning process. -
Page 32: Included Applications And Reading The Software Manuals
Included Applications and Reading the Software Manuals This section of the manual is intended as a quick reference to the applications that came with your scanner. It is not intended to replace or to expand on the software manuals. Adobe Acrobat Reader The Acrobat Reader is the application you can use to read the software manuals for the applications included with your scanner. -
Page 33: Picturefun! (Windows 95, 98, Or Nt)
In InfoCenter 32 and InfoCenter Lite you can scan documents, images, and anything you want to scan. InfoCenter 32 and InfoCenter Lite will display your completed scans as thumbnails on its desktop. You can use the toolbar at the top of the desktop to do several different things to your image. - Page 34 If you are scanning pictures or objects, you can scan directly into any of the PictureFun suite (except for the Setup and informational ones) or, in InfoCenter 32, you can drag your thumbnail onto the Application Bar icon for the application. See below for a description of what each of the PictureFun applications can do.
-
Page 35: Infocenter Lite Applications (Windows 3.1 Or 3.11)
PictureMall is not directly affiliated with Info. You will need to contact PictureMall for any questions about orders or pricing for items ordered through the PictureMall or PictureFun applications. InfoCenter Lite Applications (Windows 3.1 or 3.11) The InfoCenter Lite Applications are the ColorDesk pair of imaging applications which has been designed to work with Windows 3.1 or 3.11. - Page 36 Do you want to read the InfoCenter 32 or InfoCenter Lite manual? You will want to use the Adobe Acrobat Reader. Do you want to put your image onto a tee shirt or a mug or anything else? You will want to use PictureMall and choose from a wide variety of items on which to put your image.
-
Page 37: Maintenance
Maintenance Precautions Keep the scanner out of direct sunlight. Direct exposure to the sun or excessive heat may cause damage to the unit. Do not install the scanner in a humid or dusty place. Moisture or excessive dust can impair the scanning mechanism and may cause damage to the unit. -
Page 38: Troubleshooting
Troubleshooting Frequently Asked Questions (FAQ) Frequently Asked Questions are a collection of problem solving questions and solutions. If you are having problems, looking in the FAQ might help you solve it. The FAQ is created using both those questions we think you might ask and questions others have asked (with this or other scanners) and the best solutions from Technical Support. - Page 39 through port was included as part of its design that will allow you to connect your printer to the scanner so they can share the same parallel port on your computer. In most cases, you will not need to install a second parallel port to have both the scanner and printer work on the same computer. See the last section of Scanner Setup for instructions on how to connect both your scanner and printer to the same port on your computer.
-
Page 40: Scanner Operation
mode is usually done in the CMOS/BIOS setup (usually accessed while your computer is booting up). Consult the documentation that came with your computer for specific information on how to access your CMOS/BIOS and how to change the parallel port mode. The following directions may not apply directly to your CMOS/BIOS setup. - Page 41 Windows 3.1 or Windows 3.11: 1. With your desktop clear, press the Ctrl and Esc keys at the same time. This will bring up a Task List window. Program Manager is the Windows 3.1 and Windows 3.11 desktop and cannot be closed.
- Page 42 5. Click on Maximum. 6. Click on Ok. Why do my scanning results seem dark? Every computer deals with images and graphics differently. You may need to make adjustments to better suit your computer. 1. Try using the Color Matching setting in the TWAIN user interface window. Note: The scan could take a bit longer than without the Color Matching setting.
-
Page 43: Printer Setup And Operation
Try reducing the resolution of your image, reduce the scanning area, change the mode, or free up hard drive space. Information on how to change the resolution, mode and scanning area is in the scanner User’s Guide. Freeing up hard drive space is a matter of deleting or otherwise removing unneeded files or programs. -
Page 44: Technical Support
f) Click the Details tab g) Click Spooler Settings h) Select Print Directly to the Printer i) Click OK and OK again j) If prompted to reboot, do so. k) If the problem persists, you will need to disable the bi-directional properties of your printer (refer to your printer documentation or consult your printer manufacturer). - Page 45 NAME: PHONE NUMBER: FAX NUM- BER: ADDRESS: E-MAIL ADDRESS: COMPUTER MANUFACTURER: (what company built your computer or if it is custom built) COMPUTER TYPE: (486 or Pentium and what speed) VERSION OF WINDOWS: (Windows 95 or Windows 3.1 or 3.11) SCANNER MODEL NUMBER: (Commonly found on the front of the Quick Start Guide) SERIAL NUMBER: (Usually on the back or bottom of the scanner or on the...
-
Page 46: Specifications
Specifications All specifications are subject to change without notice. Model: FB750 Scanner Type: Flatbed Scanner Optical Resolution: 600 dpi * 600 dpi (H*V) Maximum Resolution: 9600 dpi Scanning Modes: Black & White Line Art mode Halftone mode 10-bit gray scale (8-bit output) -
Page 47: Ec Declaration Of Conformity
EC Declaration of Conformity According to EN45014 Manufacturer’s Name: Info Peripherals, Inc. Model Number : FB750 Conforms to the following Product Specifications: Emission: EN 50081-1 (1992) EN 55022 (Class B) (Conducted Radiated) (1994) EN 60555-2 (Harmonics) (1987) EN 60555-3 (Flicker) (1987) -
Page 48: Appendix
Appendix Here you will find information helpful for learning more about your scanner and digital imaging. The information provided in this appendix is for your information and does not imply any warranty or support for anything you do with this information. Tips &... -
Page 49: Saving
printers require margins & most will shrink the image to fit within those margins). 5. When scanning documents with the Copier function, it will be processed as an image not a text document. If there are margins on the document but you scan at the full 8 ½ x 11 inches, the printer will see that as an 8 ½... -
Page 50: Saving To Floppy Diskettes Or For Email
document with a background image (like a printed watermark). 6. Most error messages while doing OCR are the result of one of the above not being as it should be (ie. too high of a resolution or an incorrect scan mode). 7. -
Page 51: Glossary Of Imaging Terms
Glossary of Imaging Terms Some of the terms here are not used in the scanner or camera driver or application software included with your scanner or camera. The information here is for your information only and does not imply support for any imaging task or application. 3rd-Party Software Application software of many kinds is generally available from your computer store or other vendor. - Page 52 8-bit grayscale Grayscale, in contrast, is scanned in 8 or 10 bits (output of 8 bits), a single channel of color, providing for 256 shades of gray. 1-bit black and white Line-Art, Error Diffusion and Half-tone modes scan in single bit (either on or off) which is only black and white, no shades or gradations of color.
- Page 53 Bitmap The representation of a digital image in the computer’s memory. Bi-directional Parallel Port mode. This less advanced port mode allows communication to pass in both directions between the computer and parallel port devices. Brightness The balances of dark and light shades determine the intensity of an image. Cast Too much of one color in an image, such as too much red giving an image an all-over red appearance.
- Page 54 Compression Compression means the reduction of data needed to save information, especially image and sound data. There are lossless methods, which only remove redundant data, and lossy methods, which achieve extremely high compression rates at acceptable loss of information (such as JPEG and MPEG). A lossy format can alter an image’s appearance.
- Page 55 Direct Color Generic term for TrueColor, RealColor and HiColor. In these modes, the color information saved in the display memory is not translated by a look-up table, but passed directly to the D/A converter. This means that the full color information has to be saved for each pixel. Display Adapter or Video Card A card installed inside the computer (or integrated into the motherboard) that generates video signal to create, with the monitor, a screen image.
- Page 56 Enhanced Parallel Port mode. On some computers, you will have an EPP emulation, which is denoted by a version number in the BIOS (ie. EPP 1.7). This mode will allow the computer to send an advanced parallel port signal to installed parallel port device(s). The EPP mode also allows fast communications through the parallel port and is the preferred mode for most parallel port devices.
- Page 57 Hue provides the contrast between colors, what distinguishes one color from another. Hue Saturation Value. The characteristics of the image’s color based on the hue, saturation and brightness (value). Histogram This graph of how many numbers of each possible brightness levels occur in an image is created by looking at each pixel and computing its brightness and then counting the number of times each level occurs in the image.
- Page 58 multiplied (for example, a block of four equally colored pixels represents the original pixel), aliasing effects (“blocks” and “stairs”) will occur. This can be avoided by interpolation procedures (using average colors for inserted pixels). Horizontal interpolation (x filter) is relatively easy to perform, since the pixels are drawn to the screen in lines.
- Page 59 manager, Memmaker, which can be run from a DOS-prompt (but not within Windows). Running a memory manager can free up conventional (the first 640K) memory for use by programs. MIME Multipurpose Internet Mail Extensions, a standard format that allows the attachment of graphics and other non-text files, such as programs, to text-based e-mail messages.
- Page 60 OpenGL 3-D software interface (3-D API). Implemented, for example, in Windows NT and later releases of Windows 95. Based on Iris GL from Silicon Graphics and licensed by Microsoft. Optical Resolution The true resolution of the scanner determined by its hardware optics. The scanner driver yielding an interpolated resolution often enhances optical resolution.
- Page 61 installing support for the device. Only devices or interface cards that Windows 95 has direct support for can be Plug and Play. Scanner, digital camera and other imaging device support is not built into Windows 95; therefore, no scanner, digital camera or other imaging device can be truly Plug and Play. As of this writing (May 98), support for imaging devices is reputed to be integrated in Windows 98, but since the full-release has not yet been revealed, there is no way to verify this.
- Page 62 Read Only Memory. Chip memory that cannot be written to, such as the BIOS of a computer or the firmware of an expansion board. Rotate Change the perspective of an image with respect to the original. Rotate will turn the image to one direction or the other, ¼...
- Page 63 Serial Device A device that is designed to be connected to the serial port. Examples include external modems, digital cameras, mice, digital notepads, etc. Serial Port Also called a Comport. This connection is often 9-pin or 25-pin and generally a male connector. The signal from the computer is in a serial stream to the attached device.
-
Page 64: File Formats
YCbCr format: Y contains the luminance (brightness) signal, Cb and Cr contain the chrominance (color) information. See also YUV and RGB. YCbCr and YUV are linked via the following equations: Y = 0.3 R + 0.59 G + 0.11 B Cb = (U/2) + 0.5 Cr = (V/1.6) + 0.5 Zoom... - Page 65 folders in Windows and other operating systems. An icon file from one operating system may not work on another. JPG, JPEG This compressed format is commonly used to pass images from one person to another across the Internet. All of the imaging programs packaged with your scanner support this format. JPG is a lossy format, which means to provide its highest degrees of compression, it removes some of the picture elements.
-
Page 66: Limited Warranty
Info Limited Warranty Info warrants this scanner to be free of manufacturing defects, both materials and workmanship, for a period of one year from the date of original purchase. This warranty applies only to the original purchaser. In the event of a defect, Info will repair this product free of charge, including parts, labor, and return postage. This warranty does not cover damage, loss, abuse, misuse, unauthorized repair, shipping damage, natural phenomena, or effects of use other than intended.