Garmin GPSMAP 96 Pilot's Manual
Portable aviation receiver
Hide thumbs
Also See for GPSMAP 96:
- Features (6 pages) ,
- Quick reference manual (2 pages) ,
- Declaration of conformity (1 page)
Table of Contents
Advertisement
Quick Links
Advertisement
Table of Contents

Related Manuals for Garmin GPSMAP 96


Summary of Contents for Garmin GPSMAP 96
- Page 1 GPSMAP 96/96C ® portable aviation receiver pilot’s guide...
- Page 2 Garmin. Garmin hereby grants permission to download a single copy of this manual onto a hard drive or other electronic storage medium...
-
Page 3: About This Manual
Thank you for choosing the Garmin GPSMAP 96/96C, an unsurpassed portable aviation receiver that utilizes the proven performance of Garmin GPS, full-featured mapping and navigation for aviation, marine, and automotive applications. Take a moment now to compare the contents of this package with the packing list on the outside of the box. -
Page 4: Table Of Contents
Introduction ... i About This Manual ...i Manual Conventions ...i Warning ...iv Caution ...v Caring for the GPSMAP 96/96C ...vi Getting Started ... 1 Unit Overview ...1 Installing the Batteries ...3 Adjusting the Backlight and Contrast ...4 Basic Operation ... 5 Turning On the GPSMAP 96/96C ...5... - Page 5 Accessories ...124 What are Map Datums? ...125 What is Position Format? ...125 What is WAAS? ...126 What is Differential GPS (DGPS)? ...126 Interfacing the GPSMAP 96/96C...129 Messages ...130 Data Field Options ...132 License Agreement and Warranty...134 Declaration of Conformity (DoC) ...137 Index ...
-
Page 6: Warning
This Notice is being provided in accordance with California’s Proposition 65. If you have any questions or would like additional information, please refer to our Web site at http://www.garmin.com/prop65. Minimize the amount of time spent viewing the screen of the GPSMAP 96/96C while driving and use voice prompts when possible. -
Page 7: Caution
Other Garmin dashboard or friction mounting options should be used. Garmin does not take any responsibility for any fines, penalties, or damages that may be incurred as a result of disregarding this notice. -
Page 8: Caring For The Gpsmap 96/96C
Avoid chemical cleaners and solvents that can damage plastic components. Cleaning the Screen The GPSMAP 96/96C screen should be cleaned using a soft, clean, lint-free cloth. Water, isopropyl alcohol, or eyeglass cleaner can be used if needed. If these are used, apply the liquid to the cloth and then gently wipe the screen with the moistened cloth. -
Page 9: Getting Started
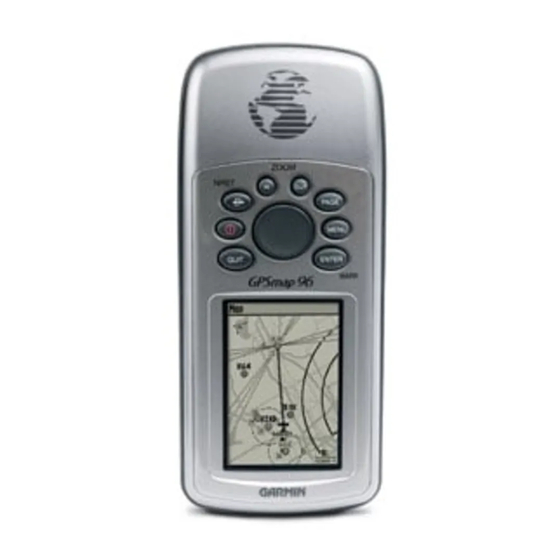
> ettInG tarted ettInG tarted Unit Overview The GPSMAP 96/96C is an all-in-one, versatile aviation, automotive, and marine navigator- perfect for air, land, or water. This portable GPS navigator Internal features a 256-color TFT screen, a built-in basemap, antenna Jeppesen aviation database, and auto routing to provide you with automatically generated turn-by-turn directions. - Page 10 MOB (Marine) Mode. POWER/BACKLIGHT Key • Press and Hold to turn unit On/Off • Press and Release to adjust backlighting (Contrast - GPSMAP 96). QUIT Key • Press and release to cancel data entry or exit a page. ROCKER Key •...
-
Page 11: Installing The Batteries
Installing the Batteries The GPSMAP 96/96C operates on two AA batteries (not included), which are located in the back of the unit. Alkaline or NiMH batteries (see setting the battery type) can be used. Stored data is not be lost when batteries are removed. -
Page 12: Adjusting The Backlight And Contrast
96C Backlight Backlight and Adjustment Contrast Adjustment To adjust the contrast level: (GPSMAP 96 only): 1. Press and quickly release the POWER key. 2. Press the ROCKER to the right to increase the contrast or to the left to decrease the contrast. -
Page 13: Basic Operation
Page appears. To acknowledge that you have read and understand the warning, press ENTER to continue. 3. To turn off the GPSMAP 96/96C, press and hold the POWER key again. WARNING: When you agree with the statements on the Warning Page it is assumed... -
Page 14: Initializing The Gpsmap 96/96C
Initializing the GPSMAP 96/96C As soon as you turn the GPSMAP 96/96C on, it begins searching for satellites in your area and should acquire a fix within a few minutes. When you have cycled through the Start Up and Warning Pages, the Satellite Page appears. -
Page 15: Status Bar
GPS Accuracy Satellite Array “Sky View” Signal Strength Bars Satellite Page Press MENU to view options for Simulator, WAAS, Track Up/North Up, Multicolor screen, and New Location to use the Map Page to establish your approximate location. Once the receiver has collected information from and is fixed on at least three satellites, the unit is “Ready to Navigate”... -
Page 16: Changing Usage Modes
Message Log feature, refer to page How to Operate Unit Features The GPSMAP 96/96C unit’s advanced keypad system is designed to allow quick, convenient selection of navigation options and data entry. Many keys on the keypad have dual functions, when pressed and released they perform a primary function and when pressed and held they perform a secondary function. - Page 17 The following features are referred to throughout this manual. Cursor—the highlighted area on the screen that can be moved up/down/left/right with the ROCKER to select individual fields. Moving the cursor makes a selection, begins data entry, or scrolls through a list. Field—the location on a page where data or an option can be entered and shown.
-
Page 18: Selecting Options And Entering Data
Selecting Options and Entering Data You can select and start options and enter data to customize your GPSMAP 96/96C to fit your personal needs. This requires movement of the cursor, which is identified in this manual as highlighting, selecting, or choosing an item in a list or a field on the screen. - Page 19 To select and start an on-screen button: Use the ROCKER to highlight the on-screen button, and press ENTER. To enter data in a data field: 1. Use the ROCKER highlight the data field, and press ENTER to start the field. 2.
-
Page 20: Using Additional Map Data
Interface Cable (with a serial connector) is used to transfer MapSource CD-ROM data to the unit. To aid in learning to use the GPSMAP 96/96C, please use the Simulator Mode. Simulator Mode is also helpful for practicing with the unit indoors or when no satellite signals are available. - Page 21 To put the unit into Simulator Mode using the Main Menu: 1. Press MENU twice to show the Main Menu. 2. Highlight the Setup icon, and press ENTER to show the Setup Menu. 3. Highlight the System icon, and press ENTER to show the System Setup Page.
-
Page 22: Using Direct To Key
Press PAGE or QUIT to view the simulated navigation on the other main pages. Using DIRECT TO Key The GPSMAP 96/96C includes an internal Jeppesen database, and memory for up to 1,000 user-created waypoints. The GPSMAP 96 accepts 22MB, while the GPSMAP 96C accepts 118MB of MapSource data. - Page 23 Intersections—identifier, nearest VOR, radial and distance from nearest VOR, position (latitude/ longitude), and region/country. ARTCC—Air Route Traffic Control Centers. Airspace—boundaries (Class B, Class C, Class D, Control Zones, SUAs, and MOAs), controlling agency, and vertical boundaries. FSS—Flight Service Stations. User Waypoints—name, symbol, position (lat/lon), elevation, and comment.
- Page 24 aSIc peratIon To Go To an airport or navaid: 1. Press DIRECT TO to show the Go To Page. If Aviation is not highlighted, press the ROCKER until the top field is highlighted. Press the ROCKER right or left until Aviation is selected.
- Page 25 To view usage restrictions for a communication frequency: 1. Select Comm with the ROCKER in the top field. Use the ROCKER to highlight any frequency with usage restrictions (as denoted by an asterisk), and press ENTER. A Usage Restrictions Page appears describing the restrictions for the selected frequency.
-
Page 26: Select Approach
The original route is still available for later use. The approaches provided in the Jeppesen database are for monitoring purposes only. The GPSMAP 96/96C is not an IFR-approved instrument and should not be used as a primary source of navigation guidance in instrument conditions. - Page 27 To select an approach using the Active Route Page: 1. Access the Active Route Page, and press MENU. 2. Use the ROCKER to choose Select Approach. 3. Select an Approach from the window. 4. Indicate Yes or No in the “Vectors?” window. To cancel vectors and/or an approach from the Go To Approach Page: 1.
-
Page 28: Go To User And Recent
aSIc peratIon Go To User and Recent To Go To a recently used waypoint or user- created waypoint: 1. Press DIRECT TO to show the Go To Page. Use the ROCKER to highlight the first field. Press the ROCKER to the right or left until Recent or User is selected. -
Page 29: Understanding Vectors
Active Approach Page If you select Vectors, the GPSMAP 96/96C creates an extension of the final course, beyond the final approach waypoint in the database (final approach fix [FAF]). -
Page 30: Go To Page Options Menu
aSIc peratIon Go To Page Options Menu The available options are described below. In the sections following, some options, such as Show Details, also have instructions detailing how to use the option. To access the Go To Page Options Menu: 1. -
Page 31: Nearest Pages Overview
Nearest Pages Overview In Aviation Mode, the Nearest function is accessed by pressing and holding DIRECT TO detailed information on the nearest airports, airport weather sources, VORs, NDBs, intersections, and user waypoints within 200 miles of your present position. You can also access information regarding the five nearest FSS (flight service station) and center (ARTCC) points of communication, along with their associated frequency(s). - Page 32 aSIc peratIon ARTCC (Air Route Traffic Control Center)—five nearest with bearing to and distance and frequency(s) FSS (Flight Service Station)—five nearest with bearing to and distance, frequency(s) and VOR (for duplex operations) Airspace—up to nine (depending on number of alerts provided) with name, time to entry (when applicable), and status.
-
Page 33: Setting Airport Criteria
4. Press QUIT to return to the Nearest Pages. You can also highlight any one of the on- screen buttons to perform that action, such as Delete, Map, or Go To. To select a nearby waypoint as your destination: 1. Show the nearest pages and select a category. 2. - Page 34 aSIc peratIon 3. With the runway surface field highlighted, press ENTER. Use the ROCKER to select the surface type, and press ENTER. 4. Highlight the minimum runway length field, and press ENTER. Use the ROCKER to enter the minimum acceptable runway length. Press ENTER.
- Page 35 To view additional communication frequencies: DIRECT TO 1. Press and hold Nearest Page. 2. Use the ROCKER to select the ARTCC or FSS category. 3. Press the ROCKER down to highlight the Center or Station field (depending which category you are on), and press ENTER. 4.
-
Page 36: Navigating In Automotive Mode
You can select Faster Time, Shorter Distance, or Off Road option windows show on the Map Page. Select and option and the unit calculates the route. When complete, the Map Page shows a bold magenta (gray for the GPSMAP 96) line overlaying the roads 96/96C Owner’s Manual... -
Page 37: Going To A Destination In Marine Mode
on your route. A guidance message shows at the top of the page with directions to the first turn on the route. As you approach each turn, a tone sounds and a Turn Preview Page appears with a detailed graphic of the turn. -
Page 38: Man Overboard (Mob)
When you select a Find Menu item (typically from the Marine Points list), select the Go To button. The GPSMAP 96/96C creates a direct-line navigation route to the destination. If you want to create a route with turns at specific points, refer to the section on Creating Routes. -
Page 39: Creating And Using Waypoints
Creating and Using Waypoints The Garmin GPSMAP 96/96C stores up to 1,000 alphanumeric waypoints with a user-defined icon, comment, altitude, and depth available for each waypoint. Waypoints can be created using three basic methods: Mark Waypoint Page 96/96C Owner’s Manual Enter/Mark key—allows you to mark your... -
Page 40: Creating Waypoints Graphically
Page Arrow. When you move the cursor over a map item, you see a highlighted description of that item. The GPSMAP 96/96C uses the map item text shown on the cartography as the default name and symbol for the new waypoint. - Page 41 Additional Options for Creating Waypoints Waypoints can also be created by manually entering position coordinates through the Find feature of the Main Menu. This method can be useful for creating a waypoint at a specific latitude/longitude position from a chart. You can also manually change the location coordinates in the New Waypoint Page to create a new waypoint.
- Page 42 aSIc peratIon A waypoint can also be created by projecting the distance and bearing from a specific location to a new location. To create a new waypoint by projecting its location: 1. Create a waypoint using your favorite method (discussed in previous sections) or select a waypoint from the Find Waypoints List.
-
Page 43: Waypoint Menu Options
Waypoint Menu Options As well as Project Location, additional options are available by pressing MENU on the New Waypoint and Waypoint Information Pages: Average Location, Find Near Here, Change Reference, Set Proximity, Add To Route, View Sun and Moon, View Hunt and Fish, and Reposition Here. - Page 44 aSIc peratIon To find an item (waypoint, etc) near a selected waypoint : Select Find Near Here to show the Find Menu, and select a category to show a list of map items near that waypoint. To change the reference point for a waypoint: Select Change Reference to show a map page with instructions at the bottom for placing...
- Page 45 3. A “Successfully Added Waypoint” message appears. Press ENTER to acknowledge and exit. To view Sun and Moon positions at a waypoint location: Select View Sun and Moon, and press ENTER to show Sun and Moon positions for that location. See the section on Sun and Moon tables for detailed information.
-
Page 46: Reviewing And Editing Waypoints
aSIc peratIon Reviewing and Editing Waypoints Once you have created and stored a waypoint, it can be modified, reviewed, renamed, moved, or deleted at any time through the Waypoint Review and Waypoint Edit Pages. Configurable Data Fields Waypoint Information Page To access the Information Page: 1. - Page 47 3. Use the ROCKER to select the symbol from the group list, and press ENTER when finished. To delete a waypoint: Highlight the Delete button on the page, and press ENTER. Waypoints List Options Menu To view the waypoint on the map: Highlight the Map button on the page, and press ENTER.
-
Page 48: Searching For A Waypoint
aSIc peratIon To delete waypoints by symbol: 1. Highlight the waypoint to be deleted, and press MENU. 2. Highlight the symbol from the Used Symbols list, and press ENTER. 3. Use the ROCKER to highlight the symbol of the waypoint(s) to be deleted, and press ENTER. - Page 49 To find a Waypoint: 1. Press DIRECT TO to show the Find Menu. 2. Highlight the Waypoint icon, and press ENTER to show the Waypoints List. 3. Use the ROCKER to scroll up and down the list to find a waypoint. If the list is large, you can press MENU to show a list of search options.
- Page 50 aSIc peratIon To find a city: 1. Use the ROCKER to select the Cities option, and press ENTER to show the find by Nearest list of cities. 2. Use the Options Menu to find a city By Name, by entering a key word for Nearest Containing, use Select Map to select a different map to search from or to Chance Reference from your current location using...
- Page 51 Searching for an Airport The Find Aviation feature allows you to search for airports provided in the Jeppesen database in your GPSMAP 96/96C. To find an airport: (Aviation mode) 1. Press DIRECT TO when in Aviation Mode to show the Find Menu, select the Aviation...
-
Page 52: Searching For A Marine Point
aSIc peratIon To use the Aviation Go To Page Options: 1. With the airport shown on the page, press MENU to show the Options Menu. 2. Find More and Find Near Here take you to the Find Menu. Show on Map shows the airport on the map, Project Waypoint allows you to project a new waypoint from that location (see... - Page 53 4. A list of tide stations nearest to you appears. If a “None Found” message appears, then you are not currently located near a coast line. Press MENU to show the Tide Station Options Menu. Select from Nearest Containing or Change Reference.
-
Page 54: Searching For An Address
aSIc peratIon At the bottom of the Information Page are on-screen buttons for Go To, Map, and Save. Marine Services List To find Marine Services 1. Follow the same procedure as above to access the Marine Points Menu, and then select the Marine Services icon. - Page 55 4. Press MENU to show the options list. You can choose a new region, clear all, or show a list of regional cities if you want to search for a city yourself. If you select Enable City Filter an enter city field shows on the Address Page. Highlight the field and press ENTER to show the city list.
-
Page 56: Searching For A Point Of Interest
aSIc peratIon To find a Crossroad: (Automotive or Marine Modes) 1. Press FIND to show the Find Menu. 2. Highlight the Crossroads icon, and press ENTER to show the Find Crossroads search page. 3. If your unit has acquired satellite signals, the Region field at the top of the page shows your current region, and the <Enter City>... -
Page 57: Creating And Using A Route
Route navigation allows you to create a sequence of intermediate waypoints which lead you to your final destination. The GPSMAP 96/96C stores 50 routes, each with up to 250 waypoints each. A route can be created and modified from the Routes Page, and waypoints can be added to a route from the Aviation Go To Page or Find Menu. - Page 58 Methods of navigating to a destination: • When you start the “Go To” button on the Information Page for a User Waypoint or other Find Menu item, the GPSMAP 96/96C creates a straight path (point to point) from your current location to that location.
-
Page 59: Navigating A Route
each turn in the route a turn page shows a guidance message and graphic of the turn. You can view the turns at any time by pressing the ROCKER up or down while the route is active. • In Automotive Mode these two navigation methods change when you select the “Follow Roads”... - Page 60 aSIc peratIon To Preview the Turns for an Active Route: 1. From the Routes Page, highlight the route from the Routes list. 2. Press ENTER to show the Route Page for the route. 3. Highlight a route and from the Saved Routes list, and press MENU to show the options menu.
- Page 61 Route Options (for all operating modes) To start a route: From the Saved Routes Page, press MENU to show the Options Menu. Highlight the Active Route option, and press ENTER. To create a new route: From the Saved Routes Page, press MENU to show the Options Menu.
- Page 62 aSIc peratIon 3. Highlight the Route Leg Transition field, and press ENTER to show the list of options. Select Auto, Manual, or Distance. These settings control manner in which the route advances to the next leg. Using the Route Detail Page Options: To start the route: With the Options Menu shown, highlight Activate, and press ENTER.
- Page 63 To edit the route on the map: 1. With the Options Menu shown, highlight the Edit on Map option, and press ENTER to show the route on the map. Use the ROCKER to move the panning arrow to select a route waypoint on the map.
- Page 64 Vertical Deviation from the VNAV Profile. VNAV on HSI Page NOTE: The GPSMAP 96/96C is a VFR navigation tool and should not be used to perform instrument approaches. VNAV is only a VFR navigation instrument and is not intended for instrument approaches.
- Page 65 Settings Target Altitude—the altitude you want to be at when you reach your target location. Select Above Waypoint to use field elevation for airports in the Jeppesen database or “Above MSL” to specify an exact MSL altitude target. By—defines the target location with settings of distance Before or After a reference waypoint (normally the final destination airport).
-
Page 66: Main
The Aviation Mode is the default mode for the GPSMAP 96/96C. This guide first addresses each page, such as the Map Page, as shown in the Aviation Mode. The guide then describes the page shown in Marine and Automotive Mode, if major differences exist.Marine Mode features five main... -
Page 67: The Map Page
Page can be enabled in all modes. 96/96C Owner’s Manual The Map Page The GPSMAP 96/96C features a real-time moving map that can do much more than just plot your course. The Map Page shows digital cartography (map information) that includes airspace boundaries, airports, navaids, lakes, rivers, coastlines, cities and highways. - Page 68 Map Page When you press the ROCKER, the GPSMAP 96/96C enters cursor mode that pans the cartography to keep the cursor, the white pointer (panning) arrow icon , within the screen. When the cursor is active, an additional data window appears at the top of the screen to indicate the position, range, and bearing to the cursor or a selected waypoint or map item.
- Page 69 To move the arrow: Press up, down, right or left on the ROCKER. As you move the Arrow, the distance and bearing from your present position to the cursor shown in the data window. When you zoom in panning mode, the arrow stays centered on the screen.
-
Page 70: Airspace Information
aGeS To view additional details about an on- screen waypoint or map item: 1. With the waypoint or map item highlighted, press ENTER. 2. If the item is a waypoint, a Waypoint Information Page appears, showing details such as name, symbol, coordinates, elevation, and depth. - Page 71 To retrieve airspace information from the Map Page: 1. Use the ROCKER to select an open area within the airspace’s boundary. The boundary line is highlighted and a window appears showing airspace type and floor/ceiling limits. 2. To show additional information, press ENTER. Communication frequencies can be shown by highlighting the on-screen Frequencies button and pressing ENTER.
-
Page 72: Map Page Options Menu
aGeS • When the selected zoom range exceeds the resolution of the data in use, an “overzoom” warning appears below the map scale. • When mapping data, downloaded from MapSource, is used, a MapSource indentifier appears below the zoom scale indicator. Map Page Options Menu The Options Menu on the Map Page provides access to functions and features of the Map Page, as well... - Page 73 Refer to the Appendix for a complete descriptions of all data fields used in the GPSMAP 96/96C. • Measure Distance—allows you to measure the bearing/distance between two points on the map.
- Page 74 aGeS To measure the Bearing/Distance between two points: 1. Highlight the Measure Distance, and press ENTER. An on-screen pointer appears on the map screen at your present position with ENT REF below it. Measure Distance 2. Move the cursor to a reference point (the starting point that you want to measure from), and press ENTER.
-
Page 75: The Hsi Page
The HSI Page The HSI (Horizontal Situation Indicator) Page replaces the Pointer Page when the unit is in Aviation Mode. During active navigation, the HSI Page guides you to your destination with digital data field readouts and a graphic pointer with a bearing pointer. Data Fields Compass Ring Course... -
Page 76: The Pointer Page
aGeS The Pointer Page The Pointer Page replaces the HSI Page when the unit is in Marine or Automotive Mode. During active navigation, the Pointer Page guides you to your destination with digital data field readouts and a graphic Pointer appears with a bearing pointer. To show the Pointer Page in Marine and Automotive Modes: While in Automotive or Marine Mode, use... - Page 77 HSI/Pointer Page Options Menus The Options Menu on the Pointer Page allows you to customize the HSI/Pointer Page to your preferences in all unit operating modes. Like the Map Page, the HSI/Pointer Page features user-selectable data fields. Each data field can be configured to show any one of several data options, and the data window layout can be customized to change the actual size of the data shown.
-
Page 78: Active Route Page
aGeS Set CDI Scale—(Aviation and Marine Modes) Adjusts the CDI scale. Set Bug Indicator—(Aviation and Marine Modes) Sets the Bug Indicator mode. Enable/Disable VNAV Indicator—(Aviation Mode) Bearing Pointer/Course Pointer—(Marine Mode) Toggles between the Bearing Pointer and the Course Pointer. The Course Pointer, which shows how far off you are from your course and how to get on course. - Page 79 Active Route Page You can scroll through the entire list by moving the scroll bar up or down. Highlight any of the turns on the list, and press ENTER to view the Next Turn page for that turn. The Current Route and Next Turn page show similar information, just in a different layout.
-
Page 80: Active Route Page Options Menu
aGeS Active Route Page Options Menu The following route options are available by pressing Menu. Active Route Options Menu Deactivate—stops route navigation. Edit on Map—allows you to edit the route on the map. Reverse Route—reverses the order of the route. Select Approach—(Aviation Only) allows you to select the final course segment of a published approach, replacing the final destination airport (in a... -
Page 81: Position Data Page
Position Data Page The Position Data Page provides a quick reference for the important data you want to show while navigating a route in Aviation Mode and Marine Mode. The default page shown six user-selectable data fields. The two fields at the bottom of the page shown location position coordinates and the nearest airport, city, or other map features depending on the mode of operation. -
Page 82: The Map Setup Page
Position Page Reset Page The Map Setup Page The Map Page for your GPSMAP 96/96C can be customized. A factory set of default settings currently controls the Map Page screen. The Map Setup Pages allow you to determine how map features appear on the page by controlling map orientation, text size, track, map item, detailed map data, and more. -
Page 83: General Setup
To customize the Map Page: 1. To access the Map Setup Pages, press MENU with the Map Page on the screen. 2. Scroll down the Menu to the Setup Map option, and press ENTER to show the Map Setup Page. At the top of the page are icons for each setup page. -
Page 84: Tracks Setup
aGeS Aviation Setup The Aviation Settings Page allows you to turn On or Off the Aviation, Land and Obstacle data and set the radius of proximity circles. The Aviation Settings Map Setup Page Tracks Setup The Tracks Settings Page has settings for maximum zoom for viewing saved tracks and active track logs. - Page 85 Pressing MENU shows list of options for managing maps. Information Map Map Information Options Menu Points—Zoom Setup The Map Points—Zoom Page allows you determine the map zoom range at which various map features appear. You turn off the screen, set it to Auto or select a value from 20 feet to 500 miles.
- Page 86 aGeS The SUA’s Map Setup Page Airport—Zoom Setup The Airport Zoom Page of the map setup feature allows you determine the map zoom range at which various airports and runway features shown. You can turn off the screen, set it to Auto or select a value from 20 feet to 500 miles.
-
Page 87: Obstacle Data
Obstacle on the map Page are shown in red, yellow, and gray and dark gray, light gray, and white for the GPSMAP 96C and GPSMAP 96 respectively. References to obstacle icon gray tones for GPSMAP 96 units are in parentheses for this section. Standard... - Page 88 flight path has cleared the obstacle or you have pressed Enter. Obstacle Warning The GPSMAP 96/96C “Look Ahead Time” for obstacles determines the maximum time frame when an annunciation (a pop up window with tone) occurs. The default setting is 120 Seconds, however you have the option in the Obstacle Data Setup for 90 or 60 Seconds.
- Page 89 the highest priority of yellow (light gray) obstacles, where low only annunciates red (dark gray) obstacles. Obstacle Data Setup Page Obstacle Data Setup The Obstacle Data Setup Page allows you to set the levels for alerting you to obstacles in or near your flight path.
-
Page 90: The Highway Page
aGeS The Highway Page When you are navigating a route, the Highway Page can guide you to the destination using data fields and a graphic highway. Up to four user-selectable data fields show information such as speed, distance,or time to next point on the route. The list of data to show and the method of selection is the same as for the HSI/Pointer Page and is explained in detail on page... -
Page 91: Main Menu
• E6B—Calculates winds aloft, density altitude, and true airspeed based on entered data. • Flights—Shows a log of the flights you have taken using the GPSMAP 96/96C. • Timers—Allow for timing in flight functions, such as flights and batteries. • Aircraft—Allows you to enter custom information about your aircraft. -
Page 92: Find
The Find Feature provides you with a method for searching for Waypoints, Airports, Cities, and Exits which are included in the GPSMAP 96/96C basemap and Jeppesen database. You can also find a Waypoint you have saved. If you have downloaded Garmin... -
Page 93: Searching For A Location
Searching for a map item is simplified by separating the map database into groups which are shown as icons on the Find Menu Page. • When you access a Find group list, by default it contains only those items near your current location or the Panning Arrow (if active). -
Page 94: Recent Finds
To find a location using Find By Name: 1. Press DIRECT TO to show the Find Menu. 2. Use the ROCKER to highlight the icon for the type of item you want to search for, and press ENTER to show the page. If you want to search the entire item database, select All Points of Interest. - Page 95 At the bottom of the page are three on-screen buttons, these buttons appear differently depending on whether you are selecting a Find item to navigate to or adding a Find item to a route list as a waypoint. Selected as a Information Page for a Waypoint •...
-
Page 96: Options Menu
The Find Item Information Page Options Menu The Find Information Page Options Menu offers eight options for using a Find Item as a tool for navigation. Waypoint Information Page Options include “Average Location” To use the Find Item Information Page Options Menu: 1. - Page 97 • View Hunt and Fish—view the Hunt and Fish tables for this item location. (Refer to page 121 for detailed information about the Hunt and Fish Tables) • Map Information—show the map that the map item originated from. (Refer to information about downloading detailed maps.) 96/96C Owner’s Manual •...
-
Page 98: Tracks
Tracks The Tracks feature creates an electronic trail on the map Page as you travel about and is referred to as a Track Log. A track log contains information about points along its path, including time, position, altitude and depth. Use a Track Log to: •... - Page 99 4. To setup a track log, highlight Setup, and press ENTER to show the Setup Page. The first item on the page is Wrap When Full. If you don’t check this item, then the track log stops recording when full instead of overwriting the oldest data with new data.
- Page 100 3. The next prompt asks you, “Select the ending point for the saved track.” Use the Panning Arrow to identify a point on the track that you want as the End Point, and press ENTER. A Saving Track message appears followed by the Saved Track Page.
- Page 101 3. When you have completed defining the area, press ENTER to show the page with a Save button. 4. Press ENTER again to save the new track to the Saved Tracks List. To Use the TracBack feature: 1. With the Saved Tracks Page for the track or the Track Log shown, highlight the TracBack button, and press ENTER to show the TracBack Page.
-
Page 102: E6B Flight Computer
To Create a User Waypoint on a Saved Track: 1. With a saved track shown on the map, use the ROCKER to move the Panning Arrow to the point on the track that you want to mark as a user waypoint. Press ENTER to show the Mark Waypoint Page. - Page 103 Total Air Temperature—required entry for density altitude/true airspeed calculation. Total Air Temperature (TAT) is the temperature of the air including the heating effect caused by speed. Heading—required entry for winds aloft calculation. Use heading from the aircraft’s heading indicator or directional gyro.
- Page 104 The figures for Head Wind, Wind From, and Wind Speed are shown. NOTE: If a True North reference is currently selected (as the heading reference) on your GPSMAP 96/96C, you must enter “Heading” using a True North reference to accurately determine winds. To restore defaults: 1.
-
Page 105: Flight Log
The Flight Log shows a list of any recorded flights, including date, route of flight, and flight time. The GPSMAP 96/96C saves up to 50 recorded flights. Entries on this list are automatically created for each flight (but only in Aviation Mode). Recording begins when your speed exceeds 30 knots and you gain 500’... -
Page 106: Timers
An optional FlightBook software package is available to further simplify your flight record keeping. For additional detail about FlightBook, visit the Garmin Web site at www.garmin.com/aviation. Flight Log Options Menu The following options are available by pressing MENU: Delete Flight—deletes the highlighted flight record from memory. -
Page 107: Aircraft Profile
To use the Flight Timers feature: 1. Press MENU twice to open the Main Menu. 2. Highlight the Timers icon using the ROCKER, and press ENTER to open the page. 3. Use the ROCKER to highlight a timer field, and press ENTER to view options for that field. The User field can be used for any function you wish to time. -
Page 108: Weight & Balance
flight preparations to verify the weight and balance conditions for your aircraft. By entering the weight and arm values on this page, the GPSMAP 96/96C can calculate the total weight, moment and center of gravity (CG) figures, ensuring a safe flight every time. - Page 109 Weight & Balance Page Empty Aircraft—retains aircraft empty weight and arm figures, retains other arm figures, but zeros all other weight values. Restore Default—restores all settings to zero. Options Menu 96/96C Owner’s Manual To perform weight and balance calculations: 1. From the Aircraft Profile Page, use the ROCKER to select Weight &...
-
Page 110: Setup
Setup The Setup Menu allows you to customize the GPSMAP 96/96C to your personal preferences. Each setup page is identified by an icon, Highlight an icon, and press ENTER to view that setup page. The setup pages are arranged with features and data fields that can be changed to meet your requirements. -
Page 111: Display Setup
To change a System Setup feature: 1. Use the ROCKER, and ENTER keys to select the feature field and setup options. 2. With an option for a field highlighted, press ENTER to select. To view the software version, press MENU, and select Software Version. System Setup Page and Options 96/96C Owner’s Manual... -
Page 112: Interface Setup
Aviation In—the proprietary format used for connection to a Garmin panel-mounted GPS receiver. Allows Go To or route selection on the panel-mount to be automatically show on the GPSMAP 96/96C. NMEA In/NMEA Out—supports input and output of standard NMEA 0183 version 3.01 data. - Page 113 Baud Rate, and press ENTER. Use the ROCKER to highlight a setting, and press ENTER. 4. For Garmin DGPS or RTCM In/NMEA Out, use the ROCKER to highlight Beacon, and press ENTER. Use the ROCKER to select Scan or...
-
Page 114: Tones Setup
If Scan is selected, the GPSMAP 96/96C automatically directs the beacon receiver to scan for available beacon transmitters. If User is selected, select the Freq, and Bit Rate fields, and enter the appropriate settings. The beacon status, signal-to-noise ratio and distance to beacon are shown in the bottom of the page. -
Page 115: Routing Setup
To move, insert or remove a page: 1. Access the Page Sequence Setup Page. 2. To move a page in the order, highlight the page, and press ENTER. Select Move, then move up or down until a position is shown, and press ENTER. - Page 116 Follow Road Options 4. If you want the Next Turn Preview Page to show just before each turn on the route, select On from the Next Turn field. 5. When using the Follow Road guidance method, select the Follow Road Options on-screen button, and press ENTER to choose from a page of options.
-
Page 117: Time Setup
To set an alarm: 1. Access the Setup page. 2. Use the ROCKER to highlight the field to the right of the alarm name you want to start, and press ENTER. 3. Highlight the next field to the right, and press ENTER to start. -
Page 118: Units Setup
Units Setup The Units Setup Page allows you to select the units of measurement for your GPSMAP 96/96C. To use the Units Setup feature: 1. Access the Units Setup Page. 2. Use the ROCKER and ENTER keys to highlight the various units fields, and select a unit from the lists. - Page 119 Map Datum—allows you to manually select the datum reference used to determine a given position. The default setting is WGS 84. The unit automatically chooses the best datum depending upon your chosen position format. Datums are used to describe geographic positions for surveying, mapping, and navigation and are not actual maps built in the unit.
-
Page 120: Welcome Page Setup
a grid north reference (and is used in conjunction with the grid position formats). User Mag Var allows you to specify the magnetic variation at your current position and provides magnetic north heading references based upon the variation you enter. Enter the magnetic variation of your current position in the Magnetic Variation field if you have selected User Mag Var for the heading. -
Page 121: Proximity Waypoints
Proximity Waypoints The Proximity Waypoints Page allows you to establish waypoints that have alarm circles around them at specified distances. The alarm helps you to avoid locations that are restricted or hazardous. Proximity Waypoints List To use the Proximity Waypoint feature: 1. -
Page 122: Flight Planner
Flight Planner The Flight Planner allows you to view the following for any given day and location: Sunrise/Sunset times, moon phase flight plans saved as routes and a day, week or month calendar format. Planner: Week Format To use the Flight Planner feature: 1. -
Page 123: Alarm Clock
Alarm Clock The Alarm Clock Feature allows you to use your GPSMAP 96/96C as an alarm clock. You can choose from different alarm tones, and use the Snooze feature to delay the alarm for an additional seven minutes. 96/96C Owner’s Manual To set the Alarm Clock: 1. -
Page 124: Nav/Sonar Alarms Page
Nav/Sonar Alarms Page The Navigation/Sonar Alarms Pages of the Main Menu allows you to define alarm settings for navigation and sonar. To access the Alarms Tab of the Main Menu: 1. Press MENU twice to open the Main Menu. 2. Highlight the Nav/Sonar Alarms icon, and press ENTER to show these pages. -
Page 125: Sonar Alarms
Nav (Navigation) Alarms Next Turn—sets an alarm to indicate next turn in route. Select Off for no Next Turn alarm. Select Dist to enter a specific distance. Select Time to enter a specific time before the turn for the alarm to go off. Select Auto for the unit to provide a Next Turn alarm at its discretion. -
Page 126: Calculator
Calculator The Calculator Feature allows you to use your GPSMAP 96/96C as a calculator. You can select either a Standard or Scientific calculator and you can choose from degrees or radians using the Options Menu. To use the Calculator: 1. Access the Calculator from the Main Menu. - Page 127 To use the lap feature: With the stopwatch running, use the ROCKER to highlight the Lap field, and press ENTER. To reset the stopwatch: With the stopwatch stopped, use the ROCKER to highlight the Reset field, and press ENTER. To time lap by distance: Use the ROCKER to highlight the Options Menu, and press ENTER.
-
Page 128: Sun And Moon
Sun and Moon The Sun and Moon Tables provide you with a graphic depiction of the sun and moon relative to the Earth. Sun and moon positions can be shown for any time, date, and location. The Sun and Moon Page also shows sunrise, sunset, moonrise and moonset times for the selected time, date and location. -
Page 129: Hunt And Fish
Hunt and Fish The Hunt and Fish Tables provide you with a listing of predicted best times for hunting and fishing for a chosen date and location. To show hunting and fishing predictions: 1. Access the Hunt and Fish Page from the Main Menu. -
Page 130: Messages
Messages The Message Log of the Main Menu shows a list of messages generated by your GPSMAP 96/96C. Use the ROCKER to scroll the entire list of messages on the Messages Page. You can also use the Message Filters page to filter the messages to show only a certain types of messages. -
Page 131: Appendix
Source: Two 1.5 volt AA batteries or 12 V Adapter Cable, or up to 36 VDC external power Battery Life: GPSMAP 96 - Up to 25 hours (typical use) GPSMAP 96C - Up to 40 hours (typical use) Specifications subject to change without notice. -
Page 132: Accessories
Battery Pack—rechargeable, NiMH, AA battery kit, USA receptacle. For a complete list of available accessories for use with GPSMAP 96/96C, refer to the Garmin web site: http://garmin.com/products/GPSMAP96/96C/ CAUTION: Garmin Accessories have been designed and tested specifically for use with Garmin products. -
Page 133: What Are Map Datums
Lines of latitude and longitude on a map or chart are referenced to a specific map datum. Every chart has a map datum reference and the GPSMAP 96/96C can be set to match most of those commonly used. If you are navigating and comparing the GPS... -
Page 134: What Is Waas
ppendIx What is WAAS? The Wide Area Augmentation System (WAAS) is an F.A.A. funded project to improve the overall integrity of the GPS signal. It is a space-based system that broadcasts integrity information and correction data as determined by ground reference stations (see DGPS below). - Page 135 GRI-chain and secondary stations and adjust the TD coordinates accordingly. Remember that the GPSMAP 96/96C is not relying on the LORAN signal for navigation and actually converts the TD coordinate to a useful LAT/LON coordinate before storing the waypoint to memory or using it for navigation.
- Page 136 PC’s, differential beacon receivers, marine autopilots and /or a second GPS receiver. The NMEA 0183 version 3.01 interface format is supported by the GPSMAP 96/96C and enables the unit to drive up to three NMEA devices. (-) Ground...
-
Page 137: Interfacing The Gpsmap 96/96C
GPS unit. The USB Interface Cable provided with this unit allows you to connect your GPSMAP 96/96C to a PC- compatible computer’s USB port. Interfacing the GPSMAP 96/96C... -
Page 138: Messages
Can’t Unlock Maps—no applicable unlock code for one or more maps was found. All MapSource maps are not accessible. Database Error—internal problem with the unit. Contact your dealer or Garmin Product Support to have the unit repaired. Detail Maps Don’t Support Routing—maps that are loaded on the data card do not support automatic route calculation. - Page 139 No DGPS Position—no differential connection data is available, or not enough data is available to calculate a DGPS position. No Tide Stations for that Area—no tide stations within 100 miles of the area. None Found—no data matched the search criteria. Off Course—you are off course by the distance set in the Off Course Alarm.
-
Page 140: Data Field Options
Data Field Options The following list provides a brief description of each data field option. Some of these options are supported only by devices interfaced to your GPSMAP 96/96C. Accuracy—the current accuracy of your GPS determined location. Altitude—the current altitude you are at. - Page 141 Pointer—the arrow indicating the direction to travel to the next point on a route. Speed—your current vehicle speed can be measured in miles per hour, kilometers per hour, or knots. Steer—see Course to Steer. Sunrise—the time at which the sun rises on this day. Sunset—the time at which the sun sets on this day.
-
Page 142: License Agreement And Warranty
This section of the Appendix contains information about your license agreement and warranty for the GPSMAP 96/96C. Software License Agreement BY USING THE GPSMAP 96/96C, YOU AGREE TO BE BOUND BY THE TERMS AND CONDITIONS OF THE FOLLOWING SOFTWARE LICENSE AGREEMENT. PLEASE READ THIS AGREEMENT CAREFULLY. -
Page 143: Contact Garmin
Garmin retains the exclusive right to repair or replace the unit or software or offer a full refund of the purchase price at its sole discretion. - Page 144 Garmin. Online auction confirmations are not accepted for warranty verification. To obtain warranty service, an original or copy of the sales receipt from the original retailer is required. Garmin will not replace missing components from any package purchased through an online auction.
-
Page 145: Declaration Of Conformity (Doc)
FCC Compliance The GPSMAP 96/96C complies with Part 15 of the FCC interference limits for Class B digital devices FOR HOME OR OFFICE USE. These limits are designed to provide more reasonable protection against harmful interference in a residential installation, and are more stringent than “outdoor”... -
Page 146: Index
Aircraft Profile Cleaning Airport Communication Frequen- Airport Criteria cies Airspace Compass Page Airspace Alarms Options Menu Airspace Information Contact Garmin 28, 62 Create Alarm Clock Waypoint Anchor Drag Waypoints Append Route 36, 37 Current Route Page Approach 16, 18, 19, 72... - Page 147 New Location New Waypoint Length Next Turn Lighting Alarm Limited Warranty NMEA Location NRST/FIND key Location Setup Longitude Obstacle Data Off Course Magnetic Variation On-Screen Button Main Menu On-screen Button MapSource 50–53 Map Datum 111, 125 Options Map Page Options Menu Map Scales Page Layout Map Setup Page...
- Page 148 ndex User Waypoints Vectors 19, 21 View Details View Waypoints on Route VNAV 14, 23 WAAS Waypoint Create 31, 33, 34 Delete Edit Name Searching Symbol Waypoint Information Page Weight & Balance Weight and Balance Welcome Page Winds Aloft Zoom 96/96C Owner’s Manual...
- Page 150 For the latest free software updates (excluding map data) throughout the life of your Garmin products, visit the Garmin Web site at www.garmin.com. © 2004–2007 Garmin Ltd. or its subsidiaries Garmin International, Inc. 1200 East 151 Street, Olathe, Kansas 66062, USA Garmin (Europe) Ltd.